Google+

contact us

Use the form on the right to contact us.

Day or Night, we are here to serve you. Leave your plumbing problem to us.


Tinley Park, IL

(708)845-7922

Residential and Commercial plumbers and plumbing contractors available in Orland Park, Tinley Park, Oak Lawn, Palos Heights, Midlothian, Oak Forest, Homer Glen, Mokena, Frankfort, and the surrounding Chicago South Suburbs. Emergency plumbers.

copper water lines.jpg

Kevin Szabo Jr Plumbing Blog

Kevin Szabo Jr Plumbing is Tinley Park, Orland Park, Oak Forest, Midlothian, Orland Hill, Homer Glen, Mokena, Frankfort, Crestwood, Palos Heights, Oak Lawn, local plumber. Read our blog for advice, tips, a good laugh, and basic home improvement.

**We are moving our old blog to our new and improved website. Too see all our posts visit kevinszabojrplumbing.blogspot.com

Filtering by Category: January 2017

How to Choose the Right Modern Bathroom Vanities for Your Bathroom?

Rona Regan

How to Choose the Right Modern Bathroom Vanities for Your Bathroom?

Bathroom vanities give you an opportunity to do that. Whether your taste is modern, traditional or somewhere in between, your bathroom vanity should have both functional factor and aesthetic factor as it is the main focal point of the bathroom. There are plenty of options available when it comes to selecting a bathroom vanity. Two things that limit your choices are your budget and bathroom size. You can choose from variety of materials, styles, and also play around with plenty of color combinations to give a luxurious and modern look to your bathroom vanity. When you are remodeling your bathroom, you need to install some bathroom vanities like shower screen, shaving kits, bathroom vanity cabinets, tower handrails and toiletries. But you need to consider the total space utilization of your bathroom, and in this regards you can shop for some latest designer bathroom vanities available in the online market. These bathroom vanities can easily suit with your contemporary bathroom decoration, and they can easily be installed in a small space.

Tips to Make Your Bathroom Vanity Selection Easy 

Before you start off with your bathroom vanity project, it is important to consider a few factors that help you to successfully finish the project. Be aware of all the possibilities that might restrict the installation of the new bathroom vanity.

   Vanity Size: Basically, the size of the vanity is determined by the size of the bathroom. Larger and double bathroom vanities are most suitable for larger bathrooms, while smaller vanities are perfect for smaller bathrooms. If you are going with larger vanities, make sure you leave some space, especially if you want to keep trashcan next to the vanity.

    Decide Where to Place the Vanity: The vanity is a multi-functionality asset of the bathroom. So, it requires enough space to serve satisfactorily. Make sure the vanity doesn't impact the traffic flow even if the cases or doors are open, also ensure that they don't smack other fixtures or block the entry path. Also, have sufficient space above the vanity to allow proper lighting. Most importantly, make sure you don't need to reroute the plumbing system as it may impact your budget. 

  Storage Space: Along with having the modern look, you also want bathroom vanities to serve the basic purpose, which is storage. Evaluate all your storage needs, this will give you an idea about the amount of required storage space, including cabinet, drawers, and shelves. You can also add some extra space by having wall-mounted cabinet and wall mounted rack in your bathroom. In this way, you can get some extra space and you can easily arrange more things in your bathroom.

How do you decorate your bathroom with bathroom vanities?

  •      Style and Color Selection: Make sure your vanity color and style matches the decor of your home. Modern bathroom vanities are suitable for homes that have contemporary look, whereas antique vanities are suitable for traditional looking homes.  
  •      Choose Suitable Counter-top: It is always better to choose vanity counter-top first. Based on the position of counter-top, you can decide the placement of other bathroom fixtures, such as sink. Also, choose a material that is humid resistant and also goes well with water, because vanity countertops face water splashes very often.
  •     Use Your Creativity: Make some experiment using your creativity. Designing customized bathroom vanities can be fun and give more satisfying result. You can search over internet to get some ideas and you can make some modifications using your artistic flair. 

So now install some latest designer bathroom vanities and turn your traditional bathroom into a modern one. 

Guest Contributor, David Fenton

Which Points Plumber Should Keep in Mind While Doing Balcony Waterproofing?

Rona Regan

Which Points Plumber Should Keep in Mind While Doing Balcony Waterproofing?

When you move to a new home, you ensure that every care is taken to maintain it well. However, in spite of taking good care of your home, with time you will notice problems sprouting up. Water leakage in the balcony is one such issue that you will come across in your home. In most new constructions, proper balcony waterproofing is not done as constructors try to cut corners and save on money. However, with time the problem of water leakage causes a lot of inconvenience to home owners. The balcony is one of the most exposed areas of your house and the elements such as the sun, wind, rain, and snow first attack your balcony. Therefore, waterproofing is extremely important for these areas because if not done it could result in serious damage to your house. Mentioned below are top tips for balcony waterproofing

Patching the Area for Balcony Waterproofing

Only adding a waterproofing coat over the balcony is not enough, because it will not work as a patching compound. A simple waterproofing coat might not be strong and thick enough to keep the water away from settling in the cracked and chipped areas. So, one of the first things you need to do is to patch up the concrete. One of the simplest ways to do this is by getting the patching compound from a hardware store and use it directly as there is no need to mix new concrete for a small balcony. However, before the patching takes place, the cracked and chipped areas of the balcony need to be completely cleaned. Once the patching is done it needs sufficient time to dry out before the actual waterproofing process can begin.

Direct Water Away

After applying the patch, it is time to apply the waterproof coating, and when doing this avoid swirling motions. This can create small trenches on the treated area and water can easily be stored in the puddle further resulting in more leakages. However, make sure to use long strokes with your roller or brush and direct it away from the building. Take it to the edge of your balcony where you feel it is safe for the water to run off. Since you want the end of your balcony to slightly tip, grade the waterproofing coating downwards with a bit of extra pressure to the brush or roller you use for the process.

Seal the Concrete As Per The Need

In time, the balcony waterproofing membrane will also need sealing. However, you need to make sure that the right type of sealant is used for this purpose, and to identify the right sealant read the manufacturer's instructions. In the instructions, you will also come across how often you will need to apply the sealant. In order to be effective you need to consider foot traffic and other weights on your balcony and then decide the consistency of sealing needed for it. This process will help you protect the waterproofing coating and enjoy its benefits for a long time.

Taking Professional Help

Although balcony waterproofing sounds like a very easy job, there are still a lot of other important things that come under it. You need to have the right skills, tools, and time to carry out this task. If you are lacking the needed skills and tools, then it is best to get help from professionals. The professionals will make sure they provide efficient solutions so that water can be prevented from entering in the grout and extensive damage to your balcony can be avoided.

Explore the services of the various professionals who can help you and choose the best within your budget to enjoy the balcony of your home to the full!

Guest Contributor, Amelie Lawrence

Chilly Willie Chili Challenge Chili Cookoff

Rona Regan

Chilly Willie Chili Challenge Chili Cookoff

Orland Park Civic Center in Orland Park, IL

Say it with me, “Chilly Willie Chili Challenge Chili Cookoff”, that was a tongue twister. Whatever you have going on tomorrow afternoon, just cancel it, even better call your friends and family and let them know there will be a change of plans. Once again, Orland Park is hosting the Chilly Willie Chili Challenge Chili Cookoff at the Orland Park Civic Center. I was one of the lucky judges for last year’s cookoff. This year, I get to do it again.

I love to eat good food! I’m sure everyone understands that being able to taste and judge delicious, flavorful chili should be on everyone’s “Must Do List”. I learned a few things about chili while judging last year’s contest, I’m a great cook, but can’t make Award Winning Chili so I will stick to judging chili instead.

The Village of Orland Park does a beautiful job every year hosting the Chilly Willie Chili Challenge Chili Cookoff. They attract thousands of people, from all around. The set up and music make the event even better. Families come ready to judge the best chili around, some even bring their own wooden chili tasting spoons. Others, come to witness the fun event.

What Goes on Behind Closed Doors:

The judges are secretly lined up and taken in a private room. Every judge is anxious for the chili to be presented. The chili is displayed on a table with only numbers beside them. You are handed a sheet of paper with numbers, without names. As your heart is racing you are told the rules and judging etiquette. You walk down the table and taste chili by chili. The flavor and the aroma goes straight to your head and you feel as if someone’s life is riding on your shoulders. “I love them”, “Maybe I should taste them all several times”, “Am I allowed to speak to the other judges?”, “Why do I have to only pick one?”. Thoughts go through your head, you’re not sure if it’s because you’re judging chili or because the chili taste so good. You start to ponder life’s questions, then you snap back to reality and realize that everyone staring at you. “Yes, I’m taking Chili Judging serious”! You pick your winners and leave the room feeling confident with your choice.

If you love chili or just want to enjoy a fun event in our area, you should stop by tomorrow afternoon.

Saturday, January 28th 2017 at 2 pm. Orland Park Civic Center, 14750 Ravinia Ave Orland Park, I 

7 Choices of Kitchen Benchtops Available!

Rona Regan

7 Choices of Kitchen Benchtops Available!

When it comes to kitchen remodeling the very important thing to consider is kitchen benchtops. Every home owner needs to select the correct material for these countertops so that it can stay around for several years. There is a wide range of choices available these days in the market as far as benchtops are concerned. So taking the decision on the right material can prove to be difficult. When you choose the kitchen benchtops, you need to choose some durable materials, which can provide your rust resistance power along with better longevity.

In such case, you can install the granite or marble bench tops which are totally rust proof. Apart from that, you can also clean these stone benchtops in a normal way, and you can also use some portions of these benchtops as your chopper board.

#7 Choices of Kitchen Benchtops:

Once you know the options available and some idea about these materials you will be in the right position to take the decision.

1)     Quartz benchtops: It is one material that is maintenance free. These engineered quarts are scratch, stain and heat resistant. Also, it is non-porous and so does not require sealant to maintain it in the good condition. In case you check out the market for this material you will find amazing choices of patterns and colors.

2)     Granite benchtops: This material is one of the popular and common materials used for kitchen benchtops.  Lots of home owners have selected this material due to its strength and elegance. In case you want an eco-friendly material for the counter top then this can be one of the best choices. These benchtops are affordable and you can also customize the granite slabs and make your benchtop according to your kitchen size.

3)     Laminate benchtops: Do you want an economical option for counter tops? Well in that case, laminate ones can be a great option. The best part of this material is that it is available in patterns, which resemble wood, quartz and stone that too at a very reasonable price. 

4)     Marble benchtops: One of the sophisticated and attractive choices for counter tops is marble as nothing can beat its beauty. In case you are willing to spend high then this kind of counter tops are highly recommended. It is sure to add class to your kitchen.

5)     Wood benchtops: Do you want to add the same touch to your kitchen? Well in that case, consider installing wood counter tops. These When these counter tops are sealed well it can serve its purpose very well. Also, this is material is heat resistant and so you can without worrying keep hot pans on it.

6)     Glass benchtops: These kinds of counter tops offer the best visual appearance. Glass counter tops are heat resistant and strong and so can be suitable for the kitchen. Also, it is possible to make these counter tops custom made so that you can get the color and effect you desire.

7)     Stainless steel benchtops: Today, there are many interior designers making use of this material for the counter tops to offer a modern look. The best thing about these is that it blends with all color schemes. Also, these are very simple to clean. For cleaning, you just need to wipe with a wet cloth. It is considered one of the hygienic choices.

It is one of the newest materials for the kitchen benchtops. With this material, customization is easily possible and so it can fit in all odd size spaces. It is possible to embed and texture these counter tops with shells, colored glasses, tiles or stones.

Today, there are lots of homeowners who prefer this kind of material as it is very stylish. Go here for looking more stylish kitchen benchtops.

Author Bio:

Joseph Webb is excellent writer and blogger. His guidance always helps for the readers to get best idea. Follow him on Google+ and on Twitter as @aussiesmag.


How to Use Your Kitchen’s Color in The Most Effective Way

Rona Regan

How to Use Your Kitchen’s Color in The Most Effective Way

Color has been shown to have more effects on our mood and thinking than we originally thought.

No, color is not just something that looks nice and pretty, it is something which can lift our mood, make us feel more productive, calmer, more tranquil, or perhaps fire us into action. For that reason, you need to learn how to harness the power of color in your individual rooms. One room in your house which sees the most action and activity is certainly the kitchen, so how can you harness that color power in your kitchen space?

It’s easier than you think, and it doesn’t actually involve a large amount of expense either! Check out the range of colors from StoneTech1.

Color up Your Backsplash

You might think that your back splash is just a way to protect your walls from splashed food sauces when cooking etc, but you can add a bit of color here to inject some personality in your kitchen quite easily. Go for something bright if you want to splash in some personality, or maybe go for a pattern.

Paint Your Wooden Furniture

How about painting your wooden furniture, such as your kitchen chairs or even the table? There are no rules to say that wood needs to be wood colored! You can throw in a focal point here and inject some color at the same time.

Paint The Inside of Your Cupboards

The inside? Yes! If you don’t want to go too bold and paint the outside, you can subtly throw in some color by painting in the inside of your cupboards, so when you open them, you get a little pop of color. You can completely clash with your outer scheme if you want, or you can go with something which compliments it, whilst will being a little brighter.

Feature Walls Aren’t Just For Living Rooms and Bedrooms!

You can easily have a feature wall in your kitchen, for something a little different. A bold wallpaper or mural can look fantastic, or simply a brighter color than the rest of your scheme. You can play around with ideas here and see what works for you.

Splash the Color With Your Kitchen Accessories

If you don’t want to paint your walls or go all out with color, you can add subtle splashes with your kitchen accessories, such as pans, cookbooks, basically any accessories which are on show on your kitchen counter. Of course, keep them all within a theme, so they don’t completely clash, but this can be a very effective way to throw in some color without going too ‘in your face’.

Wall Art Works Wonders

If you don’t want to go all out with the color or pattern side of things, and you want to remain neutral but add a feature piece, how about a wall art hanging? This can be something modern or it can be something traditional; it could even be something simply colorful, whatever you like the look of! Placement here is everything, so find a space which is going to draw the eye towards it, without being too ‘busy’ – you don’t want to place your wall art right where your cabinets are, for example.

Be Inventive With Chalk Boards

If you have a family, then you will know that reminders need to be everywhere! Chalk boards are a great way to incorporate this tidily into your kitchen, but you can use colorful chalk to add that pop of color! You probably never even thought of this suggestion, but it can be ultra-effective, whilst also serving a very practical purpose!

These few suggestions are all easy to achieve, and none of them require major renovations to your kitchen, other than perhaps the feature wall idea. You can easily incorporate a little color into your space without major expense or effort, and all of these suggestions will give more than a pop of color. If you don’t want to be too gargantuan with your efforts, try the smaller scale ideas, such as painting the inside of your cupboards, or going for colorful accessories instead – these ideas are subtle yet effective, proving that color doesn’t have to be a major renovation issue!

Guest Contributor, Florin Aldea


Bathroom Remodeling Do's and Don'ts

Rona Regan

Bathroom Remodeling Dos and Don’ts

Remodeling a bathroom is a great way to refresh your old bathroom, and add a bit of value to your home as well. However, if you’re inexperienced in construction works or interior designing, this may be a bit of a challenge for you. Nevertheless, if you have a clear vision of what you’d like your bathroom to look like in the future, check this guide and be sure not to make any mistakes during the renovation process.

Pick the Right Surface

If you decide to change your old tiles, this time pick the porcelain ones. Unlike ceramic tiles, porcelain ones come in many shapes, sizes, patterns or colors and are much more durable than ceramic ones. What’s more, you can even choose the plank pattern, so it could like a hardwood floor. However, the color and pattern isn’t the major thing to think about. The most important thing to keep in mind is how slippery the tiles will be. Both those in the shower area and outside should be safe enough to walk on when they’re damp.

Don’t Forget the Lights

Quality lighting fixtures are an essential part of every home. If you want to have a well-illuminated bathroom, but also a perfectly designed space, don’t forget to invest in some fancy lighting fixtures. Ambient lighting with ceiling fixtures can be a fabulous upgrade to your bathroom. Wall-mounted shaded lights by the mirror, recessed fixtures, or sconce lights ‒ choose the one that you like the most and that you think would look best in the bath and go for it. Without proper lighting, you can be at risk of hurting yourself, so invest in some good lighting.

Don’t Move the Ventilation or Plumbing

Plumbing and ventilation are some of the most important features in the bathroom. Therefore, if they’ve been functioning properly, you have no need to change or move them to another place. Moving the plumbing can be dangerous, and it can cost a fortune. Not to mention, with all this additional work, the remodeling can take even longer than you expected. Furthermore, try not to block the ventilation with any new feature or décor in the new bath. It’s essential that the bathroom has proper ventilation system, since it can get steamy. Unless it’s air-conditioned properly, mold will appear in the bath causing you a lot of problem.

Expect the Unexpected

Renovation is a long and daunting process, so even when you think everything is almost complete, something will go wrong. Whether you’re faced with a broken pipe, a cracked glass, or a damaged bathtub, try to prepare yourself for these kinds of mishaps. What’s more, don’t forget to include a couple of unexpected accidents to your budget as well, so that you don’t have to go through financial stress too.

Hire a Constructor

The best thing you could do when you decide to remodel a bathroom, is to call a professional. You may think you are skillful in plumbing and constructing, but you’ll soon be proved otherwise. Therefore, save yourself the trouble of breaking a pipe, and choose some of the professional bathroom renovations Sydney offers. They’ll do the job fast, and you won’t have to worry about a thing.

Remodeling a bathroom can be challenging and exciting at the same time. While you’re looking forward to a refreshed room in your home, you need to go through an exhausting process of painting, installation and fixture changing to achieve the final result. Therefore, if you want to make the process as fast as possible and save yourself the additional stress, be sure to pick the right surface for the baths, hire a professional for all the heavy works, install quality lighting fixtures, don’t move the plumbing or ventilation system around, and always expect the unexpected.

Guest Contributor, Diana Smith

Looking For A New Kitchen Style?

Rona Regan

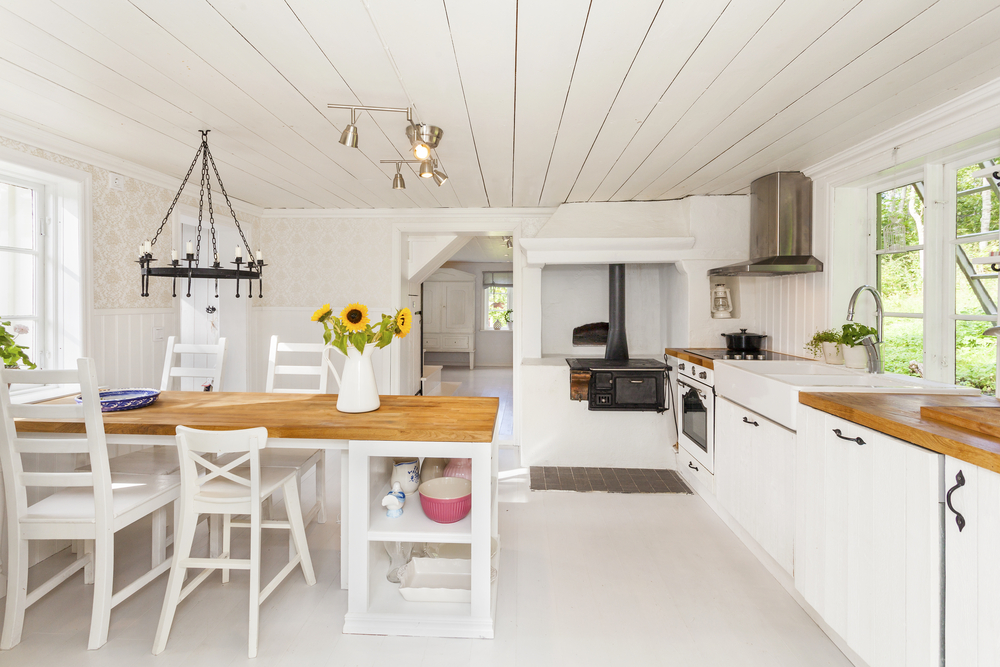
Traditional Kitchen

Looking For a New Kitchen Style?

Think about your home, which rooms gets the most traffic and activity? Really think about this.

Probably the kitchen, right? You might have said bedroom, because you sleep in there for endless hours, but you’re not awake, so you’re not really doing anything constructive.

The kitchen isn’t just a room where you cook food and move away from it, it’s a room where you prepare your meals, you store your food and drinks, it’s a place where you may eat together, it’s a place where you talk, it’s where you find the coffee in the mornings! Yes, the kitchen is important if we have a great stone worktop!

For that reason it is important to get your kitchen style bang on right from the get-go, and if you are thinking about mixing it up and changing things around, you need to get your styling correct in the planning stage, to give you the best chance of creating your perfect kitchen.

Think About The Architecture of Your Home

What sort of home design do you have? Do you have a new build, and therefore a modern style? Or do you have a more Medieval or Victorian style? This is the basis of what your kitchen is going to be, because it’s no good going against the style of your building – it all needs to tie in.

If you have an old fashioned style of home, then a traditional kitchen will look fantastic, and if you have a modern, new house, then a more minimalist, modern style is for you.

You also need to think about the layout in terms of your kitchen too – is the rest of your house quite open plan? In that case you again need to go for something modern.

What is Your Kitchen For?

Aside from cooking, what do you do in your kitchen? Is there a dining table in there? Is your house a family home? You need to create your style and space in conjunction with what you use your kitchen for. If you go for an ultra-modern style, with stainless steel handles, then this is not really going to tie in with having children around, because they are going to become dirty quite easily!

On the other hand, do you love to cook? Do you spend a lot of time in the kitchen? In that case you maybe need to incorporate more counter space, to allow you to enjoy your cooking endeavors.

What do You Like?

Your kitchen should have a splash of your personality in it, otherwise it is cold and unfriendly! If you like bright colors then perhaps this is a route you should be going down. Maybe you like traditional designs and you’re quite a traditional person – again, that should dictate the style you go for. Think carefully about what you like, what sums you up, and try and throw in a few nods to your personality.

Talk it Through With a Professional

If aren’t sure which route to go down, or you need a little inspiration, have a chat with a professional first. You need to create the space that is best for you, and that means not rushing into anything. Employ a kitchen designer for extra oomph and advice, to help you find a style which fits in not only with your home and layout, but with your needs and personality too.

Take Your Time

We will reiterate this point – do not rush! Take your time! Creating your ideal kitchen space is not a race, it is something which is going to cost you quite a lot of money, even if you know the cost cutting tricks of the trade, so it makes perfect sense that you should really put the right amount of thought and creative effort into it. If you don’t, you will end up replacing your kitchen within a few years, and that is not only time consuming, but completely against the rules of cost effectiveness too!

Your kitchen is one of the most important rooms in the house, if not the most important room, so every single facet of your revamp, or even simple redecoration, should be carefully thought out and planned, from materials, to appliances, colors to textures.

Guest Contributor, Florin Aldea


picture source: L Kae Interiors

What To Do When Insulation Gets Wet

Rona Regan

Learn How to Treat Water Damage on the Different Types of Insulation

If you’ve lived in the Pacific Northwest longer than a month, you know we get a lot of rain. Not, of course, as much as is painted by Hollywood in movies like “Sleepless in Seattle” or “The Killing”. However, the fall and winter months unleash a low, misty cloud-bank that keeps us all inside and snug in our black, gray, or dark blue jackets.

While the steady rainfall is also what we’ve got to thank for our lush, beautiful landscape, it also brings challenges as well — the most obvious being that all this damp weather makes it difficult to keep this moisture out of our homes and insulation.

So, what should you do when you notice that your insulation is wet? Well, that will depend on the type of insulation you’re dealing with. Now that we’re heading into our wet, fall weather yet again, it’s time to arm yourself with the knowledge gleaned from home insulation experts that can enable you to protect your home from the issues caused by damp insulation.

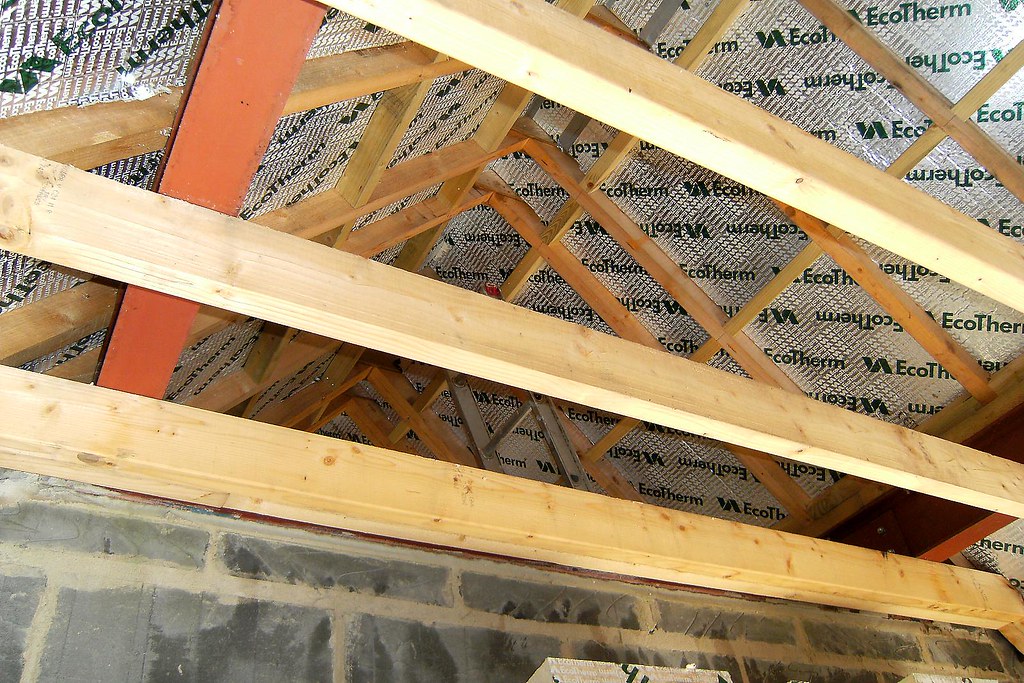
Checking Roof Insulation for Water Damage

What To Do About Wet Spray Foam Insulation:

Aren’t you the lucky one! Closed-cell spray foam insulation repels water and provides a moisture barrier. This means the water won’t have penetrated the insulation itself and it should simply evaporate from the surface.

Clean up is fairly easy. Use an old towel to dry the spray foam to the best of your ability and place a fan nearby to dry out any water that you may have missed. Because spray foam insulation offers an airtight seal, the wooden structure behind should be dry as well, but just in case, you should take a peek yourself or have a professional come in to check it out. If water is getting between the wood and your spray foam insulation, it can begin causing wood rot, mold, and reduced insulation abilities.

What To Do About Wet Fiberglass Insulation:

Don’t fret — things could be worse! Fiberglass insulation is made from spun glass fibers. It won’t absorb water and, when a dousing does occur, the water won’t cause any major structural damage to the insulation.

However, water that has accumulated inside the fiberglass insulation will dramatically reduce the functionality of the insulation. Water conducts temperatures very easily, so when the warm air of your home presses against the insulation, the water will transfer that energy right outside. Additionally, the density of fiberglass insulation makes it difficult for the water to evaporate (usually only a problem when the insulation has been thoroughly wetted, in which case full replacement may be recommended). This means that moisture can lead to damage in the wood around the insulation.

So, your job is to help your insulation dry out. A dehumidifier and a few fans will often do the trick. Place them inside your attic or crawl space to help the area dry out. If possible, lift out the fiberglass bats that have been affected and place them in the sun or in a warm, dry area to let the water inside evaporate, then relay them. Please remember, if you do handle the insulation, do so only with gloves, long sleeves and pants, protective eyewear, and a breathing mask. Fiberglass fibers should not come into direct contact with your skin, eyes, or lungs.

Check up on your insulation over the next few weeks. If you start noticing a musty smell, it’s a sure sign that your insulation has been contaminated by the water. When this occurs, you’ll likely need to replace some or all of the insulation. This is most likely to happen after a flood, or if you’ve had pests in your home such as mice or rats.

What To Do About Wet Cellulose Insulation:

While cellulose insulation is for the win when it comes to being an eco-friendly or ‘green’ option, it’s not the best performer when it gets wet. Cellulose insulation is made from plant fibers, such as recycled newspapers. These fibers wick up moisture like a sponge. If your water damage is minimal, you may be able to simply have the affected area of cellulose insulation removed and (possibly) dried.

If your leak was significant, large areas of your insulation are likely affected. Unfortunately, cellulose is a great conductor of water and offers nutrients for mold and mildew. Usually, wet cellulose insulation will develop mold within a few days to a couple of weeks, which will require a total replacement of the insulation.

There is the possibility of removing and successfully drying cellulose batting, for those homeowners who have a large enough dry space for the batts to lay while they dry (this can take up to 10 days or more). If successful, the area in which they were laying can be thoroughly cleaned to prevent mold growth (and dried), and the bats can be laid down again.

What To Do About Wet Cotton Insulation:

As you might imagine, cotton insulation is prone to collecting moisture. Often made from recycled blue jeans or other plant fibers, cotton insulation will easily and rapidly absorb moisture. Thankfully, it is easier to dry out than other types of insulation, such as cellulose.

If you’ve only got a small area that’s been damaged, remove the insulation at least a foot further out than the visible wet area. Then, place the bat in the sun or in a warm dry place. Once dried, it can be replaced. Be sure to frequently check the area for any additional moisture or signs that mold growth is starting to develop.

Also, it’s important to know that if cotton insulation is subjected to repeated water exposure, it’s insular abilities often begin to decrease and the chemicals used to deter pests and slow the burn rate in the event of fire may have leached out.

If your cotton insulation has been saturated, such as in the event of a flood, all affected insulation will need to be replaced. It is possible that some insulation might be salvageable, but you would run the risk of introducing mold or moisture into your brand new insulation. Any cotton insulation that has mold growth should be scrapped.

What To Do About Wet Foam Board Insulation:

You’re in luck! Foam board insulation, like spray foam insulation, is water repellent and an unlikely host for mold or mildew growth. It is important to make sure you keep your foam board insulation dry, however, as well as the areas surrounding it. Because foam board is impermeable to water, it can create a seal that traps moisture in an area of the home, such as in a wall cavity. The wooden beams and drywall or sheetrock are not water resistant — they will be damaged and require replacement.

If you’ve noticed your foam board insulation has condensation or moisture on it, thoroughly dry the area with a towel. If there is any chance that moisture could have gotten behind the foam board, have a professional inspect the area to make sure you catch any water damage before it becomes a serious problem.

Home Insulation Options and Installation

Have a type of insulation that we didn’t mention here or are curious to learn more about getting new insulation installed in your home? We’d recommend contacting a reputable local business that specializes in insulation installation for attics, crawl spaces, and other areas of your home. They’ll be able to provide insight on the types of insulation best used for your home, the R-value of each option, and quotes for installation.

Featured images:

I'm the marketing manager for Clean Crawls, a Pacific Northwest crawl space cleaning & insulation company. At home, I love to spend time with my wife, 4 children, and golf. At work, I help connect my clients to their customers through content that helps people solve problems. 

The Calm of Grey?

Rona Regan

 Benjamin Moore

 Benjamin Moore

The Calm of Grey?

The first thing to come into your mind when you think of the color grey could be one of two things – it could be Mr Grey, if you are a fan of the Fifty Shades series, or it could be a mundane and dull color shade.

If you went for the latter, you’re airing on the side of negativity!

Grey can be a very calming and serene color, when it is matched up correctly, and used in the right way. Of course, when you do grey in the wrong way, it can be come cold and unfriendly, but like anything in life, that can be turned on its head!

Check out these suggestions on how to turn your grey kitchen into a harmonious space of relaxation and serenity. You can choose one grey color for your kitchen worktop from Inovastone.

Use Grey With Warmer Colors

Yes, grey can be cold and unfriendly when used on its own, but if you can team it with warmer colors, such as woods for example, then you can find that it is strangely warm and calming. Wood, such as wooden chairs or a wooden worktop, also adds an earthy tone to your space, preventing the grey from becoming too clinical or cold. If you go for a wooden floor, perhaps laminate to mimic the wooden style, then grey cabinets will be warmed up instantly.

Copper is another great choice, because this is a warm and rustic color to go for, and when used with grey you have a strange combination which actually works really well, to add depth and sophistication to your kitchen space.

Make an Impact with Cabinets

The impact of using grey can be quite strong and you can use that with cabinets to create a sharp but stylishly clean appearance. Go for a bold shade and team it with a light shade for your worktop, to tone the harshness down. Of course, grey on your cabinets is also a good choice because it is a durable option to go for in terms of cleaning. In addition, grey cabinets basically look bold and stylish!

Add in Extra Color

If you want to try something a little different, try mixing your grey color scheme with a splash of color here and there. This doesn’t have to be something huge or over the top, perhaps just some colored chairs, such as a blue or green, to add a splash or pop. Stick to natural shades, and you will have the perfect blend, and something a little different too.

Natural Light Adds to The Mix

Grey can look dark and unfriendly when it is used in a small, unlit room, but if you have a large window or lots of natural light, the grey can actually look quite creamy and friendly. If you can allow plenty of natural light into your room then you really will have a calm and serene appearance from the get-go.

Grey Can be Used to Create Drama

A grey kitchen, when used with other colors which warm it up slightly, can actually look quite dramatic, especially if you use grey in a back splash which runs the full height of your room. You can go for a lighter, simple shade, or a darker one which looks more sophisticated.

Add in Some Nature

If you are a little concerned about your kitchen looking cold with the grey color shade, throw in some nature to bring about instant serenity! Think plants, fruit, flowers, basically anything natural will do the trick.

These are just a few tips and tricks on how you can make a grey kitchen look instantly calming, without going too over the top. This all just goes to show that any color can be made into whatever effect you want it to have, and it just takes some little tricks of the trade to create the appearance you want.

Grey does not have to be cold and unfriendly, especially if you don’t go down the route of pairing it with warmer colors, to bring it away from the cold side, and into the warm side. If you go for lighter colors, this certainly is a warmer feel instantly, but even darker greys can be made earthier and warmer with the right advice. 

Guest Contributor, Florin Aldea

6 Friendly Tips to Find the Best House Painting Contractor in Your Town

Rona Regan

Sherwin-williams

Sherwin-williams

6 Friendly Tips to Find the Best House Painting Contractor in Your Town

Do-it-yourself (DIY) approach on your simple house project like coming up with new curtains. But a house painting project for the whole house is considered a large-scale work and it requires the professional expertise of painting contractor. If your house was built before 1970, most probably the house contained lead paint and you will be hiring a house painting contractor for the safety of the work. House painting contractors are trained to minimize the health hazards that painting work can cause.

Selecting a professional and good house painting contractor is a step-by-step process. It can be tedious most of the time but you need to follow them to be more organized and get the desired result. Below are some tips from Wincrest you may use when hiring a contractor:

Ask around. This is the first step you need to do. Ask your mom or dad if they know someone who worked for them during the painting renovation in your house. Ask your friends if they can recommend a good house painting contractors who did the painting in their home. Maybe you can also your neighbor if they know someone who can help you.

Contacts from different fields are helpful. If you know some real-estate agents, they may be able to give you good referrals for local house painting contractors. A local hardware store can also help you. Usually, they keep a list of house painting contractors who buy materials from them. Most likely, your local store will give you a list of house painting contractors they know or who have been loyal to their store.

Check the referrals. If you have the list of house painting contractors, you need to do some background check. Make sure that these house painting contractors are licensed. You can check online to verify if your chosen house painting contractor has a license to perform the work. Companies who offer the service you need home are licensed to do the home painting work.

Make a shortlist. Yes, this is important because you would only get one house painting contractor after all. You can include at least 3 best house painting contractors based from your referrals. From these three contractors, ask for free estimates on the work. Then, ask them if they have some references. References are important because you will be able to know from the previous clients if this certain house painting contractor is good or professional enough to carry the work load.

Professional behavior is important. You should choose a house painting contractor who is pleasant, courteous and capable to communicate clearly. You will find out more about the work behavior of this certain house painting contractor when you make a call to the references given to you.


Contract must be presented. In every transaction, a contract should be signed by both parties. In this way, you will have an idea about the scope of work, warranty and pricing.


Finding a skilled and reliable house painting contractor can seem like an overwhelming task at first. But you should take the steps one by one and use common sense. 

Guest Contributor, Candice Larson