Kevin Szabo Jr Plumbing Blog — Kevin Szabo Jr Plumbing - Plumbing Services│Local Plumber│Tinley Park, IL Google+

contact us

Use the form on the right to contact us.

Day or Night, we are here to serve you. Leave your plumbing problem to us.


Tinley Park, IL

(708)845-7922

Residential and Commercial plumbers and plumbing contractors available in Orland Park, Tinley Park, Oak Lawn, Palos Heights, Midlothian, Oak Forest, Homer Glen, Mokena, Frankfort, and the surrounding Chicago South Suburbs. Emergency plumbers.

copper water lines.jpg

Kevin Szabo Jr Plumbing Blog

Kevin Szabo Jr Plumbing is Tinley Park, Orland Park, Oak Forest, Midlothian, Orland Hill, Homer Glen, Mokena, Frankfort, Crestwood, Palos Heights, Oak Lawn, local plumber. Read our blog for advice, tips, a good laugh, and basic home improvement.

**We are moving our old blog to our new and improved website. Too see all our posts visit kevinszabojrplumbing.blogspot.com

Is There the COVID-19 in Our Water?

RH Business Marketing Solutions

image1.jpg

With the approaching second wave of COVID-19, the world is back to the point of extreme health security measures. Some people are getting anxious as the number of the infected is rising again in some areas. Although it’s still not clear what the future holds, we can’t underestimate the importance of following personal hygiene measures.  

We are very well familiar with them. Social distancing, personal protection wear like masks and gloves, sanitizers are all on the list. Besides this, we mustn’t forget to regularly wash hands with soap and water at least for 20 seconds. But stop, what about the water? Is New York tap water safe to drink or use for washing groceries or dishes? Let’s drill into the topic.

Can the Virus Spread through Water?

Why can we assume that there is coronavirus in water? The logic is based on the way the virus is spreading. It’s known that the infected person can transfer COVID-19 to the non-infected one in respiratory droplets. These droplets are released when the person with the virus coughs, talks, or sneezes. 

All these are clear. But about COVID-19 in water? Since the infected droplets can spread to any surface, it’s only logical to wonder if they can spread to water. At the moment, no evidence proves the fact that such a possibility exists. According to the EPA, it’s safe to drink water from tap

This is explained by the fact that water supplies are subject to filtration systems before being delivered to our taps. These systems filter and disinfect the water; therefore, even if the viruses exist there, they are killed. 

The situation with wastewater is a bit different. The virus has been detected in the feces of some patients who were diagnosed with COVID-19. This leads us to the assumption that it can be spread in wastewater. In fact, the virus has been discovered in untreated wastewater. 

Unfortunately, not much can be said as the information about the incident is rather limited. What is clear is that there has been no proof that anyone has got infected due to exposure to wastewater. 

The last important point about a possible sphere with the increased risk of catching the virus is water facilities. Here, we refer to swimming pools, spas and hot tubs, water playgrounds. Normally, the risk of virus spread there is low. This is explained by severe water disinfection. The aquatic venues usually use bromine or chlorine, which should inactivate the coronavirus.

As you can see, it seems that the water is free from viruses. However, we should still consider water safety tips.

How to Protect Yourself

At first glance, it seems that we are safe to drink the water from the tap, as well as use it for cooking and washing groceries. Is it so in reality? The safety of water solely depends on the filtration system that is supposed to disinfect it before it’s supplied to our taps. 

Truth be told, if the water from taps were so safe, no household would ever install a drinking water filtration system. Even if we accept the fact that the supplied living fluid is filtered and disinfected, it still travels around pipes before arriving at our homes. These pipes are far from clean. Therefore, they may spread the viruses, including the coronavirus. 

Taking all these into consideration, the king of water safety tips at home is installing a reliable filtration system. Today, there are many models on the market. It’s advisable to choose the one that disinfects the water. 

Why Is Water Safety Important?

Water is the basis of our lives. High-quality, pure water is essential for our physical well-being. After all, it makes up 80% of the human body. That’s why it’s vital to ensure that you are consuming healthy, beneficial water. 

Another important aspect of why we should mind water safety is because of the consumed amount. Normally, an individual should drink about two liters per day. Such an amount of unhealthy, contaminated liquid can significantly harm the body, including all the vitals. 

As you can see, drinking pure water is one of the ways how you can protect yourself from coronavirus. What other protective measures do you take?

Guest Contributor: Alex Altuhov

How to Choose the Right Kitchen Cabinet Materials for Your Home

RH Business Marketing Solutions

When it comes to choosing materials for your kitchen cabinets, there are a mind-boggling number of options. We’re going to go over some of the most popular options here - our focus will be on cost and functionality, because there’s no accounting for taste (though we will touch a bit on aesthetics).

In this piece, we won’t look at hardware or add-ons like glass finishes - the focus will be on the construction. Cabinetry is highly-customizable, so you can riff off of the materials we present here fairly easily.

Wood cabinets

Wood is, by far, the most popular type of material for kitchen cabinets.There are two types of wood cabinetry - solid wood and engineered wood. Wood is prone to expansion when it’s exposed to moisture, so you’ll need to seal your wood cabinets - most come pre-sealed, but in rare cases, you may need to seal the cabinets yourself as soon as they're installed.

Solid wood

Hardwood cabinetry is more expensive than the engineered woods we’ll talk about next. There’s a good reason for that, though - hardwood cabinets are incredibly durable. They’re impact and scratch-resistant. You can also pick from a wide variety of styles - Oak, Cherry, Pine, or even Maple. 

You could also pick a softwood, like Mahogany, - this type of wood is much more prone to scratching and denting, however.

You should note that solid wood is more prone to warping than some engineered woods - for this reason, materials like plywood are much more commonly used in modern day cabinetry.

Plywood

Plywood is an engineered wood - it tends to be less expensive than hardwood, but can be almost as durable. Plywood comes in a variety of different grades - you’ll want a high-grade plywood if aesthetics are important to you. 

While you could pick an inexpensive, highly functional material like Baltic Birch plywood, the finish on these types of plywood is usually less visually appealing. Opting for Oak or Maple can be more aesthetically pleasing, though Baltic Birch can be finished to improve its look.

MDF (Fiberboard)

Medium-density fiberboard (MDF) is a very popular material for kitchen cabinets. It’s relatively inexpensive, it doesn’t warp or crack, and it’s quite easy to paint.
The main disadvantage of MDF is that it scratches very easily - and unlike solid wood, you can’t simply sand away the scratches. This might not be the best material to use if you have small children or pets who might be prone to scratching your cabinets.

Particleboard

Particleboard is the least expensive option available, so for budget renovations it can be an excellent choice. You can find high-end particleboard available that can withstand moisture to a certain degree - most particleboard, however, will warp when things get too humid. Particleboard is the weakest cabinet material, so unless you’re working on a budget, you should probably avoid it.

Wood veneer

Wood veneer isn’t actually a type of cabinetry - it’s more of a footnote. Plywood, for example, uses a wood veneer finish. Basically, if you want to improve the look of, say, an MDF cabinet, you can request a specific type of wood veneer as a finish. Wood veneers can act as a lower cost alternative when you want the look of hardwood without paying the price (or dealing with the warping-related problems).

Wood alternatives

There are a couple of materials other than wood that are being used for cabinetry in the 21st century. Indeed, these alternatives can add a modern, almost futuristic look to your kitchen.

Metals

There are all kinds of metal cabinets available - most are made of stainless steel. They don’t have the moisture-related drawbacks that wood cabinets do, because they’re not porous. They do, however, tend to scratch more easily. Maintenance on stainless steel cabinets is a breeze - you can just wipe them down regularly, and you never need to reseal them. They are, however, on the expensive side.

Thermoplastics

Thermoplastics are incredibly versatile - you can get an astonishing variety of different colors. They’re low-maintenance, inexpensive, easy to install and maintain, and are moisture-resistant.

There are downsides, however. They aren't heat-resistant, so you can’t install them near heat sources. They also tend to yellow over time.

Cabinet renovation tips 

Once you’ve figured out which cabinet material best suits your needs, you can start renovating. You’ll, of course, need to measure everything to ensure you’re getting the right size. You’ll also want to have a dumpster or some other way to dispose of renovation waste


The best time to renovate your cabinets is when you’re doing other kitchen renovations - when your cabinets have been taken out, it can be easier for plumbers and electricians to do their work. Minor and major kitchen renovations can both pay off a lot - we wish you all the best!

Guest Contributor: Christie Simon

DIY Bathroom Remodel for Beginners

RH Business Marketing Solutions

1421333517658.jpeg

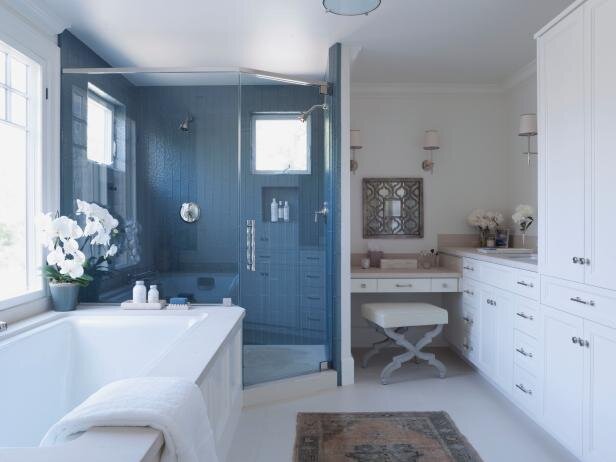
Bathroom remodels are a popular home improvement project for homeowners and can be seen as a good DIY opportunity. However, a DIY bathroom remodel is no simple task. For DIY beginners a full remodel may be too challenging. It’s often best to leave major portions of this home improvement project to professionals. This includes electrical, floor, and plumbing. For example, if you need plumbing work done, be sure to call a 24 hour plumbing service to help.

If you are a DIY beginner, there are still some portions of your bathroom remodel you can do yourself. These are 5 bathroom ideas for projects you don’t need the pros to help you with.

Update the Vanity

The vanity is a huge stylistic piece in any bathroom. This is great news for DIY beginners because making any change, even simple changes, can make the space feel updated. The simplest option for updating your bathroom vanity is to give it a new coat of paint. If you want your bathroom to feel bigger, neutral colors are your best options. These would include white, gray, or brown.

To paint your vanity, unscrew all the drawers and remove any additional hardware. Clean and sand the wood and then paint with your new color. Once the coat of paint dries, just assemble it back together and you have what feels like an entirely new bathroom piece.

Replace Faucets

Another simple task for DIY beginners is replacing the faucets. By now your sink and tub faucets are most likely outdated or chipped which makes it the perfect appliance to focus on updating. It may seem like a small change but it will help make your bathroom space feel brand new.

While replacing a faucet is one of the easier tasks for DIY home improvement, there are some specific steps to take. Before you do anything, turn off the water supply. This valve can usually be found underneath the sink. Once you’ve done that, you can disconnect the supply lines, remove the nuts, and take out your old faucet.

Find your new faucet and insert it into the mounting holes on the sink. Connect the supply lines to your faucet. Now all you need to do is turn on the water and see if you have any leaks.

Paint the Walls

For home improvement beginners, painting the walls is one of the easiest updates you can make to your bathroom. A fresh coat of paint can make any space feel bigger, welcoming, and completely new. One of the best colors for making your bathroom feel large and open is white. However, if you want a little more color to the space, light colors are another great option for a large-feeling bathroom.

Once you’ve chosen the right color and bought the right amount, the next step for your DIY project is cleaning the walls. Be sure to get around the bathtub and shower so you don’t have any lingering soap scum that could ruin your paint job.

The most difficult part of painting your bathroom walls is removing the toilet. It can be hard to paint around it so it’s often best to just remove it from the space until you’re done. However, this may be a job for the professionals if you don’t feel you can do it properly. Remove any other obstructions, cover the floors, and tape the trim.

Now the real fun begins. Paint the walls using a roller, let the first coat dry, and then apply the second. Once everything is dry and you’re happy with the paint, move everything back into the bathroom.

Add New Storage

Nothing says a DIY bathroom remodel like more storage. This is a great project to help organize your space or add additional surfaces for decoration. Without the clutter, your bathroom will feel open, inviting, and updated.

A recently popular option for storage is open shelving. You can place open shelves above the toilet or on the wall by the shower. Depending on the style of your bathroom, you may have many different options to create these shelves.

DIY beginners can rest assured that this task is totally do-able. All you need to do is buy brackets, mark the places you want them on the wall, and secure them. Once you’re happy with their placement, you only need to add the shelves and decorate.

Update Decorations

While updating your bathroom decorations doesn’t involve any screwdrivers, paintbrushes, or brackets, this is still a great project for a bathroom remodel. By removing your old decorations and adding new items, your bathroom space will transform.

Some popular decorations for your bathroom include shower curtains, framed pictures, potted plants, soap dispensers, candles, and baskets. If you repainted your walls, be sure to find decorations that help that color pop instead of clashing.

Just because you’re a home improvement beginner doesn’t mean you can’t take control of the space yourself. While major portions of your bathroom remodel is best left to the pros, there are still many tasks you can do on your own. Just be creative, do your research, and consult help if problems arise.

About the Author

Jennifer Bell is a freelance writer, blogger, dog-enthusiast, and avid beachgoer operating out of Southern New Jersey.


Using Natural Stone Sinks With a Natural Stone Cleaner

RH Business Marketing Solutions

Stone sinks can be very beautiful, but like anything else, they require some basic attention and care to keep them looking beautiful and new. Stone sinks come in an enormous variety of styles, from the blandest white soapstone to the most ornate marble. Stone sinks aren't indestructible, but unlike granite, they are not nearly as resistant to scratching or staining. However, there are just some differences between various types of stone, with a bearing on their cleaning and upkeep, so make sure that you know what type of stone sink you own. Here are some tips on how to take care of your sinks and keep them looking great:

A natural stone sink is one in which the pores of the stone are large enough for the liquid to seep through without being absorbed. Common stones include marble, limestone, travertine, slate, granite, soapstone, and even red sandstone. Each material will have slightly different cleaning requirements, as each comes in slightly different colors, sizes, and shapes. To keep your natural stone sink clean and looking great, here are some quick and easy tips:

Never use harsh chemicals, abrasives, or abrasives on your stone sink. Some common household cleaners can leave deposits on your material, causing hard water stains that are nearly impossible to remove. Other common problems with stone sinks include staining from soap scum, deposits left behind by limescale, and even the occasional stain caused by tiny mineral deposits left behind by microorganisms. Using abrasive cleaning supplies on your stone sink is the quickest way to ruin it, as using something like bleach to clean it will only leave the substance behind to attract more dirt.

Before actually washing the sink, make sure to rinse it completely. The hard water, soap scum, and any mineral deposits can potentially stain your stone sink if they are not removed. Rinsing it with a commercial cleaner is the best way to ensure that all of these potential stains are removed. You can also use a mild unscented detergent mixed with water to wipe down your sink, although make sure to not use anything with abrasive properties.

Once you've gotten all of the stains out of it, you can start cleaning up the rest of it. When cleaning a stone sink, never use steel wool, scouring pads, or other abrasive cleaning supplies as they will scratch the surface and permanently dull the finish. Instead, use a soft, dry cloth with a small amount of water on the area to be cleaned. Wipe in circular movements and stop immediately if the cloth becomes scratchy. For harder stains, simply use the alkaline cleaner designed for cleaning stainless steel appliances. This is a mild cleaning solution that is designed specifically for cleaning stone sinks and should be used sparingly and with proper care to keep the underlying finish intact.

If the spot that needs to be cleaned is blackened, it may be necessary to use a different approach. Since the minerals from hard water can discolor anything, you may have to use a more intense cleaning solution to remove the stain completely. If the stain is heavily mineral deposits, however, it's probably best to just use an alkaline cleaner. Any other solution may cause the minerals to re-soil the sink. If using an acidic cleaner, carefully wipe down the entire area to remove all traces of the acid.

When it comes to washing a stone sink, there are a few different ways to go about doing this. For light staining, simply use a regular old toothbrush and some hot water. Use a gentle scrubbing motion to gently clear off the hard water mineral deposits. This is a simple and cost-effective way to maintain your sink's clean look. On the other hand, if the stain is deeper or has caused the sink to become clogged with hard water mineral deposits, you will probably need to use some type of chemical cleaning agent. These can usually be bought at most hardware stores, and there are many different brands to choose from.

Some of these products are environmentally safe, but some can cause damage to the stone and fixtures made from natural stone. When selecting a natural stone sink made from natural stone or ceramic, it's always a good idea to test a small area before actually using it in your home. Use a drop or two of your favorite household cleaning product to spray onto the area. If the product discolors the area, likely, your stone sink will too. It's important to follow the directions on your faucet or sink made from natural stone when choosing a cleaning product to ensure the protection of your investment.

Guest Contributor: Amory

Taking Care of Your Garage This Winter

RH Business Marketing Solutions

When you think of winterizing your home, your mind might not turn to your garage — but it should. After all, this space is where you store your car, which is the second-biggest investment many people have. 

Plus, winterizing your vehicle’s space can help you slash your home heating costs and protect those you hold most dear. Here are five tips for taking care of your garage this winter. 

inspecting-your-garage-door.jpg

1. Inspect Your Door 

You might not think about your garage door much, but consider this sobering statistic — approximately 30,000 people suffer injuries from malfunctions each year. Some, including children, die. You should check the function once a month and give your unit a thorough inspection every quarter. 

When inspecting your automatic garage door opener, look for items like broken overhead or torsion springs, bent or broken rollers, and frayed cables. Use your ears and your eyes — does the unit sound noisier than usual? Do you see any bent or rusted tracks or broken panels in the door itself? 

untitled_design_1.jpg

2. Create Storage Space

The winter months are the time to store your landscaping equipment. Doing so properly extends its usefulness year after year. Take the time to wash hoes and spades with soap and water and sharpen the blades with a flat-file. 

Merely stacking your tools in the garage leads to a cluttered mess. You can use a pegboard to hang rakes and other lawn items. A high-quality tool chest keeps your automotive wrenches and bolts organized. 

3. Insulate 

Is your home office located above your uninsulated garage? If so, it’s no wonder you freeze on the job, even when the rest of your house stays toasty. One of the best ways to increase your comfort and productivity is to insulate the ceiling beneath you to keep your toes from freezing on the hardwood floor above. 

Don’t stop with just the roof. Cold temperatures can shorten your vehicle’s engine life, so it pays dividends in automotive maintenance to keep your garage warmer in the winter. Plus, you’ll save on heating fuel because opening the door to the main part of your home will no longer introduce frigid outdoor temperatures to your kitchen. 

4. Seal Your Floor 

When you open your garage door in the summer, you don’t want your neighbors to see a cracked, oil-stained slab of concrete. Leaving your floor untreated means it absorbs every drop of fluid your vehicle spills. 

Coat your garage floor with epoxy to protect it from cracking and stains. The shiny surface lets you wipe up even motor oil with ease. 

5. Protect Potentially Hazardous Materials

Do you have a container of antifreeze sitting on your garage floor? To children and pets, the stuff can taste delicious — but there are severe adverse health effects. If you want to protect your loved ones, keep such materials on high shelves or behind locked doors. 

Did you bring your outdoor grill in for the winter? You should never store propane in your garage because of the risk of explosion. Also, don’t daydream about having an indoor barbecue — most charcoal and gas grills emit far too much carbon monoxide, even if you leave the door open. 

Take Care of Your Garage This Winter With These Tips 

When cold weather arrives, caring for your vehicle’s space will save you money and keep you more comfortable. Take care of your garage this winter with these tips.

Guest Contributor: Rose Morrison 

Tips for Turning Your Backyard Into A Relaxing Outdoor Haven

RH Business Marketing Solutions

Haven1.jpg

Have you always wanted to transform your backyard into a secret garden? Do you want to build your own outdoor paradise? Building an outdoor haven in your backyard may sound challenging and expensive, but it is not. As long as you know what you want, you’ll be able to turn your backyard into a beautiful and relaxing refuge.

Before you start transforming your backyard, you should first clean it and remove all clutter. If you’ve been using the space to store some of your things, or if it is littered with children’s toys and scattered outdoor furniture, it’s time to start clearing the area. Once it is spic and span, you can begin your transformation project. 

Here are some suggestions on what to do to turn your backyard or patio into a relaxing outdoor haven. 

Weather-proof your backyard or patio  

Regardless of its size, your backyard should be cool in the summer and warm in the winter. To start off, set up a roofed area or a patio as this can help protect you from unpredictable weather. Next, use customized misting systems for the hot days, and build a small fire pit that you can use during the cold and wintry months.

There’s nothing more relaxing than a backyard that’s cool in the summer and comfortably warm in winter. 

Choose a theme for your backyard makeover 

Working with a theme for your backyard makeover project will help make things easier and more fun. It is also a good strategy for achieving creative unity and bringing all elements together in an open space.

Likewise, if you anchor your concept and design around a theme, you just might turn your backyard into a mini-resort. That sounds like a good idea, don’t you think so? 

Choose a theme that you are familiar with, something that is doable. Some good examples include beach vibe, barbecue station, a tropical island, mountain lodge-inspired, and Bali or Mediterranean-inspired. 

efd3500d-bad3-41e8-a65e-137ef5373dbb.ac612d38a749ca9d26d67cf0ae0f7d05.jpeg

Use the right outdoor furniture

You cannot use your living room couch for your backyard patio, so you need to find furniture built to withstand unpredictable outdoor elements. It’s important to consider comfort as well, so look for chairs that allow you to relax. You can go for lounging chairs, chaise lounges, swing chairs, and a deep seating set. You might also want to set up a hammock. 

Arrange your patio and make it inviting and relaxing. Place an outdoor rug or carpet and fill it with large soft cushions or bean bags. 

Putting a table or two is also a good idea, especially if you plan to entertain guests or hold gatherings with family and friends. Get your creative juices flowing and decorate the table. You can paint it with dainty flowers or whatever you want. If painting is not your cup of tea, you can cover it with a colorful or festive tablecloth.

You may also consider putting a daybed, where you can relax and read a book after a hard day’s work. Don’t forget to add fluffy, cottony soft pillows.

70.jpg

Add water and fire features 

Water refreshes the soul, soothes and calms the mind, and helps you feel relaxed and rejuvenated. Find an area where you can place a small fountain. You do not have to spend a lot; simply look for materials you can reuse, such as old (but still sturdy) wooden barrels. 

If a water fountain is too big for your space, then maybe you can go for a birdbath or a tabletop fountain. You can also place an aquarium somewhere on your patio, but you need to be willing to take care of it the whole year ‘round. 

If your backyard space is big, you may want to consider installing a regular-sized swimming pool or a stock tank pool. You can accentuate the area with lounging chairs and a barbecue corner. Can you imagine yourself relaxing by the poolside now? 

Aside from water elements, your backyard also needs some fire – or heat. Once the cold days start rolling in, your fire pit will help keep you and your family warm. You may also want to consider getting a patio heater for those cold, wintry nights. If you want a safer alternative, choose to use a chiminea - a front-loading oven or an outdoor fireplace that releases smoke the same way a chimney does. 

Don’t forget the lights 

Light up your backyard with outdoor lights. If you want to be creative and festive, use string lights. You can hang them all over the place and create a dreamy, magical, and dramatic effect. You can also use lanterns if you want to create a particular mood. 

If you want to be simple but sure, use spotlights or floodlights.   

Protect your privacy 

You wouldn’t want your neighbors spying on you when you’re entertaining guests or relaxing by the pool, would you? This is why you need to put a fence around your property or backyard. If a fence is too expensive or tedious for you, putting up a garden wall is a good alternative.  

Use umbrellas for shade

If you do not have a patio or gazebo, umbrellas can serve as your protection from the sun and other weather-related elements. Set up some umbrellas near your tables and lounging chairs, specifically those near the pool. 

If you want to go all out in providing shade for you, your family, and visitors, find the time and budget to build a patio or gazebo. It’s a practical and sensible choice, especially when the harsh summer sun and winter winds start hounding you.

Decorate your patio and backyard 

Put décor and accents all around your patio and backyard. Plants and flowers are always excellent choices, so you can start with these.

If you’re worried about plants taking up a lot of space, you can opt for tiered planters since they do not use up a lot of ground space. You can also choose to make terrariums or glass gardens. They are easy to manage as they are self-sustaining and work like a mini greenhouse. 

For something unique and creative, you can put up a potting corner. Nothing fancy; just an outdoor table with pots, seeds, plants, and other stuff you need for potting and growing plants. This is perfect if you love plants and plan to host plant potting parties in the future. 

Hire a landscape artist 

Getting your backyard or garden landscaped is also a good idea. A landscaped backyard is not only pleasant to look at but also calming and rejuvenating. Just imagine all the beautiful greens and flowers surrounding you and how breathtaking such a sight would be. 

Make your backyard child-friendly 

Whether or not you have children at home, it is crucial to ensure that your backyard is safe and child-friendly. You’ll never know when your nephews and nieces will drop by or when the neighborhood kids are going to visit you, so it’s better to be prepared. 

Add a few play structures and fun features such as kiddie slides and swings. A child-friendly picnic table is also a good backyard addition.

You do not have to spend a lot to transform your backyard into a relaxing haven. All you need to start the ball rolling are time, determination, a little help from family and friends, and the tips listed above. 

Guest Contributor: Anna Fox

5 Amazing High-Tech Features You Need to Include in Your Remodel

RH Business Marketing Solutions

Technology advancements are great additions to a modern household as they can make your everyday life much more convenient and even help you save money. So, if you are about to remodel your home, it’s a great opportunity to upgrade its technological features too! 

And don’t worry – automated and efficient homes are not just for the rich and famous anymore! Today, smart homes are more affordable and achievable than ever. Here’s a list of five amazing high-tech features you need to include in your home renovation!

Smart thermostats

Besides installing insulation and closing air leaks to keep your house warm, technology advancements can help you save money and energy on heating, cooling, and electricity. Adding a smart thermostat during your home remodeling can improve its efficiency.Installing a few extra temperature sensors is advised as it will upgrade your heating and cooling systems even more. 

These sensors should be hardwired directly into your smart thermostat, so you can automatically regulate the temperature in each room. And you can adjust the temperature from your phone since this new breed of thermostats can be controlled from your computer or a smartphone. Some of these amazing thermostats incorporate Alexa, Amazon’s digital assistant, allowing you to use voice activation. And it can even learn your temperature preferences!

4.jpg

Automated security systems

While you are renovating your home, it’s much easier to automate your home security and add various sensors like the ones that detect motion, door or window access, flooding, broken glass, smoke, or carbon monoxide. Each of these sensors can be integrated into an automation system and customized to the layout of your home.

And there are more high-tech security features for you to consider. For example, if a door or any of the windows have been accessed, you can receive alerts on your mobile device. Also, you can upgrade your home’s security by adding remotely controlled CCTV cameras so you can keep an eye on your property from afar. Again, you can manage this system through your phone, computer, or tablet. 

Modernized entertainment systems

2.jpg

While remodeling your home, why not upgrade your entertainment system too? Custom speaker systems can be directly integrated into your home’s construction and matched to the paint on your walls for a seamless appearance. And with a wireless sound system, you can listen to your favorite music all around the house. 

Also, the TV technology has been revolutionized by 4K TV that has a resolution of eight million pixels, four times the number of full HD! And there are weather-resistant models available, so you can transform your backyard into an outdoor entertainment center your family and friends will adore.

Just mount the wireless speakers into your patio and get a top-rated outdoor TV! The anti-glare LCD screens together with 4K TV technology provide crystal-clear clarity and a life-like picture. You and you and your family can enjoy nights under the stars or binge on your favorite show all day long during a beautiful summer day. 

Central vacuum system

This convenience-driven innovation will help you make vacuuming a breeze! How does it work? The central vacuum system is integrated throughout your property and contains a central unit and vacuum points built-in around your home. These vacuum points are linked to the main unit via a concealed ducting network installed within the walls and floors. The central unit is typically located in a garage, utility room, basement, or under the stairs.

This way, you can vacuum faster and more conveniently without getting tangled up in cords while moving from room to room. Instead, all you need to do is plug a lightweight hose into the vacuum points and sweep all your dirt and dust away!

Solar panels

Take advantage of the fastest-growing energy technology in the world and introduce solar panels to your space during your remodel. The switch to the solar system generates a significant ROI, so energy-efficient features not only help you save money but also add value to your home! They are easy on the environment too, as they rely on a clean and renewable energy source.

Installing solar panels can improve your home and impact your electric and gas bills tremendously. Depending on where you live, you can even earn money by selling the energy you don’t use back to the grid. These simple additions will deliver immediate and long-term value to your home. You can enhance your outdoor living, increase efficiency, and safety while also saving you money! 

So, if you are planning a renovation, don’t miss out on the opportunity to take your home improvements to the next level.

About the author: Mike Johnston is an avid blogging enthusiast and experienced freelance writer. He’s a regular contributor to the Smooth Decorator blog and numerous other online publications where he writes about real estate, construction, home improvement, and interior design.

Laminate Flooring: Advantages and Disadvantages

RH Business Marketing Solutions

Laminate flooring can give you the look and feel of wood flooring at a fraction of the price of the real thing. Let’s take a look at its advantages and disadvantages.

image1.jpeg

Laminate flooring does one thing truly well regardless of anything else: it emulates wood flooring. Wood flooring by itself and genuine wood flooring can be quite the expensive thing to have to buy and to install. Laminate flooring on this front provides a much cheaper alternative. We all love the look and feel of a rustic wood flooring but unfortunately not all of us are blessed with the finances to be able to get this type of flooring and this is where laminate flooring really does come into play and appeal to the masses of people who want wood look alike flooring.

Created many years prior as a reasonable option in contrast to genuine wood, laminate flooring manufacturers of today have increased their game with better quality and many sorts of wood variants. You'll discover everything from American symbols like oak, hickory and heartwood pine to exotics, for example, tigerwood and prado. 

There are natural and antiqued renditions, as well, on the off chance that you need your floor to look as though it's been there for quite a long time. Furthermore, numerous makers toss in an increasingly varied arrangement of stone, tile and metal carbon copies. 

This assortment is because of the photographic cycle used to make the plan layer of laminate — a high-goal picture of real wood that is strikingly similar. The picture is printed and stuck to a center of fiberboard upheld by a base layer that has been treated to deal with damage arising due to too much moisture. It's completely covered by an intense, clear top wear layer that cancels out the risk of scratches and dings. 

With such a wide variety of options that you can choose from, here is our list of advantages and disadvantages of laminate flooring. By taking a closer look at this, you can make an informed decision as to whether laminate flooring is right for you or not. The very last thing that you want to do is to get new tiles, install them and then find out that they are not well equipped for your home or that simply, you do not like how these tiles look and feel now. So, make sure that you properly do research on the type of flooring before you go out and invest in one. The whole process of laying tiles is extremely time consuming and heavy on resource consumption, so make sure that you know what you are getting yourself into. 

The Good News 

  • Laminate flooring comes as boards or tiles. The edges and closures are intended to snap together so there's no nailing, making installation a decent DIY project.

  • The laminate construction gives the pieces security and keeps creases from opening up during changes in humidity.

  • Lightweight, snap-together laminate flooring is installed over a slender froth pad underlayment. That makes it a decent possibility for installment over most existing decks — except for cover — nullifying the requirement for tear-out.

  • Snap-together laminate flooring kills the requirement for VOC-delivering pastes.

  • No old-development or colorful trees are utilized to make laminate flooring.

  • The wear layer of laminate floors are very extreme, which makes cleanup and upkeep simple. Regular clearing keeps the surface free from rough coarseness.

The Not-So-Good News 

  • Indeed, even the best cover flooring is defenseless against moisture damage and shouldn't be installed in pantries and rooms with sump siphons or floor channels. Installations on cellar floors and sections ought to incorporate a defence against moisture. Laminate flooring in the kitchen is alright insofar as you're constant about tidying up spills and splashes. Laminate flooring in the restroom isn't suggested except if all edges are stuck during installation and the edge is fixed with silicone caulk.

  • Laminate flooring can't be resurfaced the manner in which genuine wood can, so whenever it's exhausted, it'll need to be replaced. Check the guarantee of the laminate tiles you're considering purchasing; items with higher guarantees mean better quality and longer life. Maintain a strategic distance from modest laminate flooring.

  • It might look genuine, yet as of yet, it is an engineered product that feels unnaturally hard and can be brutal sounding when someone walks on it.

  • The wear layer of laminate flooring contains plastic that doesn't degrade in landfills. Some cover materials might be made with formaldehyde and different synthetic substances that ecological specialists state can deliver harmful VOCs, albeit stricter EPA rules have diminished VOC content in laminate flooring.

A Bit More Good News 

In the event that you have your heart set on genuine wood yet are pulled in to the advantages of laminate, then wood laminate flooring may be the answer. This is a type of laminate flooring product that has real wood veneer instead of image and layers of wear. One thing to remember is that it will take an occasional refinish which will depend on the type of laminate and the thickness of the veneer. 

Home Safety Checklist

RH Business Marketing Solutions

According to the National Center for Health Statistics, the number of emergency visits caused by unintentional injuries is 30.6 million. A vast percentage of said injuries occur at home. Unfortunately, injuries at home can happen when you least expect it.   

For instance, the U.S. Consumer Product Safety Commission's National Electronic Injury Surveillance Systems (NEISS) revealed that more than 15,000 injuries caused by garage doors happen annually. 

That said, you have to do more than make garage door repair a priority. You also need to have a robust home security checklist laid out in place that covers all the bases. For your peace of mind, below are some of the things that should be included in your comprehensive home safety checklist:

Inspect your pipes on a routine basis

Check your pipes for any signs of corrosion, rust, and leakage. Ensure you know what your pipes are made of as well as their size. Be mindful that lead pipes are prevalent in houses built before 1986.

Clean the shower heads

Turn on the shower in each of the bathrooms. Observe the water pressure as well as the temperature. If you notice that the pressure is low, try removing and cleaning the shower heads to see if the problem is resolved.

Locate the primary shut-off valve

Your water system's shut off valve is often situated under the kitchen or the bathroom sink. Find out where it is and try turning it off to check if it's in good working order. Once turned off, no water should come out from any of the faucets.

Inspect your kitchen appliances

In the kitchen, there's no shortage of safety hazards. Often, kitchen appliances are considered one of the biggest culprits. In line with this, it would be a good idea to give appliances a good once-over using a sponge. 

You can also do a thorough test run to determine any potential safety hazards caused by age, improper installation, and damage.

Clean vents and coils

While dust bunnies may seem cute, they are considered one of the most prevalent fire hazards. Vacuum and wipe down all vents and appliance coils to keep any risk of fires at bay.

Check water filters

Undoubtedly, clean drinking water is essential. Ensure the water you drink is free from pollutants, by  using a water filter for your faucets, fridge, and any source of drinking water.

Tune-up your HVAC system

Regardless if it's winter or summer, you must have your whole HVAC system inspected, tuned up, and cleaned on a routine basis. This can help ensure the air conditioner and furnace are safe and working accordingly.

Ensure circuits are not overloaded

Major appliances like refrigerators can use up a lot of energy and can trip the main breaker. If the trip occurs often, it can result in overheating and might lead to a potential fire. It is recommended that you consult an electrician, so you'll know if a dedicated circuit is needed.

Install safety latches

If you have pets or small children, it is recommended that you make sure they won't have access to dangerous household items like knives or cleaners. You can also add locks or safety latches to drawers and cupboards where hazardous items are stored.

Also, slipping in a shower or tub is another common household accident that can easily be avoided. Avoid slipping and prevent falls in your shower or tub by adding grab bars as well as non-slip decals and mats. 

Test carbon monoxide and smoke detectors

It is considered ideal that kitchens should have carbon monoxide and smoke detectors. It is also recommended to test both to ensure the sensors are dust-free and won't interfere with proper detection. 

It would also be best to check the batteries to see if they are still working okay. If you notice anything odd, have a professional check your sensors to know if you need to purchase new ones.

Inspect the water heater

Have a professional check your water heater regularly to ensure it is properly installed and works accordingly. At least once a year, flush the tank so you can wash away the sediments. This can also help extend your heater's life.

If you own a gas water heater, it would be best if you know how to look after the pilot light and the venting system. Ensure the water heater is always set at 120 degrees (or lower) to ensure burns are avoided.

Conclusion

Ensuring your house is a safe haven for you and your loved ones is no easy feat. Fortunately, the checklist above can help you create a robust security system that can help warrant everyone's safety and peace of mind.

Guest Contributor: Irene Trentham

Swimming Pool Leaks: Basic Guide for Pool Owners

RH Business Marketing Solutions

GettyPoolLeak-5c046a47c9e77c000186b886.jpg

It’s but normal for swimming pools to lose water due to evaporation.

The rate of evaporation varies according to daily temperature range, the local climate’s relative humidity, and several other factors.

If your pool is losing water solely due to evaporation, the water loss would be about two inches per week.

However, if you’re losing so much more than that within the same period, there is a possibility of a swimming pool leak, which can pose a myriad of problems.

Before you call pool leak detection services, it would be better to confirm first that there is, indeed, a leak. Another reason you’d call for services is for closing pool chemicals help and assistance.

Signs You Have A Swimming Pool Leak

Considering that even the smallest of leaks can make your pool lose hundreds upon hundreds of gallons of water each week, a massive water bill is one of the clearest indications that there’s a leak somewhere.

You can also tell that you have a swimming pool leak if there is standing water near your pool.

A puddle of water near your pool is expected during the rainy season or when someone is using it regularly.

However, when it hasn’t been raining, or no one took a dip in the pool for quite a while, standing water near the pool is a red flag. It could be a sign of an underground leak, especially if the grass around the pool feels mushy or uneven.

You might also want to check for leaks if you see cracks in and around your swimming pool.

Keep an eye on your pool’s chemical levels, too, which could suddenly drop if the pool is leaking water—and the chemicals along with it.

Keep in mind that inconsistent chemical levels also foster the growth of algae, which will turn your pool green in a short amount of time—a clear indication that there’s a pool leak somewhere.

Verifying A Swimming Pool Leak

It’s tempting to call pool professionals right away, but you have to be certain that a leak does exist before you bring in the big guns.

Two of the simplest ways of confirming if you have a swimming pool leak are the bucket test and the dye test.

The Bucket Test

Pool owners use the bucket test to determine whether normal evaporation or a pool leak is responsible for water loss. It involves the following steps:

  • Fill your pool to normal levels.

  • Fill a five-gallon bucket with pool water up to an inch from the top.

  • Place the bucket on your pool’s second step and make sure it’s immersed in at least five inches of pool water.

  • Use a tape or marker to indicate the water level inside and outside the bucket.

  • Leave the bucket there for 24 hours, then check the bucket and mark the current water level both inside and outside the bucket.

If the culprit is evaporation, then the drop in water level both inside and outside the bucket should be roughly the same.

If the water level drop outside the bucket is more significant than the one inside, there is a clear likelihood of a leak.

The Dye Test

If you suspect that the leak is originating from a specific part of your pool, a dye test should be able to confirm it.

To perform a dye test properly, you need to:

  • Turn off your pool’s filtration system since you need the water to be as still and calm as possible.

  • Fill a plastic syringe with dye or food coloring.

  • Position yourself near the area of the suspected leak, dip your syringe into the water, and release small amounts of the dye.

The idea of a dye test revolves around the fact that since it's heavier than water, the dye will make its way towards the leak faster than water can. 

If the dye does get through cracks in your pool or any other part of your swimming pool system, then you will have confirmed the existence of a swimming pool leak.

The next step would then be to call swimming pool leak detection specialists. With their experience and advanced leak detection equipment, they should be able to pinpoint the exact origin of the leak in no time at all.

Guest Contributor: Anthony Quinn