Kevin Szabo Jr Plumbing Blog — Kevin Szabo Jr Plumbing - Plumbing Services│Local Plumber│Tinley Park, IL Google+

contact us

Use the form on the right to contact us.

Day or Night, we are here to serve you. Leave your plumbing problem to us.


Tinley Park, IL

(708)845-7922

Residential and Commercial plumbers and plumbing contractors available in Orland Park, Tinley Park, Oak Lawn, Palos Heights, Midlothian, Oak Forest, Homer Glen, Mokena, Frankfort, and the surrounding Chicago South Suburbs. Emergency plumbers.

copper water lines.jpg

Kevin Szabo Jr Plumbing Blog

Kevin Szabo Jr Plumbing is Tinley Park, Orland Park, Oak Forest, Midlothian, Orland Hill, Homer Glen, Mokena, Frankfort, Crestwood, Palos Heights, Oak Lawn, local plumber. Read our blog for advice, tips, a good laugh, and basic home improvement.

**We are moving our old blog to our new and improved website. Too see all our posts visit kevinszabojrplumbing.blogspot.com

Filtering by Tag: Midlothian Plumber

Tips To Pull Off A Gorgeous Eclectic Design

RH Business Marketing Solutions

IMG_2953.jpeg

Tips to Pull Off a Gorgeous Eclectic Design

Eclectic design is super attractive. It’s full of freedom, mismatched items and fun colors. However, because it’s so hard to define, creating a beautiful eclectic space is not an easy task, especially if you don’t want to end up with an overly kitsch home. Luckily, here are a few tips that will help you create a successful eclectic design that matches your lifestyle and feels just right!

Start from scratch

This is a trick that many interior designers swear by: every time you’re designing a new look, start with a blank canvas. Since the eclectic look is definitely in-your-face and very eye-catching, starting with a neutral background is a great idea to avoid creating an overwhelming space. While neutral colors like white, gray and beige instantly come to mind, you can also opt for various natural materials like wood and stone. They are eco-friendly and look neutral, but are also warm and inviting.

Coordinate your colors

Many people think that nothing is supposed to match in eclectic design. However, that’s not true! The key is in coordinating your colors that will allow you to create a successful design and a coherent space. For instance, choose a color that can be introduced in multiple areas in your home and use it on everything from textiles to art and paint. Opt for a variety of different prints and patterns in your chosen color to stay true to your eclectic design yet subtly pull the room together.

Add statement pieces

Every space needs a statement piece that will be the star of the show. No matter if you opt for an art piece or a furniture item, this is the element that will make your eclectic design come to life. So, don’t hesitate to make it bold and make it big. In this case, forget everything about coordination, because you want your statement piece to pop. Even your quirky collection of items can serve as a focal point. For instance, if you’re an avid comic book fan or someone obsessed with music, there are super cute bobbleheads in all styles and themes that can be grouped together. These figurines will look amazing when displayed on your shelf and will definitely start a few conversations. All in all, find something you like, make it stand out and you have your statement piece!

Find balance

The goal of every interior is to have balance in symmetry and scale. Even if you have furniture in different styles, textures or from different periods, you can still use similar lines and sizes to create a sense of harmony. Your space is meant to be lived in, so don’t sacrifice good layout and organization for forced diversity.

Mix textures

In order to add more interest to your eclectic home, try to invest in different textures. When you combine rough and smooth textures, you can opt for a simpler color palette and still have a fun and quirky space. For instance, think fluffy pillows, shaggy rugs, rough wooden furniture and smooth, polished finishes. Combine them and your home will be full of surprises.

Think outside the box

The eclectic look has no clearly defined rules, so take advantage of that and let your mind play with different ideas and solutions. Grab an item and find a new and unusual use for it or instead of throwing something away, repurpose it and give it new life. This process is super fun and will give your space character and interest—that’s what eclecticism is all about!

Creating a successful eclectic look is all about achieving balance. Don’t give yourself too many limits, but also don’t go crazy. Eclectic design can easily get out of hand if you’re not paying attention! So, keep these tips in mind, be moderate but let your imagination fly high.

 Guest Contributor, Diana Smith

Warming Places in Cook County

RH Business Marketing Solutions

IMG_1956.jpeg

We’re lucky to have heat in our homes, unfortunately there’s families without heating or proper housing. It’s more sad to think that there’s homeless people dealing with this weather. It’s -50, please help the people that you could and if you can’t, call one of the numbers below they should be able to advise you.

Here’s a list of all the Warming Places in Cook County.

Berwyn (Library)

2701 S. Harlem Ave.
Berwyn, IL

9:00 a.m.- 9:00 p.m. M-THU
9:00 a.m.- 5:00 p.m. F-SAT
1:00 p.m.- 5:00 p.m. SUN
Transport: No

Berwyn (Freedom Park)

3701 S. Scoville Ave.
Berwyn, IL

9:00 a.m. – 5:00 p.m. M-THU
9:00 a.m. – 3:00 p.m. F
Transport: No

Berwyn (Recreational Dept.)

6501 W. 31st St.
Berwyn, IL

7:00 a.m. – 9:00 p.m., M-F
Transport: No

Bloom

425 S. Halsted St.
Chicago Heights, IL

8:00 a.m. – 8:00 p.m. M/W
8:00 a.m. – 4:40 p.m. T/THU/F
Transport: No

Bremen

16361 S. Kedzie Parkway
Markham, IL

9:00 a.m. – 5:00 p.m., M-F
Transport: No

Calumet

12633 Ashland Ave.
Calumet Park, IL

8:00 a.m. – 4:00 p.m. M-F
Transport: Yes, please call 708.388.6606.

Cicero (Village Building)

4949 W. Cermak Rd.
Cicero, IL

8:00 a.m.- 8:00 p.m. M-F
Transport: No

Cicero (Library)

5444 W. 34th St.
Cicero, IL

8:00 a.m.- 8:00 p.m., M-F
Transport: No

Cicero (Community Center)

2250 S. 49th Ave.
Cicero, IL

8:00 a.m.- 8:00 p.m., M-F
Transport: No

Elk Grove

2400 S. Arlington Heights Rd.
Arlington Heights, IL

9:00 a.m.-4:00 p.m. M-F
Transport: No

Hanover (Senior Center)

240 S. IL Route 59
Bartlett, IL

8:30 a.m.- 4:30 p.m. M/W/F
8:30 a.m.- 8:00 p.m. T and THURS
8:30 a.m.- 12:30 p.m. SAT
Transport: Yes

Lemont (Township Offices)

1115 Warner Ave.
Lemont, IL

9:00 a.m.- 4:00 p.m. M-F
Transport: Yes, please call 630.257.2522

Lemont (Community Center)

16300 Alba St.
Lemont, IL

9:00 a.m.- 2:00 p.m. M-F
Transport: Yes, please call 630.257.2522

Leyden

2620 N. Mannheim Rd.
Franklin Park, IL

6:00 a.m.- 9:00 p.m. M-F
6:00 a.m.- 2:00 p.m. SAT
6:00 a.m.- 12:00 p.m. SUN
Transport: No

Maine

1700 Ballard Rd.
Park Ridge, IL

9:00 a.m.-5:00 p.m. M-F
Transport: No

Niles

5255 Lincoln Ave.
Skokie, IL

9:00 a.m.- 5:00 p.m. M-F
Transport: No

Norwood Park

7833 W. Lawrence Ave.
Norridge, IL

9:00 a.m.- 4:00 p.m. M – THUR
9:00 a.m.- 3:00 p.m. F
Transport: No

Oak Park

130 S. Oak Park Ave.
Oak Park, IL

8:00 a.m.- 5:00 p.m. M-F
Transport: No

Orland Park

14807 Ravinia Ave.
Orland Park, IL

8:00 a.m.- 4:30 p.m. M/W/THUR/F
8:00 a.m.- 6:00 p.m. T
Transport: Yes, for seniors 55 and older. Please call 708.403.4222.

Palatine

721 S. Quentin Road
Palatine, IL

8:30 a.m.- 7:00 p.m. M
8:30 a.m.- 4:00 p.m. T- F
8:30 a.m.- 12:00 p.m. SAT
Transport: No

Palos

10802 S. Roberts Road
Palos Hills, IL

8:30 a.m.- 4:30 p.m. M-F
Transport: No

Proviso

4565 W. Harrison St.
Hillside, IL

8:00 a.m.- 4:30 p.m. M-F
Transport: Yes, for seniors 60 and older. Please call 708.449.4300.

Rich

22013 Governors Hwy
Richton Park, IL

9:00 a.m.- 4:00 p.m. M-F
Transport: No

River Forest

8020 W. Madison St.
River Forest, IL

8:00 a.m.-8:00 p.m. M-F
Transport: No

Riverside

27 Riverside Road
Riverside, IL

9:00 a.m.-5:00 p.m. M-F
Transport: No

Schaumburg

1 Illinois Boulevard
Hoffman Estates, IL

8:30 a.m.-10:00 p.m. M-THURS
8:30 a.m.- 9:00 p.m. F
Transport: No

Stickney

7745 S. Leamington Ave.
Burbank, IL

8:30 a.m.- 4:00 p.m. F
Transport: No

Wheeling

1616 N. Arlington Heights Rd.
Arlington Heights, IL

8:00 a.m.- 4:30 p.m. M-F
Transport: No

Worth

11601 S. Pulaski Rd.
Alsip, IL

8:30 a.m.- 4:30 p.m. M-F
Transport: No

Couple Finds Thousands While Renovating Their Home

RH Business Marketing Solutions

IMG_1756.jpeg

If you ever needed an excuse to remodel your home, here’s one: couple found thousands of dollars in the floorboards while renovating a home. They have been remodeling houses for 13 years. Their company, Accessible Homes, remodels homes for people with disabilities. I couldn’t have happened to a better company.

IMG_1757.jpeg

“We looked through it,” Rasmussen said of finding the money while renovating an accessible home for a nonprofit Thursday. “It’s $20s and $50s, I’d say $30,000. Maybe more.”

“When we opened up the floor there’s a heat duct that was run under the floor,” Rasmussen said. “And so someone previously must have gone into the utility room and thrown the money up on top of that duct. Pretty crazy.”

“It’s hard to process that amount of cash just laying around, and no one knew existed,” he added. “Well, someone knew, but forgot about.”

The house is owned by Bethesda, a non for profit that provides housing and services for people developmental disabilities. The money is going to help their organization make a difference in people’s lives.

IMG_1755.jpeg

source: http://www.fox32chicago.com/news/couple-finds-thousands-in-cash-under-the-floorboards-during-home-renovation

Make a DifferencE, change the roll

RH Business Marketing Solutions

Everyone Wants to Change the World

“Changing the toilet paper roll won’t make a difference to the world, but changing the toilet paper roll will make a difference to one person.”

Make a Difference, Change the Roll.

IMG_1092.jpeg

Tips to Avoid Common Heating Problems This Winter

RH Business Marketing Solutions

IMG_0734.jpeg

Tips to Avoid Common Heating Problems This Winter 

They say winter is the most magical time of the year, but is that still so if your heater breaks down? There’s nothing more troublesome than going through the cold months with a faulty heating system. Sure, it’s nice to watch the snow falling and feel the cold breeze once in a while, but it’s a different story when you’re looking forward to a cozy night at home only to find your heater fail you.

Keeping your home warm over the winter months is not only essential to your comfort but your health as well. The drop in temperature can affect your immune system and make your body more vulnerable to sickness and infections. That said, it is imperative that you take the time to make sure that your heater works well before the colder days hit.

How To Keep Your Heater Working Smoothly 

Schedule regular heater maintenance

Nobody will ever do it better than the pros. Make it a point to schedule a heater tune-up before winter starts and another when it’s over. Having your heater cleaned and checked by professionals will extend its life and give you peace of mind throughout the season.

Make sure the pilot light is on

Checking if the pilot light on your furnace is lit should be one of the first things on your list when preparing for the cold days ahead. This is a fairly simple task, and the steps on how to do it should be on your user's manual.

Clean your heater and perform a visual inspection

Wipe the dust off your heater and clean or replace dirty filters. Also, give your heater a visual once-over to ensure that all parts are intact. Check the wires closely for any signs of damage or fraying. If you see something wrong with the wirings, get in touch with an electrician as soon as possible.

Watch out for weird noises

As you clean your heater, turn it on and listen for any odd noises. Any weird or gurgling sounds could mean that there's a leak, a crack, or some other problem within. Holes in the heater can be dangerous and should be addressed by an HVAC professional immediately.

Give your heater a trial run

Lastly, do a trial run. Turn your heater on for about 10 to 20 minutes to make sure that the system is generating the expected level of heat. This will assure you that your heater is in prime condition and will work like new when you need it to.

Guest Contributor, Michelle West

How to Navigate a Flooded Apartment

RH Business Marketing Solutions

IMG_0733.jpeg

How to Navigate a Flooded Apartment

No one wants to deal with a flooded apartment. Unfortunately, it’s sometimes unavoidable. Knowing what to do if such an incident happens is important.

You’ll hopefully never have to use these tips. That said, if your apartment ever does flood, keep the following points in mind.

Protect Yourself First

This point actually has more to do with preparing for a flood. The whole experience will be a lot less stressful if you’re prepared with renters insurance.

If your apartment floods, renters insurance might cover it. Most plans are very affordable, costing about the same as a few cups of coffee per month.

It’s also important to look for early warning signs. Identify them, and you may be able to prevent a flood.

Regularly check plumbing appliances for signs of leaks. After rain, check for leaking surfaces. Alert the landlord as soon as you spot a problem.

Protect Belongings During the Flood

Obviously, during a major weather-related flood, you need to get to a safe place.

Not all apartment floods are major, though. Some result from internal plumbing issues. During minor flooding, get valuable items away from the water as soon as possible. You might even prepare ahead of time by finding a place nearby where you could store your belongings in case of a flood. Perhaps a friendly neighbor would let you keep your valuables in their apartment should the need ever arise.

Once you’ve secured your belongings, alert the landlord. You might be able to stop the leak yourself as you wait for them to send a professional. However, if the flooding is substantial, don’t go into the apartment until the utility company has disconnected the electricity.

Addressing Post-Flood Damage

The process of handling the aftermath of an apartment flood will vary on a case-by-case basis. Different regions simply have different laws and regulations.

In general, though, your landlord’s insurance will only cover the building itself and any features of the apartment they provided. It will not cover your personal belongings if they are damaged in a flood.

True, there are circumstances in which the landlord may be found liable. Perhaps the flood resulted from an issue you had previously informed them about. If they failed to address it in a timely manner despite numerous reminders, they might be responsible for covering damage to your belongings.

That said, this usually isn’t the case. This is another reason to have renters insurance. You’ll avoid dire financial circumstances if you have a policy. Renters insurance could also help with relocation costs if flooding makes the apartment uninhabitable.

Depending on the degree of damage and the cause of the flood, you might be able to terminate your lease without any repercussions. Some landlords are also willing to let tenants relocate to similar units within their properties.

Investigate your options immediately after a flood. Again, the specific laws that apply vary from one region to another. Protect yourself ahead of time with renters insurance, and you could avoid a lot of headaches if the applicable laws don’t favor tenants in these situations.

Guest Contributor, Armand Levitz

How to Install a Ventilation Fan in Your Bathroom

RH Business Marketing Solutions

IMG_0732.jpeg

How to Install a Ventilation Fan in Your Bathroom

Your bathroom is the one room in your home that is constantly under assault from a variety of sources. Harsh chemical cleaners, steamy showers and the remnants of last night’s Mexican entrees all need a way out and vent fans can do just that.

While the odor of a recently used restroom is definitely something we want to get rid of, the more important factor in installing a ventilation fan is evacuating the steam and water vapor created from baths and showers. 

This moisture, if left unaddressed can cause floors to bow, caulking to degrade, and mold to grow in our bathrooms, leaving us with costly repairs and unsightly walls, floors and ceilings. 

When you’re ready to start keeping your bathroom dry, here’s how to do it. 

Selecting a Ventilation Fan

Finding the right fan for your bathroom is an easy process, but an important one. When considering which fan fits your needs, consider the following. 

● Square footage. Fans are designated by the CFM (cubic feet per minute) of air that they move. You’ll want a fan that has at least one CFM for every square foot of your bathroom. Find square footage by multiplying the length of a room by its width. 

● Features. It may sound silly, but this is the 21st century, even our ventilation fans come with features and options now. Modern fans can commonly be equipped with a built in light, a heater, humidity sensor, motion detector, night light and even Bluetooth speakers. 

● Install options. Vent fans can be installed with or without attic access, on the ceiling or walls, and with or without cutting into the wall material. Figure out which option suits you best and pick a fan to match. 

The Tools

Installing a vent fan is a diy task that most homeowners can take on. However, you will need a few tools. 

● A drill with bits and drivers

● Screws

● Flathead and phillips screwdrivers

● Utility knife

● Jigsaw or drywall saw

● Respirator and eye protection

● Duct tape

● Wire cutters and crimpers

● Assorted electrical connectors (may be included with fan)

Time to Get Started

Once you’ve selected the right fan and have assembled the tools, you’re ready to get going. First, determine where your fan will be installed and gain access to that area. If you’ll be venting the fan through the ceiling, you’ll need to be able to get into the attic. 

Drill a Reference Hole

Find a suitable position on the ceiling, ideally between the shower and the toilet, and drill a reference hole through to the attic. A 3/8” bit is big enough for this. 

Measure the vent fan housing and note it on a piece of paper, you’ll need this next. 

Now, climb into the attic and locate your reference hole. Clear away any debris, insulation, or stored objects from the area. Using the measurement you just took, locate the final position of the fan between two joists nearest your hole. 

Note that position in relation to your reference hole so you can transfer that to the ceiling back in the bathroom. 

Mark the Layout in the Bathroom

Back in the bathroom, measure the inside dimension of the fan’s intake. 

Using your reference hole and the notes you made in the attic, transfer the measurements from the attic to the ceiling and use a square to mark out the intake port on the ceiling. 

Cut the Hole

Using the saw you have on hand, cut along the lines you just drew for you intake port. Be sure to wear your airway and eye protection and support the cut-out piece so that it doesn’t rip drywall paper from the ceiling as you finish the cut. 

Drop in Your Fan

Now, head back into the attic with your vent fan. Attach a 90-degree elbow to the outlet port of the fan and secure it with duct tape (preferably foil duct tape).

Remove the knock out panel and attach applicable wiring (you may need an electrician for this portion).

Attach the metal brackets to the fan at the designated points. 

Drop the fan into position, through your ceiling hole 

Secure the Fan

Using the drill and 1 ½” drywall screws, secure the brackets to the joists. 

Slide the flexible ducting over the elbow you installed and secure in place with foil tape. 

Cut Your Vent Hole

All exhaust fans need to be vented to the outdoors. Never allow a fan to blow into the attic or other space, this will cause mold and water damage as the steam condenses into water. 

Locate a spot on the inside of the roof close to your vent fan. Using a hole saw sized to the cap kit, cut a hole through the roof to the outside. 

Connect Your Flexible Hose

Once you’ve cut your hole, make your way onto the roof and locate the opening. Using the cap or vent kit, place the cap in position and secure it according to the instructions provided.

The SheltonRoofing.com information guide says that while you’re up there, check out the condition of your roof. Aging and disheveled roofs cause homeowners a multitude of problems and can be extremely costly if they fail.

Back in the attic, connect the other end of your flexible hose to the cap or vent kit and secure it with foil tape. You may also need to fill any gaps around your ceiling hole with spray foam or caulking. 

Give it Power

Ensure that power to the wiring you’ll be using is disconnected. 

In the bathroom, expose the blower motor and its wiring. 

Make the applicable connections using the wiring diagram provided in the fan kit. If you’re uncomfortable with home wiring, consider hiring an electrician. 

Secure all wiring and attach the ground. Cover the blower motor and turn on power to the fan. If it comes on, you’re good to go. 

Finishing Up

Replace the cover to the vent fan and secure it in place. Caulk or silicone any gaps between the fan and ceiling. 

Retest the operation and that’s it, you’re in the venting business.

An exhaust fan makes an excellent addition to any bathroom and removes the water and odor vapors that can cause you bathroom headaches for years to come. With this guide, we hope you can get a new vent fan installed in no time!

Guest Contributor, Tom Masters  

An Insight into Contemporary Hot Water Systems

RH Business Marketing Solutions

Plumber in Crestwood

An Insight into Contemporary Hot Water Systems

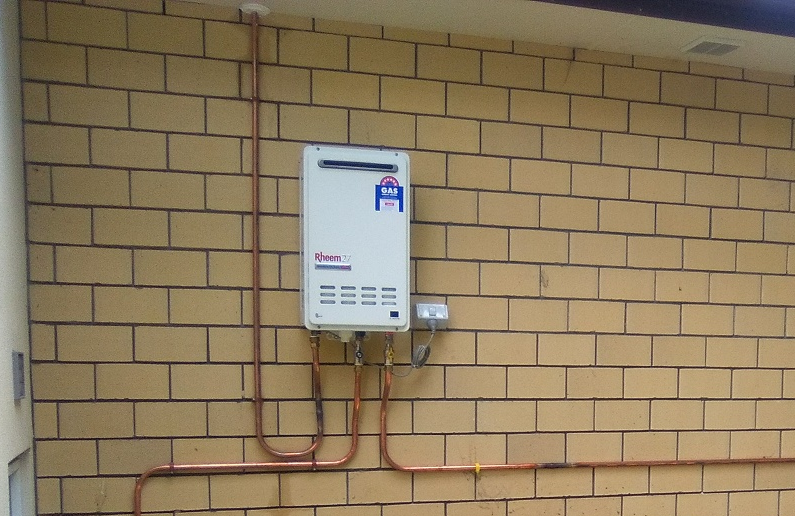
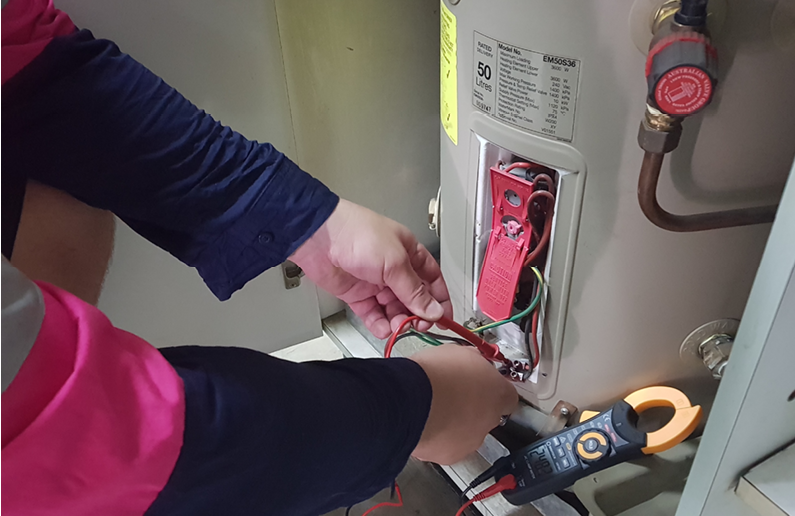
Consistent and instant access to hot water is paramount in every household. The only problem is that water heaters are some of the most energy-hungry appliances in an average home that account for 15% of utility bills. That is to say that those who are using a suboptimal heater risk losing hundreds of dollars every year. On the other hand, making a wise upfront investment enables one to reap many benefits over a long haul. Here are the key factors you should take into account before going on a shopping adventure.

Knowing Your Options

Technology is constantly improving and heaters are more efficient than ever. However, they are not created equal and besides, needs of people differ wildly. A new heater may seem like an expensive purchase, but do not wait for an emergency to strike or your budget to slowly melt. Get familiar with the basic types of heaters available today. There are four common options to choose from:

Plumber in Crestwood IL

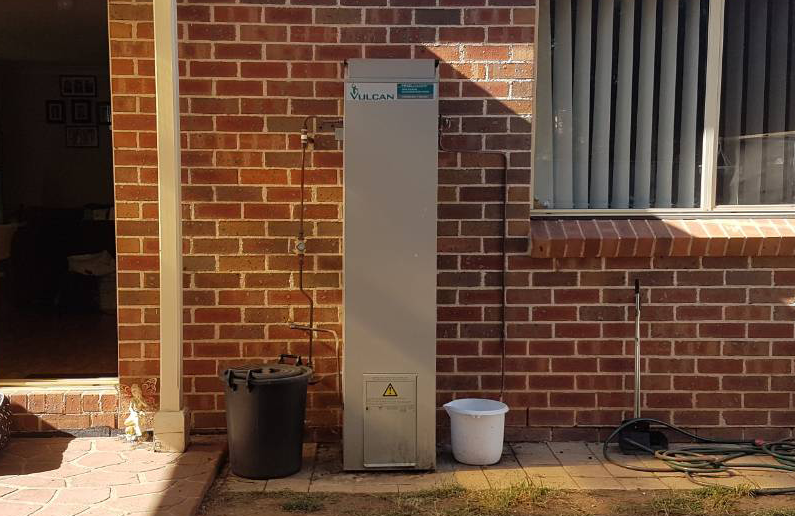
·       Conventional storage heaters are still the most widely used of all. They maintain a steady reservoir and release the water when you use the tap in the home. As the hot water level drops, the cold water enters the reservoir and replenishes the used water. One big downside of conventional storage heaters is the fact that they constantly heat water via a stand-by energy process. Hence, from the energy-efficiency standpoint, they lag behind their counterparts. 

·       Tankless (on-demand) water heaters certainly have an edge in the green department because they do not face you with stand-by energy losses.  This is due to the lack of a standard reservoir, which so many people are used to. When you turn on a tap, the cold water simply travels to the heater. In there, gas burners or electric heating elements raise the temperature and supply you with hot water galore.

·       Indirect water heaters are unique in a sense they are an integral part of the household heating system. Much like conventional storage units, they maintain a certain amount of water in a tank. However, the difference is that they are not using their own heat source to provide hot water. Instead, they harness heat from a furnace or a boiler. This “native” integration makes them rather energy efficient.

·       Solar water heaters are a newer addition to product palette, a staple of renewable energy home systems. As the name suggests, they capture sunlight to heat the water in the tank. So, unlike all other heaters, they do not use common energy sources—propane, natural gas, and electricity. Active versions have circulating pumps and controls, while passive models lack them.

Making The Right Call

Regardless of your choice, make sure to maintain your heater properly. That is the key to increasing its longevity and long-term performance. All heaters have their lifespan and some are harder to install than others. With this in mind, you should find reliable local pros, as the guys behind Hot Water Nurse, for all your repair and installation needs. Furthermore, never lose sight of energy-efficiency, bearing in mind that older models are always less efficient than the newer ones.

Once you decide on the type of water heater, you have a few more steps in the decision making process to complete. One of the key factors is the appropriate size of the heater. For instance, if you live just with your partner, it is not like you require a conventional unit with a large reservoir, as that would only lead to inflated energy bills.  \

Guest Contributor, Lillian Connors

Crestwood Plumber

Test the waters  

Heaters are essential appliances no home can do without. But, an unfortunate choice can also cause many problems and headaches. So, it is crucial to research different sizes and types of heaters. There is no shortage of quality solutions out there and you want to purchase the one that is right for your needs. If you play it smart, the investment is likely to pay dividends as you will trim your energy consumption and bills. To get the most bang for your buck, take your time when shopping around, and commit to regular maintenance. Do not rush such an important decision.


Budget-Friendly Backyard Landscaping Ideas

RH Business Marketing Solutions

Plumber in Crestwood

Budget-Friendly Backyard Landscaping Ideas

Your home is your castle, and it should also be a reflection of who you are, or so they say. It’s not a good idea to put in a lot of hard work and effort to make the interior of our home look amazing but completely ignore your backyard. If you’re worried about spending a fortune on backyard landscaping, you can relax – there are many affordable ways you can turn your backyard into a charming oasis of peace. Read on to find out what you can do to make your backyard look amazing without breaking the bank.

Plumber in Crestwood IL

Pretty patio

Summer is beautiful but it’s also hot, which is why a lot of people choose to spend as much time outdoors as possible. In order to be able to entertain guests in your backyard, you should have a comfortable seating area where you can organize little parties. It doesn’t matter if you’re thinking about birthdays, anniversaries, good old barbecue parties, or you’re just dreaming about a place where you can enjoy your coffee breaks, patios are perfect for you. Patios are the best choice because they look great on your lawn, they provide a nice shadow or useful hiding place in case of heavy rain. All in all, they are both useful and beautiful places where you can spend your free time with your friends and family.

Crestwood Plumber

Garage alternatives

We all agree that having a nice dry place for your car is important, but does it really need to be a garage? Garages might be useful, but they are wasting your precious space in your backyard which you can otherwise use for something nice and creative such as a children’s slide or an above-ground swimming pool. As an alternative, you can call professionals from Malibu Shade Pty Ltd to set up carpark structures which are multifunctional. Such structures can serve as an alternative for a garage or storage space and they can be removed when you need some additional space.

Creswood IL Plumber

Plant more trees

Being ‘green’ is very important, and everyone can do little things which will help save the planet. For example, you can start by planting more trees in your backyard. There’s no better place to start because it’s your property and you can plant whichever tree you want. It’s up to you whether you’ll opt for a decorative tree such as oak, maple or linden which not only look good, but provide great shade, or perhaps you’d like something ‘multifunctional’. You can always plant fruit- bearing trees such as apples, cherries or walnuts and enjoy not only the shade but the fruits as well. Even though it might take a while for the trees to start bearing fruit, once they do, you’ll be happy to eat them. What is more, tree blossoms look and smell magical in spring, thus creating a blissful atmosphere in your backyard. Go ahead and contact https://www.thelocaltreeexperts.com/il/chicago/ if you need any tree services.

Light up the atmosphere

It’s amazing how a few ordinary lamps can make a big difference in any environment. Can you imagine an exciting movie night with a bottle of your favorite beer and a bowl of popcorns in your garden? Why not?! All you have to do to make this happen is to make your backyard a bit more comfortable. Your lawn has to be nice and neat but also well-lit. You can use your old night lamps or you can install vintage lanterns. If you don’t have any, you can find cheap ones at any flea market. Bring out bean bags and old blankets, light up the lamps and arm yourself with drinks and snacks. Now all you have to do is pick the right movie.

For homeowners who are fortunate enough to have an unlimited budget, renovating and upgrading a backyard is a piece of cake. For others, this means a bit more careful planning and hard work, but it can still be done. You don’t need to spend a fortune to turn your backyard into an oasis of peace; start planning and be prepared to do a bit of work yourself and you’ll be happy with the results.

Guest Contributor, Diana Smith

How To Maintain Drainage Systems

RH Business Marketing Solutions

How To Maintain Drainage Systems

How To Maintain Drainage Systems

A home’s drainage system is an important part of its structure. Ideally, drainage systems should be installed properly using high-quality materials during the construction period. However, there are times when contractors fall short and instead of using high-quality pipes and coatings, low-standard materials are used to cut down on costs. 

You don’t need to be an expert to know if your drainage system was done perfectly. If it was done shabbily, you’ll notice that over time you will see leaks on your sink, floors, and even walls. If you are experiencing this, then there is no need to panic because there are ways for you to fix it with or without professional help. 

1.      Trace where the leaks are coming from

Before you assume that you have defective pipes or sinks, first know where the leak is coming from. Chances are the leaks can also come from behind the walls because the pipes pass that area. You can also check the cabinet beneath the sink. If the leak comes from the pipe connecting the sink, then you can assume that that pipe needs repairing. 

2.      Replace all defective parts

Now that you know that there’s a leak in a pipe or an O-ring starts to drip, don’t try to repair them. Instead, buy a high-quality replacement so you don’t have to repair it often. Some people think that repairing damaged parts with epoxy or coating is cheaper; however, it could prolong the life of your pipes only for a short amount of time. It’s always better to replace defective parts immediately. 

3.      Insulate pipes

Insulating pipes means covering them with a coating that can keep the warmth inside the pipes. When the winter season arrives and there is no running water passing through them, the pipes can become brittle which makes them break easier. That’s why it’s advisable to have running water whenever the cold season comes. 

4.      Renovate defective drainage systems

When all else fails, you have to resort to renovating your drainage. This sounds easier said than done because a complete renovation of your drainage means that certain structures would be torn down to make way for new pipes hidden behind or in between walls. 

Plumbing Tips for Beginners

While the previous tips often require a professional to do it, you can fix leaks at home with these simple reminders:

  •  Use a bucket to hold your tools. This is also a good way to catch water when it flows.
  •  Use a plunger for clogs in your toilet or sink. Using plungers is the most common way to remove clogs because it is also the cheapest. 
  • Turn on faucets to check for leaks when you’re done repairing. This will help you know if there are still parts that need to be fixed. 

Leaky drainage should not be a big problem because there are DIY methods that you can do when you notice leaks and damages on your pipes and sinks. If there are cases that the problem escalates, you can always contact a plumber or an expert at repairing or renovating damaged drains

Guest Contributor, Eva Semon