Kevin Szabo Jr Plumbing Blog — Kevin Szabo Jr Plumbing - Plumbing Services│Local Plumber│Tinley Park, IL Google+

contact us

Use the form on the right to contact us.

Day or Night, we are here to serve you. Leave your plumbing problem to us.


Tinley Park, IL

(708)845-7922

Residential and Commercial plumbers and plumbing contractors available in Orland Park, Tinley Park, Oak Lawn, Palos Heights, Midlothian, Oak Forest, Homer Glen, Mokena, Frankfort, and the surrounding Chicago South Suburbs. Emergency plumbers.

copper water lines.jpg

Kevin Szabo Jr Plumbing Blog

Kevin Szabo Jr Plumbing is Tinley Park, Orland Park, Oak Forest, Midlothian, Orland Hill, Homer Glen, Mokena, Frankfort, Crestwood, Palos Heights, Oak Lawn, local plumber. Read our blog for advice, tips, a good laugh, and basic home improvement.

**We are moving our old blog to our new and improved website. Too see all our posts visit kevinszabojrplumbing.blogspot.com

Filtering by Tag: Plumber in Midlothian

Seven Home Improvements That Do Not Increase Your Home Value

RH Business Marketing Solutions

Plumbers in Crestwood IL

Seven home improvements that do not increase your home value.

A survey by the Homeowner Protection found that fifty-eight percent of homeowners in the U.S intend to carry out some kind of home remodeling in the next twelve months.

Most of the proprietors surveyed said that they wanted to renovate their homes so as to increase the value of the house when they do eventually sell it.

Not all home enhancements add value to your house. Some home renovations do not add value worst still various improvements can detract from the value of your house.

Here are eight home renovations that can lower the value of your house:

1.   Bright and Bold Paint Colors.

Trendy homeowners might feel the need to invest in painting the exterior of the home in bright colors. However, bright paint colors may not add to the value of your house especially if the house is ultimately sold to someone who does not like bright colors.

Instead, homeowners should paint both the interior and exterior of their house neutral colors before placing the house on the market.

Neutral colors can help the new homeowner to easily envision themselves in your home.

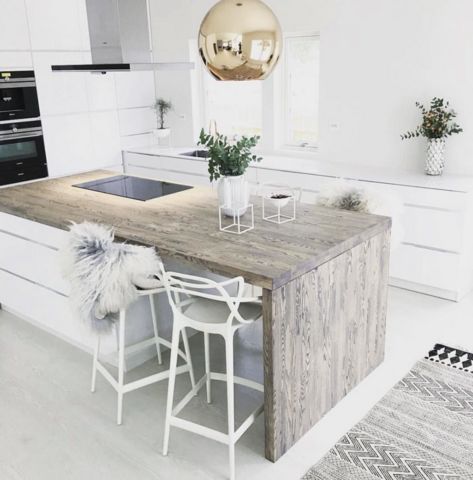
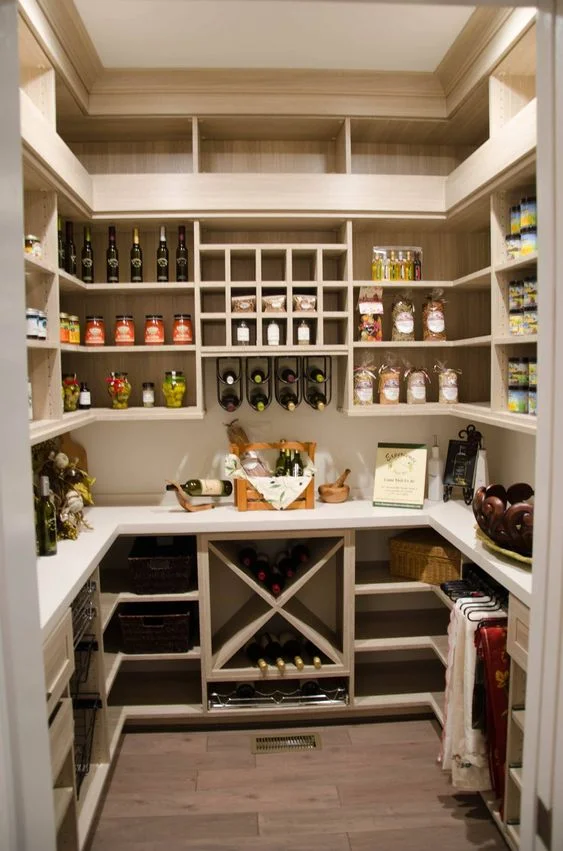
2.   Extreme High-end Kitchen renovations.

The kitchen is one of the rooms that most homeowners invest huge sums of money. However, homeowners do not recoup the full amount spent in the kitchen remodel as kitchen’s resale values are below the actual remodeling costs.

To avoid making this mistake, buy middle range kitchen appliances in place of high-end kitchen appliances.
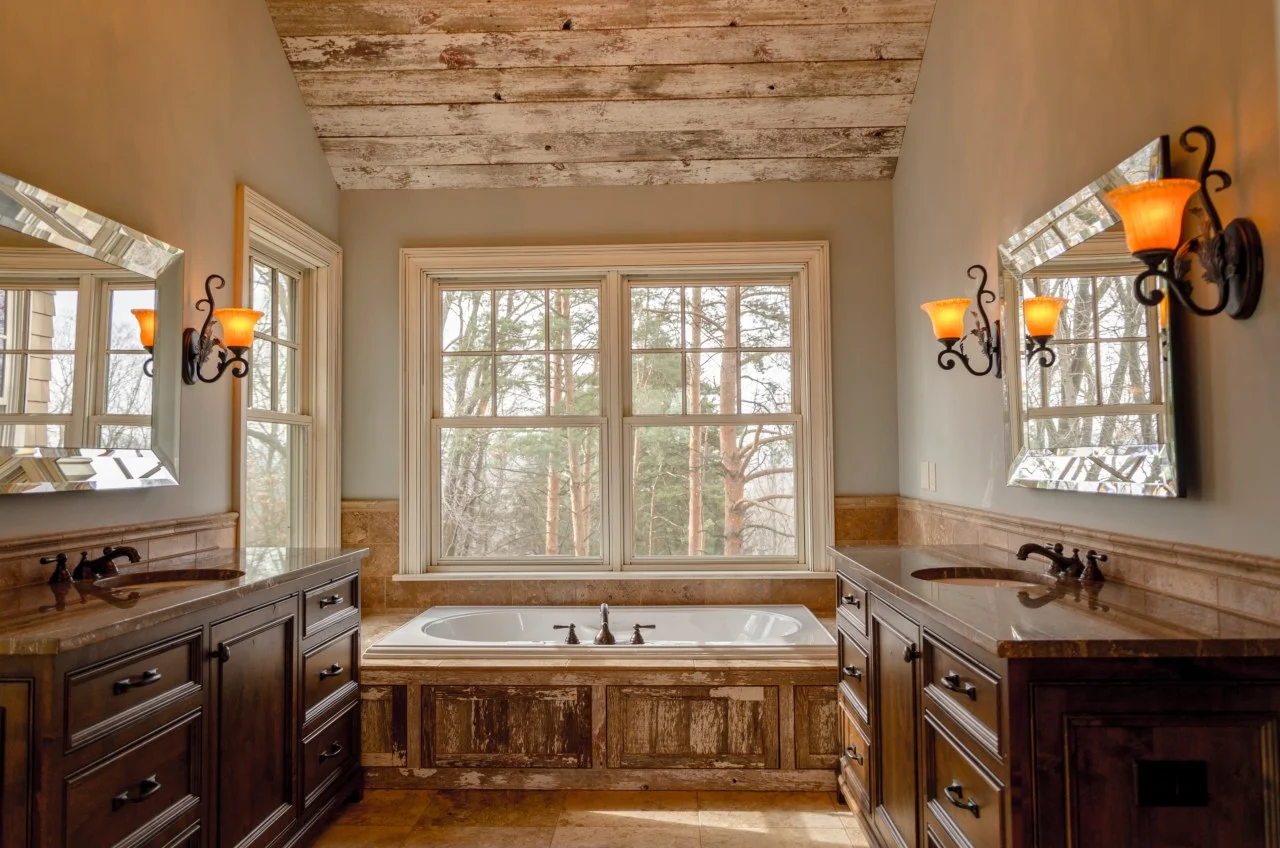
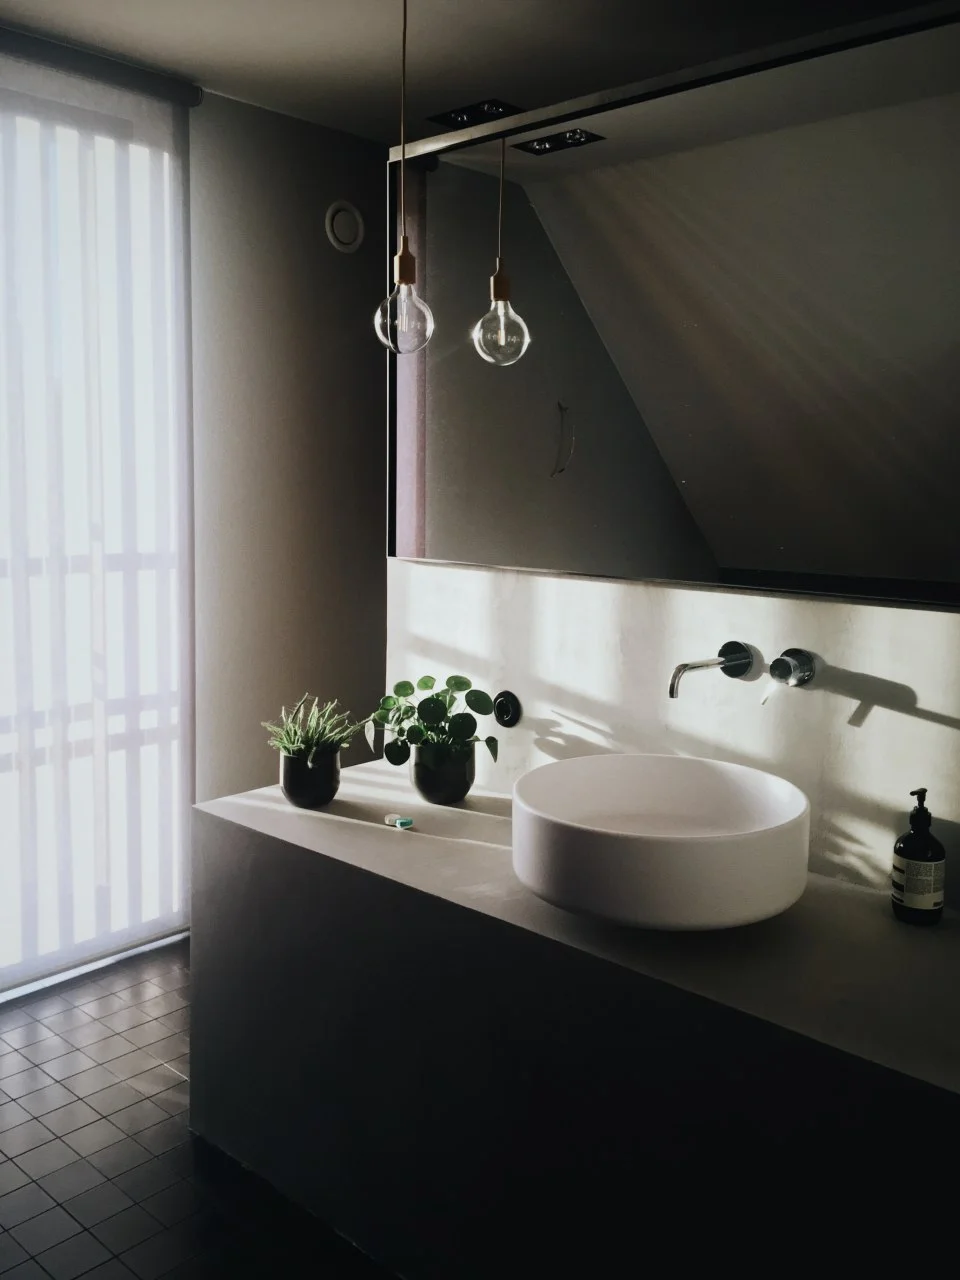
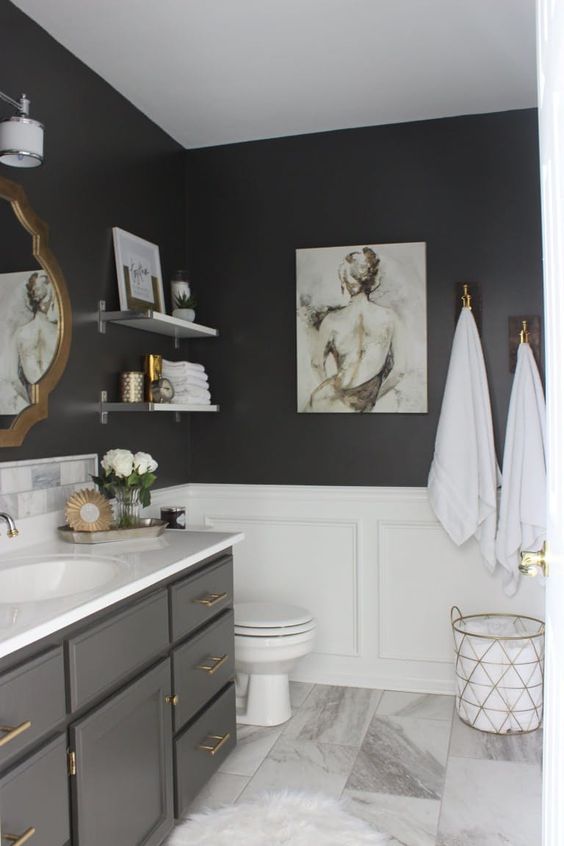
3.     Luxury Bathroom.

Luxury bathrooms increase the value to your home, but over personalized finishes and over-the-top whirlpool tubs may not be too attractive to would-be buyers with a different bathroom preference.

To ensure that your house is desirable to many people install a walk-in shower and avoid extremely luxurious bathroom finishes.

4.   Combining two bedrooms to create a bigger room.

Knocking down walls to create one big bedroom might seem like a good idea to a young couple or to a retired couple whose children have moved away from the house. But this is a bad idea for homeowners who want to sell their home in the future.

Young families with children, want their children to have separate bedrooms, and they, do not mind if the rooms are small.

Each separate bedroom adds about fifteen percent value to the home, so try and implement simple décor tricks in the small bedrooms to make them seem bigger instead of taking down the wall.

5.   A swimming pool.

Families with kids and people who live in places with high temperatures at least six months in a year, may opt to buy a house with a swimming pool.

However, if the home is located in a place that is quite cold throughout the year a swimming pool will not add any value to your house.

6.   A hot tub.

For families with young children, a hot tub is a safety hazard in the home. Hence such families might offer to buy the home a certain price, less the cost of uninstalling the hot tub from the house.

If you have to install a hot tub to your home, consider installing a moveable hot tub that you can carry with you once you sell the house.

7.   Costly landscaping.

Lavish landscaping decorations may increase the curb appeal of your home, but they will not raise the value of your home.

Prospective buyers will only see the high maintenance costs required for the decorations and this may make them fearful of buying the home.

Homeowners should install simple easy to maintain garden décor which can be removed easily should the need arise.

8.   Creative interior décor.

Unusual wall colors, too much wallpaper, and quirky wall-to-wall carpets are some of the creative décor installations that detract from your home.

If the prospective buyer dislikes the décor installations in your home, they will most likely be calculating how much it will cost them to remove such items. Accordingly, they will offer to buy your house for a low price taking into consideration that they will incur additional uninstalling costs in the home.

When decorating your home avoid over personalizing your home as most probable buyers may not share similar décor preferences with you.

Avoid all the mistakes discussed above, for you to get the best possible price for your house when you do decide to sell it.

 Guest Contributor, Danny “Wheels“  Margagliano

Easy Ways to Cozy Up Your Home

RH Business Marketing Solutions

Crestwood Plumbers

Easy Ways to Cozy Up Your Home

What is it that you love about your home? Some will talk about location, some about the size, and others about functionality. But what all of us have in common is that we love that feeling of joy and relief as we step into our homes after a long journey or a tough day at work. That doesn’t come from the location or the amount of money you’ve invested in sprucing the place up. It comes from all the little personal touches that you and the ones you love have put into every corner of your home. And if you seem to lack that heart-warming feeling, here are some ways for you to make your home cozier and more welcoming for you, your family and anybody else who decides to visit.

Plumbers in Creswood IL

Add some warmth to your sofa

The living-room sofa is usually the place where most families gather to watch films, play board games together or share a pot of hot tea while talking about how everybody’s day went. That’s why you should start there. Add a throw blanket to your sofa and your armchair, and don’t be shy with cushions either. Make sure you choose soft, warm and fluffy fabric in various colors and patterns. As long as you’re making the place more comfortable, why not add some style to it as well?

Crestwood Plumbers

Step on clouds

When the temperatures outside drop, there’s nothing worse than stepping on cold floor with your bare feet. So, if you don’t have wall-to-wall carpets, you can always get some area rugs. Opt for natural materials, like cotton, wool or jute, and don’t hesitate to layer them for extra coziness. Furthermore, if you have a pair of nice, comfy slippers next to your front door, you can put them on as soon as you enter your home and have them thaw your feet from the freezing cold outside.

Plumbers in Crestwood IL

Create a perfect reading spot

There’s nothing more inviting than a nice reading nook, some hot tea and the characters from your favorite book just waiting for you to join them in their next adventure. First, find a place near a big window, so that you get plenty of natural light. Second, invest in a lovely egg chair and perhaps even an ottoman for your feet, both in premium fabrics and a color of your preference. Finally, put a small table next to your chair, so that you have a place to put down your book and your tea cup or a coffee mug. What more could a person want?

Dress your windows up

Bare windows or short, light-colored and translucent curtains are modern and cute, but if you want to add warmth to your living space, you should consider some other options. For example, thick and heavy pattern drapes that fall down to the floor will definitely do the trick. Not only will they visually make the room more pleasant, but they’ll also help insulate your home by preventing cold from leaking through your windows.

Plumbers in Crestwood IL

Let your home show what you love

Displaying things like your family photos, your kids’ drawings or holiday cards from your closest friends and family will add some personal charm to any space. You can also print and frame some inspirational quotes and messages to reflect your beliefs and temperament. And why stop with the visual? If there’s anything that turns a house into a home it’s the smell of freshly-baked cookies. So, either bake your favorite cookies, or at least get a few scented candles for each of your rooms.

Don’t forget the bathroom

First thing’s first. Get a reliable plumber to check all your pipes for leaks. Once you know you’re on the safe side, you can relax and start adding some bath mats, shower and window curtains, as well as some plush towels. If the size of your bathroom allows it, consider replacing your shower with a beautiful bathtub, where you can take long, hot bubble baths whenever you feel like it. Throw in some string lights for ambient lighting and a house plant or two in the name of eco-friendliness and your bathroom will become as warm and as welcoming as the rest of your home.

These tips are just a small part of what you can do to add some allure to your home. And while there are many more wonderful ideas out there, these are a great starting point for turning your home into an oasis of comfort and warmth.

Guest Contributor, Cooper Klein

5 Sustainable Storage Solutions Ideas For Your Home

RH Business Marketing Solutions

best plumber in crestwood il

5 Sustainable Storage Solutions Ideas for Your Home

Making your home green and sustainable doesn’t sound like the easiest job in the world, but it’s still not as hard as it seems. This is particularly true when we’re talking about storage solutions that give everyone a headache no matter how much space they have. But, all you need are a couple of ideas that could boost your sustainability level and solve your storage issues, and you’ll realize how amazing this entire process is sooner than you’ve imagined. So, if you too are trying to find sustainable storage solutions for your home as well, here’s what you need to do. 

Declutter everything first

This is the first step toward more sustainable living and more effective storage solutions. We all own too many things we don’t even use, so getting rid of them is the way to go. Start decluttering your home room by room, especially the bathroom, and you’ll get a ton of new storage space you never knew existed, and organizing everything else should be much easier now that you have fewer possessions and more space.

Find sustainable materials

Sustainable storage should be based on having sustainable materials you can use when storing and organizing your stuff. That’s why plastic containers aren’t the best ideas in the world, although they can seem like the most practical and efficient solutions, especially for our food. Instead, use glass containers and mason jars that are just as useful, but much more sustainable.

Rely on big solutions

If your home is still full of stuff after a thorough decluttering process, and you want to keep all of these things around you at all times, think about bigger storage solutions that can solve all of your problems at once. Sustainable wall-to-wall shelving units and other reliable storage solutions that will protect all your possessions and keep them safe might be the things you were looking for, so explore these ideas and find a way to incorporate them into your home.

Explore hidden storage space

If your furniture is made from reclaimed and natural materials, you already know how amazing and comfortable it can be. But, if you find new furniture that’s just as natural, but has some hidden storage space as well, you could get the best of both worlds. Everything from sofas and sectionals to benches and coffee tables can be used as an additional storage solution, as long as it’s eco-friendly.

Get a rattan bar cart

This isn’t just about making your home more sustainable, but also adding a dose of elegance into your indoor and outdoor space as well. Rattan bar carts are amazing for serving your drinks, storing your newspapers and magazines, as well as presenting healthy fruits and tasty desserts to your guests. There are lots of models you can choose from, so pick whichever you like, but keep in mind that rattan is one of the most sustainable materials out there and you definitely won’t make a mistake by introducing it into your home.

From tiny glass jars to enormous shelves, sustainable storage ideas are everywhere around us, and it’s our job to define what we need and turn our dreams into reality. As long as we’re trying to introduce sustainability into every aspect of our life, including home design and storage ideas, we can be sure we’re doing something good for our planet and preserving it for future generations.

Guest Contributors, Amelia Atkins

Tips to Avoid Common Heating Problems This Winter

RH Business Marketing Solutions

IMG_0734.jpeg

Tips to Avoid Common Heating Problems This Winter 

They say winter is the most magical time of the year, but is that still so if your heater breaks down? There’s nothing more troublesome than going through the cold months with a faulty heating system. Sure, it’s nice to watch the snow falling and feel the cold breeze once in a while, but it’s a different story when you’re looking forward to a cozy night at home only to find your heater fail you.

Keeping your home warm over the winter months is not only essential to your comfort but your health as well. The drop in temperature can affect your immune system and make your body more vulnerable to sickness and infections. That said, it is imperative that you take the time to make sure that your heater works well before the colder days hit.

How To Keep Your Heater Working Smoothly 

Schedule regular heater maintenance

Nobody will ever do it better than the pros. Make it a point to schedule a heater tune-up before winter starts and another when it’s over. Having your heater cleaned and checked by professionals will extend its life and give you peace of mind throughout the season.

Make sure the pilot light is on

Checking if the pilot light on your furnace is lit should be one of the first things on your list when preparing for the cold days ahead. This is a fairly simple task, and the steps on how to do it should be on your user's manual.

Clean your heater and perform a visual inspection

Wipe the dust off your heater and clean or replace dirty filters. Also, give your heater a visual once-over to ensure that all parts are intact. Check the wires closely for any signs of damage or fraying. If you see something wrong with the wirings, get in touch with an electrician as soon as possible.

Watch out for weird noises

As you clean your heater, turn it on and listen for any odd noises. Any weird or gurgling sounds could mean that there's a leak, a crack, or some other problem within. Holes in the heater can be dangerous and should be addressed by an HVAC professional immediately.

Give your heater a trial run

Lastly, do a trial run. Turn your heater on for about 10 to 20 minutes to make sure that the system is generating the expected level of heat. This will assure you that your heater is in prime condition and will work like new when you need it to.

Guest Contributor, Michelle West

How to Install a Ventilation Fan in Your Bathroom

RH Business Marketing Solutions

IMG_0732.jpeg

How to Install a Ventilation Fan in Your Bathroom

Your bathroom is the one room in your home that is constantly under assault from a variety of sources. Harsh chemical cleaners, steamy showers and the remnants of last night’s Mexican entrees all need a way out and vent fans can do just that.

While the odor of a recently used restroom is definitely something we want to get rid of, the more important factor in installing a ventilation fan is evacuating the steam and water vapor created from baths and showers. 

This moisture, if left unaddressed can cause floors to bow, caulking to degrade, and mold to grow in our bathrooms, leaving us with costly repairs and unsightly walls, floors and ceilings. 

When you’re ready to start keeping your bathroom dry, here’s how to do it. 

Selecting a Ventilation Fan

Finding the right fan for your bathroom is an easy process, but an important one. When considering which fan fits your needs, consider the following. 

● Square footage. Fans are designated by the CFM (cubic feet per minute) of air that they move. You’ll want a fan that has at least one CFM for every square foot of your bathroom. Find square footage by multiplying the length of a room by its width. 

● Features. It may sound silly, but this is the 21st century, even our ventilation fans come with features and options now. Modern fans can commonly be equipped with a built in light, a heater, humidity sensor, motion detector, night light and even Bluetooth speakers. 

● Install options. Vent fans can be installed with or without attic access, on the ceiling or walls, and with or without cutting into the wall material. Figure out which option suits you best and pick a fan to match. 

The Tools

Installing a vent fan is a diy task that most homeowners can take on. However, you will need a few tools. 

● A drill with bits and drivers

● Screws

● Flathead and phillips screwdrivers

● Utility knife

● Jigsaw or drywall saw

● Respirator and eye protection

● Duct tape

● Wire cutters and crimpers

● Assorted electrical connectors (may be included with fan)

Time to Get Started

Once you’ve selected the right fan and have assembled the tools, you’re ready to get going. First, determine where your fan will be installed and gain access to that area. If you’ll be venting the fan through the ceiling, you’ll need to be able to get into the attic. 

Drill a Reference Hole

Find a suitable position on the ceiling, ideally between the shower and the toilet, and drill a reference hole through to the attic. A 3/8” bit is big enough for this. 

Measure the vent fan housing and note it on a piece of paper, you’ll need this next. 

Now, climb into the attic and locate your reference hole. Clear away any debris, insulation, or stored objects from the area. Using the measurement you just took, locate the final position of the fan between two joists nearest your hole. 

Note that position in relation to your reference hole so you can transfer that to the ceiling back in the bathroom. 

Mark the Layout in the Bathroom

Back in the bathroom, measure the inside dimension of the fan’s intake. 

Using your reference hole and the notes you made in the attic, transfer the measurements from the attic to the ceiling and use a square to mark out the intake port on the ceiling. 

Cut the Hole

Using the saw you have on hand, cut along the lines you just drew for you intake port. Be sure to wear your airway and eye protection and support the cut-out piece so that it doesn’t rip drywall paper from the ceiling as you finish the cut. 

Drop in Your Fan

Now, head back into the attic with your vent fan. Attach a 90-degree elbow to the outlet port of the fan and secure it with duct tape (preferably foil duct tape).

Remove the knock out panel and attach applicable wiring (you may need an electrician for this portion).

Attach the metal brackets to the fan at the designated points. 

Drop the fan into position, through your ceiling hole 

Secure the Fan

Using the drill and 1 ½” drywall screws, secure the brackets to the joists. 

Slide the flexible ducting over the elbow you installed and secure in place with foil tape. 

Cut Your Vent Hole

All exhaust fans need to be vented to the outdoors. Never allow a fan to blow into the attic or other space, this will cause mold and water damage as the steam condenses into water. 

Locate a spot on the inside of the roof close to your vent fan. Using a hole saw sized to the cap kit, cut a hole through the roof to the outside. 

Connect Your Flexible Hose

Once you’ve cut your hole, make your way onto the roof and locate the opening. Using the cap or vent kit, place the cap in position and secure it according to the instructions provided.

The SheltonRoofing.com information guide says that while you’re up there, check out the condition of your roof. Aging and disheveled roofs cause homeowners a multitude of problems and can be extremely costly if they fail.

Back in the attic, connect the other end of your flexible hose to the cap or vent kit and secure it with foil tape. You may also need to fill any gaps around your ceiling hole with spray foam or caulking. 

Give it Power

Ensure that power to the wiring you’ll be using is disconnected. 

In the bathroom, expose the blower motor and its wiring. 

Make the applicable connections using the wiring diagram provided in the fan kit. If you’re uncomfortable with home wiring, consider hiring an electrician. 

Secure all wiring and attach the ground. Cover the blower motor and turn on power to the fan. If it comes on, you’re good to go. 

Finishing Up

Replace the cover to the vent fan and secure it in place. Caulk or silicone any gaps between the fan and ceiling. 

Retest the operation and that’s it, you’re in the venting business.

An exhaust fan makes an excellent addition to any bathroom and removes the water and odor vapors that can cause you bathroom headaches for years to come. With this guide, we hope you can get a new vent fan installed in no time!

Guest Contributor, Tom Masters  

Bathroom Renovation Ideas To Rejuvenate Your Space

RH Business Marketing Solutions

Photo From: LED WORLD

Photo From: LED WORLD

Bathroom Renovation Ideas To Rejuvenate Your Space

The days when bathrooms were just places where you’d go to take care of your personal hygiene are long gone. Nowadays, bathrooms receive an equal amount of attention like any other room in our homes when design and style are in question. It’s no longer enough to have a functional bathroom; however, functionality still does play a crucial role in any bathroom design.

So, if you feel like your bathroom could use some renovation and remodeling, but you don’t know what exactly you should do or where to start, here are some ideas to keep in mind.

Change The Tiles

Depending on the extent of the renovation project you wish to undertake, you can choose to replace some or all of the tiles in your bathroom. If, for example, you have simple white wall tiles, you can leave them where they are and choose to replace only your floor tiles. The floor tiles should fit in well with your new design, so it would be wise to have a clear concept in mind before you actually start renovating.

Play With Color

Depending on the style you’re going for, you should consider repainting your bathroom as well. Keep in mind that neutral colors will hardly ever go out of style and that a monochromatic look is simply the most suitable choice if you wish to create an elegant, sleek bathroom. On the other hand, you can opt for a slightly bolder approach and paint the bare parts of your walls in hues such as moody blue, charcoal gray or even dusty pink.

Rethink The Layout

Next, you should really rethink the current layout of your bathroom, as now is the perfect time to change anything you’re not currently satisfied with. If you don’t like the current position of your sink or bathtub, simply move it somewhere else. It’s important to mention, however, that such structural changes can sometimes be very pricey, so that’s definitely something you need to keep in mind.

Plumbers in Crestwood IL

Change Your Vanity

Vanities are one of the key elements in any bathroom, and if they are not particularly stylish, pretty much all of your previous efforts to add some pizzazz to the space will be in vain. Therefore, you should definitely replace your old, worn-out vanity with some fresh, modern alternative. Furthermore, to free up some floor space and add more visual interest to your bathroom, consider mounting your vanity on the wall instead of the floor. Not only will this look extra in every sense, but it will also make cleaning your bathroom significantly easier.

Crestwood Plumbers

Decorate

Yes, bathrooms should also be filled with decorative items, but here, it’s best if those items have an additional purpose as well. So, for example, put all of your soap bars in a big mason jar and make them work as a decor piece, aside from being the necessity. Additionally, find a way to make your hand towels work as decor as well, by rolling them up in some creative way and putting them on display. Next, incorporate some beautiful candle jars in your decor as well that will not only work as a beautiful eye-catching detail but also make the entire room smell amazing.  

Declutter

While most of the things people have in their bathrooms are not actually clutter per se, those things – such as shampoo bottles, personal hygiene products and other bathroom essentials – do tend to create a strong visual mess. That’s why you should definitely try to, at least, hide them from sight. For example, store all the products you are not using on daily basis in your vanity and get stylish new containers for the ones you do. Yes, replacing all the shampoo, body wash, hand soap, etc. containers may sound somewhat like a waste of time but, in the end, it will leave your bathroom looking super stylish.

Make a Statement

Finally, add a statement piece in your bathroom. Any well-decorated room features a statement piece and your new bathroom shouldn’t be any different. This could be an elaborate chandelier, an over sized statement mirror in a beautiful frame or even an interesting backsplash. It can be literally anything, as long as it makes a statement and reflects your personal style.

And there you have it. These were just some of the ideas you can try out if you wish to create a truly amazing bathroom. Of course, you can take each of these ideas and give them your own personal touch and create a space worthy of interior design magazine cover.

Guest Contributor, Cooper Klein

Why You Should Build a Duplex

RH Business Marketing Solutions

Plumbers in Crestwood

Why You Should Build a Duplex

Building your first home is a once-in-a-lifetime experience and it should be something you put a lot of thought into. There are usually three main ways to go: you can build a condo, a town house or a single family house.

However, there’s also an option of building a duplex, which often gets overlooked. It’s a mistake to do so. There are many advantages of investing in a duplex and you could find it worth your while later on, both in terms of money and comfort.

Mortgage Benefits

When you borrow money to build a home, there’s a difference if you’re building it to live in or to rent, sell or just keep it vacant. Homes that are built to be lived in get better rates since banks want to help people with purchasing their first property.

A duplex is, obviously, two properties in one, which means you can both live in it and rent it out without any inconvenience. When it comes to the bank, a duplex is seen as one property, which means that you get all the perks of building a home to live in, with the ability to also rent it.

Family Living

Building a home should be something that you do with your future family plans in mind. For instance, many decide to invite their parents to live with them as they grow older and require additional care. Young adults might also need a place of their own as time goes by.

Duplexes such as the ones designed by Meadan Homes allow you to do so without jeopardizing your privacy and remaining comfortable and independent in the process. This is something to be considered long before there’s an actual need for it.

Airbnb

For most people, Airbnb isn’t a regular source of income but something they could use when their home is vacant for a while. When you have a duplex, you could keep a unit open for guests at all times. This turns Airbnb into a full-time job and you need to dedicate more time and resources to keeping the unit presentable.

Even though a duplex could be rented for a while, it’s better to rely on Airbnb. While renting the room out for a while means more income, Airbnb gives more freedom if your circumstances change unexpectedly.

Taxes

There are different types of write-offs that you can get when building a home. One type of write-off is used when you’re purchasing a home to live in. In those cases, you can basically deduct your mortgage. When you’re renting a home, the write-offs are used to cover the costs of refurnishing and repairing things for new occupants.

With a duplex, you get to use both of these write-offs, which really comes in handy for a young family. However, you can’t easily switch which unit is yours and which one you get to rent out, but that’s not that much of a problem for most homes.

Building a duplex is a good investment because it gives you more freedom in the way you live and use your home. A duplex could be rented without inconvenience and you can also change it into a granny flat. There are also tax and mortgage benefits to think about.

Guest Contributor, Amelia Atkins

Bathroom Painting Tips

RH Business Marketing Solutions

Painted Bathroom.jpg

Bathroom Painting Tips

The bathrooms in your home serve a very necessary and functional purpose. However, they are also another room in the home where you can showcase your personal style. Throwing a new color of paint on the walls is just one of the many ways you can add style to the space. It’s also one of the greatest ways to do so.

If adding your own style to the space isn’t enough, another great reason to paint the space is due to the fact that most bathrooms are likely to undergo a lot of abuse from the steam that constantly arises from baths and showers. The humidity levels in your bathroom are likely to rise and fall more drastically which remains a tough challenge for the paint and walls to persist against.

Fortunately, freshly painting your bathroom is a simple DIY project that tends to take no more than a few days to complete, but before you begin slathering paint everywhere you should continue to read the helpful painting tips below.

Choose a Paint Color First

Since it is already established that shinier sheens are best for bathrooms where moisture is often a concern, you must only be concerned with your choice of paint color. Choosing the wrong paint color can easily make your bathroom seem sterile and uninviting. To avoid this, it is suggested that you choose an overall color scheme for your bathroom based on three colors complementary to one another on the Color Wheel. Once you have these three colors, choose one that best suits your bathroom as a paint color for the walls. The other two colors can be shown through any other accents and decor.

Collect All the Proper Materials and Supplies

Before you begin painting your bathroom, gather all the proper painting materials and supplies. These may include:

●      Primer

●      Paint

●      Stir sticks

●      Paint rollers

●      Roller covers

●      Disposable gloves and other safety gear to protect your skin or inhalation

●      Small paint brushes, for cutting in or touch-ups

●      Paint trays

●      Painters tape

●      Rags

●      Drop cloths

●      Sandpaper

●      Tack cloth to remove any sanding dust

●      Painters putty

●      Putty knife

Being prepared to paint is extremely important. Otherwise, you may end up with a mess or an unfinished project due to the lack of supplies. Running out for more could cause the paint to dry in the meantime, which won’t due any justice to the overall appearance of the paint job.

Make Sure Your Bathroom Is Properly Ventilated

It’s vital to your health and the completion of your bathroom paint project if proper ventilation is provided. The higher levels of humidity can damage your paint in no time or stop it from completely drying. To provide adequate ventilation, open windows, turn on ceiling fans nearby, or start the exhaust fan to help clear the room of any steam. This will remove the moisture faster. Have those in the household run a fan if they need to use the bathroom at any point.

Conduct Prep Work

Prep your bathroom by removing any outlet plates such as electrical sockets or light switches. Then, lightly wash down the walls with soap and warm water. After the walls dry completely, apply painters tape to the baseboards. Next, patch and sand any dents or holes in the walls. To protect your floors, tape down a drop cloth. You may also want to cover your counter, sink, bathtub and toilet to prevent them from paint spills or drips.

Before you paint, you will want to prime the walls first. Make sure the primer is fully dry before you start putting on the first layer of paint. When you do go to paint the color on the walls, cut in around the room’s edges first. This includes where the walls meet adjoining walls, the ceiling and the baseboard.

Use More Durable Paint on Window Sills

If you plan on repainting your window sills in the bathroom, you may want to consider using more durable paint. High gloss or semi gloss paint is perhaps best for your window frame and sill since moisture seems to be more prevalent in these areas. If moisture around the window sills of your bathroom is of your utmost concern, you may even upgrade to an exterior paint for this part of your project.

Consider Wood Paneling

If your drywall isn’t in the best of shape or you prefer not to redo the drywall in your bathroom, consider wood paneling. You can often find wood paneling sold cheaply by the sheet. These sheets come in many styles, wood types, and colors. Nonetheless, you can always install them and paint them whichever color you choose. When you apply wood panels to your bathroom walls, they are adding more protection against moisture as well as a lovely contrast to whatever paint color you chose for the remaining wall space.

Have a Variety of Lighting and Capture the Room’s Essence

Lighting plays a large role in the essence of your bathroom even after you paint. Since the levels of natural light are always changing in a bathroom throughout the day, it’s wise to have a good balance of both natural and fixed lighting. A lot of natural light will only enhance any and every flaw you make in the bathroom during your painting project. Even after you complete the paint job, the flaws will still be noticeable. With this in mind, paints with a higher shine are best.

When you have a smaller sized bathroom that gets a lot of natural light, ask the representatives where you plan to purchase the paint if they can mix it at 75% strength. This will lighten the color slightly which prevents flaws from being as noticeable. Aside from lighting the strength of color in the paint, there are ways you can play with the lighting to keep the color of the walls looking as close as possible to the color you desire. For instance, to warm up the color you can choose 40 watt incandescent light bulbs, while 100 watt light bulbs tend to make the color in the room seem cooler.

Don’t Rush Your Project

Perhaps the most detrimental thing you can do while painting the bathroom in your home is rush to complete it. Of course, poor preparation also plays a substantial role in a bad paint job. Nevertheless, it is the failure to take your time that really makes the paint in your bathroom lack appeal and showcase any flaws. Take your time. Even by doing so, the entire bathroom should be fully painted and completed in just a few days time. Make sure that you prepare your drywall, smooth out the walls, prime, and paint the next layer after each layer is completely dry. By doing so, you are certainly going to be more pleased with the results.

Guest Contributor, Tom Masters

Signs Your Heat Pump Needs Immediate Service

RH Business Marketing Solutions

Winter House.jpg

Signs Your Heat Pump Needs Immediate Service

Heat pumps have always been a reliable way of keeping ourselves warm during the winter. However, heat pumps are still machines that are bound to have something go wrong with it in the course of its lifespan.

When it suddenly acts up, it most likely means that it needs immediate service. Here are some signs that should tell you when to call an HVAC company for a professional heating system repair.

Insanely high energy bills

Getting high energy bills when you’ve got your heat pump running all throughout the summers and winters is perfectly natural. What isn’t is an energy bill that is practically double what you usually get. The prime suspect in any suspiciously high bill will be your heat pump.

Dirty air filters could be the cause as it restricts airflow and makes the heat pump work harder, which in turn leads to more energy consumption and higher bills. There could also be holes in your duct, which wastes a lot of precious heated air. These are possible causes that you can DIY, but some problems like low refrigerant charge or refrigerant overcharge are best left to HVAC experts.

Weird sounds

An HVAC system does make some noise, but when it’s louder than usual, and there are clattering, banging, hissing, or bubbling sounds involved, waste no time in shutting the unit down and calling a trusted HVAC company. Only pros should deal with what could be a poorly-lubricated central air fan motor, a loose fan belts, a compressor running under too much pressure, or a refrigerant leak.

Burning smells

Does the heated air coming out of your heat pump smell have a burning smell? If so, shut it down immediately because there really must be something burning inside. It could be a component that’s overheating or a simple electrical problem. Whatever the cause, never even try to turn the unit on again until the HVAC pros get there.

No more heat

If the heat pump has been running for an hour and everyone is still shivering, then there must be something wrong with your heat pump. A dirty air filter can cause it, but so can a malfunctioning PCB assembly, a defective thermistor, or a failing capacitor.

While you can change the air filters yourself, only skilled and experienced HVAC professionals should deal with the other possible issues.

You wouldn’t want your heat pump to break down in the middle of winter, so if you notice any of the signs mentioned above, call an HVAC company right away.

 Guest Contributor, Michelle West

Getting Rid Of Mold In Your Home

RH Business Marketing Solutions

Mold in your house.jpg

Getting Rid of Mold in Your Home

Although just a tiny organism, minuscule mold can pack a serious punch: one report reveals mold cost the U.S. $22.4 billion in health care expenses in 2016 alone. How much is that? That’s almost the GDP of Jamaica. Without plumbing performed by a professional in your kitchen, bathroom, or workplace, mold can quickly get the upper hand. So what can be done to rid your household of mold in your sinks, leaky showers, closets and bed sheets? Here are some tips to get you started.

Humidity: Mold’s Favorite Environment

Mold loves moisture. In fact, it needs it to survive. Just like us humans and other animals, mold needs water to survive and thrive. But given even a little bit of moisture, this simple organism becomes a nuisance, wreaking havoc on our respiratory, and even neurological, systems. Once mold gets exposed to moisture, it can begin to multiply. At that point, it is able to release spores that go up into the air and settle on nearby surfaces, creating veritable mold colonies. With humidity above 50%, mold starts flourishspawning new mold wherever it can. However, without humidity, mold dies of thirst. So step one in controlling mold is to dehumidify your home.

Get Leaks and Floods Fixed by Pros

A quality professional plumbing service is a must when your home has sprung a leak. Yes, maybe you could tighten a nut or bolt or two, but while the leak was happening, how much mold started to grow? A plumbing expert can come in and not only fix the problem but analyze the area to see if any mold used the leak to start building an unwanted home. And if there is any significant flooding, regardless of the source or type, it’s a must to get experienced pros to handle the cleanup. These things cannot be left to chance.

You Can Hunt and Kill It

Even though mold can be dangerous, it’s also a fairly fragile little creature. Once spotted, some bleach mixed with water will get the job done. Killing the mold really isn’t the most difficult part of the job. The challenge comes with protecting yourself and your family in the process. Cover all of your skin and blow a fan out a window to whisk away any spores stirred up while cleaning. And, when in doubt, play it safe by hiring a professional to handle the work.

If you find mold lurking in your house, be sure to check and double check all plumbing fixtures nearby. Quite often, it is visible in various different colors, so you can easily spot it and quash it. If you can’t see it, you can sniff it out. It has an unmistakable musty odor.  Even if you don’t have bleach handy, don’t worry, other household cleaners also do a good job of stopping it in its tracks. If, after zapping the mold, you keep the humidity down, you can quite literally breath easy.

Guest Contributor, Cindy Trillo