Google+

contact us

Use the form on the right to contact us.

Day or Night, we are here to serve you. Leave your plumbing problem to us.


Tinley Park, IL

(708)845-7922

Residential and Commercial plumbers and plumbing contractors available in Orland Park, Tinley Park, Oak Lawn, Palos Heights, Midlothian, Oak Forest, Homer Glen, Mokena, Frankfort, and the surrounding Chicago South Suburbs. Emergency plumbers.

copper water lines.jpg

Kevin Szabo Jr Plumbing Blog

Kevin Szabo Jr Plumbing is Tinley Park, Orland Park, Oak Forest, Midlothian, Orland Hill, Homer Glen, Mokena, Frankfort, Crestwood, Palos Heights, Oak Lawn, local plumber. Read our blog for advice, tips, a good laugh, and basic home improvement.

**We are moving our old blog to our new and improved website. Too see all our posts visit kevinszabojrplumbing.blogspot.com

Filtering by Category: September 2020

9 Fall Living Room Ideas

RH Business Marketing Solutions

Many people love when Fall comes around because it means they get to decorate their homes. Decorating can be fun and unique, depending on the way things are placed and correspond.

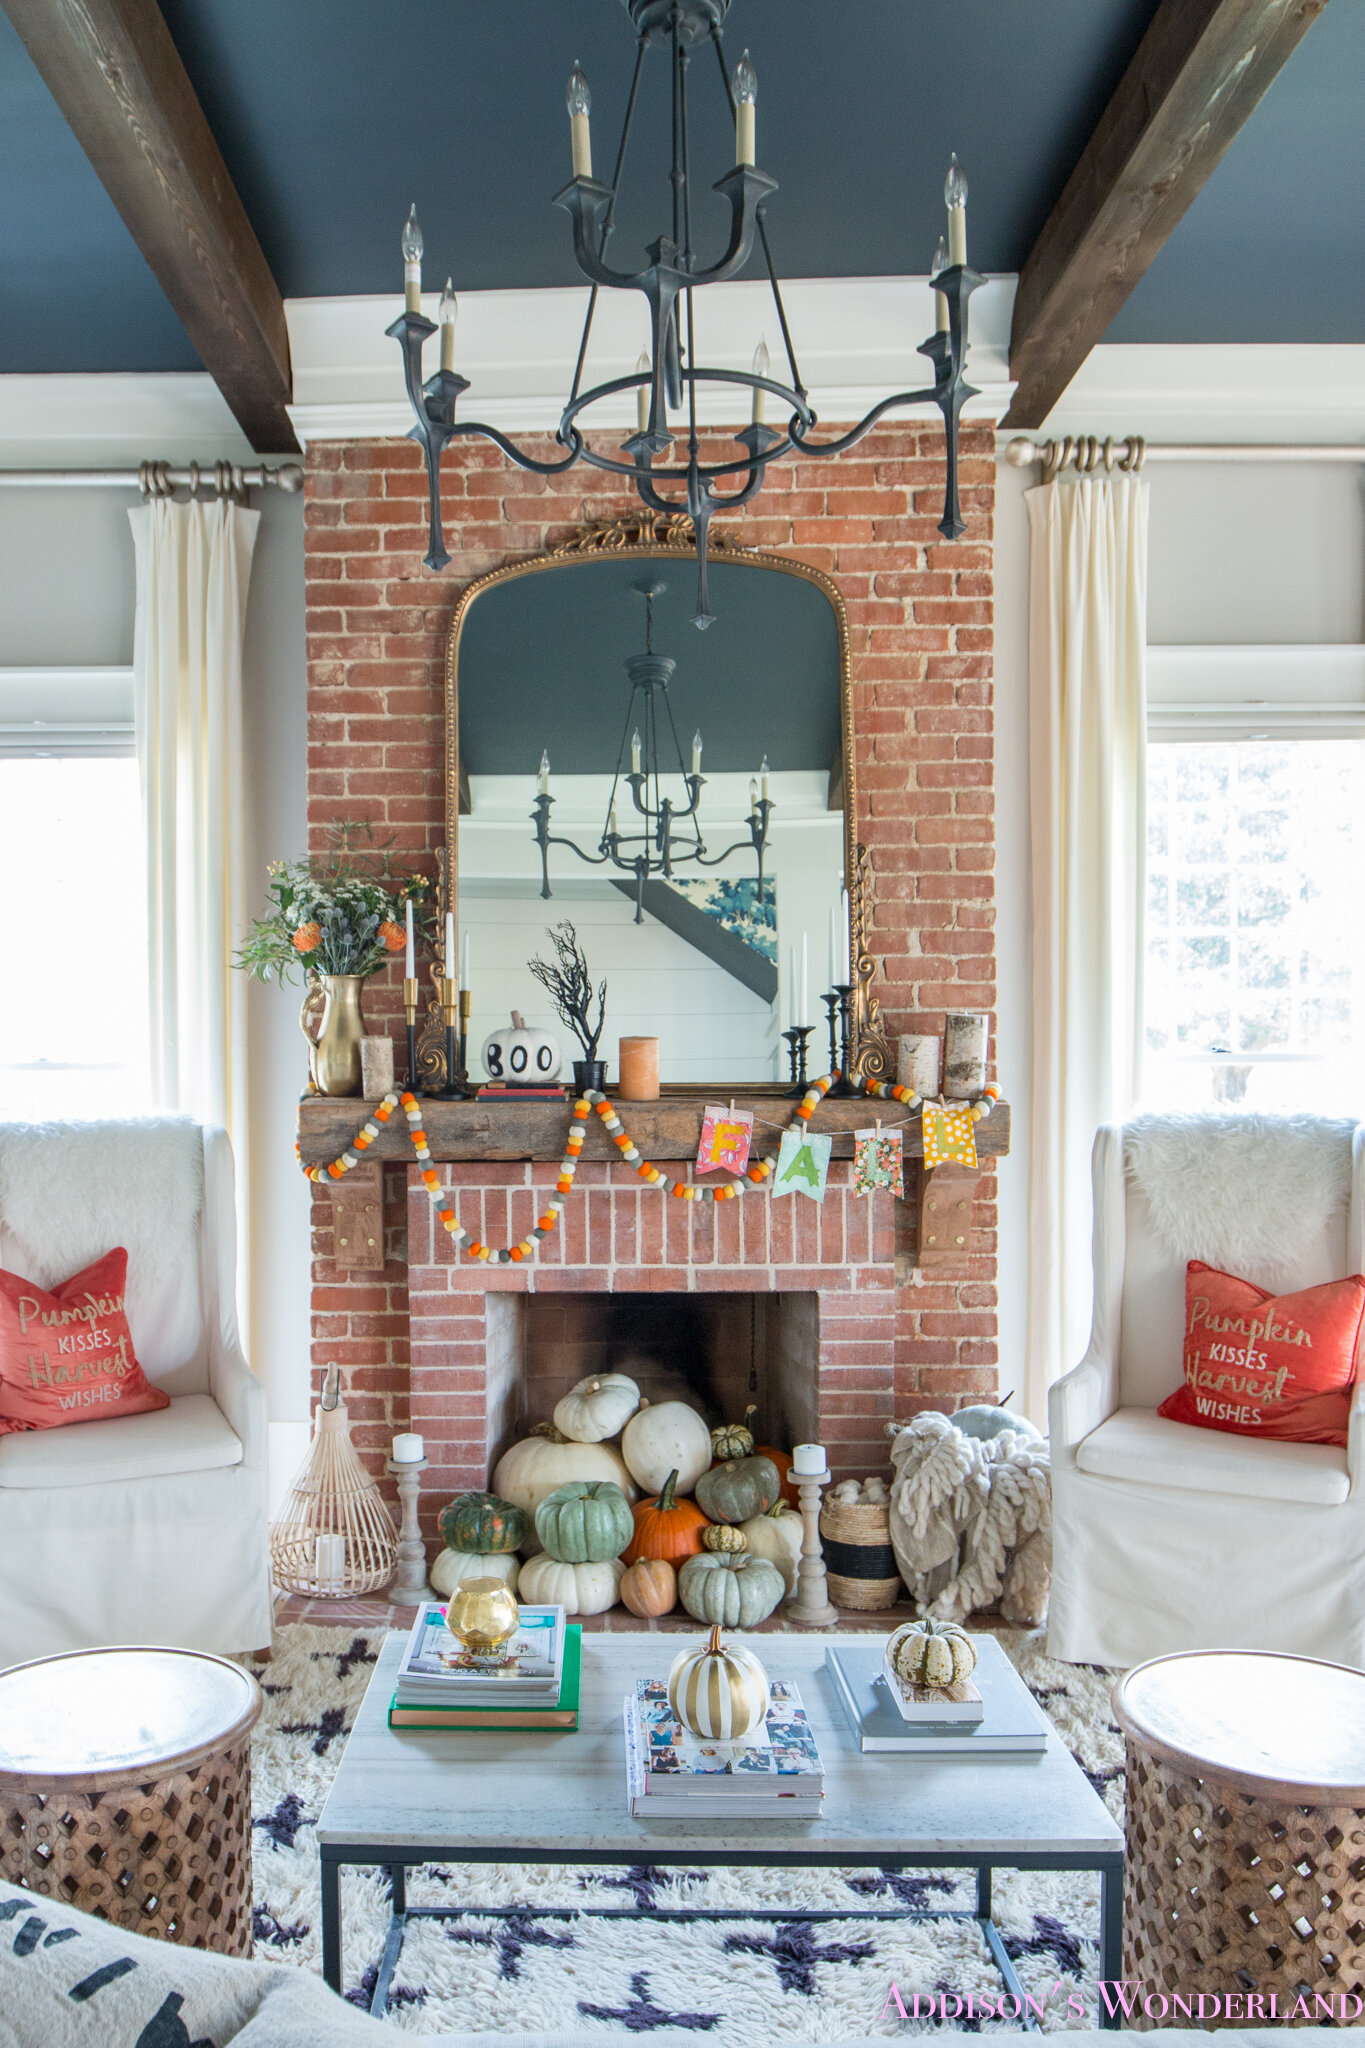
halloween-fall-living-room-pumpkins-decor-decorating-fireplace-mantle-18-of-31.jpg

Decorating the mantel is a great way to catch people’s attention. Fill it with multiple fall colors to make it pop.

If you are going for the farmhouse theme, if you do not want to add a splash of color, add in decoration that says things that go along with Fall, Thanksgiving or Halloween.

Adding decorations around the TV is a great way to make sure the decorations are seen, since many people watch TV.

Leaving decorations sitting on the coffee table brings the attention to it, since the coffee table has many uses and is usually used frequently by homeowners and guests.

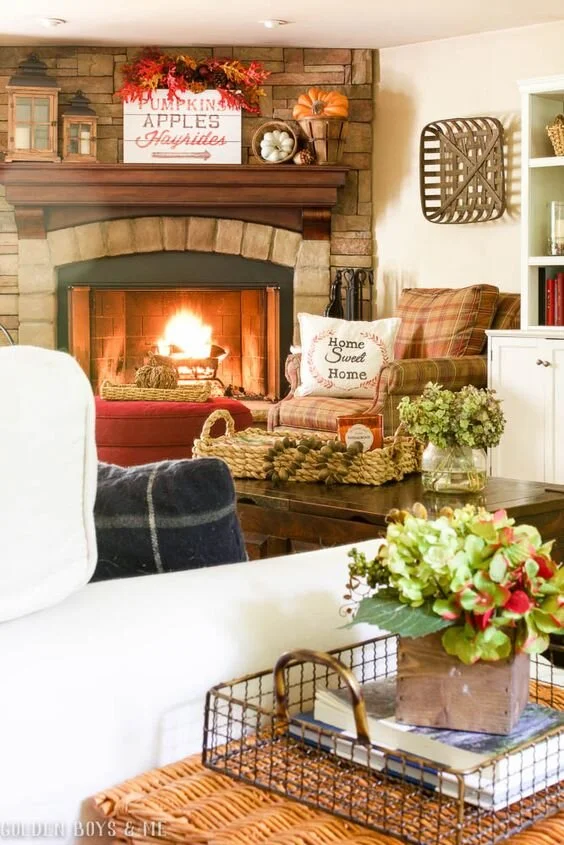
Adding plaid decoration is a great way to add a fall vibes.

Adding a pop of color in a neutral color scheme helps the look of fall. Some people like the white farmhouse style, but throwing in a splash of color brings attention to the decorations.

Adding string lights around the room can give off an additional glow to complement your fall decorations.

51hcYD647IL.jpg

Throw pillows are the easiest way to add decorations into your home. These can be found practically anywhere and give a fall look instantly.

Add decorations that have a similar color scheme to make the decorations look good together and flow.

Guest Contributor: Tiffany Powell

How to Pack for a Move: A Complete Checklist

RH Business Marketing Solutions

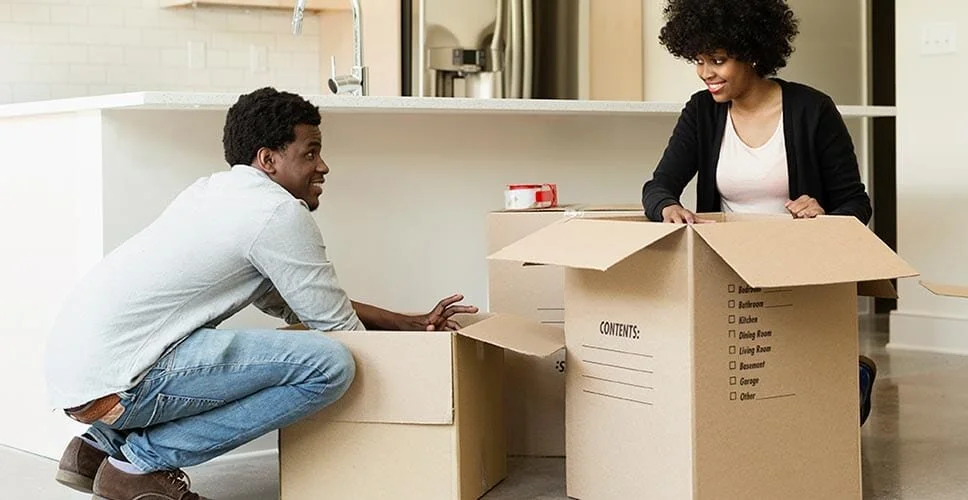
e8f12760-6f08-11e8-a5e3-7d1e2afa2917-packing-checklist-1.jpg

One of the most stressful aspects of moving is packing. When considering how to pack for a move, a smart approach is first to gather the moving supplies you’ll need and then systematically go room-by-room until the job is done. Follow MYMOVE’s checklist for moving to make the process more manageable and creates less stress.

General packing tips

Packing is one of the most crucial phases of moving. By organizing items based on common functions, room use, or other factors, it makes it easier to keep track of your belongings during transport and unpack at your new place.

Here are some easy packing guidelines: 

  • Pack like items together. Start packing each box with a layer of padding – it can be newspapers, bubble wrap, or household goods, like blankets or towels. Then, put the heaviest items into the box first.

  • Label each box by room and by its contents.

  • Pack a box of essentials. Must-have items like: screwdrivers, hammers, snacks, drinks, toothbrushes, a change of clothes, paper plates, plastic utensils and cups, a first-aid kit, medications, etc.

  • Refrain from filling boxes to the brim. This prevents boxes from becoming super heavy and reduces the likelihood that they break or are dropped during transit.

That settled, let’s move from room to room with packing checklists and tips.

Start by gathering your moving supplies

To ensure a successful move, you’ll need the following moving supplies:

  1. Gather cheap or free packing and moving boxes: Use websites like NextDoor Neighbor to search for used boxes or ask your friends and family. Gather a variety of sizes and make sure the packing boxes are in good condition.

  2. Buy bubble wrap (or try to find it for free): Bubble wrap keeps your items protected during the move. And best of all, you can buy it at office supply or department stores inexpensively or find it free on Facebook Marketplace.

  3. Rent a dolly: Carrying boxes between places becomes taxing and could lead to drops. To prevent them from happening, rent a dolly from a home improvement store or moving company as it makes moving much easier.

Go room-by-room with a packing checklist

Start by making an inventory of the items you plan to take. Do this based on each room — this will help you organize faster and keep track of your valuable possessions. From there, gather moving supplies such as packing and moving boxes, padding, tape, and blankets — everything you’d need to protect your things during transit.

When you go to pack your items, try to combine them based on function — for example, pack kitchen supplies together.

Lastly, don’t forget to mark your moving boxes so you know exactly where it goes in your new home. On the top and sides of your box note the room name, the contents of the box, and whether or not items inside of the box are fragile. For example, a box you packed from the kitchen could say: “kitchen/everyday dishes/fragile.”

MM_Room-by-Room-Packing-Checklist_Infographic_Comp1.png

Here are some additional packing checklist items for each room of the house:

The kitchen

  1. Defrost the refrigerator: At least 48 hours prior to moving out.

  2. Organize dishes: Packing dishes for moving isn’t as hard as you might think. Just make sure to pack them carefully by wrapping them in bubble wrap. And refrain from overpacking boxes. Overpacking will make it more difficult to move the boxes and if a box incurs damage, you could lose a whole grouping of plates.

  3. Use sectioned boxes for your glasses: It’s a simple, secure way to transport them.

  4. Pack small appliances: Start by removing any blades or loose components. Tape the cord around the appliance, tape any additional parts to it, and be sure to include the instructions.

  5. Pack dry goods: Tape paper or bubble wrap around seasonings and pack jars containing spices or food on the bottom so they don’t move around during transit.

  6. For refrigerated goods: Store them in coolers with ice.

The dining room

  1. Roll up the rug: Secure in plastic or use a rope.

  2. Pack chairs: By removing the legs and placing them in moving boxes with the nails/casters in a labeled plastic bag.

  3. Secure kitchen table: By wrapping it in a blanket and placing it in an area where it doesn’t slide around.

  4. Pack decorations (this includes lamps, pictures, artwork, etc.): By wrapping any items containing glass or ceramics in paper or bubble wrap.

The living room and den

  1. Secure electronics: For TVs and computers, secure the screens using a blanket and unscrew the base (if the device has one). Tape the screws and base to the back of the TV.

  2. Pack furniture: Place furniture into the moving truck before packing moving boxes. Remove the legs off couch and chairs to make them easier to maneuver into your new home.

  3. Keep electronic components organized: Tape the power cables to each electronic component along with the HDMI or audio auxiliary cables and remote control.

  4. Handle artwork and mirrors carefully: Wrap them in blankets or bubble wrap.

  5. Prepare your coffee table for transport: Put furniture sliders under the legs so you don’t scratch the floors when you move it. Cover the top of the table with a blanket to prevent scratching.

  6. Remove bulbs and lampshades from lamps: Store in boxes, and cushion carefully. Wrap the base of the lamp in bubble wrap if it’s fragile.

  7. Pack your books, CDs, and DVDs in separate boxes: Don’t make boxes too heavy or they’ll break.

The bedrooms

  1. Pack casual clothing: Fold them and place them in moving boxes. For formal wear, consider buying wardrobe boxes that allow you to keep the clothing on hangers during transport.

  2. Organize jewelry: Put all valuables in a container you keep on you at all times during the move.

  3. Pack mattresses: Put them in bed bags that will keep the mattress protected from the elements during the move.

  4. Keep all bedding and pillows clean: Put them in trash bags to keep out dust and place them in labeled moving boxes.

  5. Pack your home office: For crucial files, keep them in a safe or locked file box.

The bathroom

  1. Pack toiletries together: Make sure to have easy access to them for your new home. The bathroom will likely be the first room you unpack.

  2. Organize towels: Pack towels, toilet paper, soap, and more in one box for each bathroom your new home has.

The laundry room

  1. Move appliances: First, unplug the washer and dryer. Next, disconnect all components including the dryer vent and washer hose, and tape the power cords to each appliance.

  2. Throw away detergents and fabric softener: They’re dangerous to transport.

  3. Use laundry hampers/baskets as moving boxes: Pack hampers with socks, T-shirts, and more for an easy move.

The garage/storage shed

  1. Pack lawn furniture cushions: Put them in boxes or trash bags.

  2. Dispose of hazardous materials: Get rid of any paint, fertilizer, or weed killer — these are hazardous to move.

  3. Pack tools: Put them in a tool chest. For items like a saw or hammer, wrap them in towels then pack them in boxes.

  4. Drain the items requiring gas: For your grill or mower, drain the gas before transporting the item. Remove the gas tank from the grill (if applicable) and turn it in before moving.

  5. Deflate pool toys: This will make it easier to pack them in boxes. s.

  6. Take your bike with you: Use a bike rack on your car or SUV for safe transport.

Frequently asked questions

What packing supplies do I need for moving?

When considering how to pack for a move, you’ll need to buy or find items such as boxes, tape, blankets, a moving truck or trailer, and rope for securing loose items.

Where can I get free packing and moving boxes and supplies?

Moving is a common reality for many of us, which means once someone completes their move, they won’t need their supplies any longer. Websites such as Facebook Marketplace or Freecycle are filled with people giving away free moving supplies. Make sure to check these out a few weeks before Moving Day.

How do you pack dishes for a move?

Layer the bottom of the boxes with packing peanuts or paper. From there, wrap each plate in a layer of bubble wrap then stand the dishes up in the box. This is the best way to keep them secure. And once tightly packed, don’t forget to write “FRAGILE” on the box.

How do I organize items before moving?

A great tip is to go room by room and organize items in each into three categories: Items you plan to keep, items you plan to donate, and stuff that goes into the garbage. Organizing before a move makes it much more manageable, as you only take the items you need.

How should I pack a moving truck?

You’ll want to pack the heaviest items such as furniture and appliances into the truck first. Secure them with fasteners so they don’t slide around. Next, add in the bulkiest remaining items before filling the truck with boxes. And for luxury/fragile items or electronics, it’s ideal to pack them into your vehicle where they remain more secure.

Contributor: MyMove.com

5 Tips to Prevent Water Damage

RH Business Marketing Solutions

iStock_000054681266_Large-1498x666.jpg

Water damage is one of the most common concerns for homeowners. Once it occurs, it can be a major contributor to loss of property. Just imagine when most of your floor is flooded with water. You don't have a place to relax and it might also disrupt your remote working during these unprecedented times.

Water damage from a flood, fire, or leak won't only cause structural problems that can lead to property damage but also increase mold growth, which presents a health risk. So, it should come as no surprise that water damage claims have been growing faster than other homeowner insurance components.

Plumbing issues often cause this common concern. That's why it's crucial to inspect and keep an eye on your plumbing systems in your home regularly. You can also use water pressure in your pool system as an indicator of your water flow and condition. If you're noticing a low water pressure in your pool system or there are more air bubbles than normal, then you're more likely to have a bit of water damage out there. 

Don't fret just yet. The good news is that in more than 90% of cases, water damage is quite preventable. These five tips below will help you to improve your water flow condition, preventing water from destroying your home.

#1. Regularly Check Your Water Pipes

The first best practice you can do is checking all the water pipes regularly. Start by inspecting your hoses and faucets. Make sure that they're no cracks, clogs, leaks, or even pipes bust. Next, you can double-check the seal and caulking around your tubs and showers. 

While manual checking can be painful sometimes, you can rely on the automated system to alert you whenever a problem occurs. You also need to consider replacing the hoses or pipes you have every five to seven years to prevent any emergencies caused by water damage.

#2. Inspect Your Pool’s Components

As mentioned above, your pool systems can also be a common cause and an indicator of water damage. Therefore, you need to ensure that the circulation of the water isn't restricted. 

Don't forget to inspect the setting of the pumps, heaters, filter, and return lines for possible damaged or worn parts. It can prevent the worst before the water rushes in.

#3. Repair Your Home's Exterior

While you're focusing on the hoses, pipes, and pool system, don't also forget to pay attention at the outside of your home. Check your windows, and if there's a space for water to come in, you need to caulk and seal them.

Next, you can check your roof and find out whether there are any missing, damaged shingles or not. Make a regular, necessary repair to prevent a leak. Not to mention that it's also important to clean out the debris from your downspouts that can cause water to build up.

#4. Prevent Water Seepage

Make sure your basement is clear too. Check for any cracks in the building's foundation or floor slabs. If it's necessary, you can reseal your basement to avoid home water damage before it occurs. 

Try to constantly look for any water seepage down there, especially during rainy seasons. You might want to seriously consider painting any cracks that can cause erosion with a water sealant.

#5. Ask Professionals to Solve Specific Problems 

If you ever find an issue with your water flow, don't rush to fix it by yourself because you might just rub the salt into the wounds. For safety, let the professionals handle some maintenance of your water flow. 

Indeed, it's critical to check your water condition regularly. Still, when it comes to identifying and replacing a leaking pump or even an engine, you might leave it to the experts. Thus, calling professionals is the easiest and safest way to deal with your water damage, and it can save you time and energy too.

Conclusion

Water damage can cost you billions of dollars for the reparation. If it is left unaddressed, even a small storm and small leak can cause flooding and destruction to your home. Therefore, while many people do not see this as a common occurrence, water damage accounts for many homeowners' insurance claims. However, whether the water damage is covered under your current insurance policy or not, it's always better to take a proactive approach and protect your home before it's too late.

Guest Contributor: Diana R

5 Fall On The Front Porch DIY Decorations

RH Business Marketing Solutions

Most of us get excited for Fall to come around because of the cool crispy air, and the opportunity to decorate our houses in displays of beautiful colors. Decorating the outside of your house is a nice way to show off your love for fall. However, Fall decor can get pricey. In this article, you can find ways to make displays similar to these by DIY.

99ae82708ada44a58ae76af55ce1ade5.jpg

What you’ll need here us two wooden crates to start. You can buy these wooden crates at your local craft store, or you can get some wood and put it together yourself. Grab a couple pumpkins, real or fake, and different sizes. Place them in the crates, where you feel it looks best. Add in a sign relating to fall to take it a step further, or you can just put pumpkins in it. You can paint or carve the pumpkins to give it more personality. Then, take a candle or lanterns, and set them beside the crates and on top to give it light and bring attention to it.

This one is a bit more pricey to DIY, but there are ways to save money. Instead of getting real pumpkins, you can buy fake ones. You can also paint the pumpkins yourself, to your color of choice. When picking out the flowers, if you do not want the responsibility of taking care of the flowers, you can simply get fake ones instead, at a fraction of the cost. When you have both pumpkins and flowers, you need to arrange them to your liking on the steps.

You will need two wooden crates again, and 3 different sized pumpkins, real or fake, your choice. You will also need fake leaves and flowers. Arrange the pumpkins in the crates, and then fill the rest of the inside with the flowers of your choice. Take the leaves and stick those on the outside of the box. Fill in the space where it’s needed.

Pumpkins of all sizes are needed, real or fake is your preference. Stack them on the steps to your liking, and put plants behind them so they are peaking. Fake or real plants is your preference as well, but if you are trying to stay on a budget, then fake will be more cost efficient. Add some leaves to the mix, not to much to cover the plants, and then add string lights to make all the colors pop.

A vintage home theme, all you need is wood, a hay stack, corn stalks, a bucket and pumpkins. Depending on where you live, you might already have some of these items available, but if you don’t you can easily purchase these for cheap at a farmers market. start with the ladder and corn stalk up against the house, and add the hay bale in front of it. Add the bucket, and stack the pumpkins to your liking. Make sure you get neutral colored pumpkins or you paint them if you’re going for the vintage style theme.

Guest Contributor: Tiffany Powell

8 Festive Fall Mantels

RH Business Marketing Solutions

After the hot Summer days come the chilly, windy Fall nights. Most people look forward to the weather change, after months of hot weather, they enjoy the opportunity to cool off, and break out the fall decorations. There are numerous ways to get your house into the Fall spirit, and many different DIY projects you can do to add a little touch of your own.

0ff4aa344a5bde95ea5c48b26e21773d.jpg

DIY pallet, find any pallet and repurpose it into a cute sign for your fall mantel piece. Make it the main focus of the piece, and surround it with extra decorations to make it pop.

20b3113f6429de656a10f8cd5be22981.jpg

Have things hanging from the mantel, and surround the fireplace with fall related objects that complement each other with the reds, yellows, and oranges.

Wreaths are a popular DIY trend. Make a wreath with the colors of fall, and then surround the mantel with the corresponding colors. Add some lights, pinecones, etc. You can always incorporate real pinecones instead of fake ones to bring it to life.

f6480128cb181d64e6bbcb2f08944a86.jpg

Adding fall decorations does not mean you have to get rid of your previous mantel pieces. Change out the flowers in vases to brightly colored leaves, add miniature fall items, add stuff that hangs. Don’t be afraid to add pieces onto the floor to surround and compliment the mantel.

Add a chalkboard to the mantel so it is easy to change it up. Make a new chalkboard drawing every week, or however often you want. Adding the chalkboard gives the opportunity to change it whenever you want to display something different.

Farmhouse vibes? You can still decorate for Fall while keeping that theme. Find things that are basic in color: nudes, whites, plaid, mute greens. Be sure to add just a tiny pop of color to enhance the farmhouse theme.

6ba13e4da62594cfdf1c909f40c47280.jpg

Want to go even more neutral than Farmhouse themed? White and green are the perfect colors to match together to give the warm cozy feels of fall. Match a neutral green with white, and there you have it. a cozy, neutral fall mantel.

0dba0f250f699c5934cec98b8796ab4f.jpg

Add pieces that compliment your living room. You do not have to add a crazy amount of decor, take into consideration the atmosphere. You do not want it to look overly crammed and cluttered. Sometimes, all it takes is adding a simple sign and a couple of pumpkins to get someone in the spirit.

Guest Contributor: Tiffany Powell

5 Commercial Plumbing Myths That Cost You Money

RH Business Marketing Solutions

commercial_plumbing.jpg

Hiring a professional plumber may take too long and cost you a lot of money. It is the primary reason we tend to ask our others for their suggestions or search for hacks on the internet. However, we do not know that some of these are just myths and can instead cause you more problems in the future. Moreover, residential and industrial plumbing differs from each other, so not all suggestions apply to both. To help you avoid following such misleading facts, here is a list of some commercial plumbing myths that can cause you more money if you follow them.

Myth 1: Your building maintenance can take care of it.

Your building maintenance team is indeed responsible for the welfare of your commercial building. With the help of the maintenance people, you will be able to know the problems within your space and locate the areas you need to focus on. It also includes the plumbing system. However, not because they see the problem means that they also know how to fix it. You still need to hire a professional plumber to fix whatever the issues are. They can even help you install a grease duct access door and panel for more security on your plumbing system. Also, note that not all plumbers can fix all plumbing issues, so you will have to find a reliable one.

Myth 2: You can ignore slow leaks.

It is easy to ignore slow leaks and tag them as unimportant. However, this is a big deal that you need to fix right away. If not, these wasted water will add up and indeed make a big difference in your water bill. Moreover, if you fail to tend it right away, it may cause wear and tear to your faucet and other plumbing fixtures. It would be a problem for you in the future, mostly for your commercial building. To avoid these from happening, make sure to call a professional plumber to inspect and fix it right away.

Myth 3: It is safe to flush any bathroom paper products.

We all know that you can’t just flush products such as tampons and other feminine products in your toilet. However, most people think that because paper is biodegradable, it means that it is safe to flush it down. But that is not true at all. It is not safe to flush these bathroom paper products and even those with “flushable” labels. 

Myth 4: You should use toilet tabs for freshness.

For commercial buildings, having fresh and clean toilets is a must, mainly because it is for business. For these cases, your cleaning team might result in just dropping toilet tabs to avoid cleaning from time to time. However, the strong cleaning bleach could cause harm from your toilet’s inner workings. It can also destroy some parts of your plumbing system, which is very dangerous for your building. To ensure that this never happens, ask your cleaning crew never to let the bleach sit on your toilets for too long.

Myth 5: You can use boiling water to wash away the grease on your pipes.

You might have already heard about this myth from older people. We thought that something hot might help the grease break down. However, using boiling water to wash away the grease on your pipes is not helpful. It does not do anything at all. If you do not want to have grease clogs on your pipes, you have to make sure that it goes to the trash at all times.

If you are looking for a better way to protect your commercial building’s plumbing system, you can install Grease Duct Access Door and Panel on your wall or ceilings. To learn more about our products, visit Best Access Doors, or give us a call anytime at 1-800-483-0823.

Guest Contributor: Chris Jackson

Essential Tips to Improve Water Flow in Pool Plumbing

RH Business Marketing Solutions

Do you suspect low water pressure in your pool system? Perhaps you’ve noticed that the water jets don’t work like they used to, or maybe you’ve observed more air bubbles than normal. Whatever the reason for your concern, low water pressure is an issue in a pool, but it can be handled with relative ease. 

First though, you need to understand how you can optimize your pool water circulation, before you can improve the water flow in your pool. 

What Hinders Effective Water Flow?

1. Clogged Mechanisms 

Debris within the skimmer basket, strainer basket, filter, or impeller is a key reason for a decreased water flow in your pool. Even leaves and twigs can get caught in your strainer basket, slowing down the overall water pressure. Even pool toys and swimming suits can get sucked in and cause some serious clogging issues. 

2. Plumbing Problems

If the pipes leading into your pool are older, you may notice some plumbing irregularities may result in ineffective water flow. A burst, bent, or collapsed pipe will affect how much water is reaching your pool. Issues with pipes are best handled by a professional plumber

While not a plumbing problem per say, using all your pool’s features at the same time can lead to a reduction in water flow. Turning off some or all of your pool’s features, like the sprinkler system, may improve your water flow. If the issue is due to too many pool features all at once, you may wish to invest in a larger motor that can better handle the necessary water pressure required. 

How to Improve Your Pool's Water Flow

You can take the following steps to improve the water flow in your pool plumbing:

  • Carry out regular inspections of pipes

The main issue with pool plumbing as stated earlier, is clogging. Even though the filters in your water circulation system may be working properly, they are always susceptible to clogging if you do not check on them regularly. Conducting regular inspections on your pool system to ensure everything is working properly. 

You also have to be vigilant about the state of your pipes. Check your pressure gauge, which can indicate the area of the pool that is in need of a servicing. Low pressure indicates that the suction line or pump is the problem. High pressure indicates that the problem is with your return line or even your filter. 

  • Clear out any debris

Simply cleaning out a skimmer basket or a strainer basket, especially in the autumn or after a big storm, can make an improvement towards your overall water pressure. A clogged filter will require a little more work and it’s important to follow the instructions for your filter when cleaning it out. If the source of your clog is the impeller, you’ll notice low PSI readings and a reduction of water flowing through the pump. 

  • Inspect the pool components regularly

Regularly check on the setting of the pumps, heaters, and other pool components to ensure that the circulation of the water isn't restricted. The solution might be just as simple as ensuring that the bypass mode on the heater pipes has not been engaged.

  • Hire professionals to solve significant problems

Unless you’re a pool professional or a plumber, you will probably need to contact a professional to handle some maintenance of your pool. Monitoring your pool frequently and keeping it clean is simple enough for pool owners, but identifying and replacing a leaking pump or even a motor may be beyond a skilled pool owner. Calling a professional straight away when you notice a potential problem can save you time and money, giving you more time in the long run to enjoy your pool.

Guest Contributor: Liz Buckley

Resources to Help You Budget for Common Home Repairs

RH Business Marketing Solutions

image1.jpeg

As a homeowner, you’ll inevitably end up facing routine maintenance issues and bigger repair projects. Hiring contractors to handle these problems can get a bit pricey, but if you budget, save, and familiarize yourself with fair rates ahead of time, you’ll have a much easier time footing the bill! Here’s how to recognize structural damage early on and select the right contractors to make your home livable again.

Paying for Home Maintenance

Home maintenance can be expensive! Follow these guides to prepare for these costs in advance. 

  • Create a solid emergency fund to cover maintenance and repair expenses - the bigger your home, the more you should save.

  • Follow these simple budgeting tips to start setting aside more money for home repairs. 

  • Refinancing your home loan can free up funds to pay for repairs, so it’s time to research the answers to all of your refi FAQ

Plumbing and Water Damage

Left unattended, plumbing leaks and water damage can cause extensive problems for homeowners, so it’s important to act quickly to remedy these issues.

  • If you notice any of these plumbing issues, don’t try to fix them on your own - it’s time to call a plumber!

  • These signs of water damage should also prompt you to reach out to a plumber or other contractor. 

  • When you need to fix plumbing problems, anticipate spending between $170 to $430.

  • Establish a working relationship with a reputable plumber from Kevin Szabo Jr. Plumbing. You’ll be able to turn to one contractor for all of your plumbing renovation needs!

Roof Replacement

After spending years in your home, you may need to shell out for a roof replacement. Here’s how to handle this crucial repair project. 

  • Keep an eye out for these warning signs that your home needs a new roof. 

  • The cost to replace your roof will vary based on where you live, your home’s square footage and the materials needed. 

  • When it comes to hiring roofers, choose wisely - compare prices, references, and contracts from several companies. 

Foundation Repair

If your foundation is not sturdy, your home is not safe. These resources will help you keep your foundation from becoming compromised.

  • Learn to spot the difference between the natural home settling and dangerous foundation problems. 

  • The price of repairing your foundation depends on the specific repairs needed, but you should expect to spend anywhere from $2,500 to $5,000. 

  • Get estimates from at least three contractors for this project, and ask your loved ones for local recommendations.

When you own a home, you can’t afford to overlook damage and necessary repairs. Doing so can lead to even bigger structural issues in the future, so saving for these inevitable costs is key. With these resources on hand as references, you’ll be able to mark smart decisions when it comes to hiring contractors with reasonable rates!

Guest Contributor: Bob Shannon

Air Conditioner Not Working? Here’s What You Need to Do

RH Business Marketing Solutions

During hot summer days, your air conditioning unit will have to work twice as hard to keep your home cool. But what happens when your AC unit breaks down? Waiting for a repair technician isn’t always the most comfortable option, so it helps to know how to repair your AC unit yourself. 

Our AC repair experts have put together their top do-it-yourself AC repair in Van Nuys tips so that you can keep you and your family cool. These are quick fixes to common AC failures, so it’s still a good idea to call a service guy who can permanently address your problems.

How to Fix Your AC Yourself

Say goodbye to sweltering heat. If your air conditioning unit has stopped working, you can take the DIY-route and fix it yourself. Here are the most common AC problems and what you can do to fix them:

Air Conditioner Won’t Turn On

If your air conditioner won’t turn on, don’t panic! In most cases, all you have to do is reset your thermostat and see if your unit turns back on. First, make sure that your AC unit is actually plugged in. Next, lower the thermostat to ten degrees while the setting is on cool. 

If your AC still won’t turn on, check the circuit breaker. Air conditioning units can cause the circuit breaker to trip, ultimately cutting off power completely. Simply flip the switch on your circuit breaker to turn it on again, and check if it turns the AC back on.

Nothing wrong with the thermostat and the circuit breaker? Your AC might be experiencing something more serious: electrical or water damage. Check for leaks, rust, and smoke around your AC unit. If you see even the slightest sign of electrical and water damage, call a professional immediately. 

When none of the tips above work, the problem might be with the motor or compressor. In this case, get in touch with a professional repair company to fix your AC.

Air Conditioner Isn’t Cooling The Air

Does your AC turn on, but it’s just not cooling the air? Your AC unit likely has a blocked air condenser. Check the exterior of the unit (the one that’s facing outdoors) and remove any debris that might be blocking the air from circulating properly. 

The next step is to check the filter. Over time, your AC unit’s filter will accumulate dirt and dust, which can restrict air. Take your filter out and check if it’s clean -- if it’s covered in dust, you simply have to replace your filter, which you can buy from most stores. 

After doing the tips mentioned above, and your AC still isn’t cooling the air, the problem might be with the refrigerant or compressor. We wouldn’t recommend attempting to replace the refrigerant yourself. It’s best to work with a service guy.

Air Conditioner Is Cooling… But Not Enough

If your air conditioner turns on and is cooling the air, but it isn’t cooling it to your standards, your AC unit might be too small for your home. A typical AC unit maintains an average temperature difference of around 20-25 degrees between exterior and interior temperatures. Don’t expect your AC to keep the indoors at a comfortable 60 degrees when it’s 95 degrees hot outside.

Other Things You Can Do

Here are simple tips that you can practice to keep your surroundings even cooler:

  • Lower your curtains during the day to block sunlight

  • Use a dehumidifier

  • Turn off the lights

Conclusion

When things become too hot to handle, and if your DIY mobile repairs aren’t doing the trick, it’s best to call a professional AC repair company.

Guest Contributor: Joel Gerace, Ice Age HVAC

What Should Be In A Modern Kitchen

RH Business Marketing Solutions

Modern kitchen design is simplicity, versatility and harmony. These are the main criteria for arranging the premises today. At the same time, modern kitchen design focuses on manufacturability, convenience of cooking. The room becomes not only a place for culinary experiments, but is conducive to communication, relaxation, filled with an atmosphere of comfort.

Storage system

Which one to choose depends on your needs:

Pull-out systems are a sure way to use the entire shelf space;

Special cabinets such as bottle holders, large crockery compartments or pull-out corner cabinets optimize storage;

Railing Systems - with their help it is convenient to keep in sight spices, knives or measuring cups

Oven

What could be easier than cooking food in the oven? All you need to do is cut the food and season it with spices, and the technique will do everything for you. All the more modern - now the ovens can choose the cooking program themselves, just pressing one button.

For example, in the Gorenje by Karim Rashid oven, created on the principle of a traditional wood-burning stove, hot air, thanks to the arch, is concentrated in the ceiling and ensures even baking of dishes on several levels.

Hob

photo-1477240683898-7799e52eefba.jpeg

With a modern gas hob, the wok burner makes it easy to cook better Asian food than you would in a restaurant.

And in addition, the hotplates of the smart hob, thanks to the increased power, cook faster and with less energy.

Dishwasher

Russian designers are trying to find a place for a dishwasher even in the smallest kitchen - it is really very convenient, especially for large families.

Dishwashers of the new generation can determine the mode themselves - for example, if you only need to rinse a crystal set, and not start a full cycle, the technique will easily do this.

Coffee Maker

A coffee maker is a type of home appliance installed in the kitchen.  As MyFriendsCoffee  says, coffee maker provides the preparation of various types of coffee drinks in an automatic mode, which is its main difference from conventional coffee makers. Only minimal control of the machine is allowed.

Other than that, there are also coffee makers that come with a built-grinder which provides an exceptional bean to cup experience without the need for any extra effort from your end. Just add some quality beans and it will grind and brew itself to make you a soul-touching cup of coffee. You can also visit this article, for A Complete Coffee History

Types of coffee makers

The general principle of the coffee machine is to pass steam or hot water through the ground coffee powder. Thanks to this, the brewing of the drink takes place. However, there are different types of these units, which are fundamentally different in their design and operation. We list these types in order to decide for ourselves which coffee machine to choose for the home, read reviews about different types of machines, find out their pros and cons

Capsule

This type of coffee machine uses ready-made prepackaged capsules with various types of coffee to prepare coffee. Each capsule is packed in a plastic or foil container that is pierced inside the coffee machine. Hot water flows through the capsule and brews coffee. One capsule is required to prepare 1 cup of beverage. Now such devices are gaining popularity due to several reasons. They are convenient, quickly prepare drinks, you can choose any type of coffee

Automatic

If you do not know how to choose a coffee machine for the home with the maximum number of useful functions, then give preference to the automatic model, which fully justifies the name "coffee machine" and is its main representative. However, keep in mind that the cost of such devices is the highest.

Powerful hood

In modern hoods, the air intake system is not located in the center, like in previous generation models, but along the perimeter. They work quietly and purify the air more efficiently.

And even with the installation of the hood, you can save on electricity. The built-in backlight additionally illuminates the hob and the work area, and LED bulbs consume much less electricity compared to conventional ones.

New Generation Microwave Oven

Modern microwave ovens have also changed - today, a microwave oven evenly heats, defrosts, cooks itself according to preset recipes and saves energy.

Some models are equipped with a grill - you can save on the purchase of additional equipment. For example, the Gorenje by Karim Rashid microwave oven comes with a grill grate.

Guest Contributor: Emma Harrington