Google+

contact us

Use the form on the right to contact us.

Day or Night, we are here to serve you. Leave your plumbing problem to us.


Tinley Park, IL

(708)845-7922

Residential and Commercial plumbers and plumbing contractors available in Orland Park, Tinley Park, Oak Lawn, Palos Heights, Midlothian, Oak Forest, Homer Glen, Mokena, Frankfort, and the surrounding Chicago South Suburbs. Emergency plumbers.

copper water lines.jpg

Kevin Szabo Jr Plumbing Blog

Kevin Szabo Jr Plumbing is Tinley Park, Orland Park, Oak Forest, Midlothian, Orland Hill, Homer Glen, Mokena, Frankfort, Crestwood, Palos Heights, Oak Lawn, local plumber. Read our blog for advice, tips, a good laugh, and basic home improvement.

**We are moving our old blog to our new and improved website. Too see all our posts visit kevinszabojrplumbing.blogspot.com

Filtering by Category: October

7 Subtle Signs That Your Sewer Line is in Need of Replacement

RH Business Marketing Solutions

Sewer lines are one of those things you hope never go bad, as the results can be catastrophic when it does. A broken sewer line can damage foundation, contaminate drinking water, and backing up sewage are some of its possible effects.

The good news is that a few warning signs can let you know it is time for sewer line installation before it becomes a major problem. Read this article to know the signs to look out for.

Calling a professional to examine your sewage line and provide a replacement cost estimate is necessary if you see any of these signs. A new sewage line installation is a small price to pay for peace of mind, so don't wait until it's too late!

#1. The slow draining of water

Every home has a main water line that supplies fresh, clean water and a sewer line that removes wastewater to the septic tank or main sewer line outside. When you start noticing that the water is not coming out with as much pressure as it should in your shower, it is a sign that you have a main water line issue.

On the other hand, if you notice that the water drains more slowly than usual, you may have a sewage line issue that is still draining. Get a plunger to unclog your drain. If the wastewater is still draining slowly, there is a possibility that you have blockage down the sewer line. Again, it is a problem that a plumber should handle. Never attempt to do it yourself.

#2. Visible signs of mold growth

Another telltale sign of a major sewer line problem is mold growth along the walls of your home. If you see this, along with water trail marks on the ceiling and walls, it could signify seepage somewhere in your home. But, again, you should call a professional plumber to help you with this issue before it becomes a serious problem.

Molds thrive in a moist environment, and they can spread rather quickly. It also posed a dangerous threat to your health. Immediately addressing this issue will prevent any further damage.

#3. An awful sulfuric smell

Don't be alarmed because there is no evil spirit in your house. However, if you frequently smell something like sulfur in your house, it may come from the sewer line since the septic tank is supposed to be airtight. A smell emanating from it means that there is a leak somewhere. You don't have to worry about calling an exorcist. Instead, call a company that is an expert in sewer line installation.

#4. Bubbling toilet water

When you notice that the waste kind of bubbles back in the bowl instead of going down the drain every time you flush, it is a sign that your sewer line is clogged. If you see this problem, you could be dealing with a serious issue. It could be caused by something as simple as toilet paper buildup obstructing the sewage system.

#5.A soaked yard

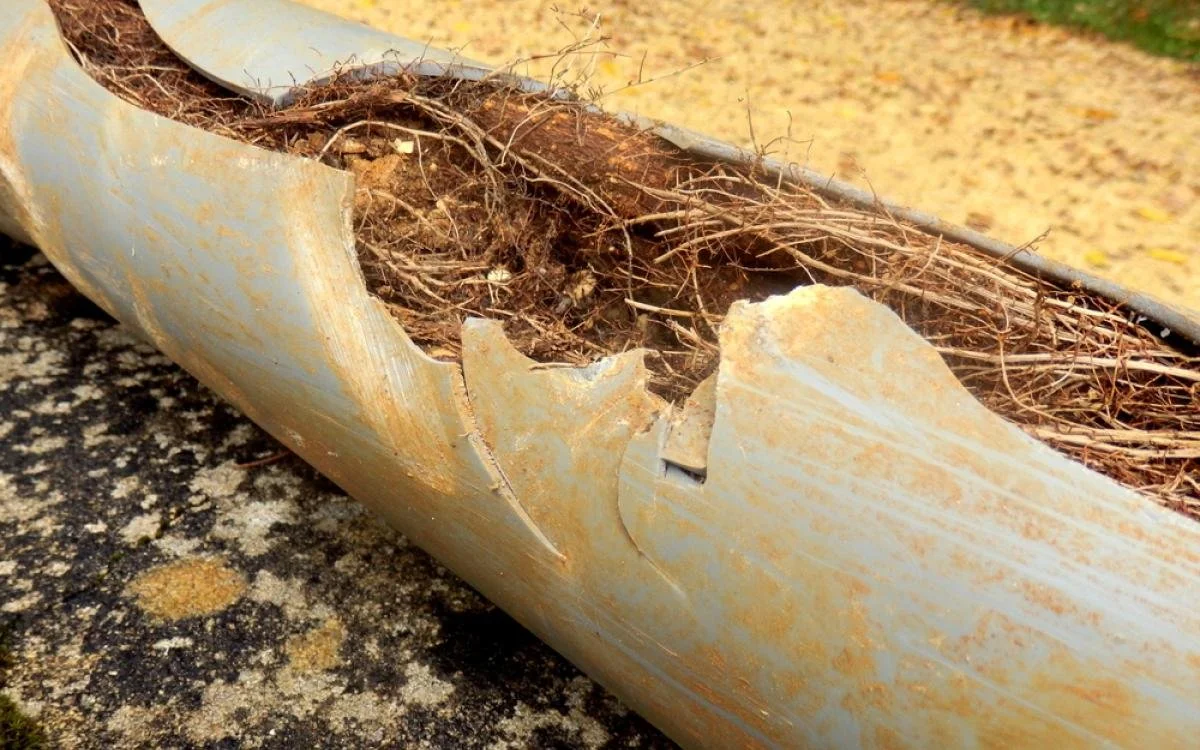
A soggy lawn is one of the less visible indicators of a broken sewage line. The reason for your soaked yard could be a damaged sewage line next to a tree root instead of the sprinkler. The filth absorbs the extra water from the sinks, toilets, and other plumbing fixtures.

Usually, the yard would gradually become saturated, making the issue difficult to see. But, on the other hand, you could one day discover the grass to be abnormally wet and perhaps have puddles close to the underground pipes in your yard. In either scenario, you must contact a plumber right away.

#6.Unusual gurgling sounds

Your sewer system could be problematic if your sinks or toilets produce strange noises like gurgling. Since noises might appear for various reasons, this is one of the more inconspicuous indications of a collapsed sewage line. But because there is a problem, it makes sense to call a plumber.

Not only your toilet, but other fixtures may produce odd noises. Your bathtubs, sinks, and faucets may also make unsettling noises that trigger warning alerts to your common sense.

#7. Pest infestation

The emergence of critters inside your home is one more warning sign to look out for whenever there is a problem with your sewer line. These are pests like flies, scorpions, cockroaches, and ants. Rats, snails, worms, lizards, and even snakes are included. If you find these animals and are certain that other possible points of entry are sealed, they may have entered through your sewage line. There could be a break somewhere wide enough for animals to squeeze through.

Conclusion

You could also consider other indicators, such as lush grass areas in your yard. Don't hesitate to ask a professional for assistance if you discover any issues with your sewage line other than the above. You can create a strategy to fix your sewer line with their advice before it develops into a bigger issue. In some cases, a sewage line installation is also necessary.


About the Author:

Merrie is a Marketing Manager for the Rooter Ranger brand. Her focus is on results driven strategic marketing efforts that deliver sales and profit growth. In her spare time she enjoys the outdoors and traveling the world.

Bed Bug DIY Mistakes You Should Never Do at Home

RH Business Marketing Solutions

Bed bugs have always been a looming problem in both residential and industrial areas. While both business owners and homeowners have been shown bed bug removal methods they can do by themselves, doing the wrong thing could lead to mishaps.

DIY isn’t entirely wrong, but it should be well-informed and done right so as to avoid hazardous issues. But just to be on the safe side and avoid further mishaps, the best option for treating bed bugs is to contact a professional that can do bed bug heat treatments in Sacramento, CA.

Here is a rundown of some bed bug DIY mistakes that should never be done at home.

Using the wrong pesticides

Of course, pesticides are highly toxic and hazardous. Even the ones that are registered by the US EPA (Environmental Protection Agency) have been linked to multiple health problems such as acute poisoning, certain types of cancer, hormone disruption, asthma, neurotoxicity, organ damage, and more. The use of these pesticides are more dangerous than their benefits.

That’s why it’s important to check with a professional exterminator. After assessing the infestation, they will come up with a proper treatment plan to deal with the bed bugs in your area. They also have the right tools and equipment to carry out these treatments.

Not buying a vapor steam cleaner

Nowadays in the cleaning industry, steam cleaners are one of the fastest growing technologies. We’d even go as far as saying that these are a heaven-sent item for anyone that’s wary about bedbugs. Vapor steam cleaners look similar to a vacuum, but they are much more powerful. Steam cleaners use water and electricity to clean, disinfect, and deodorize any surface. These are safe for use in homes since they don’t need any kind of chemicals. 

Vapor steam cleaners are great for maintaining a bed bug-free environment because they generate  a tremendous amount of heat, eliminating pests from clothes, furniture, and beddings. The steam vapor can also reach nooks and crannies, just where bed bugs like to hide most. If you’re trying to steer clear of bed bugs, vapor steam cleaners are worth an investment.

Not using a bed bug monitor

Bed bug monitors/interceptors have been one of the most useful devices ever invented for bed bug monitoring and management. These devices are usually shaped like a plastic dish with an outer shallow part designed to catch and contain bed bugs. They function on the assumption that bed bugs do not have the ability to climb slippery, vertical surfaces. So with these things, you can breathe easy for a bit knowing bed bugs won’t reach your pillows.

Other uses for a bed bug monitor and interceptor include the following:

●      Keeps bed occupants from bed bugs

●      Sees and counts bed bugs present

●      Assess the effectiveness of certain bed bug treatments

●      Serves as an early detection system for bed bugs in hotels, apartments, houses

●      Used as part of a DIY bed bug management practice

Not prepping the rooms prior to treatment

Most, if not all, pest control companies will require homeowners to do significant preparations prior to the start of a treatment. These requirements may differ based on the type of treatment as well as the type of residence. Unfortunately, some clients don’t think this is necessary, leading to a myriad of problems that pest control companies are all too familiar with.

The actions they require Below is a sample checklist for clients to complete before their bed bug service begins.

Below is a list of the preparations homeowners should take note of before having exterminators begin their treatment:

●      Lift mattresses and box springs out of the bed frame

●      Empty all closets, dressers, drawers

●      Wash and dry all clothing within the room on high heat

●      Bag all personal items that cannot be laundered

●      Empty all luggage and travel bags into untied bags

●      Remove all sofa, chair, and other upholstered furniture cushions and accessories

●      Remove all sheets, blankets, pillowcases, and other bed coverings from the mattress and box spring and dry for at least 50 minutes on high heat

●      Thoroughly vacuum your mattress, box spring, inside of dresser drawers, all carpeting throughout your entire home, floors, area rugs, sofas, futons, recliners, upholstered furniture, and physical bugs you may see

●      Remove and dry all curtains and window dressings on high heat

●      Inspect items that cannot be washed such as books, electronics, picture frames, and plastic toys

●      Place them into plastic bags only if you do not find bed bugs on these items

●      Reduce clutter under your bed and around the room

●      Encase your mattress using specialized mattress encasements

Unless homeowners do these themselves, technicians will leave the room just as it is. This results in a lot of mishandling in materials that could spread bed bugs throughout your home, or even destroy your beddings and belongings. Neglecting proper preparation could prolong the whole treatment process.

Bed bugs are tough, but you have to be even tougher

Dealing with bed bugs takes so much time and energy, but that’s why there are pest control companies that can help. These companies have exterminators that are properly trained and equipped with the right tools for carrying out bed bug heat treatments in Sacramento, CA. DIY methods may be cheaper, but these may not be as effective and some mistakes can even cost you more money instead.

Awesome Home Improvement Ideas for Dog Owners

RH Business Marketing Solutions

Our dogs are our family members, and every family member deserves to feel comfortable, safe and welcome in their own house. So if you’re planning to conduct some home improvements in the future, don’t forget to surprise your pup with some improvements for their own comfort. If you need dog-friendly renovation ideas, you’ll find plenty here:

Install dog-friendly flooring

Let’s start your renovation from the bottom up by installing new flooring. If you have an indoor pup, choose the flooring that’s easy to clean and resistant to slips. For dogs, concrete, tile and hardwood floors are the best choices that can’t be damaged by your dog’s claws and accidents. And consider installing heating under the floor—this will feel so good on your senior dog’s joints and bones.

Built-in doggy doors

Suppose you don’t like the open space concept, then you know how annoying it can be to constantly go around the house, opening the doors for your pup. Well, you can make your life much easier with built-in doggy doors. There are costly but super-practical sliding doggy doors that are built into the walls, but those that install on your regular doors are a great option too.

Build a mud room

If you regularly walk your dog or let them into your yard (as you should), you know how much dirt your furry friends can drag inside. This can be solved with a practical mud room. This small room is usually built near the entrance of the house and can be used to leave dirty clothing and shoes, as well as wipe your dog’s paws and store their personal items. If you have space to work with, you can also install a small dog shower in your mud room and have a practical grooming station in a safe and easy-to-clean place.

Build a doggy sanctuary

Dogs usually love to be surrounded by people, but sometimes even they need some peace and quiet. When there’s a lot of noise and chaos in your home, or when you have visitors over, your dog will love to retreat to their sanctuary and avoid over-stimulation. You can easily designate a corner under the stairs or in your catch-all closet to make a cozy dog nook. Make this place soundproof, and boost the comfort with a cozy dog bed for sweet dreams and relaxation. The best bed options are doggy cots which are lightweight, easy to move and wash. Providing your dog with a safe space will create a calm and secure dog without stress and anxiety.

Create a designated dog feeding area

If you want to additionally boost comfort for both you and your dog, then build a designated feeding area. This doggy dining room will ensure they get all the privacy they need while eating without taking away any space in their kitchen or living room. A practical solution for a feeding station is a pull-out drawer with bowls for feeding. Next to it, you can build a cabinet with kibble bins for easy access. Since these cabinets and drawers close after use, they prevent the spreading of any dog food odors and allow you to avoid spillage.

Stylish gates

We usually allow our dog access to all the parts of the house, but sometimes, we just need to limit their access to certain rooms, either for their safety or for the safety of other people. What most people resort to are baby gates, but these can be very ugly and short. A better solution is a sliding half-door with a metal railing resistant to scratching and biting. These are easy to build between the kitchen peninsula and the wall, on top of the staircase or between rooms.

Include easy access for senior dogs

Some dogs are very susceptible to joint and spine issues, especially in their senior years. To make your pup easier to navigate their home, you can consider building ramps to your entrance, couch or first floor. This can often be a very cheap improvement that will mean a lot to your pup.

Surprise your dog with a view

Don’t worry, you’re not a bad dog parent if you sometimes leave your dog alone at home—this is a sad necessity for many of us. However, you can also expect your dog to get bored while you’re not there. One thing that can give them something to do is look outside the window. Build a practical window seating for your pup so they can get a nice view outside, keep an eye on the intruders and watch squirrels play around outside—it’s like a blockbuster for dogs!

Like any family member, your dog deserves to have their needs met at home. With these practical home improvement ideas, you’ll not only make your dog’s life better, but also make your house easier to clean, maintain and keep beautiful and stylish. You’ll get to spend less time stressing over your house and more time cuddling with your dog!

Guest Contributor: Diana Smith

How To Self-Install Your New Internet Service

RH Business Marketing Solutions

Have you ever wondered how to self-install your new internet service? You can usually achieve this by following the instructions given to you by your service provider. 

It's often a simple process that involves plugging in the modem and router to a central location of the home and signing onto the network using a default password before updating it to a password of your choosing.

While it might seem overwhelming to take on such a technical task, we've done it before and have helped many others complete their own internet self-installation, so you can do it, too.

Below, we share how to self-install your new internet service with step-by-step instructions. While details may vary depending on your service provider, these instructions should help you get up and running.

Make Sure You're Eligible

Before you begin the process of self-installing your new internet service, it's crucial to check that you're eligible to do so. Your eligibility is typically indicated by whether or not you were given (or offered) a self-installation kit when you signed up for the service.

If you don't have a self-installation kit, that usually means you're not eligible to self-install and will need to wait for a technician to do it for you. Waiting for a technician can take days or even weeks. If you're eager to get online, self-installing is your fastest option.

Some addresses may not be eligible for self-installation if there has never been internet provided at that address by the provider before. You can find out if you're eligible by entering your street address as you order your internet online. Another option is utilizing chat or their customer service phone number to check.

Other providers may not offer a self-installation option. Some popular providers that do offer this option include:

  • At&T

  • Century Link

  • Google Fiber

  • Cox Communications

  • Spectrum

  • Verizon

  • Xfinity

If you're eligible for self-installation but still prefer to have someone do it for you, that's possible, too. However, you'll need to wait longer for an available technician.

Also, if you have a provider like Verizon, your self-installation might be a bit harder. Here is an extra resource on this

Order a Self-Installation Kit

If you're eligible to self-install your new internet service, you should have received (or been offered) a self-installation kit. Your kit will include everything you need to get online, including the:

  • Modem

  • Router

  • Coaxial cables

  • Ethernet cables

  • Printed instructions or a link to access online instructions

If you didn't receive a self-installation kit, don't worry. You can try ordering one from your internet service provider's website or customer service line. They may even send one to you overnight so you can get started as soon as possible.

You may need to return your old equipment before they ship you a new self-installation kit if you're upgrading your internet speed and need a new modem that's compatible with the higher speeds.

Follow Instructions as Provided

Once you have your self-installation kit, it's time to get started. The first thing you'll want to do is read through the instructions provided. Either read the printed material that came with your kit or follow the link to online instructions.

It's crucial to follow the instructions since they are specific to your service and equipment. Don't try to shortcut the process, as it could result in problems later.

If you have questions about the instructions, don't hesitate to contact your internet service provider's customer service department for help.

Find a Central Location To Install

One of the first things you'll need to do is find a central location to install your modem and router. A good location should be somewhere near an outlet and close to where your main computer or TV is located. 

You don't want to place it on either end of the house, as the WiFi signal may not reach the other side. Try to find a place that's in the middle of your home so it can reach every room. It's also important that the location has enough ventilation to help keep your equipment cool.

If you're not sure where the best place to install your modem and router is, take a walk around your home and look for potential locations. Once you've begun the installation process, you can try doing a test WiFi connection from that location to double-check the strength of your signal from various spots in the house.

Install the Modem

Once you've found the best location for installation, it's time to set up your modem. Start by plugging the power cord into an outlet and then connecting it to the back of the modem.

To do this, take the modem out of the box and use the cord to plug it into the wall. You may be plugging it into a:

  • Phone jack

  • Coaxial jack

  • Optical or Ethernet jack

The specifics will vary for different providers, so refer to your specific provider's instructions.

Connect Modem and Router

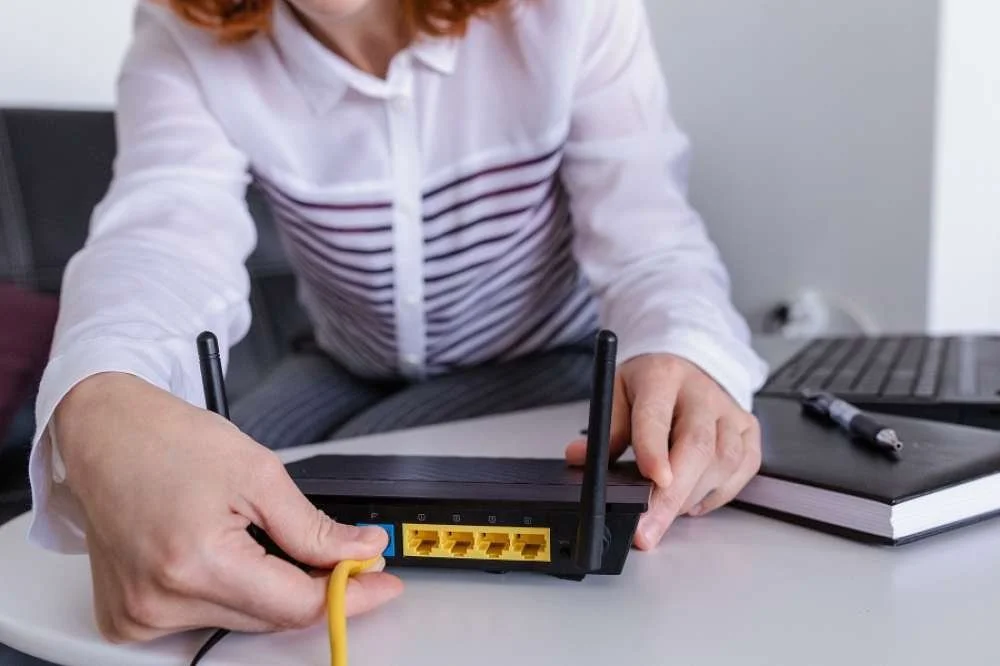
Now, plug your modem into your router to connect the two using an Ethernet cable.

Plugin Router

Plug your router in so that both devices are plugged into the wall and connected to each other.

Wait for a Light Indicator

After about 30 seconds to 1 minute, check the light status on your modem and router. They should be blinking or solid, depending on your provider's instructions.

Locate Network Default Password

Check the back of the router or the box it came in for a network default password. You'll use it to sign on to your WiFi for the first time.

Connect To WiFi From Your Devices

Using your default password, connect to your WiFi network. Once you're connected, you should be able to follow the instructions given to you by your provider to change the password to something you'd prefer.

Wrapping Up

By following these simple instructions, you should know how to self-install your new internet service without any problems. 

If you have any trouble along the way or run into issues, don't hesitate to reach out to your provider's customer service department for help. They'll be more than happy to assist you.

Guest Contributor: Andreas Grant

Home Improvement Checklist

RH Business Marketing Solutions

When doing a home improvement project, there are things to consider first before having to spend some money or have something in your house be replaced. First, identify what you want to change in your home’s current design. For example, living room setup, kitchen equipment, bathroom shower, and many more. Next, after you identify the areas you want to improve, you would want to list down what are the things you want to change or upgrade in that area. Another example is if you want to change the design of your sofa.

There are two categories that need to be considered which are functional and aesthetic. But for home improvements, both of these factors are needed. Here are some checklists for Home Improvement projects.

1. REPLACE BROKEN UTILITY

Functionality of the house is very important. It should be the top priority of every home. Every homeowner should have maintenance to their plumbing system, electrical wiring, water supply, etc. The aesthetic of your house is also important. There are several ways to add aesthetics to your utility tools such as having more modern showers, modern faucets, and even light switch plates that can now be decorated. Although the light switch cover doesn’t get much attention, it is actually great to have designs even in the smallest details.

 2. REARRANGGING FURNITURE AND APPLIANCES

To have more creativity and uniqueness in your home, consider having rearrangements in your home. To avoid having a boring and somehow repetitive layout in your house, try changing the things in your house from time to time to add a new perspective.

3. PAINTS

Paint jobs are also one of the factors to add to the checklist for home improvements. If there are signs of paint chips, faded colors, cracked, peeling, or when you no longer like the color of your paint. Consider having your house repainted so your walls will be protected. Having a new paint job can also have your house look elegant instantly. When choosing the right color of paint, choose the color that you really like to match your personality.

4. NEW MATTRESS

If you are no longer comfortable in your bedroom, consider buying a new mattress. When choosing  a mattress, it should be made from a high-end material that gives comfort and coziness. Choose a mattress that gives both durability and comfort at the same time. Since you will be using your new mattress for a really long time.

5. NEW TOOLS

Tools can also have an expiration date, if you are using a microwave for a really long time, it might not work perfectly as it was before. Buying out new tools for your home can also avoid you from getting infections and bacteria. For example, if you still use the same kitchenware for years, some of its properties might peel off and be included in your food. So it’s best to change it from time to time. Another examples are knives, when it becomes dull, it is time to change it. Appliances are also included in this list since it becomes a tool that you use every day. Having functional home results in an elegant home.

6. EXTERIORS

Exterior walls also need to repaint, pathway and walkways also need cleaning maintenance from to time, and windows needs to be treated. The roof also needs to be checked from time to time, especially if there is bad weather. It's better to spend some money on repairs rather than getting wet from leakage when it's raining.


In conclusion, for every household, there will be a different checklist for home improvement. The lists that were mentioned earlier are just an example. Home improvements vary for each individual. So to have the right checklist, always identify the things that you wanted to improve first from your house and create a list on what you want to do after figuring out what are the areas in your home that needs improvements.

How to Pimp Your Living Room Without Spending Too Much

RH Business Marketing Solutions

Living Room is one of the most noticeable areas in a house. Homeowners usually spend a lot of their time in the living room. Since entertainment is usually found in the living room and this is the first room a person goes to when entering a house. If there are visitors to a house, they are also more likely to spend their time in the living room. There are times that you might feel insecure about the design of your living room. However, it is perfectly normal.

 Improving the setup of your living room can be difficult if you are on a tight budget for decorations. Fortunately, there are several ways that your living room can have a high-end appearance without having to damage your budget a lot. Here are some ideas for homeowners that want to upgrade their living room setup without spending a lot of money.

1. Affordable Furniture

Most homeowners feel that the need to spend for a piece of new furniture is not a great choice and they tend to buy cheap once instead but regret it later on. In reality, when buying cheap furniture you are spending a lot of money instead. Low-cost furniture is also low quality since they are poorly built. On the other hand, furniture speaks for its price it is expensive because the process of building it is high quality. But furniture is still expensive to buy, that is why if there’s a sale in malls, discount stores, or secondhand stores, grab the opportunity to buy your new furniture as it will have a lower price but you can ensure that the quality is high and it will last for a long period of time.

2. Appliances

If you want to have a big flat screen television, PlayStation, surround sound, a working heater, or an air conditioner but are afraid to spend your money, worry not. There are several ways to have new appliances in your living room. Just like buying a piece of furniture, seek opportunities if there is a sale in stores or you can buy online for a lower cost. Since there must be entertainment in the living room, it is great to have new appliances.

3. Centrepiece

In a living room, usually has a center table that you can decorate with for example a flower vase. One of the most inexpensive ways to decorate your living room is having a centerpiece in the middle of the living room. You can get a plant or a flower, or put some books and magazines to add more texture to your living room.

4. Pillows

Adding a pillow to your sofa is a great way of tidying up your living room. It provides a cozy and friendly vibe in it. It can also serve a purpose. As an example, if your house does not have a guest room, your guests can sleep on the couch instead. Using a pillow in your living room gives your guests extra comfort. And, pillows add more elegance to the room and make it look more aesthetic.

5. Ventilation

Make sure that your living room is well ventilated so it will be relaxing to stay there even for a long period of time. Just like humans, a house also needs to breathe and proper ventilation will keep the air fresh and easier to breathe.

6. Adding more plants

Plants and flowers give an aesthetic of which room you’ve put it into. Having plants also give the room fresh air to breathe. It also balances the appliances’ radiation so even if you spent a lot of time watching television, the plants will decrease the radiation in the room.

7. Adding tiny details

Accessories to your living room like small cabinets, wallpapers, posters, and one of the least common decorations that a homeowner can do is to change the switch plates. Though it is just for utilities, having this least popular part of the house has a decoration that can really pimp up your living room. To make it look more expensive, there are brushed copper switch plate covers that look really elegant but it comes at an affordable price. So having these tiny details that don’t get noticed much can surely add more texture to your living room.

8. Windows

For windows, you would want to change see-through materials if you are using it. If you don’t have yet a budget for a tinted window, you can use rack curtains as a cover. It is highly recommended to have privacy in your living room. If you want a more modern approach, you can also use blinds that are made of bamboo or wood.

9. Rearranging the positions of your furniture

When rearranging furniture, gives you more creativity as you can experiment with what position is the best for your furniture and appliances. It is also a great exercise to do as it helps your mind relax while rearranging your living room. By also doing it from time to time, you can avoid having boring and repetitive arrangements in your living room.

10. Cleanliness

The last step is totally free and every homeowner will be able to do it. Avoid hoarding a lot of unnecessary things in your living room. If it can no longer be used, throw it in the trash or donate to someone else. Freeing up some space in your living room can make it more spacious and if you are into minimalistic designs, it's best to clean up your living room.


The best way to pimp up a living room is to have the best comfort that it can offer. Expensive things aren’t primarily needed when you want to improve your home. You can just start simply by cleaning up your living room and rearranging the positions of your furniture to make it look new. As long as it gives you satisfaction, expensive stuff is not necessary for home beautification.

What are 5 of the Most Commonly Noted Home Inspection Items?

RH Business Marketing Solutions

The process of purchasing a new home can be both exciting and stressful. Numerous issues with your new home will need to be addressed throughout this process, including potential issues with the appliances, fixtures, foundation, construction, electricity, plumbing, etc. Fortunately, there is home inspection, an easy and practical approach to make sure your new house isn't a disaster.

Significance of Home Inspections

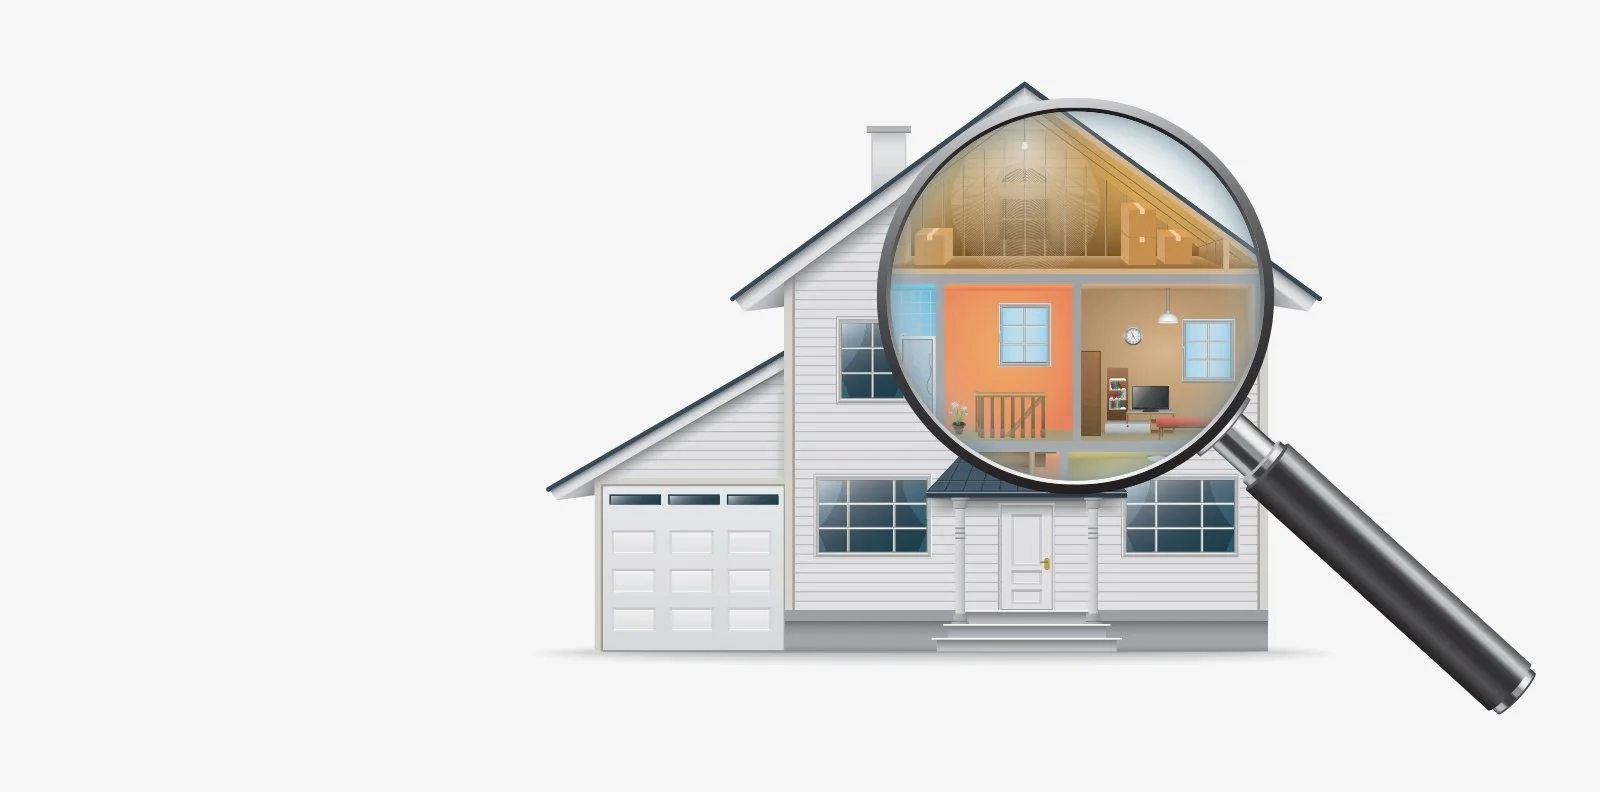
A home inspection is considered a crucial step in the purchasing process. It is comparable to taking your new home for a trial run or test drive, wherein your home gets to be thoroughly assessed and examined so that any problem or defect within the property is spotted.  However, to have a new house undergo a home inspection, the prospective owner has first to engage the services of an expert who is trained and experienced for the position. You can find a licensed and competent inspector via the American Society of Home Inspectors (ASHI), a long-standing non-profit organization for inspectors in America. ASHI sets the bar for quality home inspections.

The inspector will perform a comprehensive inspection of the home, pointing out any faults that the buyer would want to discuss with the seller in order to have the issues fixed as well as any serious problems that might cause them to reconsider making the purchase. If you want to be referred to a truly capable home inspector in Philadelphia, you can contact ASHI or go straight up to Eagle Inspections, one of the finest home inspections in Philadelphia.

Checklist of Home Inspection Items

Following the inspection, a home inspector will provide a report that lists down the home's key characteristics, provides an overview of each main living area, and details any issues. Of course, the home buyer is an essential component of the inspection process; therefore, he or she must familiarize himself/herself with the process. By reading through the list of the items that every house inspection checklist should have, homebuyers may become comfortable with the procedure. So, here five of the most commonly noted home inspection items:

1.    Ground and Exterior

A home inspector should start by assessing the property's general state and the outside parts of the home during an inspection. Damages to the garage, deck, stairs, patio, or driveway, presence of leaks and standing water, grading and drainage, stability of siding and foundation, and health of exterior house paint and landscaping are the things to look out for.

2.    Doors, Windows, and Roof

A home inspector should thoroughly assess the quality and anticipated lifespan of the roof, doors, and windows components because repair and replacement of these items are among the most expensive. He will look for defects such as poor caulking, cracks, faulty installation, rot and decay, and other issues when evaluating windows and doors. When inspecting the roof and attic, the inspector will probably pay particular attention to gutters, shingles, soffits, exterior vents, chimneys, and flashing among others.

3.    Interior Rooms

Interior areas can expose serious structural problems, so you need to be concerned about them. Internal doors, windows, walls, ceilings, floors, outlets, insulation, lighting and switches, temperature control, paint and trim, and fireplaces should all be included on the inspection checklist.

4.    Attic and Basement

Many potential homebuyers frequently disregard the attic. In the attic, the inspector will make sure he doesn't discover insulation install flaws, inadequate ventilation, damages to structure, or nearby plumbing issues. In the basement, the things the inspector will search for include signs of pest infestation, moisture, faulty insulation, structural damages, and foundational problems.

5.    Plumbing, electrical, and major systems

The plumbing, electrical, and HVAC systems must all be thoroughly inspected as part of any house inspection, but first, the inspector should determine and note how old these components already are and how long they will last. He will then make sure the water heater and pump are operating properly and check the plumbing system for issues like leaky or damaged pipes. Presence of dangerous gasses, ventilation, airflow, flue quality, filters, and ductwork are all included in the HVAC system inspection, while for the electrical systems, the inspector will look at cables, wiring, fuses, main service panels, and breakers.

Home Inspections Philadelphia

Surprise expenses from unexpected repairs can easily overshadow the thrill of moving into a new house. In Philadelphia, you can reduce the likelihood of future repairs by hiring a certified home inspector. Doing so will help you acquire the knowledge you need to make the best choice for your future. Keeping this checklist close at hand can also help you be ready for the home inspection.

References:

https://www.rocketmortgage.com/learn/home-inspection-checklist

https://www.bobvila.com/articles/home-inspection-checklist/

Home Inspection Checklist 2022

RH Business Marketing Solutions

It can take months to buy a home and it can be challenging to know what to look for when thinking about potential future repairs. That is why, prior to moving in, you have to hire someone trained to conduct a home inspection. A house inspection can help you make sure you have made the right choice  and give you an indication of the kind of maintenance you can anticipate for your new home. You can avail of full home inspections in Philadelphia.

What Home Inspection is Like

When a house undergoes home inspection, everything in and around it, including the foundation and roof, is thoroughly assessed by a strained inspector to assure the prospective homeowner that the abode is livable and that all its systems are operating properly. The home inspection is conducted following the seller’s approval of the buyer’s offer and before closing on the property.

In order to prevent consumers from unintentionally purchasing a house that will only bring potentially danger to residents, home inspectors help make known the weaknesses in the structures or systems. Thus, homebuyers can ultimately save money since, if any issues are discovered, they can discuss with the seller about the repairs and then bargain for a reduced sale price. Additionally, after knowing the flaws or weak points of the property , the buyer can decide not to proceed.

Long List of the Items to Inspect

Arie van Tuijl of Home Inspector Secrets provides a detailed list of all items that home inspectors examine during house inspection.

A. Exterior

  1. Roof

    1. Shingles

    2. Flashing

    3. Gutters

    4. Soffit Vents

    5. Structural

  2. Exterior Walls

    1. Caulking

    2. Wood Trim

    3. Siding

    4. Stone/Brick

  3. Deck, Exterior Doors, Windows

 B.  Grounds

  1. Driveway and Walkways

  2. Lot

  3. Trees and Shrubs

C. Electrical System

D. Home Interior

  1. Bathrooms

    1. Sink

    2. Toilet

    3. Exhaust Fan

    4. Drywall

  2. Plumbing System

    1. Pipes

    2. Main water line

    3. Water Pressure

  3. Interior Doors

  4. Windows

  5. Electrical System

    1. Panel Box

    2. Outlets

  6. Bedrooms

    1. Wall

    2. Light Fixtures

    3. Closet

  7. Kitchen

  8. Garage

  9. Attic

  10. Smoke and Carbon Monoxide

  11. HVAC System

  12. Basement/Crawl Space

Home Inspectors Philadelphia PA

The cost of a home inspection is an additional expense, but it almost always pays off. By identifying issues early on, when they are still at the expense  of the seller, you can avoid having to pay for expensive repairs. You will also become aware of expected maintenance through an inspection. Although you can’t expect inspectors to catch everything, taking this extra step will give you peace of mind and the assurance that you move into a home that won't cost you a lot in maintenance and repairs up front. That being said, we recommend Eagle Inspections for your full home inspections in Philadelphia. Eagle Inspections provides Philadelphia homeowners and buyers with the best inspections available by utilizing the most recent technology and training. We evaluate the status of your house using the most up-to-date tools (i.e. digital moisture meters and radon detectors). Our skilled home inspectors in Philadelphia, PA can locate and identify any problems with your house using these equipment.


References:

https://homeinspectorsecrets.com/home-inspections/home-inspection-checklist/

https://www.consumeraffairs.com/finance/home-inspection-checklist.html

https://learnandserve.org/home-inspection-checklist/

6 Tips That Will Help You Do Basic Maintenance Repairs Around The House

RH Business Marketing Solutions

Doing some basic maintenance and repairs around the house can save you a lot of money in the long run. If you know how to fix a leaky faucet, change a light bulb, or tighten a screw, you can take care of many common problems yourself. In this blog post, we will provide 6 tips that will help you do basic maintenance and repairs around the house. Keep these tips in mind the next time something goes wrong!

Basic maintenance repairs around the house - 6 tips to do them properly

Home maintenance is something every homeowner deals with whether they like it or not. It’s the responsibility that comes with owning a home and if you don’t keep up with it, things will start to fall apart. But, there is good news! You can save a lot of money by doing some of the basic repairs and maintenance tasks yourself. With a little know-how, you can fix many common problems without having to call in a professional. Moreover, professionals working on garage door installation Schaumburg IL projects say that even something as simple as keeping your garage door tracks clean can make a big difference. More importantly, it is crucial that you know how to prevent a disaster, instead of just fixing the problem after it’s already happened. Here are six tips that will help you do basic repairs and maintenance around your house:  

1. Tighten up

Loose screws, nails, and bolts are not only unsightly, but they can also be dangerous. Over time, they can work their way out and cause all sorts of problems. Check all the screws, nails, and bolts in your home on a regular basis and tighten them up if they are loose. This is especially important for any furniture that gets used often, such as chairs and tables. Tightening up loose screws will also help to prevent squeaks. If you don’t know how to tighten a screw, bolt, or nail, there are plenty of resources available online that can teach you. All you have to do is do your own research and learn everything that you want to know.

2. Clean your gutters

The gutters around your home protect it from potential water damage. They channel water away from your roof and foundation, so it’s important to keep them clean and free of debris. If you live in an area with a lot of trees, you may need to clean your gutters more often. Once the leaves start to fall, make sure you clean them out so they can do their job. You can choose to hire a professional for this, or you can decide to do it on your own, it is up to you. Cleaning your gutters will also help to prevent mosquitoes from breeding in standing water. If you don’t feel comfortable doing this yourself, you can always contact a local contractor and learn more about gutter maintenance.

3. Check your smoke detectors

Your smoke detectors are one of the most important safety devices in your home. They can save your life in the event of a fire, so it’s important to check them regularly and make sure they are working properly. Most smoke detectors need to be replaced every ten years or so. If you’re not sure how old your smoke detectors are, it’s a good idea to replace them. You can buy smoke detectors at most hardware stores. Just make sure you get the right type for your home. If you have any questions, the staff at the store will be able to help you.

4. Test your carbon monoxide detectors

Carbon monoxide is a gas that you can't see or smell, but it can be very dangerous. That's why you need to have a carbon monoxide detector in your house. These devices will sound an alarm if there is carbon monoxide present in the air. You should test your carbon monoxide detectors monthly and make sure they are working properly. Carbon monoxide detectors can be bought in the vast majority of hardware stores around the country. Just like smoke detectors, you need to replace them every few years. If you have any questions, the staff at the store will be able to help you.

5. Fixing the leaks

Even the smallest of leaks can cause the biggest of issues and damage to a home. Water can seep into walls, floors, and ceilings, causing mold and rot. If you have a leak in your home, make sure you deal with it right away. Many leaks can be fixed with a simple patch kit. These kits are available at most hardware stores. If you’re not sure how to use one, the staff at the store will be able to help you. If you have a more serious leak, you may need to call a professional.

6. Structural repairs and maintenance

Finally, it’s important to do some basic maintenance on the structure of your home. This includes things like checking for cracks in the foundation, fixing loose shingles, and painting the exterior of your home. These types of repairs can be done by a professional or you can do them yourself. Just make sure you know what you’re doing before you start.

If you follow these tips, you’ll be able to do basic maintenance and repairs around your home. These tasks may seem daunting at first, but they will become easier with practice. Just remember to stay safe and always call a professional if you’re not sure how to do something.

6 House Projects That You Should Hire An Expert For

RH Business Marketing Solutions

There are some house projects that are best left to the professionals. If you're not sure whether or not a project is one of them, read on for a list of six projects that you should hire an expert for. From roofing to plumbing, these projects can be difficult and dangerous for the average homeowner to attempt on their own. So if you're thinking about taking on a home improvement project, it's important to know when to call in the experts!

1. Roofing

Roofing projects can be extremely dangerous, and even a small mistake can lead to serious injury. If you're not experienced in roofing, it's best to leave this project to the professionals. Roofers have the training and experience necessary to safely and effectively work on your roof. So if you need a new roof or even just some repairs, be sure to call a roofing contractor.

A good example of when you should hire a professional roofing contractor is if your roof was damaged in a storm. Roofing contractors have the experience and knowledge necessary to properly assess the damage and make the necessary repairs. They will also be able to advise you on whether or not you need to replace your entire roof.

2. Setting up garage doors

Another project that you should hire an expert for is setting up garage doors. This is a project that requires precision and expertise, and it's important to make sure that the door is installed correctly. Garage doors are very heavy, and if they're not installed properly, they can cause serious injury. 

So if you're not experienced in installing garage doors, it's best to leave this project to the professionals. Garage door installation is a two-person job, and it's important to have someone help you who knows what they're doing. Namely, the experts for garage door opener installation carmel say that it’s important that the springs are properly tensioned. Otherwise, the door could come crashing down, which could seriously injure someone. This is a tricky process, and if you're not experienced in doing it, you could seriously injure yourself. So be sure to hire a professional garage door installer to get the job done right.

3. Electrical Work

Electrical work can be extremely dangerous, and even a small mistake can lead to serious injury. If you're not experienced in electrical work, it's best to leave this project to the professionals.

Electricians have the training and experience necessary to safely and effectively work on your electrical system. They also have the proper equipment to get the job done right. So if you need new electrical work or even just some repairs, be sure to call an electrician.

4. HVAC

HVAC systems are complex, and even a small mistake can lead to big problems. If you're not experienced in HVAC, it's best to leave this project to the professionals.

HVAC technicians have the training and experience necessary to safely and effectively work on your HVAC system. They also have the proper equipment to get the job done right. In case you need a new HVAC or even just some repairs, be sure to call an expert. When it comes to anything complex, always go with someone who knows what they're doing!

5. Painting

Painting may be difficult, and even a minor blunder might create major issues. It's best to leave this work to the professionals if you're not skilled in painting. Painters have the training and experience needed to do the job safely and effectively. They also have the appropriate equipment to get the task done correctly. So, if you need new paint or simply some maintenance, contact a professional painter immediately.

In addition, painters will often clean up after themselves and haul away any old paint, which can save you a lot of time and effort.

6. Landscaping

Landscaping may be tough, and even a little mistake might result in major problems. If you're not an expert in landscaping, it's better to leave the job to the pros.

Landscapers have the training and experience necessary to safely and effectively work on your landscaping. They also have the proper equipment to get the job done right. So if you need new landscaping or even just some repairs, be sure to call a professional landscaper. You'll be glad you did.

Hiring a professional for these six house projects can save you time, money, and stress in the long run. So if you're not sure whether or not you can handle a project on your own, it's always best to err on the side of caution and call in an expert.