Google+

contact us

Use the form on the right to contact us.

Day or Night, we are here to serve you. Leave your plumbing problem to us.


Tinley Park, IL

(708)845-7922

Residential and Commercial plumbers and plumbing contractors available in Orland Park, Tinley Park, Oak Lawn, Palos Heights, Midlothian, Oak Forest, Homer Glen, Mokena, Frankfort, and the surrounding Chicago South Suburbs. Emergency plumbers.

copper water lines.jpg

Kevin Szabo Jr Plumbing Blog

Kevin Szabo Jr Plumbing is Tinley Park, Orland Park, Oak Forest, Midlothian, Orland Hill, Homer Glen, Mokena, Frankfort, Crestwood, Palos Heights, Oak Lawn, local plumber. Read our blog for advice, tips, a good laugh, and basic home improvement.

**We are moving our old blog to our new and improved website. Too see all our posts visit kevinszabojrplumbing.blogspot.com

Filtering by Category: March

Small Bathroom Inspiration

RH Business Marketing Solutions

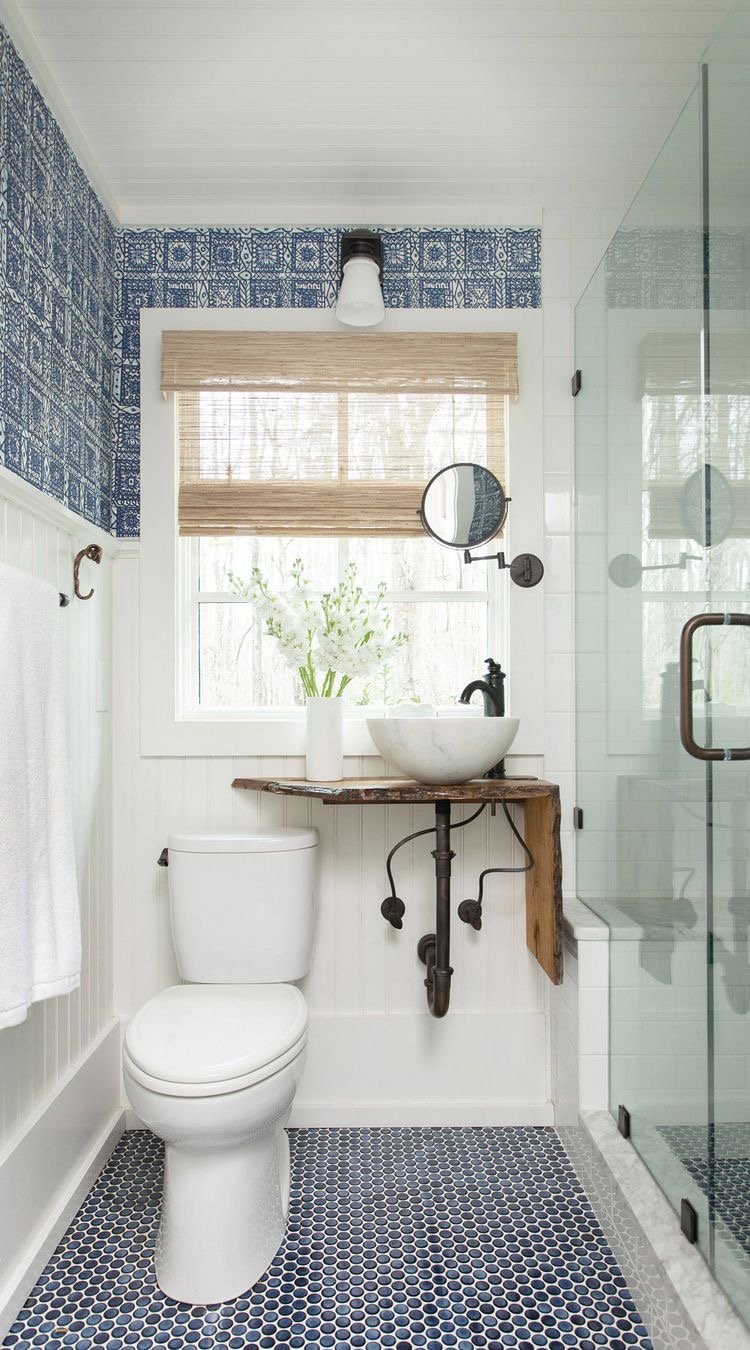
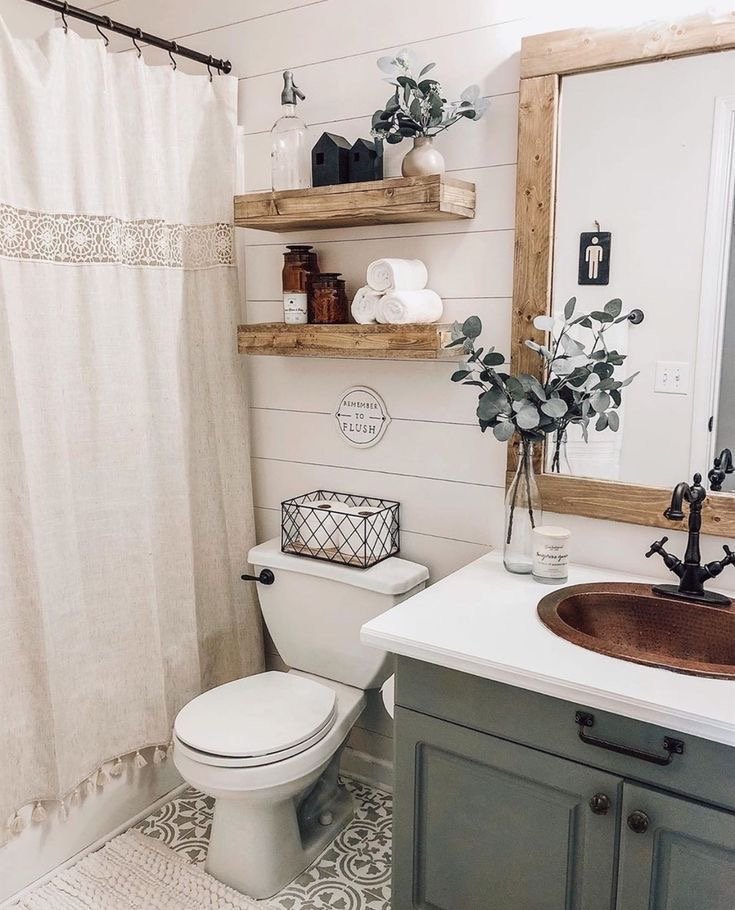
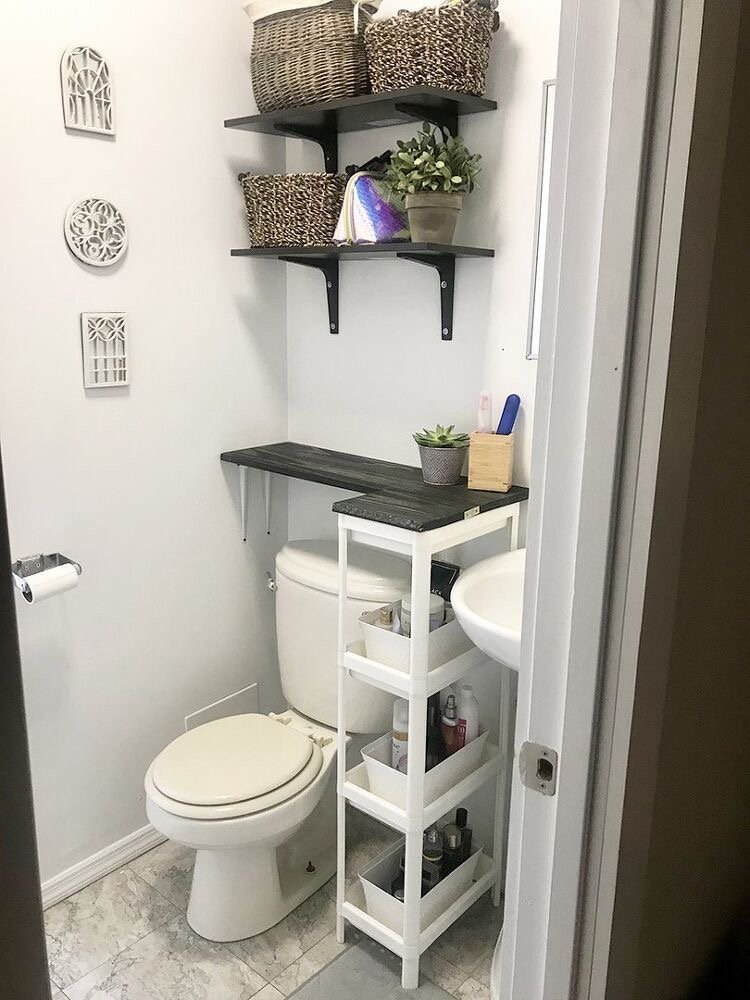
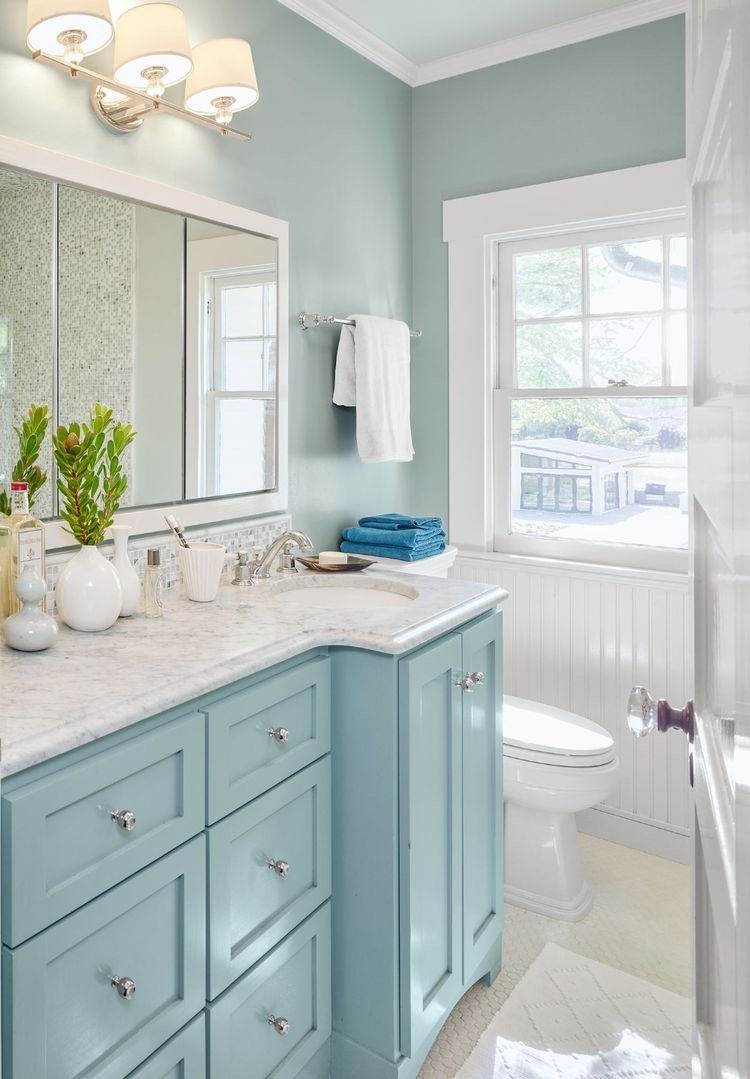
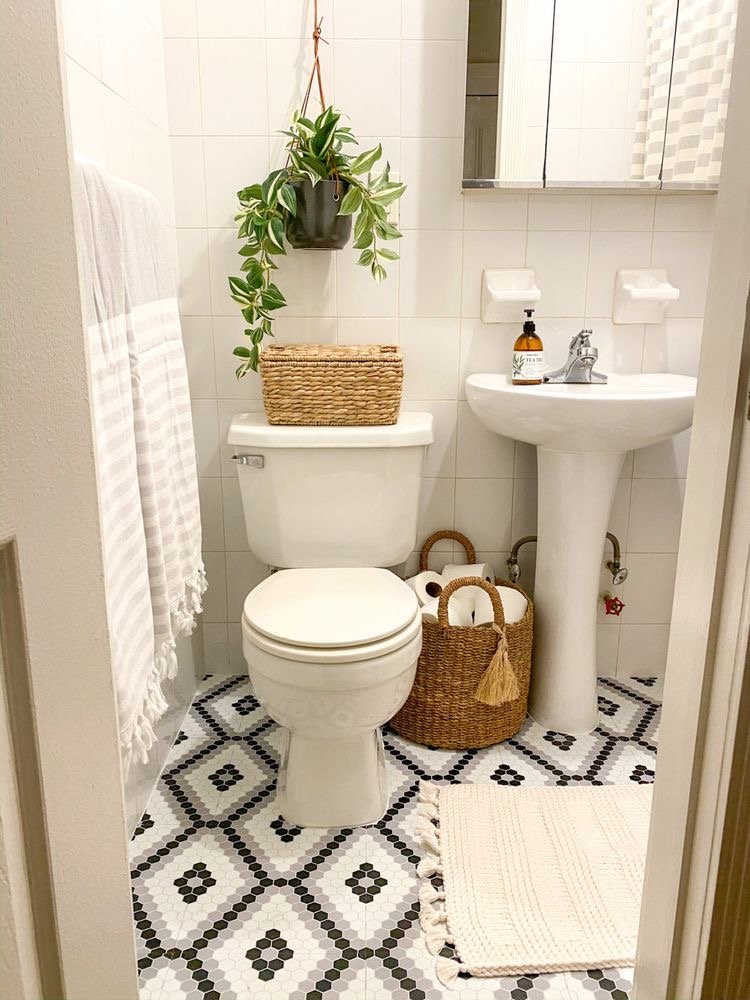
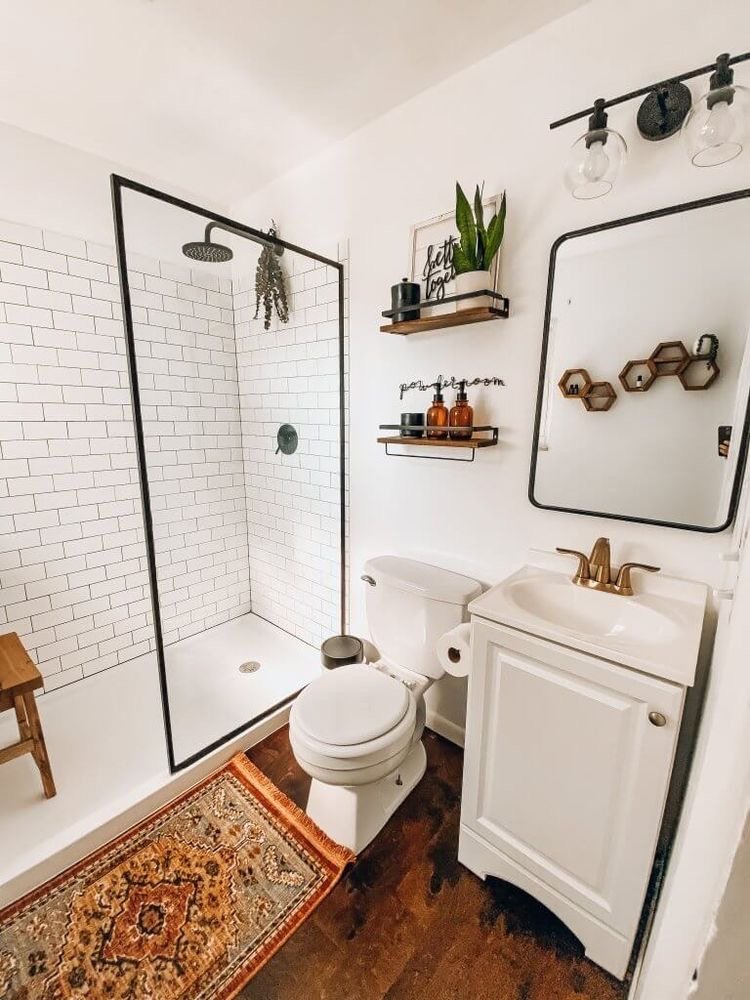
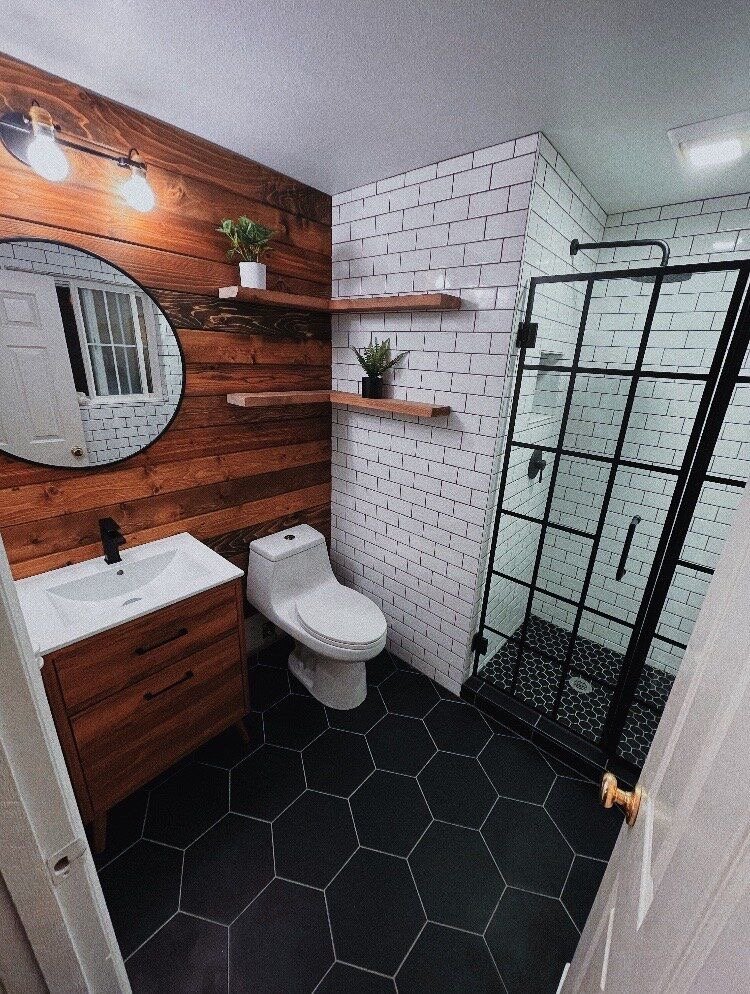
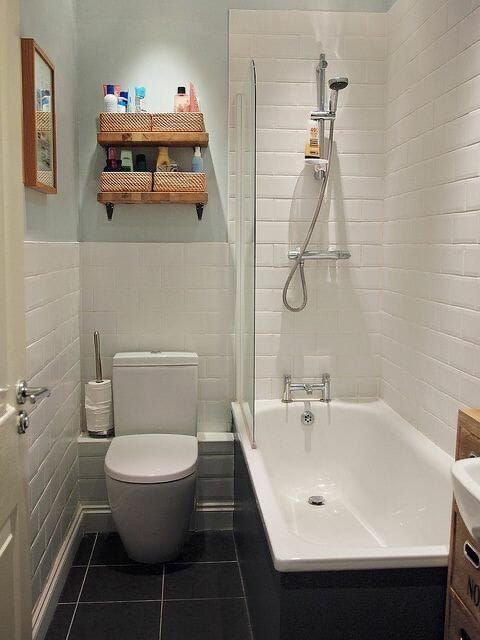
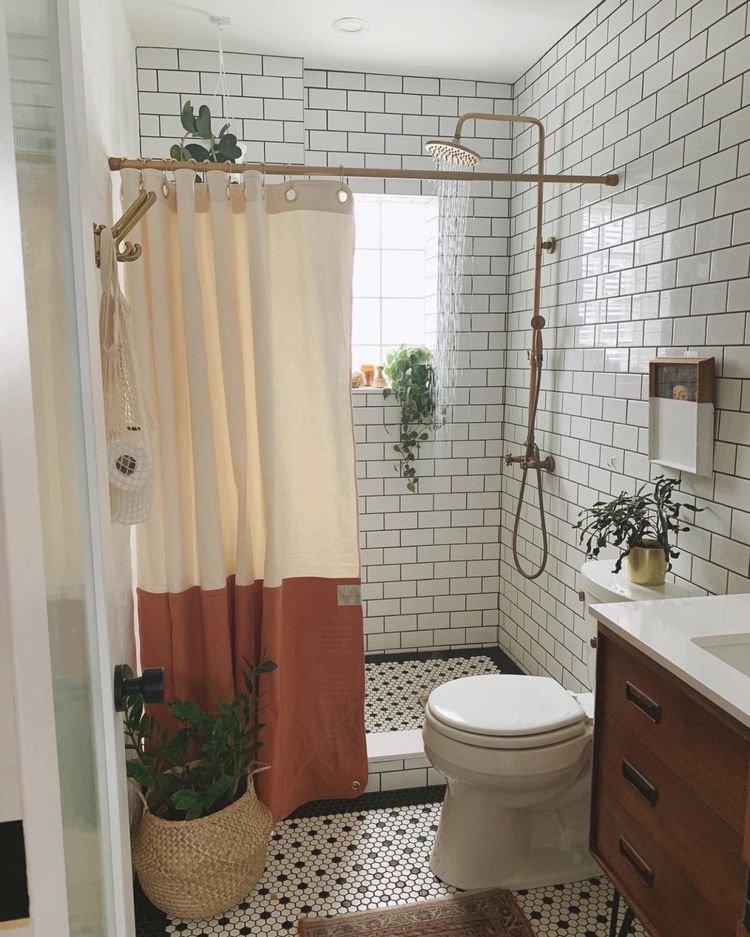
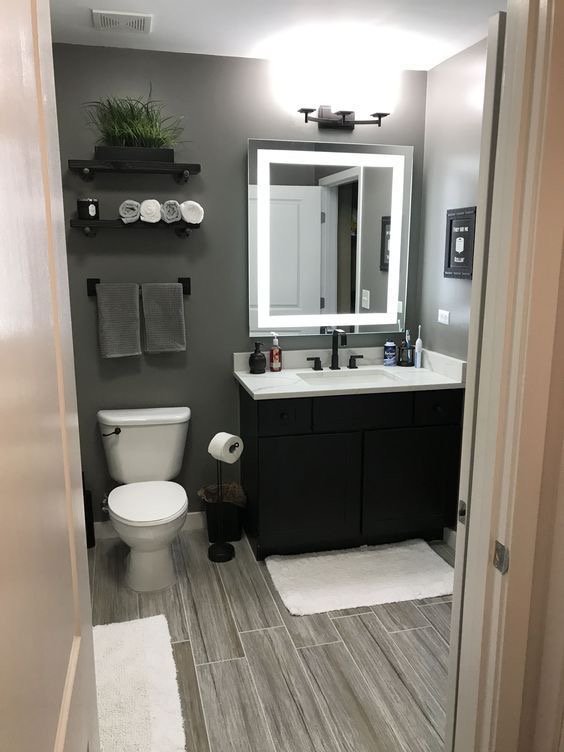
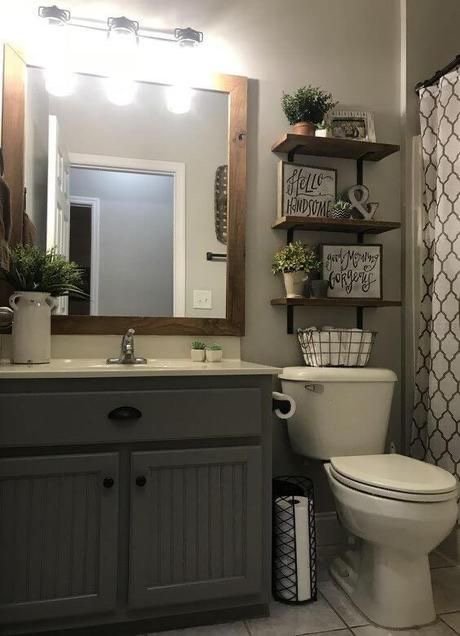
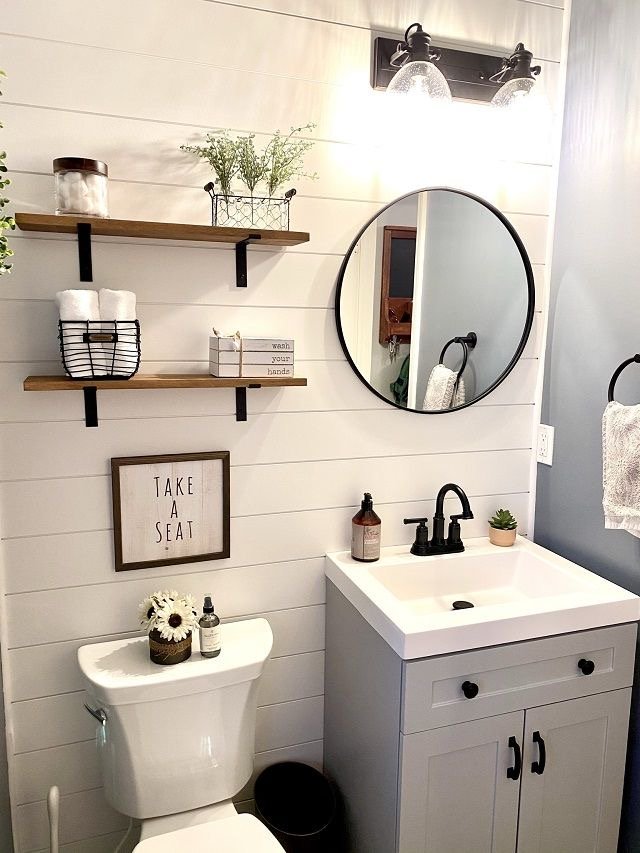
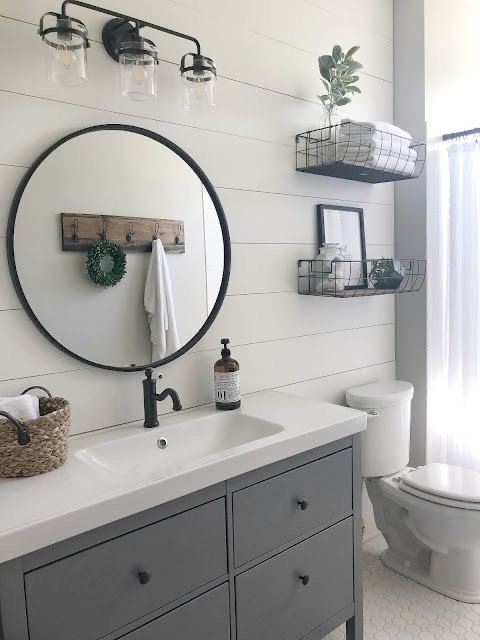
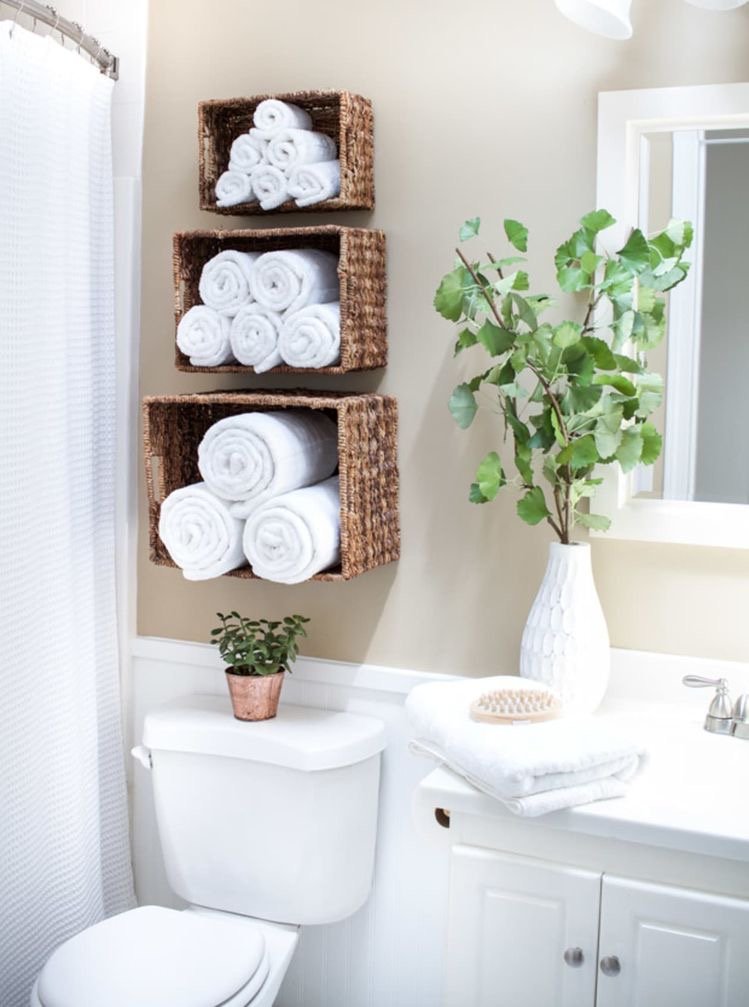
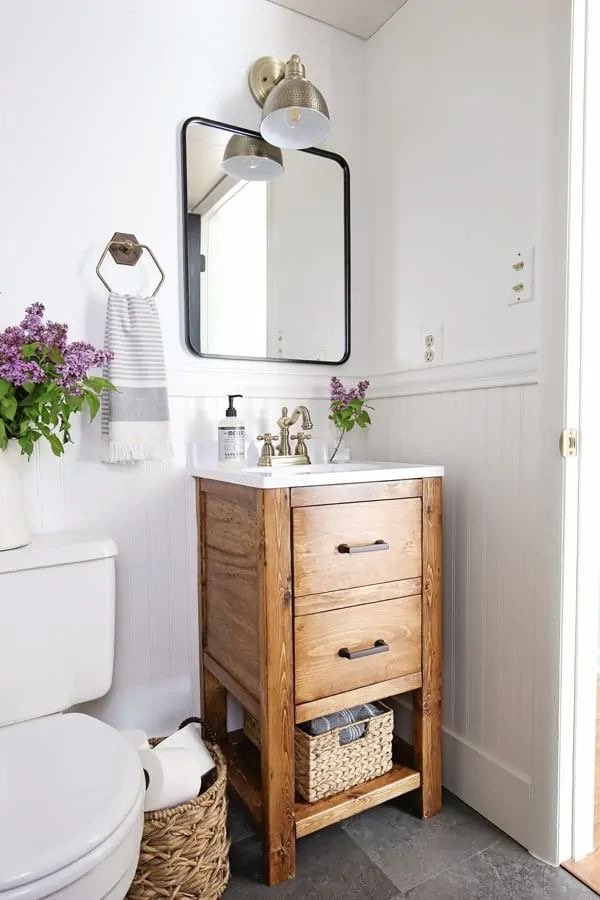
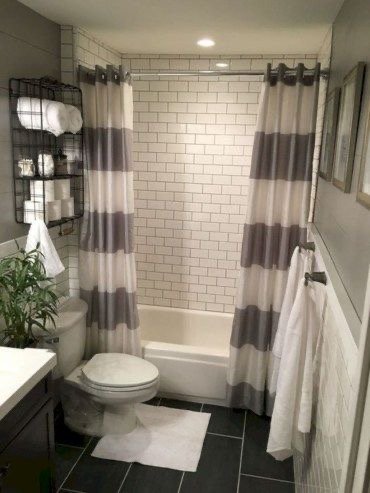
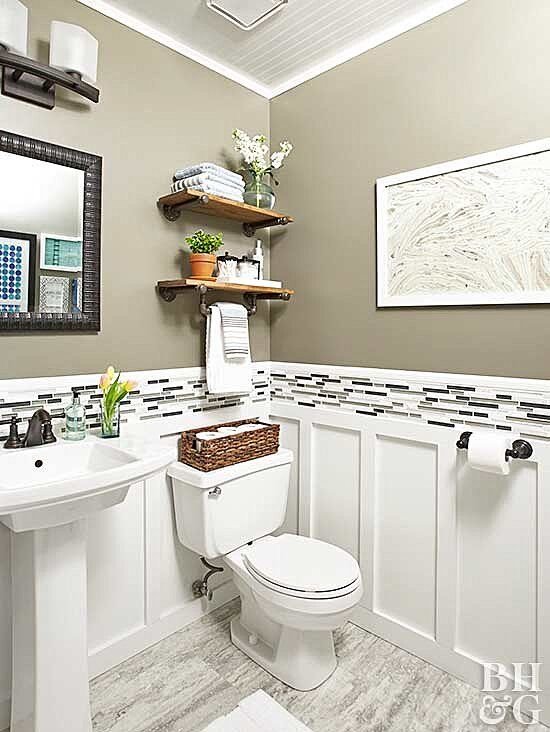
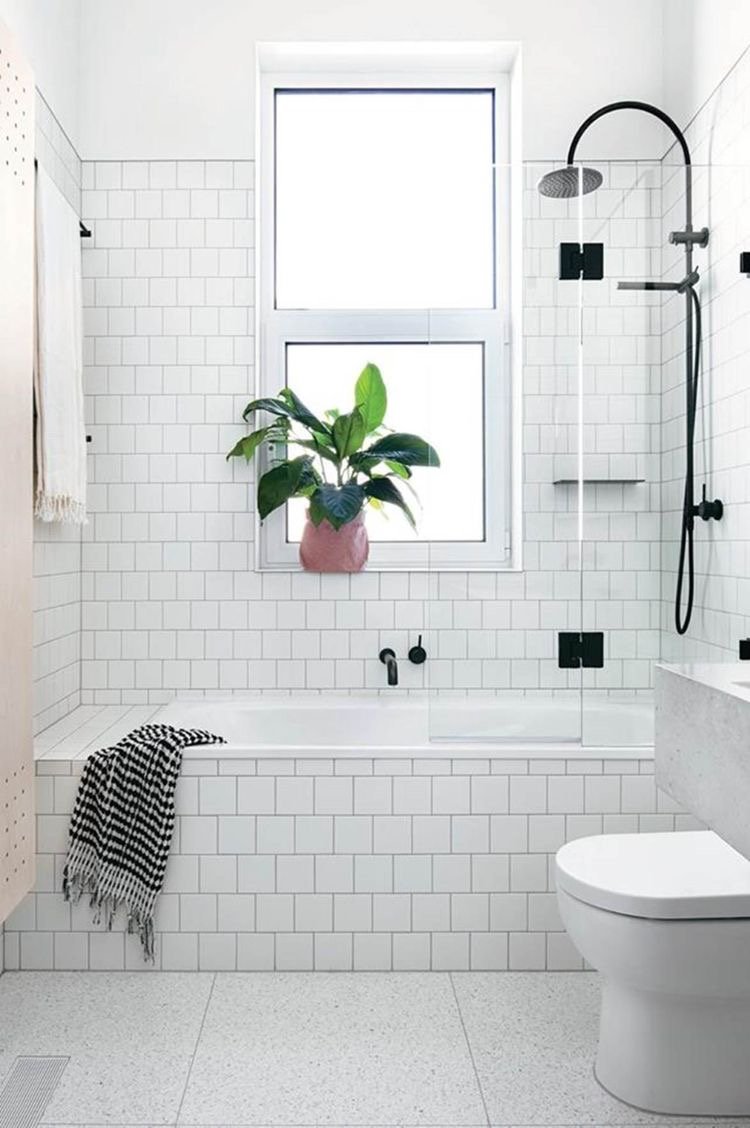
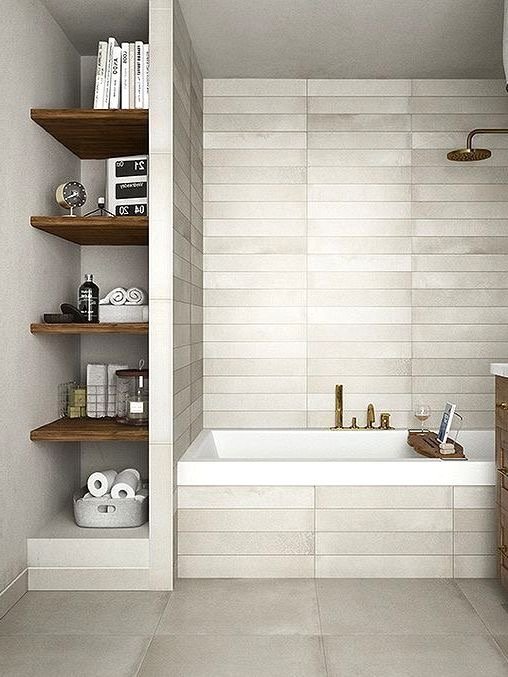
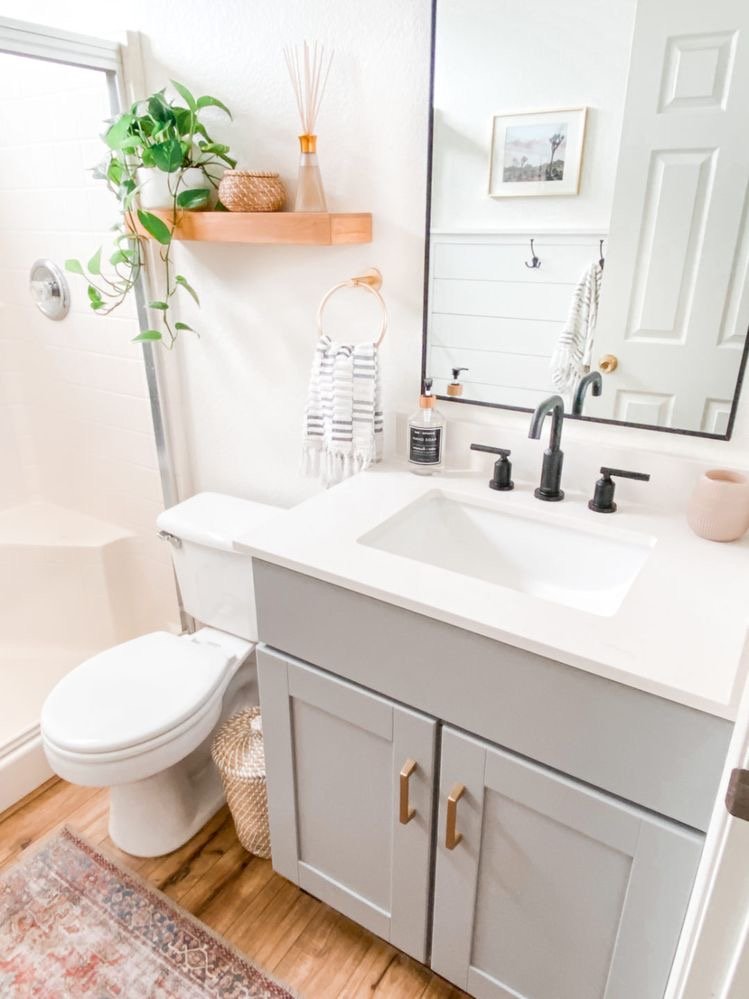
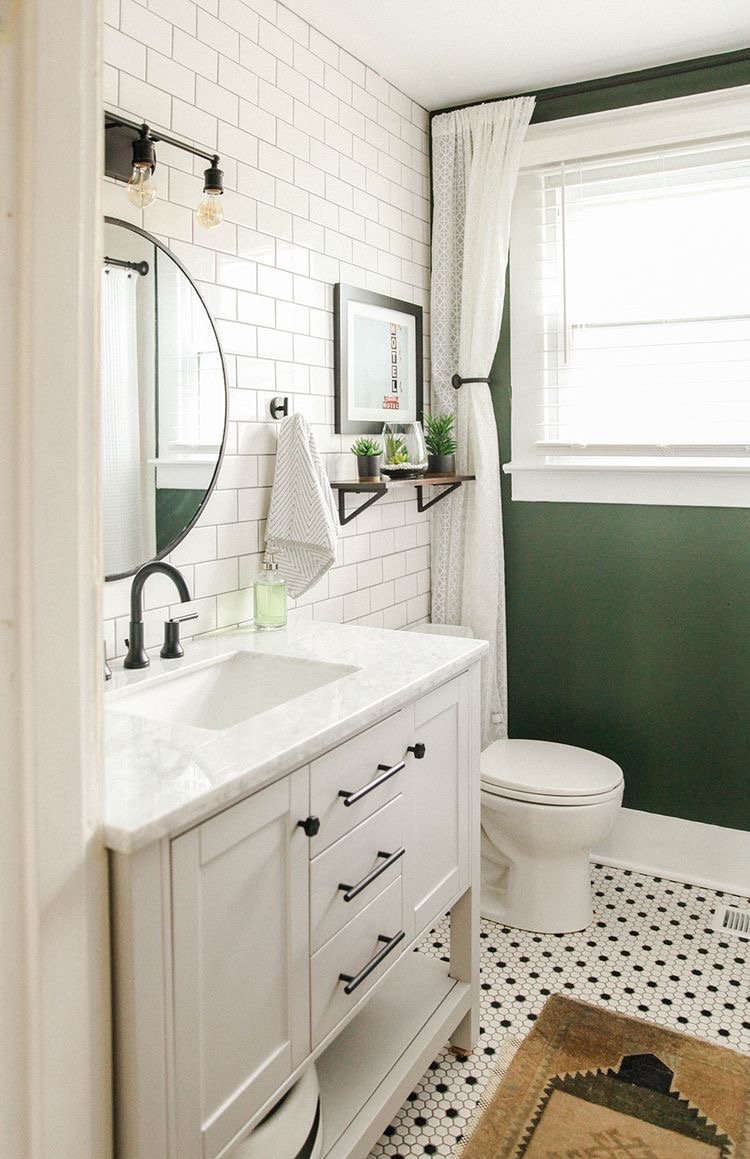
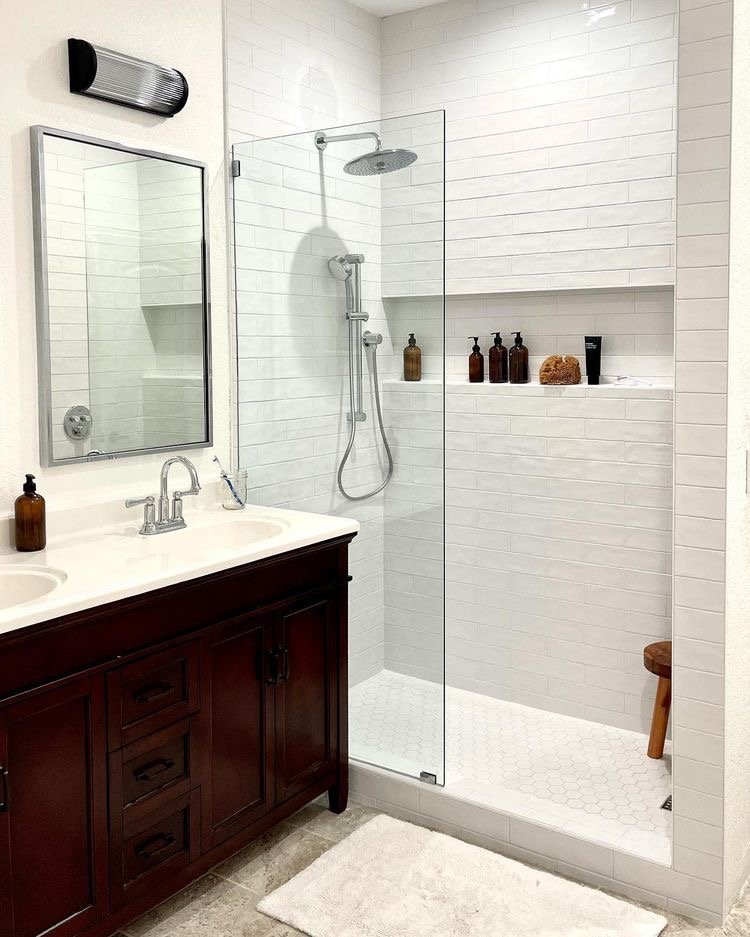
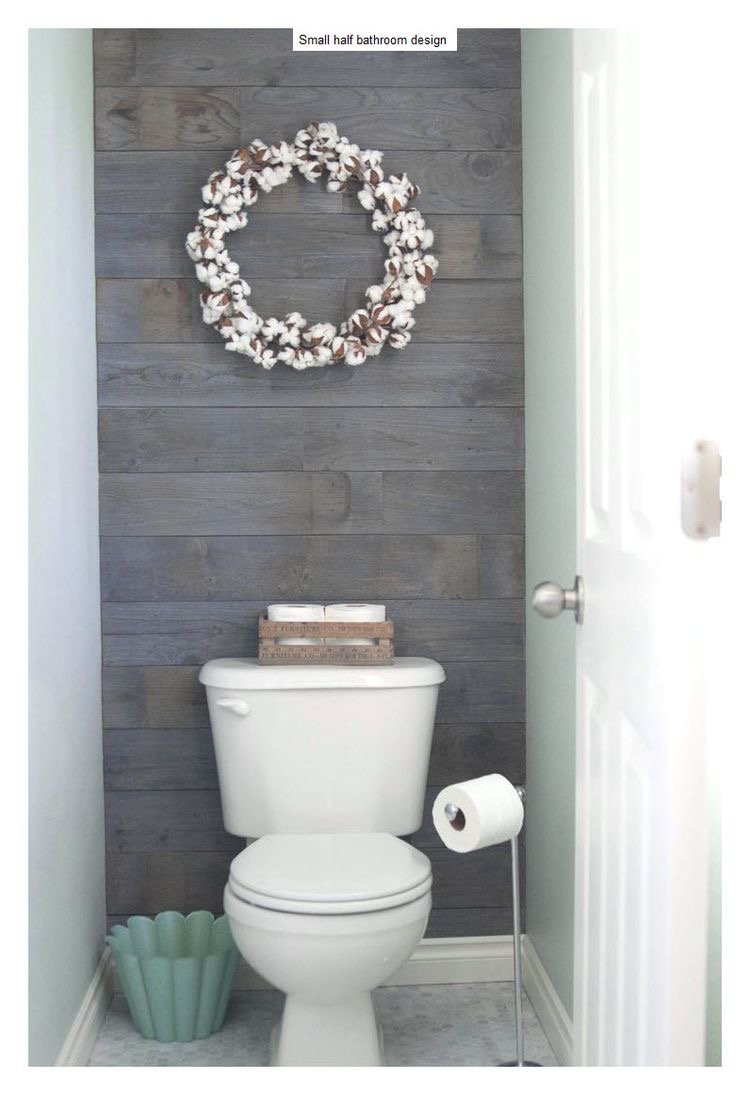
We all want a nice, aesthetically pleasing bathroom, but many of us don’t know where to even start. Sometimes it’s hard for people to see the vision because their bathroom is small and they don’t have a lot of space for decorating. We’re here to tell you that it’s totally possible. We gathered all of our favorite small bathrooms that are decorated nicely and aesthetically to help inspire you to take change and start that bathroom renovation you’ve been wanting to do.

Easter Decorations

RH Business Marketing Solutions

Easter is right around the corner, and most people love to decorate for the occasion. Why not celebrate every holiday that exists? We love decorating for Easter, and we’re here to show you our favorite inspiration pictures for decorating.

Starting out with the front door, who doesn’t love door wreaths? They’re perfect for outside decor because they can be seen from farther away and can boost your curb side appeal. Plus, there’s tons of cute wreaths that are pre-made, or you can DIY a wreath to your liking!

Do you have a coffee cart in your house, or just love coffee in general? This cute Easter pun would be perfect for the kitchen.

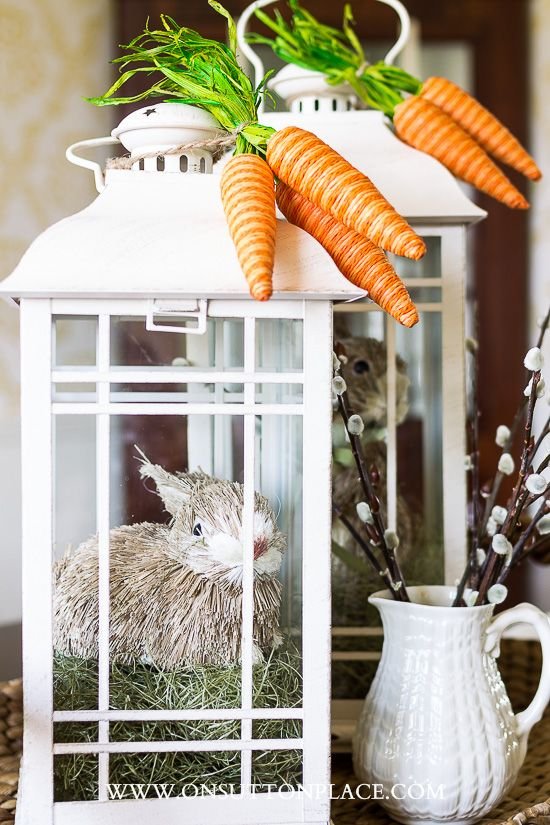
Do you have lanterns that you change through the seasons and holidays? This is a great small decoration that you can use for Easter, but spring in general if you keep it up.

Rustic signs are the new big decoration that has gone viral this year. You can DIY this and make it customized to your own liking, or websites like Etsy can provide you one, and you’re supporting a small business owner.

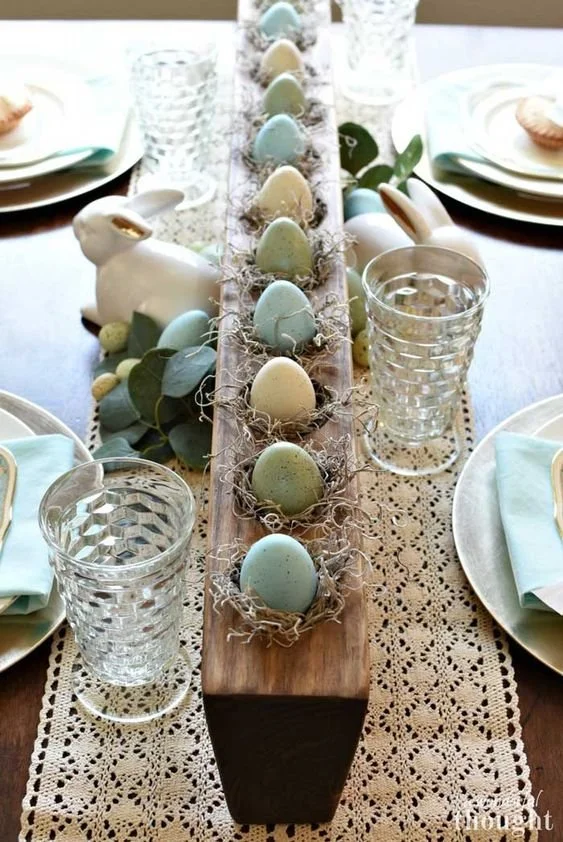
This bright beautiful centerpiece would definitely catch your attention. The eggs can be dyed yourself, or you can buy fake ones. This is a perfect small but festive piece.

Tiered trays are perfect to use year round for decorating because it adds dimension, and it small enough to stick in places you don’t want to throw big decorations. This is a small but super cute piece to add to your kitchen table or your kitchen.

This is a unique way to make a door decoration. This is simple, and takes an umbrella and flowers, fresh or fake.

Having Easter dinner at your house? This is a cute way to include decorations but keep it minimal so there’s more space on the table.

The perfect DIY with mason jars!

6 Common Garage Door Problems (And What Can Cause Them)

RH Business Marketing Solutions

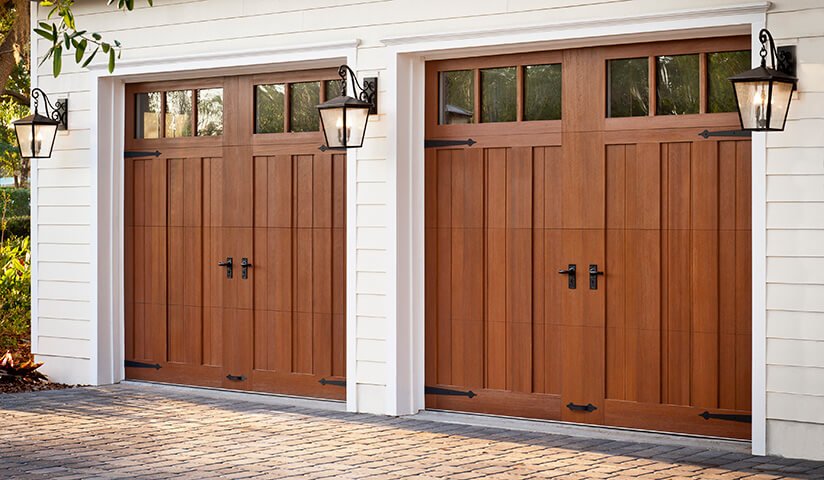
Garage doors rarely get the attention they deserve despite being one of the hardest-working systems in a home. A lot of homeowners tend to put off garage door repairs and maintenance and only realize how important it is after experiencing the consequences.

Quality garage doors add value to your home. They are an investment that pays for itself in the long run, but only if you keep them in good working condition. Otherwise, you will be spending a lot of money on garage door repair or, worse, need to replace your garage door way before it has lived out its expected lifespan.

If you want an efficient and longer-lasting garage door, you need to be aware of the most common issues that cause garage doors to malfunction and address them before they get worse.

Here are six of the most common garage door problems you need to watch out for:


1. Garage door is making loud, unusual noises.

Is your garage door making weird sounds it normally doesn’t do? These noises could indicate a number of possible underlying problems.

Most of the time, a creaking noise when opening or closing usually means that parts of your garage door are rubbing against each other and could use some lubrication. A rattling sound, on the other hand, may signify that something has gotten loose – a nut, a bolt, or some other hardware – and needs tightening.

There are also instances where the noise from your garage door is caused by a broken or worn out spring. Damaged torsion springs can make a popping sound every time the garage door is closed or opened. Replacing torsion springs, however, is very dangerous and best left to garage door professionals.


2. Garage door is lopsided or moves unevenly.

Garage doors are opened and closed dozens of times daily. This constant movement may cause the door to shift position or the tracks to become misaligned over time.

The first thing to do when dealing with an uneven or misaligned garage door is to check the tracks for rust, damage, or any debris that might be interfering with its movement. Wipe down the tracks thoroughly to make sure there’s no blockage. If this solution doesn’t work, though, it’s possible that the problem is within the spring system. A garage door specialist can help you determine the root of the issue and perform a garage door spring replacement, if needed.


3. Garage door won’t stay shut or open all the way.

Though rare, there are times when the garage door begins to move but suddenly stops working halfway. When a garage door doesn’t open or close all the way, it’s likely that the limits are off. These limits tell the door when to stop opening or closing and the motor to stop working. There should be a section in the manual on how to adjust your garage door limits.

A garage door may also fail to shut completely if there are obstructions underneath or to the photo eye sensor. If your automatic garage door reverses back up before reaching the ground, clean the photo eye sensor and make sure there’s nothing in its way. This should solve the problem in many cases but, if it doesn’t, it’s time to call in professional help.


4. Garage door opens slowly.

A sluggish garage door is usually an indication of worn-out rollers or unclean tracks. Garages tend to dry up faster in arid climates or freeze during winter, which can make it harder for the garage door to slide up or down its tracks. To prevent this from happening, wipe out the tracks and lubricate your garage door’s rollers regularly, especially during the colder and warmer seasons.

Still, it’s not always the climate that’s to blame for a garage door that’s moving at a snail’s pace. There are instances where the problem is due to door spring issues. Again, anything involving garage door springs should be handled by a professional.


5. Garage door closes too fast.

Conversely, a garage door may also close too quickly and pose a threat to safety. If your garage door slams shut as soon as you hit the remote, there’s a good chance that either the torsion spring or cables are broken.

These cables and springs are designed to control the movement and apply steady pressure on your garage door as it operates. When they become worn out or broken, the system may be unable to sense or react to obstructions in the door’s course and just close in on anything in its path. To avoid accidents or injuries, you should get a professional to repair a garage door with a broken cable or spring system right away.


6. Garage door is stuck or won’t budge.

A garage door should be able to glide freely along its tracks to protect your property and belongings, but wear and tear may cause it to get stuck or stop working altogether at least once over the course of its useful life.

Many times, a garage door may get stuck due to obstructions, track misalignment, or a broken moving part. However, if your garage door has not moved an inch since you tried to operate it, you may be dealing with a faulty garage door opener.

There are several things that could go wrong with the opener. It could be something simple like the remote needing a change of batteries or the motor unplugged from the power source. Otherwise, you could be dealing with more complex issues like a blown fuse, tripped circuit breaker, photo eye sensor issues, or severe damage that requires a garage door opener replacement.

While you may choose to tackle some of the issues mentioned above on your own, we recommend enlisting the help of a reputable garage door company for your garage door repair and replacement needs. Garage door technicians have the knowledge, skills, and equipment to fix and install garage doors safely and to manufacturer’s standards.

Professional repairs and regular maintenance will allow you to maximize the use of your garage door and save you money in the long run.

Guest Contributor: Evan Taylor

3 Most Popular Roofing Materials

RH Business Marketing Solutions

Having a variety of alternatives as a homeowner is usually advantageous. You may want to make sure you're making the best decision for the long-term condition of your home, and then you might want materials that are within your budget. Here are some of the common roofing materials.

Asphalt shingles

These materials are among the most popular roofing materials on the market today. The most cost-effective type of roof is asphalt roofing.

The majority of an asphalt roof comprises asphalt shingles and other asphalt roofing components. Asphalt roofing is inexpensive, and you may choose from a selection of shingles to suit your tastes. Asphalt shingles come in three varieties: 3-tab luxury, dimensional, and multi-tab luxury. While 3-tab shingles were originally regarded as the most preferred, dimensional shingles have become the most popular.

Pros of Asphalt Shingles

●      The cost and convenience of installation are the two greatest advantages of asphalt roof shingles. They are quick and simple to erect and dismantle.

●      The granules stacked on top of the shingles aid in reflecting UV rays, which can heat and damage your home's roof.

●      Several fiberglass shingles are fire resistant and will not catch fire if they encounter stray sparks.

●      Asphalt roofs typically last 20 years, making them suitable for homeowners who need a new roof but don't plan to stay in the house for long.

Cons of Asphalt Shingles

●      Following hail storms and poor weather, the granules that coat and protect the shingles might become displaced, damaging the roof. Excessive UV light or humidity trapped beneath the moss can cause the shingles to break down prematurely, resulting in curled edges and corners that allow water in.

●      Any impact, such as hailstones or falling debris limbs, can crack or shatter the shingles, causing a leak.

Roofing Made of Metal

Due to its extended lifespan and beautiful appearance, metal roofing has become more popular among homeowners. Metal roofing comes in two styles: standing-seam and screw-down.

A standing seam roof consists of a succession of metal panels secured together on the seams. When metal heats up, it allows panels to expand and contract easily. A screw-down panel does precisely what it says it will. Screws are driven into the panel to prevent any expansion or contraction.

Pros of Roofing Made of Metal

●      Some metal roofs, if placed properly, can withstand wind gusts of up to 140 miles per hour, will also not rust or crack, and may be impact-resistant.

●      Metal roofs will not ignite and burst into flames in the event of a wildfire or a lightning strike.

●      Metal roofs reflect the sun's UV and infrared light rays, contributing to radiant heat on the roof surface.

Cons Of Roofing Made of Metal

●      Roofs made of metal can be recycled. The majority of shingle tear-off garbage, on the other hand, ends up in the construction waste stream.

●      Metal roofs can cost up to multiple times as much as other types of roofing.

●      Depending on what type of decking is used during installation, metal roofs may be noisier than other goods during heavy rain or hailstorm.

●      It may be difficult to obtain an identical match to the existing metal if a repair is needed or a home extension is constructed years later.

Cedar Shake Roofing

Cedar shake roofing is a high-end, natural wood roofing solution. It's one of the most appealing roofing solutions available, even though it performs the same functions as asphalt or metal roof.

Pros of Cedar Shake Roofing

●      Cedar shake roofing is energy efficient, which means it keeps your house cool in summer and warm in the winter.

●      A typical shingle roof can lose color in sections due to hailstorms, but a cedar shake roof professionally treated roof preserves its color and shape despite the weather.

●      A properly maintained and treated shingle shake roof will last for many years.

●      Because wood is biodegradable, the materials left behind from your roof will not end up in a landfill.

Cons Of Cedar Shake Roofing

●      Cleaning is necessary every 4-5 years, and regular inspections are required.

●      Material and installation costs are higher, resulting in higher insurance premiums.

●      Costly treatments.

Industry experts can help you identify these materials, and they can provide you with more detailed information and specialized recommendations depending on your preferences and needs.

Guest Contributor: Hannah Boothe

Should You Paint Your Garage Floor Yourself? Here’s Why Or Why Not

RH Business Marketing Solutions

Garage floors can be painted any color you want, and they can be designed to match the style of your home. There are a few things you should consider before painting your garage floor, however.

One reason you might want to paint your garage floor is to protect it from stains and weathering. Paint can also make your garage floor easier to clean. If you use your garage for working on projects, painting the floor can also make it easier to clean up any spills.

On the other hand, painting your garage floor yourself can be a big project. If you're not experienced in painting, it's best to hire a professional. Painting your garage floor is also a good way to add value to your home if you're thinking of selling. If you do decide to paint your garage floor yourself, be sure to use high-quality paint and primer. You'll also want to make sure the floor is clean and dry before you start painting.

Some people are content to keep their garage floor painted the same old color. Others want a more colorful or unique look. But if you're not sure how to paint your garage floor, don't worry! Here's what you need to know before taking on this DIY project. 

1) You'll Need To Sand The Floor First

One of the most important steps in painting your garage floor is to sand it first. This will help the paint adhere to the surface and will also create a smooth surface for painting. You can use a power sander or hand sandpaper to do this.

First, make sure the floor is clean and dry. Then, start sanding in one direction, using light pressure. Be sure to sand the entire surface of the floor. If you see any areas that need more attention, go back and sand them again. Once you're finished sanding, vacuum up the dust and debris. 

2) Choose The Right Paint And Primer

Choosing the right paint and primer is essential for painting your garage floor. You'll want to use high-quality paint, which is designed for concrete surfaces such as polyurethane concrete floor paint as It is durable and will resist stains and wear. 

You'll also need to choose a primer that's designed for concrete. This will help the paint adhere to the surface and will also create a smooth surface for painting. Be sure to read the labels on the paint and primer to make sure they're compatible. 

3) Prepare The Floor For Painting

Once you've chosen the right paint and primer, it's time to prepare the floor for painting. This includes cleaning and sanding it again. Make sure the floor is clean and dry before you start sanding. 

To make sure your floor is clean and dry before you start sanding, use a vacuum cleaner to remove all the dust and debris. Then, use a damp cloth to wipe the surface of the floor. Be sure to dry the floor completely before sanding. 

4) Apply The Paint

Once the floor is clean and dry, you're ready to start painting. Be sure to read the instructions on the paint can before starting. Most paints should be applied in two coats. 

Start by painting in one corner of the garage and work your way out. Be sure to apply even pressure and avoid painting too thickly or too thinly. You may want to apply a second coat if the first coat doesn't cover the surface completely. 

5) What To Look Out For

There are a few things to look out for when painting your garage floor. One is that the paint can take a while to dry, so you'll need to be patient. Another thing to watch out for is that the paint can be slippery when wet. So, if you plan on using your garage for parking your car, be sure to test the paint first and make sure it's safe to drive on.

If you are doing it by yourself, you will also want to make sure you have the right tools. This includes a power sander, hand sandpaper, vacuum cleaner, and damp cloth. If you're still unsure you can contact a professional.

Now that you know how to paint your garage floor, you can decide for yourself if this is a project you want to take on. Painting your garage floor can be a big project, but it's definitely worth the effort! Not only will it make your garage look nicer, but it will also add value to your home.

Tips for Properly Maintaining and Cleaning Your Pool

RH Business Marketing Solutions

Pool maintenance is a struggle for many homeowners, especially those trying to juggle time between families and jobs. If you have a pool, though, it might be time to find the balance between work and play. Don't sweat the small stuff, and don't get discouraged by a few missed swimmers - instead, just keep on swimming! You'll be able to clean off your pool with ease once by following these tips for proper maintenance and cleaning.


Ensure Proper pH Balance

Check the pH balance of your pool water often. If it's too high or low, bring it back to normal by adding chemicals that can be purchased at any local supplier. If you have a saltwater pool, make sure it's balanced. Such water must be kept in check with a simple bi-weekly check of the pH balance and minerals. Keep the levels of your chlorine and ph maintained using test strips. A properly balanced pool will be chlorine at 0.5 parts per million, with a pH of 7.0 or above. To lower the levels of either of these chemicals, add either acid or alkaline liquids until you reach the desired level.

A quick and easy method for maintaining pH balance is the use of tablets. Just place 500 tablets in your pool, skimmer, and filter at the beginning of the season, and they will do the job by themselves. If you want to use more tablets or want to switch out different types of formulations, contact a pool store for assistance.


Weekly Cleaning

Your pool should be cleaned and maintained during each week. It can involve cleaning tile, vinyl and plaster, hose and cartridge changes, and a close check of the filter system. If your pool is not in use, you can invest in round tarps or any specific to your pool shape and size to keep it free from debris.


Empty Pool According To Set Timer

Use a timer on your skimmer to let you know when it needs to be emptied. Empty skimmer containers at least once a week. For the best results, keep a record of how often you empty your pool. It will help you determine when it is time for repairs or replacements.


Clean The Pool Pump

A pool pump should be cleaned when replacing or repairing. It is quick, easier, and more cost-effective to take the old pump out and leave the new one in as long as it is compatible. If you do this, make sure that you clean the filter.


Replace The Pool Liner If Cracked

If there are no cracks in your vinyl liner, check if any areas or cords are deformed. If so, replace these areas. If you are unsure, take pictures of the liner to send it to a vinyl dealer. A patch can be made, saving you both time and money in the long run. If a crack is found, it is best to replace the entire liner. Be sure to choose one of the major brands to ensure a quality product.


Regularly Clean Cartridge Filters

Cartridge filters should be taken out and cleaned regularly. If you have too many dirt particles in the filter, it will cause a clog and not perform properly. You will need to purchase a replacement filter every five years or so.


Replace Chemicals

When you dispose of chemicals, you should ensure that all chemical containers are properly labeled. You should also write down the name and the strength of each liquid and use this when replacing them.


Test Your Pool Weekly

A pool should be tested once or twice a week during the swimming season. It can be done by simply swishing the water with a plastic cup or testing the salt and chemical levels. When you test your pool, make sure you record the results for future reference. Have a routine for your pool that includes weekly cleaning, chemical treatments, and testing. It will help keep your pool at its peak for use each year. Your pool should be checked at least once per year. For instance, if you opted for a pool heater installation then mark it on your calendar to get it checked one year from now.

Conclusively, a pool is an investment for many people. It provides you with a great place to play and can serve as a substantial moneymaker. To keep your pool healthy and clean, follow the above tips, and you will notice the positive effects.

Guest Contributor: Tracie Johnson

How To Prepare Your Pool For The Spring

RH Business Marketing Solutions

Spring is such an exciting time. Buds on the trees and warmer weather encourage friends and family to get back outdoors after the colder months. As a pool owner, it is the first sign that your summer pool fun is just around the corner — which means it’s time to do some spring cleaning on your pool.

Unfortunately, just because the weather warms up does not mean your pool is ready to go. You need to take some action to help ensure that your pool is safe and sanitary before using it this season. Take the following steps to prepare your pool for spring.


1. Remove and Clear Your Pool Cover

If you live in a cooler climate and covered your pool, start by removing the water off the top of the cover. Use a leaf rake or pool brush to clean debris off the cover, as well.

Spray your pool cover and let it dry. Once it is dry, you can fold it or roll it to store it for the season. Taking the time to allow the cover to dry completely will help avoid mold and mildew problems while in storage.


2. Ensure the Water Level of Your Pool Back at a Normal Height

A drier climate can cause the water level in your pool to decrease. You can use a garden hose to refill the water to halfway between the skimmer opening. To ensure your pool is functioning properly, it is important that the water stays at this level so you might have to refill the pool more in drier months when there is less rain. 


3. Start the De-Winterizing Process by Reconnecting Pool Equipment

There are certainly some parts of Arizona, Florida, and Texas that are warm enough to warrant using a pool the whole year. However, most people will opt to winterize their pools for at least a couple months out of the year. Winterizing in the warmer states looks slightly different from winterizing in the central or northern parts of the country.

Start the de-winterizing process by reconnecting your pool equipment. Your pump, heater, filter and anything else that was disconnected should be reconnected. Remove any winter freeze plugs, if you used them. Double-check that filter pieces are where they should be (including the internal grids and cartridges). Don’t forget the drain plugs and return valve fittings!


4. Review All of Your Equipment for Repairs and Replacements

Spring is the perfect time to thoroughly check your overall pool system. Look for any parts and pieces that seem worn, need a more detailed cleaning, or have cracks or holes. Addressing these problem areas before restarting your system can save you headaches during the upcoming season.

Some of the key areas to review include:

  • O-rings

  • Pipes and hoses

  • Plugs and valve covers

  • Filters (including internal components)

 Once you have done a thorough review, it is time to start your system.


5. Start Your Pool System

Every system has a slightly different startup process. Be sure to review your manual and follow the instructions specific to your system.

In general, you start this process by pumping the sitting water out of your skimmers and drains using the waste setting on a multiport valve. Then, be sure that all of your valves to and from the pool are open before you start priming your pump. Finally, prime the pump and turn on your filtration and circulation systems. Be sure to bleed any air from the system if you have an air relief valve.

As a rule, it is a good idea to let the pump run for about 24 hours before using the pool (you can run the pump while continuing to clean).


6. Clean the Pool and Treat the Water

Your initial cleaning for the year is vital to the health and safety of your pool for the whole season. Brush the tiles and pool walls; clear the water’s surface with a leaf rake or skimmer; and use a vacuum head and hose to clean the bottom of the pool.

You should also do your normal testing and adjustment of your pool chemistry but wait to do any testing until after the pump has run for a few hours. Add the appropriate chemicals to get your pool chemistry where it needs to be.

After the pool sits overnight, you might also want to shock the pool to eliminate any remaining germs and contaminants. Should you have questions or concerns about any details in this process, don’t hesitate to reach out to your local pool maintenance company for help.

Getting ready for summer swimming means more than just taking off the pool cover. A thorough inspection and cleaning in the spring will help your friends and family enjoy a safe and sanitary pool experience this year.


Author bio: Hillary Rymer is VP of Marketing at Pool Troopers. Raised in Florida, Rymer grew up around swimming pools and even swam for the University of Alabama. She is passionate about pool safety providing backyard freedom to all pool owners.

Spinning Reels Maintenance - How To Clean Spinning Reels Properly

RH Business Marketing Solutions

Learning how to take spinning reels maintenance seriously with the comprehensive guide below. Keep reading to see what our professional anglers have to share!

Finding a suitable spinning reel for your fishing purposes is merely the first step when you decide to enter this hobby. If you want your tackle box to work flawlessly within the next few years, you will have to pay particular attention to spinning reels maintenance

Check the article below to see the most detailed instructions on how to keep your reels as fresh as new!

Basic Spinning Reel Maintenance Tips

Understanding spinning reels means you have to know when to take basic care of them. Since spinning reels do not need excessive cleaning or decluttering, all you have to do is follow these simple tips so that your reels always stay in top condition.

Clean the external layers of the reel

Dust, rainwater, and other factors can tamper with the outside layers of your reel. If you think it gets slightly rusty, use a piece of soft cloth to wipe out the dirt. Feel free to add a bit of misty water so that removing clogs will be easier. 

Remember, you have to be particularly gentle with how you clean the exterior of the reel. Should you be too forceful in your movements, the dust can end up getting caught inside the reel.

Loosen the drag

After each fishing trip, the drag washers will be heavily pressurized. Hence, loosening them is highly recommended. Not only will you take off the prolonged pressure, but you can also keep your drag in its optimal condition by not getting stuck.

Respool the reel

There is no definitive frequency on how often you should respool the reel. That being said, it is wise to check how much fishing line you have used and how much you have left. 

Being prepared beforehand prevents you from the awkward situation when a fish takes the bite and yanks all of your fishing line out.

Keep your reel intact

Many anglers make the rookie mistake of opening up their reels and checking the interior. The build quality of a spinning reel tends to be trickier and more complex than the average expertise of a fisherman, making it highly difficult to re-assemble the reel. 

Try not to take your reel apart unless you absolutely have to. And in case you do, prepare a manual or ask a professional for advice should things go south.

How Do You Clean A Spinning Reel?

Cleaning a spinning reel is simple if you follow the instructions below.

Step 1: Use a spray bottle of water. Give your reel a quick spray, so the misty water softens the clogged dirt and salt. Remove the visible stains using a clean cloth.

Step 2: Remove the reel’s spool from its position. Debris, salt, and sand might get caught inside your spool. Shake the spool so that all of these unwanted materials can fall out.

Step 3: Lubricate the spool and make sure the oil is spread evenly. Next up, reattach the spool to the shaft. 

Step 4: Remove the reel’s handle. Similar to the spool, a lot of garbage can end up accumulating in the handle. Use a damp cloth to get rid of them. Then, apply a few drops of oil to grease the handle before inserting it back to the reel.

Step 5: Remove both the bail arm and the bail roller from the reel’s motor. Use a Clenzoil-soaked piece of cloth to clean up both of them before reassembling.

What can you use to clean your spinning reel?

There are several spinning reel maintenance kits available for purchase if you are willing to spend a few extra bucks. For those who wish to do things on your own, you will need the following items.

●     Multiple pieces of a soft cloth.

●     A spray bottle of water.

●     A few screwdrivers for removing the reel’s body parts.

●     A few cotton swabs. 

●     A bottle of Clenzoil.

●     A bottle of lubricating oil.

●     A roll of paper towel.

Can you use WD40 on spinning reels?

WD40 is a water displacement substance. As the material can cause dryness, most fishermen do not fancy using it on their spinning reels. If you happen to dip your reel into a bowl of WD40, chances are it will stop functioning properly due to the lack of grease.

How to clean a spinning reel after saltwater use?

Cleaning a spinning reel after saltwater use is pretty much the same as the basic cleaning instructions. The only difference is that sometimes you have to open up the entire reel for better cleansing.

How Do You Lubricate A Spinning Reel?

There are two important factors that you must pay attention to when lubricating a spinning reel, namely amount and location. There is no need to use more than a few drops of oil for each body part. 

You also have to take notice of where you are greasing, including the handle, spool shaft, and ball bearings.

What oil can you use on spinning reels?

The best type of oil used on spinning reels should be thin, light, and slightly watery. Cooking oils such as olive or veggie oil will not suffice here. And remember to stay away from machine oil also, as it is too thick for the reel to cast and retrieve smoothly.

How often should you oil your spinning reel?

Are you an active angler? If yes, try to lubricate your spinning reel once every three fishing trips. But if you are in a stage of dormancy, monthly lubrication will do the job.

Conclusion

Spinning reels maintenance is not as difficult as it sounds. As long as you have the proper cleaning tools, ensuring your reels are in their best shapes is a piece of cake. If you find this guideline helpful, do not forget to share it with other anglers!

Guest Contributor: Logan Nguyen

A Full Guide on Choosing the Right Doors & Windows for Your Home

RH Business Marketing Solutions

When it comes time to replace the doors and windows in your home, it’s important to choose the right type for your needs. Not all doors and windows are created equal – some are better suited for colder climates, while others are more durable and perfect for outdoor use. In this guide, we’ll walk you through the different types of doors and windows available, so you can make the best decision for your home.

When choosing new windows for your home, it is important to consider all of your options and make the right choice for your needs. In this guide, we will discuss the different types of windows available, the benefits of each type, and how to choose the right window for your home.

Single-pane window

Windows come in a variety of styles and materials. A single-pane window is the most basic and cheapest type of window. It has one pane of glass, which does not offer much insulation. If you have an older, drafty single-pane window, you can install a window insert to make it into a double-pane window. Window inserts are cheaper than replacing an entire window, and they can be installed yourself.

Double-pane window

Double-pane windows are more expensive than single-pane windows, but they offer better insulation and are less likely to break. A double-pane window has two panes of glass, which helps to insulate your home and keep out the cold in the winter and the heat in the summer. It also helps to reduce noise from outside. Investing in double glazing is recommended by double glazing experts because it enhances the heat retention and insulation of your home. Double-pane windows are excellent for double glazing because it has two panes of glass separated by a layer of air or gas. The air or gas helps to insulate the window and keep out the cold, making it a better option for colder climates.

Triple-pane window

Triple-pane windows are the most expensive, but also the most energy-efficient. This type of window has three panes of glass separated by two layers of air or gas. The extra panes help to insulate the window further, making it a good choice for climates that get very cold. Double glazing or triple glazing can further enhance the insulation and heat retention capacity of triple-pane windows, which can help homeowners save on energy bills in the long run.

Window materials

Windows can also be made from a variety of materials, including wood, aluminum, vinyl, and fiberglass. Wood windows are the most expensive, but they also offer the best insulation and are the most durable. Aluminum windows are less expensive than wood windows, but they don’t insulate as well and tend to corrode over time. Vinyl windows are the least expensive and are excellent materials for kitchen windows due to their moisture resistance, but they also don’t insulate well and can be prone to cracking. Fiberglass windows are a good option for both insulation and durability, making them a good choice for homes in colder climates.

Window frame

The frame of a window is the part that surrounds the window panes. You can choose a window frame in either vinyl or wood. Vinyl frames are cheaper and easier to maintain, while wood frames offer more insulation and are more aesthetically pleasing.

Window type

There are three types of windows: casement, double-hung, and slider. Casement windows open outwards from the side, double-hung windows open up and down, and slider windows slide from left to right or right to left. Choose the type of window that will work best for your home.

Window color

You can also choose the color of your window frame and panes. White is the most popular choice, but you can also find windows in other colors such as black, brown, and beige.

Window size

Windows come in a variety of sizes, so you can choose the one that will fit best in your home. Make sure to measure the opening where you want to install the window to ensure that you get the right size.

Window treatments

Window treatments are the curtains, blinds, or other coverings that you put over your windows. They can help to insulate your home, protect your privacy, and enhance the appearance of your windows. Choose the window treatments that will best suit your needs.

There are a variety of door styles available. In this guide, the different types of doors will be explored, as well as the benefits and drawbacks of each. Also included are tips on how to choose the right doors for your home.

Hinged Door

A hinged door is a door that opens by pivoting around a vertical axis that is located at the top of the door. This type of door is typically found in residential dwellings and can be opened either inward or outward. Hinged doors are the most common type of door found in homes, and they provide a number of benefits, including:

  • Ease of use: Hinged doors are easy to open and close, making them ideal for households with young children or pets.

  • Security: Hinged doors are more secure than other types of doors, as they can be locked from the inside.

  • Durability: Hinged doors are typically made from high-quality materials, which makes them durable and long-lasting.

French Doors

A French door is a hinged door that has two or more panels, each of which swings open independently from the other. This type of door is often used in exterior applications, as it allows for natural light and ventilation to enter the home. French doors are also popular in interior applications, as they can be used to create a more open and spacious feel in a room. French doors have a number of benefits, including:

  • Light and ventilation: French doors allow natural light and fresh air to enter the home, making them ideal for rooms that need extra lighting or ventilation.

  • Design: French doors come in a variety of styles, which allows you to choose the right one to match your home’s décor.

  • Security: French doors can be locked from the inside, providing an added layer of security for your home.

Sliding Door

A sliding door is a door that moves horizontally along a track mounted on the wall or ceiling. This type of door is commonly used in interior applications, as it does not take up any floor space when opened. Sliding doors are a great choice for small spaces, as they do not require any extra room to open. Sliding doors also have a number of other benefits, including:

  • Ease of use: Sliding doors are easy to open and close, making them ideal for households with young children or pets.

  • Security: Sliding doors can be locked from the inside, providing an added layer of security for your home.

  • Design: Sliding doors come in a variety of styles, which allows you to choose the right one to match your home’s décor.

Now that you know the different types of windows and doors available, it’s time to choose the right one for your home. Talk to a professional about your needs and find the best option for your budget and climate.

Guide to Downsizing

RH Business Marketing Solutions

BY MYMOVE

Most people go through a downsizing process at some point, whether it’s because they’re moving to a new city, have kids who moved out, are going through a divorce or breakup, are aging, or just want to simplify their lifestyle.

The downsizing trend has picked up steam in the past few years. Census data on new homes built in the past decade shows that the average square footage has decreased in each of the past six years. More homeowners would also rather move to a smaller house than a larger one (37% compared to 23%), according to research from real estate site Trulia.

For most people, cost is a major factor. According to a survey from Homes.com, “saving money” was the most common reason for downsizing for every generation. But figuring out how to downsize your home isn’t always easy: Half of all respondents said getting rid of possessions was a challenge.

No matter what the reason, downsizing can be a stressful and time-consuming process — both emotionally and physically. But knowing how to downsize the right way can keep the process from feeling overwhelming. Here are some downsizing tips from MYMOVE to help make the process easier.

Pro Tip: Create an inventory of your major possessions before you physically move anything. Mark each item with its fate or its new space in your next home.

Tips to make downsizing easier

1. Start early.

Give yourself plenty of time for this process, because it will inevitably take longer than you expect. Take your time, and don’t try to sort through your entire house in one day or weekend. A couple of weeks to a month is a more realistic timeline. Take it one room at a time, and take breaks throughout.

“Go through each item one by one,” says Alison Kero, CEO of ACK Organizing in Brooklyn. “It’s important to give everything you own your attention for at least a second or two. It will also help you develop a great decision-making system because you’re learning how to focus and then choose.”

If you aren’t rushed, you’ll find downsizing to be much less stressful.

2. Start small.

You probably already have things you want to get rid of in the kitchen or garage, but avoid diving into the biggest rooms at the very beginning. Start in an area with little emotional attachment. The laundry room or linen closet are good options.

Understand your needs. If you’re moving into a two-bedroom house, four sets of sheets should be plenty. The rest can go.

“Garages/attics/basements are notorious for being the hardest rooms to tackle,” says Debra Blue, of Blue Moon Estate Sales. “These rooms tend to accumulate all the old hobbies, boxes, old holiday decorations, and clutter. They’re also known to be rather uncomfortable spaces. In the summer it’s too hot, winter it’s too cold, and in the springtime, it can be too humid.”

3. Eliminate rooms you won’t have in your new home.

If you’re moving to an apartment or townhome, you might not have a garage or office space. Nearly everything in those spaces will need to be sold, donated, tossed, or relocated to other rooms. These areas might also be good items for consignment or garage sales; nice office furniture and outdoor tools are more valuable than old sofas or mattresses.

“Organize backwards,” suggests Jamie Novak, author of ‘Keep This Toss That.’ “A common suggestion is to pick out the stuff you don’t want and pack the rest. Try the opposite — pack the keepers. What’s left can be looked at and most can be shared or donated.”

4. Get rid of duplicates.

You’ll find this is especially true in your kitchen. You have two or three spatulas and ladles, a couple of oversized stock pots, and four different sized cookie sheets. Now’s the time to reduce the clutter. If you’re feeling wary of handing off that second roasting pan because you use it every Christmas (but at no other time during the year), consider giving it to a family member who can bring it over for the holiday and take it home when they leave.

5. Only make Yes or No piles — no Maybes.

When you’re going through belongings, some things are going to tug at your heartstrings, and you’ll be tempted to make a third pile of things to keep if you have space.

Don’t fall for it. You’ll end up with a Maybe pile that’s bigger than either of the other two. When that happens, you haven’t really made any progress in sorting, just moved it across the room.

Take a hard look at every item you pick up. If you use it regularly, keep it. But it’s time to let something go if it’s been sitting in a closet or on a shelf for a year or more.

“If you already weren’t using it, or didn’t like it, why on earth would you want to pack it up and schlep it to your next house?” says Hazel Thornton, of New Mexico-based Organized for Life. “I know it sounds silly, but people do it all the time. Moving isn’t cheap, either; do you really want to pay extra to move stuff you don’t even want? Don’t delude yourself by telling yourself you’ll deal with it at your next destination. No, you won’t.”

6. Reduce collections creatively.

It can be hard to thin out a lifetime collection of sneakers or snow globes from all your vacations, but they will eat up a lot of space or end up stored in a box where you’ll never see them.

Instead, pick a couple to keep and take high-resolution photos of the rest, then have them made into a photo book that can sit on your coffee table or mantle. You and guests will be able to enjoy them without the clutter. There are also tech tools or websites such as Fotobridge.com that will convert those boxes of photo negatives to digital files.

7. Don’t be afraid to sell things yourself.

With Craigslist, eBay, numerous smartphone apps, yard sales, and an abundance of consignment shops, selling your belongings has never been easier. You probably won’t make a ton of money on most items, so consider how much time you want to invest.

Yard sales are usually faster, but items won’t sell for as much. Craigslist has its drawbacks, but you’ll have a much wider audience and can probably get more for your stuff. Consignment is a good option for high-end furniture, handbags, and other accessories; prices are reasonable, and they’ll sometimes pick up heavy furniture for you.

But if that all sounds like more than you care to deal with, hiring a firm to run an estate sale might be the simplest route.

8. Allow some time to reminisce.

While you’re cleaning and sorting, there will be some days when you want to stop emptying out rooms and just look through the old drawings, mementos, and once-prized possessions. It’s OK to pause and let the nostalgia take over for a bit. Cry if you need to, or move on to another room and come back. This is why you started early — just don’t let it prevent you from eventually getting the job done.

“I always ask my clients how the item at hand makes them feel,” says Morgan Ovens, of Haven Home in Los Angeles. “If it brings up any negative feelings, let it go. If it brings happiness of course it stays! The idea here is to only be surrounded by things you absolutely love. Isn’t that a great goal?”

9. Use this as a chance to bond.

If you are a senior, invite your friends or family over and tell stories about all your favorite items. You can let them help pack, take some items off your hands, and spend quality time with loved ones before the big move.

It can be one more moment you share in the house you’ve loved — before you start making those memories together in your next home. Remember that it’s your people in your life you cherish, not the stuff around you.

Pro Tip: Go digital wherever possible. As you relocate, consider having all of your bills and other correspondence come via email vs. having paper clutter accumulating in your new, but smaller, space. Digitize photos and download favorite movies, music or games rather than have CDs and DVDs stacked up.

Our decision tree can help you

Making the move after you pack

Now that you’ve downsized your belongings, how are you going to make your move? You’ll want to have an answer in mind from the beginning of your downsizing home process.

Will you be rounding up family members to help pack and drive a moving truck? Or will you pay for a full-service moving company to pack, ship, and unpack your things? Perhaps something in-between, with a mobile storage option in which you pack a container, and then the storage company does the shipping?

Downsizing for seniors can be a little more complicated. More companies, known as senior move managers, are popping up across the country that cater specifically to seniors moving — either to smaller homes or moving into senior living or nursing communities. They’ll usually do as much or as little as you want, from packing and moving to home cleaning and estate sales.

There are hundreds of senior move specialists. The National Association of Senior Move Managersreported nearly 1,000 companies as members in its 2015-16 annual report.

“There are now senior move specialists in most communities,” says Sara Geber, an aging transition coach with LifeEncore. “These are people trained to help at every step of the way, from selecting the new residence to downsizing, to transportation back and forth, etc. They are generally very reasonable in cost and well worth the expenditure. Most real estate brokers know of such professionals, as do estate attorneys and financial advisers.”

It’s important to keep these options in mind as you downsize because it might change your opinion on whether to keep or sell certain items. If you’re moving everything yourself, a 300-pound china cabinet might be better suited for the consignment shop to avoid the hassle and risk of injury. If you’re paying for full-service, you might be more inclined to keep it, but know that such heavy items add onto the price tag.

You’ll also want to be on the lookout for potential scammers. It’s fairly rare, but there are some companies out there that will promise one attractive price for a full-service move, and then once your stuff is all packed up in the truck, they’ll demand more money while holding your items hostage. Do your research and use companies that come with recommendations from family and friends.

If you’re undecided about what type of move is best for you, let MYMOVE help you compare moving options.
Dealing with the emotional toll of downsizing

Inevitably, most people will struggle a bit with nostalgia when they’ve reached a point where it’s time to downsize. Geber, with LifeEncore, spoke with MYMOVE about how to make the best of this difficult time.

“Change is hard for everyone, but the older we get, the more accustomed we are to our surroundings and our ‘stuff,’ even if all that stuff threatens to strangle us,” she says.

She says a lot of these negative feelings come from both sadness and fear, which is why she recommends making a downsize as early as possible when it’s easier to adjust to a new environment.

And don’t let the apprehension get you down.

“Looking forward to a new environment” can help ease the transition, Geber says. Focus on the positives and appreciate how much simpler life will be with fewer surfaces to dust, rooms to vacuum, or towels to wash.

Your downsize doesn’t have to be stressful, sad, or scary. Stay positive and get excited about a simpler life in a new place with less clutter.

Mymove.com


Infographic Provided By central heating system repair company, Oncourse Home Solutions