Google+

contact us

Use the form on the right to contact us.

Day or Night, we are here to serve you. Leave your plumbing problem to us.


Tinley Park, IL

(708)845-7922

Residential and Commercial plumbers and plumbing contractors available in Orland Park, Tinley Park, Oak Lawn, Palos Heights, Midlothian, Oak Forest, Homer Glen, Mokena, Frankfort, and the surrounding Chicago South Suburbs. Emergency plumbers.

copper water lines.jpg

Kevin Szabo Jr Plumbing Blog

Kevin Szabo Jr Plumbing is Tinley Park, Orland Park, Oak Forest, Midlothian, Orland Hill, Homer Glen, Mokena, Frankfort, Crestwood, Palos Heights, Oak Lawn, local plumber. Read our blog for advice, tips, a good laugh, and basic home improvement.

**We are moving our old blog to our new and improved website. Too see all our posts visit kevinszabojrplumbing.blogspot.com

Filtering by Category: March

How can I improve the water quality in my shower?

RH Business Marketing Solutions

Access to clean water can affect many aspects of our lifestyles not only when it comes to drinking it. Using water for cleaning and washing, we can find out how water quality is impacting our health in a somewhat more indirect way. Many concerns have been raised about water quality and how easily certain substances can be ingested. There is also the issue of contaminants on the skin or the potential to breath them in during a shower. 

It is, thus, an important issue to tackle, and ultimately provide better quality water in our showers as well as for drinking. Before endeavoring to start tackling such issues, however, it’s essential to understand exactly what contaminants would be affecting water use for showering and what their effects could be. 

Issues due to shower water

Many problems can stem from poor quality water in showers; some can affect one’s health or even damage the shower fittings.

Health issues

Some of the more harmful contaminants in shower water usually come in the form of chlorine and chloramine, trihalomethanes (THMs), volatile organic chemicals (VOCs). These substances alone can be responsible for some undesired health effects when exposed to in the shower. 

The most common health effect encountered from shower water is an allergic reaction. This can manifest with dry skin and hair, itchy skin, or eyes, runny nose, or even coughing. Chlorine is largely to blame for these reactions. On the other hand, more severe reactions and problems appear from THMs and VOCs. Respiratory problems like asthma can be triggered, or even damage the lungs. 

Plumbing issues

Hard water can be a very serious problem with regard to the plumbing system itself. Not only can limescale build-up clog up the shower fittings and drains, but it also makes cleaning less effective as it limits the efficiency of shampoos and soaps. 

How to handle shower water-related problems?

There are a number of things that can be done to improve water quality in the home and in the showers as well. Water filtration systems have been around for a while and their popularity is ever-growing, especially in the wake of the many different types of filtration systems. To better understand what these are, you can find some of the best resources in the field here.

Showerhead filters

One of the most evident ways to improve shower water quality is to install a shower head filter. These little filters are very easy to install and equipped with multiple stages of filtration. Layers inside the filter can consist of sand, stainless steel mesh, activated carbon, and much more. Many of these are capable of removing substances like chlorine, limescale, and even reducing rust or absorbing bacteria. 

What is more, certain shower filters even come with added minerals and pressure settings to improve water quality further. As with drinking water filters, a shower filter is to be replaced after some time of use, to provide the maximum potential of its functionality. 

Water softeners

A great way of improving water quality for washing is by implementing a water softener. Dealing with limescale is one of the most irritating issues with showers, as not only do they reduce shampoo efficiency, but also damage fittings, and create deposits on the tub or shower screens. Water softeners come with some more equipment such as a water tank and salt that has to be maintained but are overall the most efficient at reducing limescale.

Whole house water filters

The most sure-fire way to guarantee higher quality water is to filter all the water that comes into the home. Sediment and rust can infiltrate water pipes and create tainted water. The whole house water filtration system is a catch-all blanket filter that can have multiple filtration stages with multiple types of filtering mediums. 

The capability to expand and include different water cleaning methods makes the whole house water filter highly adaptable and efficient. It’s an added bonus that all water gets this treatment, including shower water. The complexity of this system will most likely require professional installations, but once done, the maintenance process is far easier. 

Choosing which filtering medium to use specifically for shower water depends on the water source. There could be instances where collected rainwater is used for showering and that would require an entirely different filtration method than water from the city. 

Considerations for choosing shower filtrations systems

Before going out and buying a shower filter, there are some factors to consider. For one, make sure the filtration system is powerful enough to clean out contaminants present in the shower water. This can depend on the area and the water source itself. 

Consider installation, as some filters are easier than others to set into place. Water quality is important, but so is the available space and the type of filtration system. That being said it may be more worthwhile to install a more complex system that deals with many more issues than a simpler one would. 

Another thing to consider is maintenance. All water filters need periodic maintenance and more complex ones will come with a few extra steps. Layered filtering mediums will have separate time slots for when they need changing and all this has to be taken into account, in order to guarantee proper functionality. Some systems could potentially have the option of coming with service providers that make it their goal to alert their customers when maintenance is due.

What Can You Recycle After a Home Renovation?

RH Business Marketing Solutions

Renovating your home is a great way to refresh your space. However, before you get ready to throw away your old appliances and building materials, it's a good idea to consider what you can recycle after your renovation. Recycling helps to keep reusable products and materials out of landfills, and you can help others by providing them with products that are still usable.

That said, if you're getting ready to renovate your home, here are a few key things to consider recycling rather than throwing them away.

DOORS AND WINDOWS

Both internal and external doors can be recycled and reused by other homeowners, business owners, and contractors. Doors can be easily cleaned and repaired and then donated or reused in other projects. Depending on the state of the door, the wood can also be salvaged and reused. Additionally, while windows can't be as easily recycled, you may be able to donate the glass to local artists or contractors.

CABINETS

Kitchen remodels are one of the most popular home remodeling projects, which means your old cabinets could easily be reused by someone else looking to change up their kitchen's aesthetic. Up to 70% of the millions of tons of garbage produced every year can be recycled. You can either donate your cabinets to your local donation center or, if your cabinets are untreated, you can look into your local wood recycling programs and donate your cabinets to a nearby recycling plant.

WORKING APPLIANCES

If your appliances still work, but you're replacing them, you can donate them to local organizations such as Habitat for Humanity and Goodwill. Many donation centers and organizations accept stoves, refrigerators, washing machines, and dishwashers that are in good condition and working order. Be sure to call ahead to ask first whether your local donation center accepts the appliances you're looking to donate.

BATHROOM FIXTURES

If the toilet, sink, and bathtub you're replacing in your home are in good condition and aren't stained, they can be easily donated to your local salvage store. Salvage stores are particularly keen on vintage fixtures, which is good to keep in mind if you're remodeling an older home.

WOOD FLOORING AND TILES

Contractors or salvage shops may be willing to accept wood flooring or tile that's clean and undamaged. However, keep in mind that not all wood flooring or tile is recyclable. Be sure to contact your local salvage shop to ask which materials they accept.

MINI BLINDS

Whether you're looking to install new shades or blinds to give your home a facelift during your renovation, you can recycle your old and unwanted window treatments relatively easily. Of course, it's important to know what type of window treatments you have before you go about recycling them. For instance, if you have mini blinds that are made of PVC, you'll need to call ahead to your local recycling center to determine whether they'll be willing to accept them. On the other hand, aluminum mini blinds are typically accepted at most major recycling plants.

WINDOW SHADES AND WOODEN BLINDS

Roman shades can't be recycled like blinds can, but they can be donated at a local clothing drop-off or donation center where they can be reused. The fabric from your window treatments can be removed from the hardware and reused for other projects.

Similarly, cellular shades can be donated to clothing donation stores because they're made entirely of polyester fabric. It's for this reason that cellular shades can't be processed in recycling centers, but they can be reused at donation centers as fabric for filler or insulation. Wooden blinds and woven wooden blinds also can't be traditionally recycled, but they can be donated as-is and reused by others looking to spruce up their spaces.

Donating your window treatments is not only a good way to reduce your carbon footprint but also to earn yourself a charitable tax deduction. According to the Internal Revenue Service (IRS), you can deduct the fair market value of household goods, clothing, and more.

Once you've recycled or donated your unwanted window treatments and you're ready to install new ones that match your personal style, be sure to reach out to Window Treats Inc. We can help you find new custom window treatments to suit your needs, and we can even help repair your existing window treatments. For more information, contact us today.

World Plumbing Day 2022

RH Business Marketing Solutions

Friday, March 11th 2022 is world plumbing day! This is a day to spread the awareness of the importance of plumbing and how we help protect the public health. Plumbers and Inspectors make sure we have access to clean, sanitary water daily. Make sure you thank a plumber today for all they do, you may not realize how big of an importance they are, but they are our access to safe water conditions!!

Benefits Of Hiring A Skilled Plumber Service

RH Business Marketing Solutions

One of the most important parts of running a household in good shape is having a smooth plumbing system. And for that, it is essential to get a skilled plumbing service. It needs to be taken care of just like any other manufacturing work done in the house. So, a trained and skilled plumber must do the plumbing work. Plumbers know everything they need to know about their job so that you can relax.

Why Should You Hire A Skilled Plumber Service?

There are a lot of people who think plumbing is easy, but this may not be the case. There are many works that you cannot do on your own. For instance, tubs, pumps, taps and washers, and a lot of other things. For that, you need to hire a professional plumber. Here are a few reasons why you should hire the best plumbers for all of your plumbing needs.


Experience And Expertise

Skilled plumbing services do a lot of work for you. However, when you hire a professional plumbing contractor, they will be able to fix all of your plumbing needs and issues. Moreover, they will make sure that they get the job done right on the first go. Therefore,  hiring a skilled plumber services would not only save you costly services but save some costly damages in the near future also.

Budget-Friendly

You might not believe it, but hiring skilled plumber services to keep your home in good shape costs actually less than you might think. Expert plumbers cost less in the long term because they would do the perfect job on the first place. Hence, if you do it yourself, you may have to repeat the process several times. A professional and qualified plumber will suggest new and safest fittings that would be the best for the home and would go long.


Proper Tools And Materials

The tools and materials for the work will be there when you hire skilled plumber services. This saves you a lot of time because you don't have to go back and forth to the hardware store to get the necessary but costly equipment which you will not use very frequently parts and buy things you won't use again.


Prevent Recurring Issues

When you hire skilled plumber services, the problems will not recur again and again. The reason is, the do the quality job on the first go.  The plumber will be able to fix and install things for a long time. For example, if you are remodelling your home and need help with the kitchen or bathroom, hiring the professional plumbers will provide you the best services.


Identify The Root Cause

Not all drain clogs and plumbing problems are caused by food particles getting stuck in the pipes. Sometimes, the problem with the pipe itself may be the source of the problem. Plumbers are the best people to call if there is harm to the sewer line or waste backs up.

Additionally, people who are skilled at plumbing will do a thorough investigation of the problem and come up with solutions that will quickly solve your plumbing problems.


Emergency Services

You can trust the skilled plumbers you hire to come to your home to help you in an emergency to give you the best service possible. However, when you have a big plumbing problem, you'll need to quickly hire someone else to help you fix the problem. In this case, hiring online is the better decision because that would also save time.


Conclusion

Therefore, hiring skilled plumber services benefits you in numerous ways. However, if you are thinking about doing the plumbing on your own, keep in mind it will cost you more in the long term. Hence, you can go for skilled plumber services for effective and efficient work.

 Guest Contributor: Nivi Watson

Hopping into a fresh style of decor this Easter season

RH Business Marketing Solutions

Easter is a time of new beginnings and fresh starts, so why not bring that into your home decor this year? There are many fun and trendy ways to do this, from using pastel colors to adding cute Easter-themed accessories. You can even go the DIY route and make some of your decorations! No matter what route you choose, just be sure to have some fun with it and enjoy your fresh Easter style.

How to use flower arrangements in your Easter decor

Flowers are a great way to add color and life to any room, and they can be especially beautiful in Easter decor. This is also a popular time to receive Easter gifts, and if flowers are a part of a gift received that's a bonus and can be added to your decor. There are many different ways to use flowers in your decorations, from centerpieces and wreaths to garlands and swags. You can even use flowers as part of a table setting! Just be sure to choose colors and styles that fit with your Easter theme.

Decorating with pastels

Pastel colors are a great way to add a touch of springtime cheer to your home decor. They're light and airy and can brighten up any space. Plus, they're perfect for Easter! Here are some tips on how to use pastels throughout your home this season. Wall color- pastel walls can be soft and subtle, or they can be bright and cheerful. Choose a color that fits your mood and style. And if your walls aren't pastel you can consider something else like window treatments! These include curtains, drapes, and valances in soft pastels are a great way to add color and brightness to a room. Furniture: A light pink sofa or chair can be a beautiful addition to a room, or try a light blue dresser for a fresh look. And finally add accessories like pastel pillows, rugs, and throws to your decor to complete the look.

Decorating with Easter-themed accessories

If you want to go all-out with your Easter decor this year, why not add some Easter-themed accessories? There are many different options available, from figurines and statues to Easter baskets and eggs. You can find these items at most stores, or you can even make your own! One of the most popular Easter traditions is decorating eggs. This can be a fun activity for the whole family, and there are many different ways to do it. You can use traditional Easter egg colors like pastels or bright hues, or you can get creative with your designs. You can use paint, stickers, or markers to decorate your eggs, or you can try something new like adding glitter or jewels. Be sure to display your eggs in a fun and festive way once they're done, they make for good decorations in the end!

Creating an Easter centerpiece

If you want to go all-out with your Easter decor this year, why not try creating a centerpiece? This can be as simple or as elaborate as you want it to be, and there are many different ways to do it. You can use flowers, eggs, bunnies, or any other Easter-themed items to create your centerpiece. And don't forget the Easter gifts! Easter gifts are beautiful as if and full of amazing spring colors, so why not use them as a decoration? Placing them around your fireplace, or on a table as a centerpiece adds a pop of color to your surroundings!

This year, try using flowers, eggs, bunnies, or any other Easter-themed items to create a fresh feel to your home and holiday. You can also use Easter gifts as part of your decorations! There are many different options available when it comes to decorating for Easter and we hope our tips are helpful when the time comes to decorate your home! Happy Easter!

Guest Contributor: Andrew Adams

7 Tips to Make your Home Baby-Ready

RH Business Marketing Solutions

If your baby is on its way, there are probably a million things on your mind at the moment. Preparing the nursery and shopping for everything on your little one’s needs list are only the tip of the iceberg when it comes to all those things you need to do before the big arrival. Your home could probably use some prepping as well. You don’t have to go through a massive remodeling project if you don’t want to, but there are a few things you can do in order to make your home more baby-friendly.

Clean the house thoroughly

The first task on your to-do list is to make sure the crawling space is clean and safe. You still have a few weeks left to take care of this, so you shouldn’t rush it. Take one room at a time and wash every surface thoroughly, even if this means taking everything out of its place and then putting it back in later on. Pay special attention to the places that are hard to reach and can’t be cleaned easily, such as between sofa cushions or underneath furniture. It’s also a good idea to get rid of any clutter that might pose a threat once your baby starts crawling around the house.

Pick a room

You need to designate one room in the house as a nursery. The general rule is to pick the quietest room in the house, which is also away from any noise sources that might disturb your baby’s sleep at night. Next, decide whether you want to use an existing room or convert it into a nursery. If you choose the latter, you will probably have some work to do before you can move all those cute toys and baby products inside – rearrange furniture, paint walls, etc.

Childproofing

If you want to make sure that your child won’t get hurt when crawling around and exploring their new environment, childproofing is a must. There are many ways to do it, including installing safety gates at the top and bottom of the stairs, covering sharp table corners with protective foam, covering all electrical outlets with plastic caps or placing locks on cabinets containing chemicals and other unsafe items in them.

Cover sharp corners

Baby-proofing your home is one of the first things you should think about when it comes to making your home baby-ready. Cover all sharp corners with special caps and install doorknob covers on all doors that lead to rooms you want your little one to stay away from (e.g. basement). Move heavy pieces of furniture away from windows and balconies as well as from electrical outlets. If there’s a window blind in your house, make sure you secure it properly so that it doesn’t hurt your little one if they pull it down thinking it’s a toy.

Get the necessary things for the baby

If your first child arrives, don't fall into the trap that most parents fall into. Don’t buy too many things because babies grow very fast! When it comes to baby cosmetics, choose proven manufacturers. Buy products that are natural and that will be gentle on your baby's skin. Avoid any products with aggressive ingredients. If you find it difficult to decide, you can always contact your friends who already have children.

When you need to decide on clothes, choose one made of organic material. Such clothes are of high quality and will last longer. At the same time, organic cotton is grown without the use of any chemical fertilizers and pesticides. Organic cotton is most suitable for baby's delicate skin. Baby clothes from Australia is safe, reliable and will make your baby comfortable with every move.

Don't overdo it with toys

Baby products are everywhere, and they come in all shapes and colors. But what do you really need? The best way to find out is to get recommendations from trusted sources. Try asking your friends, family and neighbors with kids for their must-haves and can’t-live-without items.

When it comes time to shop, look for quality over quantity. Keep an eye out for well-made pieces that grow with your child or can be passed on to other kids in the family.

No matter how many products you have, keep in mind that babies don’t necessarily need all the bells and whistles. A lot of parents tend to overbuy when it comes to baby things. Find what works for your lifestyle and stick with it as much as possible. Remember, you can always add to your collection later on.

Get organized

 You’ll want to get organized early on, because the first few weeks with your new baby will be busy and chaotic enough without having to worry about where things are. Consider using a cloud-based organization system or creating a Google Doc with all the details you need for each room in your house so that you don’t have to search through different apps or sticky notes for what you need.

We believe that these tips were useful to you and that you will enjoy with your baby!

Mike is an Australian business consulting specialist. He’s working with companies that outsource their IT maintenance. He often writes about technology, business and marketing and is a regular contributor on several websites.

Guest Contributor: Mike Parsons

Cabinet Resurfacing in Canada: How to examine them before starting your project

RH Business Marketing Solutions

Cabinet resurfacing in Canada can be a daunting task. Before you start your project, you must take note of many things. This blog post will discuss how to examine them before beginning the cabinet resurfacing process. 

We will also cover what you should determine before beginning the process, ensure that you do it correctly, and what kind of materials you'll need for this type of project. We will also cover how long it takes to finish the project, and lastly, we will discuss who you should hire to help with your project. This blog post is meant for homeowners interested in doing their own cabinet resurfacing in Canada.

Before starting the cabinet resurfacing process

Before beginning this project, you should consider several factors., these include, but are not limited to:

  • Material of your Cabinets in Canada Home

  • Schedule the time of year when it's better to do this type of Project

  • What kind of materials will you need for this Project

  • How long will the process take

  • Hiring an expert on Cabinet Resurfacing in Canada to help you

Check the Material of your Cabinets in Canada Home.

First, let's examine what materials they are made out of. Stains and finishes may require specific materials to properly adhere to the surface.

One of the most crucial aspects of cabinet resurfacing is getting through finish coats. It's best to remove all finishes because they are not designed for high humidity. All stringed lacquers can be removed easily with a paint stripper, but you can sand them off with an orbital sander when that fails. You will have to check with your local hardware store for the most effective way to remove any finish coats on particleboard.

Other things to check:

  • Assemble the hinges securely.

  • If you notice that they are lifting up or falling out, it's best to replace them.

  • Check for any loose screws on both the fronts and backs.

  • It's best to try not to tighten them too much because this will only cause damage to your closets.

  • Look for any areas that have started to warp or bow.

  • If you see these, it's best to replace these sections, not resurface over them.

  • Check for cracks on corners, sides, and backs.

  • Do not resurface over these since they will continue to cause damage later on if you see these. It's best to replace these sections entirely before starting a cabinet resurfacing job.

Schedule the time of year when it's better to do this type of Project

Before starting this project, you need to check the weather in your area. Humidity will impact how well your Cabinet Resurfacing in Canada goes. If they are made of softwood such as pine and birch, they swell with higher humidity. Proper weather conditions are essential in your Project and the life of the new finish. Painting over excessively hot or cold surfaces could change the temperature of the paint and either shrink it or make it expand. You can do outside projects between spring and summer, but be careful about doing them too close to any heat waves because you don't want to end up with cracked boards. If you wish for your new finish to stick well, you might have to wait a few weeks for the humidity level to go down.

Materials will you need for this Project.

Next, we recommend having all materials prepared before starting this Project. If you have suitable materials on hand, it is possible to do this renovation in one weekend rather than wait weeks or months to complete it. If you do not want to save money on this project, try using the following materials:

  • Putty knife

  • Sanding block

  • Fine grit sandpaper (100 to 180)

  • Dyes and stains (if necessary)

  • A cabinet grade polyurethane varnish

  • A water-based or oil-based primer for bare wood surfaces

  • Clear gloss polyurethane varnish.

Because different types of Cabinets in Canada have different materials, you should also check with your local hardware store to see if there are any other things you'll need since they could be different.

Cabinet Resurfacing Process

Now, let's discuss ensuring that the cabinet resurfacing process is done correctly. To start with, you'll need to clean your Cabinets in Canada before you begin any work on them. Make sure they are 100% free of dirt and dust, so you won't have to worry about getting it on your new finish. Once they are spotless, you can sand them with a sanding block or an orbital sander. You should not smooth all surfaces equally because you'll want to avoid uneven walls. Start with the flat surfaces, move onto the edges, and finish by sanding around the doors and handles since they tend to be more rounded than usual.

The next step is applying a pre-stain wood conditioner to all surfaces. If you notice any lighter or darker spots after this step, continue sanding until the problem areas are gone and repeat the pre-stain wood conditioner application. You should also be careful about skipping priming because it will increase the chance of your doors sticking together when closed and prevent stains from absorbing correctly.

After staining, you can apply a clear coating of polyurethane varnish to lock in the color and protect your Cabinets in Canada from water damage for many years.

Hiring an expert on Cabinet Resurfacing in Canada to help you

Lastly, let's cover who should be hired to help with this Project. We recommend hiring a professional Cabinet Resurfacing in Canada because they have experience working with different Cabinets in Canada and have been trained to apply the proper pressure to ensure a smooth finish. They also have all the required equipment for this Project, making it possible to do it quickly since they don't have to worry about purchasing any materials.

If you decide that you would instead complete this Project yourself, we recommend asking a friend to help. However, keep in mind that cabinet resurfacing is different from painting and requires specific tools and expertise. 

We got you covered!

It's a lot to think about when you have a cabinet that needs to be resurfaced, but it's worth it. To start a job like this, you need to think about the materials, the process, and the budget. Don't hesitate to call Cabinet Refinishing & Resurfacing if you need more information or help figure out how long your project will take. We can help you with all of these things. The best way to find out more is to visit our website or call us at (604) 670-6970.

Drywallers Edmonton: Common Drywall Mistakes to Avoid

RH Business Marketing Solutions

Drywallers in Edmonton are always worried about making mistakes, especially when it comes to the most common ones. When it comes to home renovation, most people think they can do it all themselves. While this may be true for some things, drywall jobs in Edmonton are one area where you definitely don't want to cut corners. 

Inexperienced Drywallers in Edmonton can easily make common mistakes that cost them time and money. In this blog post, we'll go over a few of the most common mistakes and how to avoid them. Whether you're an expert or a novice DIYer, don't miss this helpful advice!

Mistake 1: Not reading the instructions carefully.

Many instructions assume you already know what you're doing. If you don't read them carefully, it's easy to make common mistakes like putting up too many sheets or using the wrong type of screws. If you're a novice, it's best to read all of the instructions, so even if you forget something, you can always double-check.

Here are a few tips so you won't commit this mistake:

1. Make sure you've got all the drywall screws and nails you'll need, as well as wooden joist hangers and corner beads

2. Read up on how to cut and attach your drywall sheets, so they fit perfectly into place

3. It's better if you have a plan in place or at least know where you want your project to go before you start.

4. Hire a professional instead: This job is best left to the experts. Regardless of your experience with this project, you'll never be able to get a professional finish if you try and cut corners.

Mistake 2: Cutting the drywall too small.

One of the most common mistakes experienced, and novice DIYers make cutting the material pieces too small. If you cut your pieces too small, there's no room for error if your measurements are off, and you could end up with a poorly patched area that looks worse than before.

How to avoid this mistake:

1. Measure your wall and make sure you cut your pieces as close to that size as possible.

2. Use a straight edge to ensure a clean line before cutting.

3. Always use sharp, high-quality tools to avoid jagged edges and frayed material

Mistake 3: Not using a straight edge

Using a straight edge is one of the most essential skills for drywall jobs in Edmonton. It's also one of the easiest to take for granted. You may think you're doing a good job even without a straight edge, but once you get your finished pieces up on the wall and step back, you'll realize just how much of a difference it makes.

How to avoid this mistake:

1. Use a straight metal edge that you can screw into your work area, or use an L-shaped piece of scrap wood if you don't want to drill holes in your drywall.

2. When measuring for cuts, make sure to hold the straight edge along the wall and measure to ensure your measurements are accurate.

3. If you're hanging sheetrock in an attic, use a carpenter's level for extra assurance that everything is plumb.

4. Hiring professional drywallers: We'd recommend hiring a professional in Edmonton if you're not very handy around the house for this project. Even experienced do-it-yourselfers should consider hiring out so they can guarantee their walls will be straight and even.

Mistake 4: Not using enough screws or nails.

Inexperienced Drywallers in Edmonton frequently slap up the material without enough screws or nails. If you don't use enough fasteners, your sheetrock will likely fall off the wall within a few months. The good news is that avoiding this error is simple. By simply adding more fasteners, you'll get better results in the end.

How to avoid this mistake:

1. Always follow the manufacturer's instructions for the number of screws or nails you should use, as this varies depending on the sheetrock material itself and where it's being installed (i.e., ceilings vs. walls)

2. Use a nail gun if possible; they make fastening very easy.

3. Hiring a professional: If you're not familiar with drywall jobs in Edmonton, this is another project best done by professionals. You can always learn how to use a nail gun and measure correctly, but working with sheetrock requires practice and experience to get a quality finish.

Mistake 5: Not using the correct type of screws or nails.

If you're not using the correct type of screw or nail on your drywall jobs in Edmonton, then there's a good chance it'll come down on its own within a few months. It's also likely that you'll be left with more holes in your walls than if you had used an incorrect screw or nail, to begin with.

How to avoid this mistake:

1. Follow the manufacturer's instructions when picking screws and nails for your drywall project

2. Hiring drywall contractors in Edmonton: If you're not familiar with the installation process, don't be afraid to ask for advice from drywallers in Edmonton. They might not have the same screws or nails you're looking for, but they can point you in the right direction.

Mistake 6: Putting the screws or nails in the wrong place.

It's common for people to hang their panels at the wrong height or to use screws that are too long, but these two things aren't the only ones. The first mistake will make your walls look as though they're sagging or leaning to one side, while the second mistake is more of a safety hazard. Suppose you drive too long of a screw through your drywall, especially into studs located behind your sheetrock. A person could be hurt or damage an appliance such as a refrigerator or oven if the protruding screw is left exposed.

How to avoid these mistakes:

1. Find the studs in your wall with a stud finder before you start nailing or screwing them in. This way, you know where the studs are behind the drywall.

2. Don't drive screws too far into your sheetrock or through your studs

3. Use a nail gun to make sure your sheetrock isn't damaged or that you don't accidentally hit any nails previously driven into the wall

The Verdict: DIY or Go Pro?

Our advice is to hire professional drywallers in Edmonton. If you're not very familiar with putting up sheetrock, then there's no shame in hiring someone who knows what they're doing to handle this project for you. Not only will your walls be much straighter and more even when the job is complete, but less time will be wasted, as well. If you go with a professional, they'll likely have all the tools and screws or nails that you need for your sheetrocking project. You'll be much happier if you hire a professional to do the job for you. Plus, it can be nice to let someone else do the work for you.

Getting it right- the first time!

Mistakes happen, but that doesn't mean you can't learn from them. If you have a project the same as this or are thinking of becoming one, avoid these common mistakes. There are experts at Edmonton Drywall Contractors who can help fix your error if you do it. Get all your drywall requirements met today.

Will Getting My Furnace Cleaned Make it New Again? | Abbotsford Duct Cleaning

RH Business Marketing Solutions

Maintaining your furnace's cleanliness during the warmer months is essential if you want to keep your house warm and comfortable throughout the year. This is because the dust and dirt that gathers on the components within the blower compartment of your furnace can affect the whole system, not to mention, may cause unsafe conditions.

Generally speaking, a furnace should be thoroughly cleaned and disinfected once a year, depending on the model. Regular cleaning will not only keep your HVAC system running efficiently and ensure that it lasts for years to come, but it will also prevent your ducts from becoming clogged and dispersing dust and debris throughout your house.

Let's take a closer look at some of the specific benefits of cleaning your furnace on a regular basis. 

The Benefits of Furnace Cleaning

1. It will perform at an optimal level.

Better furnace performance is one of the most significant advantages of yearly furnace cleaning. If your furnace has a clogged filter, a lower volume of air flows across the heat exchanger, which would mean that it will need to use more energy to operate in longer cycles.

As well, If the heat exchanger of your furnace, an essential and costly component which acts as an insulator, is coated with dirt, the air flow will not be able to absorb enough heat, which would ultimately increase the amount of time the furnace is required to function. 

When all the components of your furnace are cleaned properly, the furnace will operate at a faster pace and will not have to run as long to generate heat in your house.

2. It will operate quietly. 

An unmaintained furnace may shake more and become more rackety than you expect if not serviced regularly. Your furnace is typically one of the noisiest machines in your house. The rumbling and heavy noises of the furnace heating up will be heard regularly if your furnace is not cleaned properly on a regular basis. . 

With time and use, your furnace might have screws that come loose, panels that are no longer attached properly, and noises that intensify. But, when you regularly maintain your furnace, you will be able to address all these issues, thus mitigating any unwanted noises you might hear from your machine. 

3. Early detection of issues.

Prevention is essential, and with regular repair and maintenance, you can expect your furnace to survive for many years.

Imagine you have a defect in your heat exchanger which has been left unfixed. Not only may this cause safety issues involving carbon monoxide, but it may also cause the whole furnace to malfunction. This and other issues may be detected early on with a furnace cleaning or servicing near you.

Performing a visual and physical check of your furnace is one of the most important steps you can take to become aware of any issues which might be present. During an HVAC inspection, a technician may find that a fan is stuck or a furnace component is failing. It is possible to avoid worse difficulties in the future if you keep hold of these minor issues.

Why should you get your furnace cleaned regularly?

A new furnace is more expensive than keeping an old one up to date. Not to mention, due to the increasing price of conducting business and the knowledge required to install HVAC equipment, furnace installation fees may be much more than the expense of the furnace itself. So, you should always make sure to get your furnace cleaned to avoid a hefty replacement bill. . 

So, what's the verdict? Is it worth it to get a furnace cleaning?

The answer is a resounding 'Yes!' Furnace cleaning will definitely improve your system's efficiency and eliminate any built-up dirt or grime. 

Failure to clean your furnace regularly may result in various problems. These issues can sometimes negatively impact your indoor environmental quality, risk your family's health, and even cause your unit to break down.  By regularly inspecting your furnace and air filters, you may catch most of these issues before they become severe.

Have your cleaning schedule with us! 

Contact Abbotsford Duct Cleaning today if you need a furnace duct cleaning  and want to maintain the air quality in your house as quickly as possible. 

With our experts on the job, you can rest easy knowing that your furnace ducts and vents will be properly cleaned and that the overall air quality of your home is at optimal levels. In addition, we are constantly striving to keep our pricing fair so that you may get the most out of your hard earned money. 

To know more about what services we can offer for you or to book a furnace cleaning, feel free to contact us today — we guarantee you won't be disappointed!


Beginner’s Guide to Essential Garden Tools

RH Business Marketing Solutions

Getting into gardening is very exciting, but at the same time, it can be overwhelming as well, particularly if you’re a first-time gardener. Everything is new and there’s so much to learn. It’s not just about planting seeds in the soil and waiting for them to grow.

Fortunately, there are many garden tools that can make it easier for you to tend to your new garden but you need to be careful not to go overboard when purchasing them. They can cost a lot and take up a lot of space, so stay focused and make wise and practical choices.

To help you with that, here’s a list of 9 essential garden tools to get you started with your first garden project.

Gardening gloves

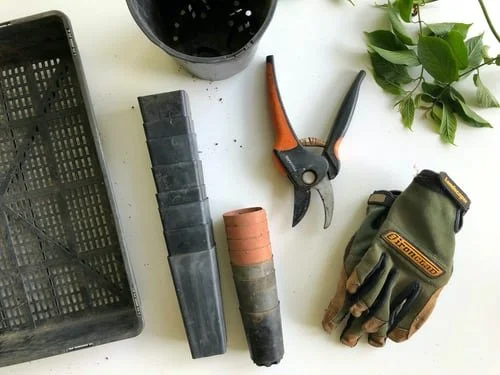
Gardening gloves may not seem to be a real tool, but they are an essential accessory that will protect your most valuable tool - your hands. They will also protect your wrists and arms from scratches, callouses, and heavy dirt – cloth, leather, rubber-coated or neoprene gloves.

Pruning shears

Hand pruners, also called secateurs, will help you control those plants that are getting out of control. Anvil-style pruners are ideal for dead wood, bypass pruners are more suited for green wood and live plants, whereas the ratcheting pruners offer more cutting strength so if you have weaker hands due to arthritis, these will be perfect.

When picking this tool, make sure they fit easily in the palm of your hand and keep them regularly sharpened to ensure cleaner cuts and less injury to plants.

Garden knife

A hori hori is the first tool most experienced gardeners recommend as it’s a sturdy, Japanese tool designed to work as a knife, a shovel, a ruler, and a few other things. You can use it for digging holes when planting seeds, for weeding and loosening the soil. It’s a practical tool but if you’re looking for something smaller, more compact but equally practical, consider getting automatic knives – these are also made of excellent materials and feel quite substantial yet easy to carry on around the garden on a daily basis. They’re built for function and longevity, are quite lightweight and ergonomic, which is very important for those long days in the garden.

Round head shovel

Shovels come in a great variety of designs and sizes, but a good-quality round head shovel will take care of most of your digging tasks. You’ll be using it to dig larger holes, break apart dirt, and transplant soil. If you have a container garden, instead of a regular shovel, a hand trowel is the ideal digging tool to transfer soil to containers and transplant seedlings.

The trio – rake, spade and hoe

This must-have trio consisting of a rake, spade and hoe is what will help you complete most of your garden chores. You’ll be using a rake to collect debris and fallen leaves in the garden so as a beginner, you'll benefit most from a leaf rake. Garden rakes are more heavy-duty than that and are typically used for spreading and levelling the soil in the garden.

A spade is used for digging, cutting, and defining edges in the garden. Generally, spade’s handle sizes vary from long or short, and as much as the long ones provide more leverage for cutting, they are also heavier than the short ones. When purchasing your first spade, go for the one that feels comfortable to use and has a strong timber handle with a stainless steel head.

The best tool for cultivating, mounting soil and weeding in your garden is a hoe. They also come in various types depending on the type of garden you have. For a vegetable garden, you’ll need a wide and sturdy hoe, whereas, for a perennial garden, a thinner hoe is ideal.

Garden hose

Water has an essential role in gardening as it keeps the plants hydrated and distributes all the nutrients from the soil to plant cells. Watering your plants regularly can be a tiring activity, so the right watering hose can definitely help.

When picking a hose, consider the material it is made of as it will determine its durability. Hoses are usually heavy-duty and last longer, while vinyl hoses are lightweight, cheap, but not as durable. They also come in different diameters, typically ½ inch, 5/8 inch and ¾ inch. The most widely used types are those with ½ inch in diameter.

Wheelbarrow

A wheelbarrow is a useful piece of equipment when you need to transport fertilizers, plants, tools soils and many other things. However, not all wheelbarrows are practical so be picky. The traditional wheelbarrow with a dual-handle and single wheel is hard to balance especially when fully loaded, and so you have uneven terrain, opt for a single-handle two-wheel model that’s easier to balance.

First-time gardeners don’t need to obsess about having a ton of tools when starting a garden. These 9 essential gardening tools will be enough to start your gardening endeavour and they’ll not only enable you to reduce time and save energy but also improve your safety and efficiency when doing gardening activities.

Guest Contributor: Diana Smith