Google+

contact us

Use the form on the right to contact us.

Day or Night, we are here to serve you. Leave your plumbing problem to us.


Tinley Park, IL

(708)845-7922

Residential and Commercial plumbers and plumbing contractors available in Orland Park, Tinley Park, Oak Lawn, Palos Heights, Midlothian, Oak Forest, Homer Glen, Mokena, Frankfort, and the surrounding Chicago South Suburbs. Emergency plumbers.

copper water lines.jpg

Kevin Szabo Jr Plumbing Blog

Kevin Szabo Jr Plumbing is Tinley Park, Orland Park, Oak Forest, Midlothian, Orland Hill, Homer Glen, Mokena, Frankfort, Crestwood, Palos Heights, Oak Lawn, local plumber. Read our blog for advice, tips, a good laugh, and basic home improvement.

**We are moving our old blog to our new and improved website. Too see all our posts visit kevinszabojrplumbing.blogspot.com

Filtering by Category: June 2024

How to Install a Kitchen Sink Plumbing System?

RH Business Marketing Solutions

Installing a kitchen sink plumbing system can seem like a daunting task, especially if you're not a seasoned DIY enthusiast. However, with the right tools, materials, and a clear step-by-step guide, you can successfully install your kitchen sink plumbing system and ensure it functions perfectly. 

Whether you’re replacing an old sink or installing a new one, this guide will walk you through the process, offering tips and insights along the way. Not only will you save money by doing it yourself, but you’ll also gain a valuable skill that can come in handy in future home improvement projects.

1. Gather Your Tools and Materials

Before you begin, make sure you have all the necessary tools and materials. You will need a sink, faucet, plumber’s putty, pipe wrench, adjustable wrench, pipe cutter, Teflon tape, PVC pipes, and fittings. Having everything on hand will streamline the installation process and prevent unnecessary delays.

2. Turn Off the Water Supply

Before starting any plumbing work, it's crucial to turn off the water supply. Locate the shut-off valves under your sink and turn them off. If there are no shut-off valves, you will need to turn off the main water supply to your home. Open the faucet to drain any remaining water from the pipes.

3. Remove the Old Sink

If you are replacing an old sink, you will need to remove it first. Start by disconnecting the water supply lines and the drain pipes. Use a pipe wrench or adjustable wrench to loosen the nuts connecting the pipes to the sink. Carefully lift the old sink out of the countertop, being cautious not to damage the surrounding area.

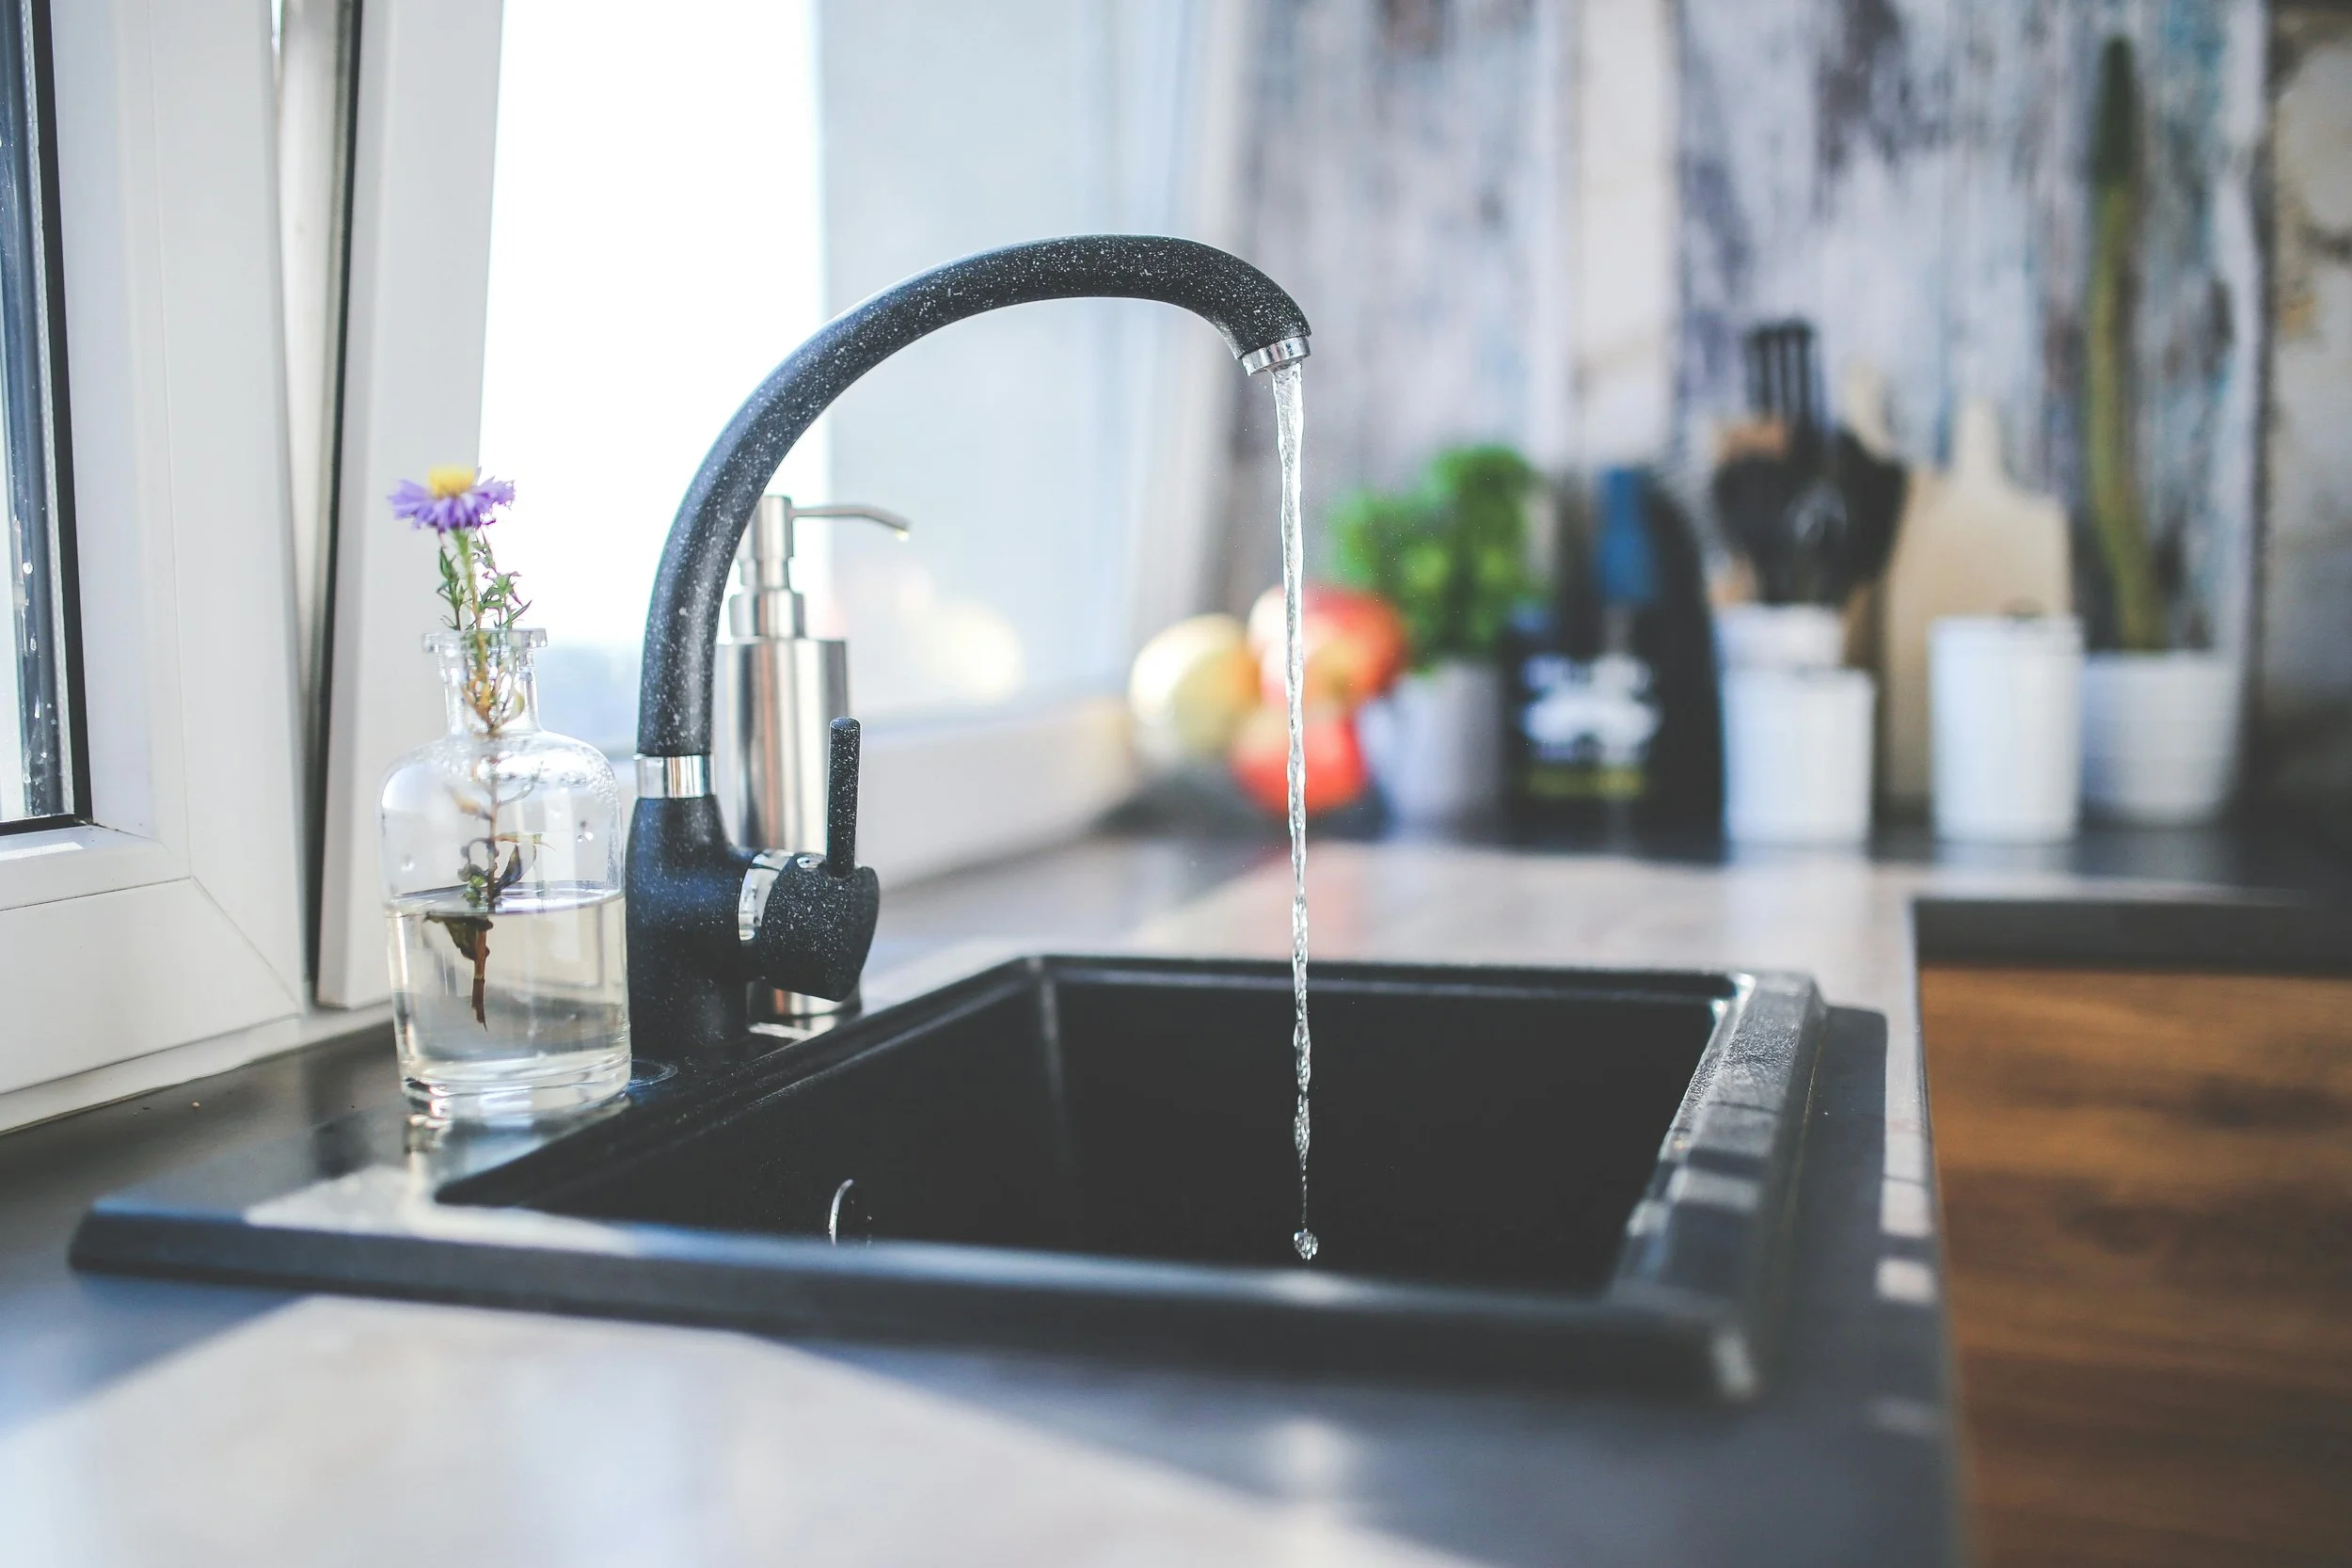
4. Install the Faucet and Accessories

Before placing the new sink into the countertop, it's easier to install the faucet and any accessories, such as a soap dispenser or sprayer. Follow the manufacturer’s instructions for installing the faucet. Apply plumber’s putty around the base of the faucet to create a watertight seal. Insert the faucet through the holes in the sink and secure it with the provided nuts and washers.

5. Position the New Sink

Carefully place the new sink into the countertop opening. Make sure it fits snugly and is level. If the sink is not level, use shims to adjust it. Apply a bead of silicone caulk around the edge of the sink to create a watertight seal between the sink and the countertop.

6. Connect the Water Supply Lines

Once the sink is in place, connect the water supply lines to the faucet. Use Teflon tape on the threads of the supply lines to ensure a tight seal. Tighten the connections with a wrench, being careful not to overtighten and damage the fittings. Turn on the water supply and check for any leaks.

7. Install the Drain Assembly

Next, install the drain assembly. Start by applying plumber’s putty around the drain opening in the sink. Insert the drain flange and press it firmly into place. From underneath the sink, attach the gasket and locknut to secure the drain flange. Tighten the locknut with a pipe wrench.

8. Connect the P-Trap and Drain Pipes

Attach the P-trap to the drain tailpiece using a slip nut and washer. Connect the other end of the P-trap to the drain pipe coming from the wall. Ensure all connections are tight and secure. The P-trap prevents sewer gases from entering your home and catches debris that could clog your plumbing system.

For more detailed information on bathroom sink plumbing, you can visit Sink plumbing.

9. Test for Leaks

After all the connections are made, turn on the water supply and test for leaks. Run water through the faucet and check all the connections for any signs of leakage. If you find any leaks, tighten the connections or apply additional plumber’s putty or Teflon tape as needed.

10. Clean Up and Finalize the Installation

Once you are sure there are no leaks, clean up any excess plumber’s putty or silicone caulk. Replace any items that were removed during the installation, such as cabinet doors. Your new kitchen sink plumbing system is now ready for use.

FAQs

What tools are essential for installing a kitchen sink plumbing system?

Essential tools for installing a kitchen sink plumbing system include a pipe wrench, adjustable wrench, pipe cutter, Teflon tape, plumber’s putty, and PVC pipes and fittings. Having these tools on hand will ensure a smooth installation process.

How long does it typically take to install a kitchen sink plumbing system?

The time required to install a kitchen sink plumbing system can vary depending on your experience and the complexity of the installation. On average, it can take between 3 to 5 hours, including the time to remove the old sink and install the new one.

Can I install a kitchen sink plumbing system by myself, or do I need a professional?

A3: While installing a kitchen sink plumbing system can be a DIY project for those with some plumbing experience, it’s important to be comfortable with basic plumbing tasks. If you’re unsure or encounter any issues, it’s best to consult a professional plumber to ensure the installation is done correctly.

What should I do if I encounter a leak during the installation?

A4: If you encounter a leak during the installation, first try tightening the connections. If the leak persists, apply additional Teflon tape or plumber’s putty to the threads. If you’re unable to stop the leak, it may be necessary to consult a professional plumber for assistance.

Conclusion

Installing a kitchen sink plumbing system is a manageable task with the right tools, materials, and guidance. By following these steps, you can successfully install your kitchen sink, ensuring a functional and leak-free plumbing system. Remember to take your time, double-check all connections, and test for leaks before completing the installation. 

With a little patience and attention to detail, you can achieve a professional-quality result and enjoy the satisfaction of a job well done. Whether you’re upgrading your kitchen or tackling a home improvement project, installing a kitchen sink plumbing system is a valuable skill that enhances your home and saves you money.

Top 10 Benefits of Laminate Flooring for Your Home

RH Business Marketing Solutions

Choosing the right flooring for your home is a significant decision that impacts not only the aesthetic appeal but also the functionality and maintenance of your space. Among the various options available, laminate flooring stands out for its versatility, durability, and cost-effectiveness. This popular flooring choice has evolved significantly over the years, offering homeowners a wide range of styles and benefits. 

In this guide, we'll explore the top 10 benefits of laminate flooring for your home, providing you with compelling reasons to consider this option for your next renovation project.

1. Durability

Laminate flooring is renowned for its durability. Made from high-density fiberboard and covered with a protective layer, laminate floors are resistant to scratches, dents, and stains. This makes them an excellent choice for high-traffic areas and homes with children or pets. Unlike hardwood floors, laminate does not warp or swell with changes in humidity, ensuring a long-lasting and resilient surface.

2. Cost-Effectiveness

One of the most attractive features of laminate flooring is its affordability. Laminate floors offer the look of hardwood, stone, or tile at a fraction of the cost. This cost-effectiveness makes it an ideal option for homeowners who want to achieve a high-end look without breaking the bank. Additionally, installation costs for laminate are generally lower compared to other flooring types, adding to the overall savings.

3. Easy Installation

Laminate flooring is designed for easy installation, often featuring a click-lock design that allows the planks to snap together without the need for nails or glue. This makes it a popular choice for DIY enthusiasts and can significantly reduce installation time and labor costs. For more information on quality laminate flooring, visit Laminate Flooring.

4. Aesthetic Variety

Laminate flooring comes in a wide range of colors, textures, and patterns, mimicking the appearance of natural wood, stone, or tile. This variety allows homeowners to choose a style that complements their interior decor and personal preferences. Whether you prefer the rustic charm of weathered wood or the sleek look of polished stone, there's a laminate option to suit your taste.

5. Low Maintenance

Maintaining laminate flooring is simple and hassle-free. Its protective top layer resists stains and spills, making it easy to clean with regular sweeping and occasional damp mopping. Unlike carpet, laminate does not trap dust, pet dander, or allergens, contributing to a healthier indoor environment. For busy households, the low maintenance requirements of laminate flooring are a significant advantage.

6. Environmental Sustainability

Many laminate flooring products are made from recycled materials and are designed to be eco-friendly. Additionally, the production process for laminate requires fewer natural resources compared to hardwood flooring. By choosing laminate, homeowners can enjoy the look of natural materials while supporting sustainable practices.

7. Versatility in Application

Laminate flooring is suitable for almost any room in the house, including living rooms, bedrooms, kitchens, and even bathrooms. Its moisture-resistant properties make it a versatile choice that can withstand the demands of different environments. With advancements in technology, waterproof laminate options are also available, further expanding its use in areas prone to moisture.

8. Comfort Underfoot

Laminate flooring is softer and warmer underfoot compared to tile or stone, providing a more comfortable walking surface. Some laminate products also come with built-in underlayment, which adds cushioning and sound insulation. This can help reduce noise levels in the home and provide additional comfort, especially in spaces where you spend a lot of time standing or walking.

9. Enhanced Property Value

Installing laminate flooring can enhance the overall value of your home. Its aesthetic appeal, combined with its durability and low maintenance, makes it an attractive feature for potential buyers. A well-maintained laminate floor can create a positive impression and contribute to a higher resale value when it comes time to sell your property.

10. Health Benefits

Laminate flooring is a healthier option compared to carpets, as it does not trap dust, allergens, or pet dander. This can significantly improve indoor air quality, making it an ideal choice for households with allergy sufferers. Additionally, the ease of cleaning laminate floors helps maintain a cleaner and more hygienic living environment.

FAQs

Can laminate flooring be installed over existing flooring?

Yes, laminate flooring can be installed over most existing floors, including concrete, vinyl, and hardwood, as long as the surface is clean, dry, and level. This makes it a convenient option for renovations, reducing the need for extensive floor preparation.

Is laminate flooring suitable for homes with pets?

Absolutely! Laminate flooring is highly resistant to scratches and stains, making it an excellent choice for homes with pets. Its durable surface can withstand the wear and tear caused by pet claws and accidental spills, ensuring a long-lasting and pet-friendly flooring solution.

How do I clean and maintain laminate flooring?

Cleaning laminate flooring is simple. Regularly sweep or vacuum to remove dust and debris. For deeper cleaning, use a damp mop with a mild cleaner specifically designed for laminate floors. Avoid using excessive water, harsh chemicals, or abrasive cleaning tools to prevent damage to the surface.

Can laminate flooring be used in bathrooms and kitchens?

Yes, laminate flooring can be used in bathrooms and kitchens, provided you choose a product with moisture-resistant properties. Waterproof laminate options are available and are designed to handle the humidity and moisture levels typical in these areas, ensuring a durable and attractive floor.

Conclusion

Laminate flooring offers a multitude of benefits that make it an excellent choice for any home. Its durability, cost-effectiveness, easy installation, and aesthetic variety provide homeowners with a practical and stylish flooring solution. The low maintenance requirements, environmental sustainability, and health benefits further enhance its appeal. 

Whether you're renovating a single room or your entire home, laminate flooring is a versatile and valuable option that can meet your needs and exceed your expectations. By considering laminate flooring, you can enjoy a beautiful, durable, and easy-to-maintain floor that adds value and comfort to your living space.

Thoughts to Have When Buying and Selling a House

RH Business Marketing Solutions

Image Credit: alexbuysvegashouses.com

Buying and selling a home have a common denominator. Both are life-changing events that involve completing a major transaction, and it's not unusual to do both concurrently. It's important to put a lot of thought into buying or selling a home. Once the transaction is complete, the deal is sealed. Make your choices using the following important thoughts about buying and selling a home.


Considerations for Buying a Home

Location

Unless you choose to live in a mobile home, you can't change the location of a house. Think about how your new home's location will affect daily life. Location may also affect a home's price. A quiet neighborhood in a prime location will likely cost more than one near a busy road or airport. Can you trade a lower price for noise, or are you willing to pay for stunning scenery? 

Proximity to parks, shopping, dining, and stores may affect what home you decide on. So will the commute time to your job, and the location and quality of schools your children will attend.


Price

Price is the biggest concern for most home shoppers. You may experience problems when budgeting for other needs if the price of a home is too high. Many buyers avoid this issue by seeking a preapproval amount from their mortgage lender before they even begin house-hunting. The lender can also advise you on what your down payment should be.

If the home you decide on needs repairs, consider negotiating with the seller. They should be willing to work with you. But if a house is move-in ready, the price may be higher. You can save money by completing cosmetic repairs like cleaning carpets and freshening paint yourself.

Type and Size 

Be aware that a detached home will generally cost more than a townhouse or condo. Single-family homes also have more maintenance responsibilities. A family's basic needs are met by considering square footage, living space, and number of bedrooms. A home's overall layout and need for a basement, garage, or attic living space is affected by lifestyle.


Amenities

Amenities such as parks and pools in a residential community may come with the stipulation of paying homeowner association fees. Consider if the extra cost will fit your budget. If the fees include lawn care, an HOA may be a good idea for someone who doesn't have the time or equipment to maintain a property. Playgrounds for children can also be a plus.


What to Consider When Selling a Home

 Real Estate Agents

It's possible to sell a home without a real estate agent. However, it isn't easy. Selling a house without an agent can feel almost like having a part-time job. Home sellers find that having a real estate agent is worth the extra money it costs for their commission. They will manage documents and keep up with the paperwork needed to answer questions home shoppers may have. These documents include important information such as the age of your roof, insurance records, and records of home improvements.

Additionally, real estate agents are familiar with the market in various locations and can recommend a competitive price for a home. They know how to negotiate to get the seller the best possible price.


Features

Think about your home's best features and how you can play them up in listings and ads. Fireplaces, great views, upgraded kitchens, and spa-style bathrooms are "hot buttons" that many homebuyers are willing to pay more for. Location and certain neighborhoods are also desirable features that can make a difference.


Timing

Studying the real estate trends in a neighborhood is important for knowing the best time to sell a home. Locations that are experiencing growth may fetch a higher price than others. Holding out for a better price may be advisable in some areas. Timing is another reason it's a good idea to have an agent. It's their job to know the best time to sell.

In most places, spring is the best time to put a home on the market. Kids are out of school, making a move easier, and warmer weather is an inspiration. The competition can mean a quicker sell at a better price.


Preparation

It's easier to sell a home that has been prepped to show to potential homebuyers. Having enough time to get it ready before showing is important. A real estate agent will help you "stage" a home by removing personal items like photographs, toys, and hobby supplies. Along with neutral-colored walls and flooring, the staging strategy will help potential buyers imagine themselves in your home.

It's also wise to get a home's foundation, HVAC system, plumbing, roof, and electrical systems ready for a home inspection.


Written by Taylor McKnight, Author for Orbit City Partners

The Importance of a Calendar in a Home

RH Business Marketing Solutions

There are many important things that every home should have, like an oven or a microwave. However, one item that isn't usually listed as a necessity is a calendar, despite the wide-ranging benefits that owning one can make available.

First, let's take a look at what a calendar is and then we'll get into a few of the many reasons why millions of Americans choose to have them in their homes.


What is a Calendar?

A calendar is a type of chart that shows the days of the year, generally divided into months. Most commonly, they consist of 12 pieces of paper bound together with different images for each month. However, there are other types as well, including daily calendars that have a funny quote, trivia question, or another unique item for every day.

They have been used for thousands of years to track dates and seasons, as those of us who lived through 2012 will remember extensive discussions about the specific calendars used by the Mayans. The current standard is the Gregorian Calendar, introduced by Pope Gregory XIII in 1582. It superseded the Julian Calendar, named for Julius Caesar.


The Importance of a Calendar in a Home

Calendars are an important indicator of what day it is and which events are upcoming, as well as serving as a visual representation of the passage of time. This valuable information can be provided at a glance without having to look through text messages or emails for dates and times.

It can also help communicate other information to people in the household. If you're studying for a test, have a long-distance phone call or Zoom meeting scheduled, or have another reason to be at home but don't wish to be disturbed, putting it on the calendar will remind everyone that you'll need some privacy during that time.

Although many phones have calendars built-in, having a physical calendar provides multiple additional benefits. Roommates, family members, spouses, significant others, and anyone else living in the home can quickly see any appointments or events happening soon. It can also benefit older adults who might not be comfortable with technology and prefer the paper calendars with which they grew up.

They can also be used to count down the days until an event takes place. If you book a trip on March 21st that leaves on June 7th, for example, you can put a "1" in the corner of June 6th and add one number to each preceding day. You would then know that your trip begins in 79 days and can find out at a glance at any time what the current number is. 

Additionally, it can also remind you of those events to avoid double-booking. For example, if a friend invites you to a social gathering on Thursday at 7 PM, you can easily look at the calendar and see if you have anything else planned.


Calendar Add-ons to Have in Your Home

There are many items that can enhance a calendar's value and make its information both more accessible and easy to view. A sheet of paper or a series of sticky notes taped to the bottom, for example, can be used for certain dates that have multiple events and might not fit in the box. Simply write an arrow on the original date that points at the paper. 

Another idea is to use ink of different colors to help differentiate at a glance. For example, each person could get their own color to avoid having to write out their name every time and save space. Alternatively, each color could correspond to a different type: parties in black, medical appointments in blue, and dates in red.

Stickers can also be used as shorthand if the calendar is large enough and the stickers are small enough. A teddy bear could signify a visit with the grandkids, a phone could represent a call that needs to be made or received, or a heart could remind you that you have a date scheduled that evening.


Final Thoughts

Calendars make it easier to schedule and remember events, as well as provide that information in a concise way to others who live in or might be visiting the home. These are a few of the reasons why many people choose to display them instead of relying on electronic calendars on their cell phones or other devices. It's also common to use both, due to the overlapping benefits provided by each.


Written by Taylor McKnight, Author for Print Tech of Western Pennsylvania

How to Manage Your Medication at Home

RH Business Marketing Solutions

Many Americans take multiple medications, making managing them difficult. In fact, one in five people between the ages of 40-79 take five or more prescription drugs. Mismanaging these prescriptions can endanger your health.

Although keeping track of multiple prescriptions is difficult, you can take some simple steps to keep your medication schedule on track.


Consult Your Pharmacist

Use the expertise of your pharmacist to confirm your dosages and the times to take them. Your pharmacist can advise you on possible side effects of your medications and warn you about possible incompatibility of your prescriptions. They will also tell you what meds need to be taken with food and which should be taken on an empty stomach. Also, review your medication with the pharmacist every time you are given a new prescription to check for potential negative interactions.


Create a Schedule

You can easily overlook taking all of your medications if you do not have a schedule. You can create one on paper or on your computer. The schedule should note what to take and when. You can then initial the entries when you have taken your meds for the day. If your schedule is on paper, post it where you cannot overlook it. Have it open on startup if you use your computer. Use your phone to set an alarm to remind you when to take the medications. It's easy to overlook a dose or two without reminders.


Use a Pill Organizer

These simple items are quite effective and simplify taking your prescriptions. At the beginning of each week, you put your daily medications in squares marked by the days of the week. It doesn't take long to do, and it prevents you from wondering if you took that day's medication or not. If the square is empty, you did. The organizers are inexpensive and only require a time investment to use.


Notify All Medical Professionals of Your Medications 

Using multiple doctors and several pharmacies can be dangerous if they do not all have a complete list of your medications. Doctor A might prescribe a medication that interacts badly with your other medications, putting your health at risk. The same goes for pharmacists. Take the time to review your complete prescription list with each medical professional who you see. Doing so will prevent serious mistakes.


Check Your Pill Bottles Regularly

Like many people, you may keep old medication bottles around. To avoid problems, you need to safely dispose of old prescriptions. You shouldn't take them, and you definitely shouldn't give them to someone else.

You may also overlook how many refills you have left on your prescriptions. If you run out, it may take several days to get a new prescription from your doctor. You may suffer ill effects if you have to skip some of your medications even for a short time. Regularly checking your prescription bottles will help keep you on the right schedule.


Store Your Medication Properly

Store your medicines in a dry, cool place, as the labels say. if you still pop your prescription in the bathroom "medicine cabinet," they may lose their effectiveness. Put your bottles in a place that is not damp and does not become hot, even in the summer. And always put them where children cannot reach. That means up high and in childproof bottles.


Think Before You Drink 

Many prescriptions do not mix well with alcohol. Check with your pharmacist if drinking while taking your medications is okay. Combining the two can lead to bad side effects, including extreme drowsiness. This warning is also true for over-the-counter medications.


Only Take Your Own Prescriptions

Some people will take the leftover medications of others, particularly family members. You may think taking others' antibiotics is okay since you've had the prescription before. This behavior has several dangers. Most prescriptions do not work if you do not take a full dose. Also, your prescription list may have changed, and your current medications may not interact well with these "borrowed" pills. Only take medications prescribed just for you. Otherwise, you are taking chances with your health.


Take Medications In the Light 

Like others, you may remember your pills after you've gotten into bed and reach for them in the dark. No matter how many times you've taken your medication, you can become confused and take the wrong one. You should take your medicine when you are wide awake and in full lighting. These are simple rules that can prevent a medical emergency.


Medication Management

You need to manage your medications carefully, especially if you have multiple prescriptions. All of your doctors and pharmacists need to have a complete list of medications you are taking. You have to keep close track of when and how much to take. Proper storage and other factors are also important. It's easy to become careless over time, but you cannot afford a lapse when it comes to your prescriptions.


Written by Taylor McKnight, Author for Peak Mental Healthcare

Building a Weather-Resilient Household

RH Business Marketing Solutions

In Michigan, residents are all too familiar with the harsh and unpredictable weather patterns ranging from heavy snowfalls in winter to severe storms and tornadoes in the summer. Such conditions necessitate the need for homes that can withstand these extreme variations, ensuring the safety and comfort of their inhabitants year-round. Building a weather-resilient household in Michigan is not just a precaution; it's a necessity. By incorporating specific building features and maintenance practices, homeowners can protect their property from significant weather-related damage and reduce ongoing repair costs.

1. Understanding Your Local Climate

The first step in building a weather-resilient home is to thoroughly understand the local climate and the specific weather threats that are most likely to occur. This understanding will guide your decisions on what protective measures are most necessary and cost-effective. For instance, homes in coastal areas might require protection from hurricanes, whereas homes in the Midwest might focus more on tornado-resistant construction. Assessing historical weather patterns and consulting with local authorities can provide valuable insights into what safeguards are most appropriate for your area.

2. Strengthening the Roof

The roof is one of the most critical components of a home’s weather resilience strategy. Ensuring it is robust enough to withstand harsh conditions is essential. For residents of Michigan, MI roof storm damage is a recurring issue, making it imperative to invest in high-quality roofing materials and professional installation. Options such as metal roofing or high-impact shingles can provide enhanced protection against severe weather. Regular inspections and maintenance are also crucial to address any vulnerabilities promptly and to prevent minor damage from escalating into more significant problems.

3. Waterproofing Basements and Foundations

Water damage from flooding is a common challenge, particularly in areas prone to heavy rainfalls or where snowmelt is significant. Waterproofing basements and foundations can prevent moisture from penetrating the home, averting potential issues like mold growth and structural decay. Techniques such as applying waterproof sealants, installing sump pumps, and ensuring proper drainage around the foundation are effective ways to keep water out. Additionally, consider elevating electrical systems and appliances off the basement floor to avoid water damage during unexpected flooding.

4. Investing in High-Impact Windows and Doors

Installing high-impact windows and doors is crucial for homes in regions susceptible to hurricanes, tornadoes, or severe thunderstorms. These specialized fixtures are designed to withstand high winds and flying debris, preserving the integrity of the home and keeping the inhabitants safe. While the initial investment might be higher than standard windows and doors, the potential cost savings from avoided damage during a single storm can justify the expense. Moreover, these windows and doors can offer additional benefits such as improved energy efficiency and noise reduction.

5. Landscaping for Weather Resistance

Strategic landscaping is not only about beautifying your property but also about enhancing its resilience to adverse weather. Planting native trees and shrubs that are adapted to the local climate can help reduce soil erosion and manage stormwater runoff. Positioning trees strategically around the home can provide a natural windbreak, reducing the impact of high winds. However, it’s important to ensure that trees are healthy and trimmed to minimize the risk of branches falling on the home during severe weather.

6. Regular Maintenance Checks

Ongoing maintenance is key to ensuring that the weather-resilient features of your home remain effective. Regularly check and clean your gutters to prevent blockages that can lead to water damage. Inspect your roof for missing or damaged shingles, especially after severe weather events. Check seals around windows and doors and repair any leaks to keep moisture and drafts out. These routine checks not only help maintain the integrity of your home but also identify potential issues before they escalate into costly repairs.

7. Emergency Power Solutions

Power outages are a common occurrence during severe weather events. Investing in emergency power solutions, such as generators or solar panels with battery backup systems, can ensure that your home remains operational when the grid goes down. This can be particularly important for running sump pumps to avoid flooding, maintaining heating or cooling systems during extreme temperatures, and keeping communications devices charged and functional. Choosing the right size and type of generator or solar system requires an assessment of your home’s energy needs during an outage.

8. Utilizing Smart Home Technologies

Smart home technologies can significantly enhance your home’s resilience by providing real-time monitoring and automated control systems. Smart thermostats can adjust heating and cooling automatically, smart water leak detectors can alert you to potential flooding risks, and connected security systems can provide emergency alerts. These technologies not only add convenience but also offer enhanced safety features that protect your home and its occupants from weather-related incidents.

9. Building Materials and Construction Techniques

Choosing the right building materials and construction techniques is crucial for a weather-resilient home. Materials like concrete and steel are more durable and can withstand harsher conditions compared to traditional wood framing. Techniques such as elevated construction can be essential in flood-prone areas to raise the home above potential water levels. Consulting with a construction expert who specializes in weather-resistant buildings can provide insights into the best materials and methods for your specific location and climate.

10. Insurance and Financial Planning

Adequate insurance coverage is essential for any homeowner but is particularly critical for those in high-risk weather areas. Review your homeowner's insurance policy to ensure it covers common local disasters and consider additional coverage for floods or earthquakes, which are often excluded from standard policies. Financial planning for potential renovations and repairs after weather events can also alleviate the stress and burden of unexpected expenses. Setting aside a contingency fund for emergency repairs can help manage these financial risks more effectively.

Conclusion

Building a weather-resilient household involves more than just preparation; it requires ongoing attention and investment. By understanding the specific weather risks in your area, implementing robust building and landscaping practices, and embracing technology for home management, you can significantly increase the safety and durability of your home. Regular maintenance, coupled with appropriate insurance and financial planning, ensures that your home can withstand the elements, providing peace of mind and a secure living environment for years to come.

Important Considerations for DIYers: Installing Your Bathroom Vanity and Sink

RH Business Marketing Solutions

Few DIY projects can bring style, function, and added value to a bathroom like a vanity replacement. Of all the tasks involved with a bathroom remodel, this project ranks just behind a tub or shower replacement as the most complex.

However, with the right planning — understanding the tools you need, the prep work involved, and anticipating any problems — even the most inexperienced DIYer can successfully install a new bathroom vanity.

Just some of the benefits of installing a new vanity by yourself include:

  • Cutting costs: You’ll save hundreds of dollars by skipping the contractor. Materials and labor cost an average of $1,500 - $2,000 for vanity installations, depending on vanity type, total contractor hours, bathroom accessibility, etc. Do it yourself, and you can easily slash those expenses in half.

  • The satisfaction that comes with every DIY project. Go ahead and pat yourself on the back once you’re done. It’s natural to take pride in your handiwork!

  • Your own design style, front and center. With a bathroom remodel, specifically a vanity replacement, you can go with any aesthetic you like. Want a more modern look? Try an Art Deco or contemporary vanity. Is tradition more your thing? Country casual or rustic are great choices. When it comes to a new bathroom vanity, do some research and find your inspiration.

  • The confidence to tackle more complex DIY initiatives. Once you’ve completed a new vanity installation, what’s to stop you from replacing that old water heater or laying a new garage floor?

  • And much more

Ready to get started? Let’s review the key steps involved. 

First Things First: Materials & Tools

For tools, the minimum you’ll need include:  

  • Crescent/adjustable wrench 

  • Utility knife 

  • Hammer 

  • Pry bar 

  • Flat-head and Phillips screwdrivers 

  • Level 

  • Wall stud finder 

  • Power drill 

  • Tape measure.  

Supplies are also essential; you’ll need: 

  • 4-inch drywall screws 

  • Nails 

  • Plumber’s putty or tape (just in case) 

  • Shims 

  • A bucket (more on that later) 

  • A caulking compound.  

Oh, and don’t forget the new vanity and sink! Some vanity installations may require specialized tools, so be sure to check the installation manual before starting.

Get Accurate Measurements – Twice!

Nothing ruins a new bathroom remodel quite like a vanity that doesn’t fit. Always pre-measure your bathroom vanity area to ensure proper fit — then measure again to double-check! Most vanities are 16 to 772 inches wide.  

Pro tip: Mark the walls with the replacement vanity’s dimensions.

Choose Your New Vanity

Your new vanity is the centerpiece of your bathroom, so you can accessorize around the new vanity style or choose a vanity that already integrates with the existing décor if you’re swapping out the vanity and leaving the rest of the bathroom as-is.

Another important step is design, fit, and accessibility considerations. Let’s say you’re going with a double vanity (typically 72 inches) for your Jack & Jill bathroom, which has a regular-size vanity. In this case, you’ll need extra room for the countertop, plumbing fixtures, and more. Similar planning is required when replacing a traditional vanity with a wall-mounted floating vanity.

Disconnect Old Plumbing

The first step is to shut off the water supply to your existing vanity sink. Close the cold and hot water lines, then turn on each faucet to empty the lines. Next, remove the drain trap (the U- or S-shaped plumbing directly underneath your sink. Make sure you have your bucket ready as you clean any hair and debris from the trap.

Now, it’s time to detach each line from your old sink. With your wrench, remove the nuts directly underneath your sink to free up the top of each line. Keep your bucket ready to catch any remaining water. On the other side of the lines, near the main supply, detach each line, wipe clean, and apply plumber’s tape to prep for the new vanity sink.

Remove Old Vanity

With the water lines taken care of, you’re ready to remove the old vanity. Be careful during this step, as you can easily peel plaster and other wall material as the vanity is removed. It helps to run your utility knife along the edge of the vanity before removing it. Many vanities are “hung” in place with metal brackets, so gently lift the sink when removing. A pry bar comes in handy here. Once the sink is free, carefully lift off the base and set aside. Do the same with the old vanity.

Take Time for Touch-Ups

From slight wall damage to additional floor tiles, do any necessary touch-ups to prepare for the new vanity.

Next: Install New Vanity & Drain

Your new vanity is ready to install! Align the vanity using the marks you made beforehand with the new dimensions. Locate the wall studs (for the next step), and ensure the new vanity is perfectly straight with a level (if necessary, use small shims to level out).

Anchor Vanity to the Wall

Consult the installation directions to get the right mounting configuration. With your drywall screws, carefully mount the vanity to the wall, and ensure you drill into the wall studs.

Secure the Vanity Top

The vanity is ready to receive the vanity top. Carefully place the top on the vanity and wedge it back so it’s directly against the wall. Use your caulking compound on the rear face of the vanity top. Your vanity may require additional compounds, fasteners, or material for a secure fit and installation.

Reconnect Plumbing Fixtures

You’re almost there! The final step is to reconnect the plumbing fixtures. Tighten the sink drain and trap first, then reconnect the cold and hot water lines to the new sink faucets. Go back and slowly tighten the drain and trap until they’re firmly in place. Turn the water supply back on for each line. Place the bucket underneath the new faucet fixtures and trap, and slowly turn on the new sink faucet. 

Check for leaks, and if you’re unsure about your handiwork, it’s highly recommended to call a professional plumber.

Bathroom Remodeling - 6 Designs for Modern Homeowners

RH Business Marketing Solutions

Bathroom remodeling is a crucial aspect of home improvement that can significantly enhance both the functionality and aesthetics of a house. A well-designed bathroom not only adds value to your home but also provides a luxurious and efficient space for daily routines. Modern homeowners are increasingly looking for ways to transform their bathrooms into stylish and practical retreats that reflect contemporary design trends.

This guide will explore six modern bathroom designs that can help you create a stunning and functional space in your home.


1.  Sleek Minimalist Design

The sleek minimalist design is all about simplicity and elegance, focusing on clean lines, neutral colors, and uncluttered spaces. This design aims to create a tranquil and organized environment free from unnecessary decorations and distractions. Nonetheless, to achieve a minimalist look, it's important to use high-quality materials and fixtures that complement the overall aesthetic. Think of smooth surfaces, sleek faucets, and streamlined cabinetry that enhance the sense of space and order.

Achieving a minimalist bathroom design can be challenging without the help of a professional bathroom remodeling company. These experts can assist with the precise planning and execution required to create a seamless and cohesive look. They can help you select the right materials, ensure proper installation, and provide tips on maintaining a clutter-free space. By working with bathroom remodelers, you can achieve a minimalist design that is both stylish and functional, creating a serene sanctuary in your home.


2.  Spa-Inspired Retreat

Transforming your bathroom into a spa-inspired retreat can provide a relaxing and luxurious escape from the stresses of daily life. This design incorporates elements such as natural materials, calming colors, and luxurious fixtures to create a soothing atmosphere. Key features of a spa-inspired bathroom include rainfall showers, soaking tubs, and ambient lighting. These elements work together to create a space where you can unwind and rejuvenate.

To enhance the spa-like experience, consider adding personal touches such as soft towels, scented candles, and indoor plants. These details can elevate the ambiance and make the space feel more inviting. Professional remodelers can help you incorporate these features seamlessly, ensuring that your bathroom not only looks beautiful but also functions as a tranquil retreat. By choosing a spa-inspired design, you can create a luxurious haven in your own home.


3.  Smart Bathroom Technology

Incorporating smart technology into your bathroom can greatly improve convenience and efficiency. Modern smart bathroom designs include features such as voice-activated controls, smart mirrors, and automated lighting. These technologies allow you to control various aspects of your bathroom with ease, enhancing your daily routines. For instance, smart mirrors can display weather updates, news, and even your calendar, making your morning routine more streamlined.

Selecting and installing the right smart devices can be overwhelming, but professional remodelers can guide you through the process. They can help you choose the best products that fit your needs and ensure proper installation for optimal performance. By integrating smart technology, you can create a modern bathroom that is both functional and innovative.


4.  Eco-Friendly Design

Eco-friendly bathroom designs are becoming increasingly popular as homeowners look for ways to reduce their environmental footprint. This design focuses on using sustainable materials, water-saving fixtures, and energy-efficient lighting. For example, choosing recycled or reclaimed materials for countertops and cabinetry can reduce the environmental impact while adding a unique, rustic charm to your bathroom. Additionally, installing low-flow toilets, faucets, and showerheads can significantly decrease water usage without sacrificing performance.

Incorporating eco-friendly elements doesn't mean you have to compromise on style or comfort. Professional remodelers can help you find and install these sustainable options, ensuring that your bathroom is both environmentally friendly and visually appealing. They can guide you in selecting materials and fixtures that meet green building standards, creating a space that is good for both you and the planet. By opting for an eco-friendly design, you can enjoy a beautiful bathroom while contributing to environmental conservation.


5.  Luxurious Finishes and Fixtures

Adding luxurious finishes and fixtures can transform an ordinary bathroom into a high-end, spa-like retreat. Consider using materials such as marble or granite for countertops, high-end faucets, and custom cabinetry to elevate the overall look and feel of the space. These elements not only enhance the aesthetic appeal but also add value to your home. Luxurious fixtures like freestanding tubs, rainfall showers, and heated floors can provide a touch of elegance and comfort, making your bathroom a pleasure to use.

Balancing luxury with practicality is essential to ensure that your bathroom remains functional and user-friendly. Professional bathroom contractors can help you integrate these luxurious features in a way that maximizes both style and functionality. They can advise on the best layout, materials, and fixtures to create a cohesive design that suits your lifestyle. By incorporating luxurious finishes and fixtures, you can create a sophisticated bathroom that offers a relaxing and indulgent experience.


6.  Bold Colors and Patterns

Using bold colors and patterns in your bathroom design can make a striking statement and add personality to the space. Vibrant tiles, patterned wallpapers, and colorful accent pieces can transform a plain bathroom into a lively and dynamic environment. For instance, you might choose a bold tile pattern for the shower area or a brightly colored vanity to serve as the focal point of the room.

When incorporating bold colors and patterns, it's important to strike a balance to avoid overwhelming the space. Professional remodelers can help you choose and place these elements strategically, ensuring that they enhance rather than dominate the design. They can also suggest complementary colors and materials to create a harmonious look. By carefully selecting and integrating bold colors and patterns, you can create a bathroom that is both stylish and inviting.


Conclusion

By exploring designs such as sleek minimalist, spa-inspired retreats, smart technology integration, eco-friendly elements, luxurious finishes, and bold colors, you can create a space that is both beautiful and practical. Each of these designs provides unique benefits and caters to different tastes and needs. Working with a professional bathroom remodeling company is crucial in executing these designs effectively. They bring the expertise and experience needed to transform your vision into reality, ensuring that every detail is meticulously planned and executed.

What to Do About a Termite Infestation in Your Home

RH Business Marketing Solutions

As a homeowner, you may prioritize protecting your home from a variety of pests. You may take decisive action to prevent bugs like roaches and spiders from getting inside.

Additionally, you must remain vigilant and take proactive measures to safeguard your house from termites. When you suspect you have them in your home, you can eliminate them effectively by hiring a professional exterminator service to find and treat your home for a termite infestation.

What is a Termite Infestation?

A termite infestation stems from termites in an outdoor colony making their way inside of your home. Termites by nature eat through materials like cardboard, wood and paper. Out in the wild, they serve an important purpose by eating the cellulose in dead or dying trees and plants. 

Inside of a home, however, they can wreak expensive and ruinous damages progressively over the course of several years. By the time you confirm their presence, you may have thousands’ worth of damages to your home.

With that, it can pay for you to know how to detect the presence of termites quickly. Some of the tell-tale signs of a termite infestation include:

• Hollow sounding wood

• Blistered wood floors

• Mud tubes

• Discarded termite wings

• Pellets or frass

• Termite droppings

• Bubbling or warped paint or drywall

You can also determine that you have a termite infestation if you see swarmer termites in your home. These termites fly away from their original colonies and start their own once they are inside of your house.

You may see them when you remodel your house, for example, and remove materials like cabinetry or drywall. Their presence can confirm that you may have a large termite infestation in your house that calls for professional pest extermination.

What to Do About a Termite Infestation in Your Home

Once you suspect or confirm that you have a termite infestation in your house, you should take quick and decisive action to get rid of it. You could try do-it-yourself methods, such as laying out bait traps to lure and kill termites. You can also buy liquid and non-liquid pest sprays at your local grocery store or hardware retailer.

However, many of the DIY methods available to you fail to get rid of termite infestations effectively. If anything, they may kill off a handful of adults and do little to nothing to exterminate the remaining termites, as well as any termite nests and eggs in your home.

Rather than continuously fight a termite infestation, you can hire a professional extermination service to come to your house to treat it for you. Professional exterminators know how to find termite infestations, detect how many and what kinds of termites you have in your home and use professional-grade chemicals and resources to get rid of a termite infestation.

Further, professional exterminators can offer continued treatment services to keep your house free from termites. You may avoid future infestations by entrusting the treatment of your house to an experienced pest control business.

Different Kinds of Termites to Know About

Finally, you may want to take note of the different kinds of termites that can make their way into your home. The most common kind are formosan subterranean termites. They get their name for their proclivity to live and remain underground for much of their existence.

They are difficult to detect because they thrive underground. However, once they get inside of your home, they can cause extensive damages to it.

The other common type of termite are drywood termites. These termites are typically not as destructive as the formosan subterranean variety. Still, they can cause enough damage that can cost you time and money to fix.

Within each termite colony, you will find several different types of termites. For example, swarmers are black or brown in color, have wings and are often as long as one inch.

You will also find worker termites and soldier termites. Worker termites are the most plentiful and are white in color while soldier termites have a yellowish color. Soldier termites protect their colonies from perceived threats like predators.

Some of the more common places to find termites in your home include the:

• Attic

• Baseboards

• Basement

• Door frames

• Windowsills

You may also commonly find them under the floorboards.

Termites can cause expensive and devastating damages to your home progressively over the course of several years. You can benefit from knowing the signs of a termite infestation and the types of termites that are in your home. You can also eliminate infestations by hiring a professional termite extermination service.

Written by Taylor McKnight, Author for North Mississippi Pest Control

Should You Make Repairs to Your Property Before Putting It On The Market?

RH Business Marketing Solutions

People who are thinking about or already preparing to sell their homes want to get the best price possible. As such, they often think that they need to make what seems like a million repairs. The question is whether these repairs are necessary and, if so, which ones to focus on. This guide seeks to provide the answers to these questions.


Why Should You Make Repairs, and Which Repairs Should You Make?

It’s no secret that making some improvements to a home can increase buyer interest and potentially fetch a better price. However, that better price could be canceled out by the cost of the repairs you make.

In some cases, repairs are necessary – especially if a mortgage company is involved in the process. If it is a private sale, a cash sale, or there are no required repairs, it’s important to be strategic with the repairs you choose to make.


Repairs and Tips to Consider Before Listing Your Home

While repairs and upgrades are up to you, the following are a few areas in which they might be beneficial.


Pay Attention to the Appearance

You or an agent will soon be taking photos of your home for the listing, and potential home buyers will be coming for a viewing. When they do so, they want to imagine living their own lives in the space. The following steps can help them imagine a good one. 

• Deep clean and declutter: If you have piles of paper and laundry, or there are grease stains in the corner, it can cast a negative light over the whole home.

• Paint the walls a neutral color: You might love bold colors, but not everyone does. You can both refresh the space and provide a blank canvas for home buyers with a coat of paint.

• Freshen up outdoors: You don’t necessarily need professional landscaping or new exterior paint, but you might consider pressure washing, cleaning up your yard, and doing a little DIY landscaping to add curb appeal.


Aim for Move In Ready

Home buyers are generally going to make the house their own by changing up flooring, counters, and more to suit their preferences. Therefore, changing such aspects will not usually provide a good ROI for the seller.

Instead of focusing on “wowing” home buyers, focus on what is necessary to make the home move-in ready. The following are some examples.

• Window treatments: If blinds are old, discolored, or broken, it’s not usually worth it to replace them. Instead, consider taking them down completely and doing a deep cleaning on the windows.

• Windows: Replacing a window screen or the entire window is typically not worth the money. However, replacing a broken window pane can be.

• Flooring and cabinets: Wear and tear is expected in homes, so there is usually no strong ROI for replacing the flooring or cabinets. However, steam cleaning the carpets, restaining or repainting the cabinets, and cleaning and polishing the cabinet handles can improve the appeal of the home. Additionally, adding new grout in flooring areas that are cracked is both affordable and can make a big visual difference.


Pay Attention to Necessities

Do you have any major leaks in the home or severe roof damage? Such repairs typically turn home buyers away much more quickly than the condition of the carpet or the color of the walls. It’s wise to focus your repair efforts on the necessities, as well as any known code violations, as they could not only cause you to bring in a lower price but might prevent a sale altogether.


Steps and Repairs to Avoid

Though there are no set-in-stone rules, updates and repairs in the following categories might lead to a lower ROI.

• Major renovations: People often look for homes with a certain type of room, like an extra bedroom in the attic or a patio. However, renovating your home in such a way with the intention of selling both takes a hefty investment and limits the types of buyers who might be interested in your home.

• New appliances: Appliance costs continue to rise. As many home buyers bring or buy their own, replacing appliances typically costs more than it brings.

• Trends: Again, home buyers want to envision their life in your home, so providing a neutral canvas is best. Following trends you see on TV or social media can be more harmful than helpful.

Ultimately, any repairs and upgrades you make are up to you. However, following the tips above can help breathe fresh life into your home, attract a wide range of potential buyers, and provide you with a favorable ROI.

Written by Taylor McKnight, Author for Newlin Miller