Google+

contact us

Use the form on the right to contact us.

Day or Night, we are here to serve you. Leave your plumbing problem to us.


Tinley Park, IL

(708)845-7922

Residential and Commercial plumbers and plumbing contractors available in Orland Park, Tinley Park, Oak Lawn, Palos Heights, Midlothian, Oak Forest, Homer Glen, Mokena, Frankfort, and the surrounding Chicago South Suburbs. Emergency plumbers.

copper water lines.jpg

Kevin Szabo Jr Plumbing Blog

Kevin Szabo Jr Plumbing is Tinley Park, Orland Park, Oak Forest, Midlothian, Orland Hill, Homer Glen, Mokena, Frankfort, Crestwood, Palos Heights, Oak Lawn, local plumber. Read our blog for advice, tips, a good laugh, and basic home improvement.

**We are moving our old blog to our new and improved website. Too see all our posts visit kevinszabojrplumbing.blogspot.com

Filtering by Category: June 2021

How to Clean Your HVAC System After a Renovation

RH Business Marketing Solutions

Finally, you’re finished with your renovations. You’re ready to enjoy the sense of relief that follows when you finish a project that has taken months.

Once a renovation wraps up, you’re left with a home that’s completely transformed, perhaps an expensive series of invoices, and a lot of dust. But when it’s time to clean up, you’ll be surprised at all the places you’ll find dust—places you didn’t even know existed in your home are covered in a thick film of it.

In addition, you may have noticed that the performance of your HVAC system has declined since you finished up your remodel. We’re here to tell you that these two events are probably related.

If your HVAC unit is dusty, then the air in your home will be dustier, too. Here’s why you should clean your heating and cooling system after renovating, and how to do it:


The Health Hazards of Construction Debris

If you’ve done some of the renovating yourself, you might feel exhausted—do you really need to start cleaning already?

Waiting to clean your home after renovations isn’t worth it. 

There’s a reason why contractors wear filtering masks when they’re working. Exposure to dusty air can lead to sneezing, coughing, and irritation of the eyes and throat. Dust mites can trigger allergic reactions for those with asthma and sensitivities.

Thankfully, these issues can be remedied simply by cleaning your HVAC system. 

Schedule Regular Maintenance

Whatever is causing issues within your HVAC system may not be immediately obvious. This is why we can’t overstate the importance of maintenance for your HVAC system. Even though it’s another bill to pay, think about the higher cost of repairing or replacing your unit if an issue goes undetected.

When it comes to HVAC maintenance, the philosophy is this: pay now, save later. Scheduling regular tune-ups can save you money in the long run—and it’ll ensure that your indoor air is of higher quality.

Get the Ducts Cleaned

If the airflow is restricted, it poses several problems:

  • The system has to work harder. This causes excessive strain to the components, which may lead to needing a repair. 

  • The air quality is reduced. The dust and debris that’s in your vents will circulate throughout your home.

  • Your energy bills will increase. As your HVAC system draws more power to combat the restricted airflow, you’ll notice an increase in your monthly utility bills. Wasted energy is expensive!

  • The performance is worse. It’s hard to enjoy your renovations when the temperature of your home is far from ideal. Don’t compromise your comfort for an inefficient HVAC system. 

Cleaning your ducts can address all of these issues at once.

Change the Filters

You’ve cleaned your ducts and vents, but the air in your home still smells dusty. What's going on?

The owner of Classic Air Conditioning and Heating says, “Too many homeowners forget to change their HVAC filters, and then wonder why their houses are covered in dust!”

According to EnergyStar, you should change your filters every 3 months. But following a renovation, switch them out right away. The buildup of sawdust, hair, and other particles isn’t doing you any favors!

Clean the Air Conditioner Coils

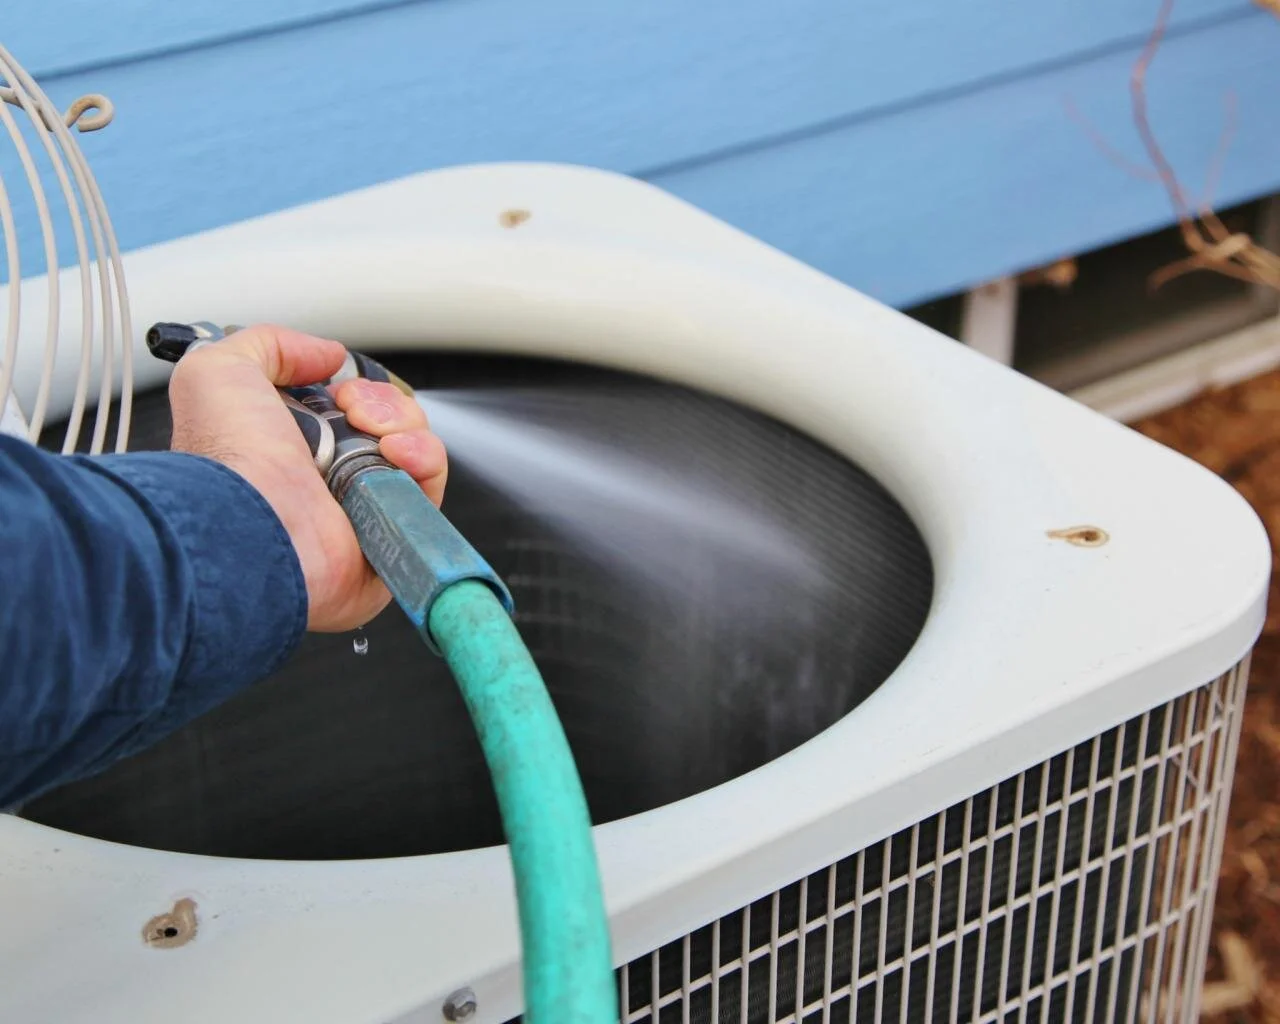
One area you may not expect to find construction debris is in your air conditioner coils, which are located in the condenser that’s outside your home.

Just like a dirty filter or restricted ductwork, dusty AC coils will affect the performance of your unit. If debris is lodged between the fins and the unit, it won’t be able to get rid of the heat from your indoor air. This diminishes the efficiency of your system and lowers the comfort levels in your home.

Leave it to an Expert

After paying for a home renovation, the last thing you want to deal with is another bill! It might seem tempting to try cleaning your HVAC system yourself, but we advise against it. Doing so may cause further damage to the unit. 

DIY work can backfire, especially if you’re inexperienced with HVAC systems. Call a professional technician instead! 

Once your renovations are complete, you might be tempted to kick back and put your feet up. Finally, you’re done dealing with contractors, unexpected issues, and living in chaos! 

But it’s hard to get comfortable when your furnace or air conditioner isn’t working properly. Restore its functionality by calling a professional to clean the unit and ducts. Doing so will improve your indoor air quality and extend the lifespan of your HVAC system.

Guest Contributor: Christie Simon

7 Effective Ways to Maintain the Hygiene and Cleanliness of the Kitchen Area

RH Business Marketing Solutions

A contamination-free kitchen enhances the value of the house and improves the hygiene standards. However, for inadequate cleaning, the kitchen can become the breeding ground for pesky creatures. And, without removing the clutter from this area, it’s impossible to prevent a pest invasion. 

Most of the harmful pests break into residential places in search of food resources. Once they start an infestation, they can cause severe property damage. As a result, you have to spend a large amount of money on repair expenses. 

Creatures like cockroaches or house rats are carriers of life-threatening diseases. Thus, every homeowner should emphasise cleaning every nook and corner of the kitchen. There are hefty cleaning solutions that can make the kitchen sparkling clean. 

Many homeowners tend to think that kitchen cleaning requires a considerable amount of time or effort. For this reason, they ended up hiring cleaning professionals. But, you can also do the cleaning jobs without taking professional's help. All you need is the required tools and products. But, before implementing any cleaning techniques or chemical products, consult with an expert. 

Are you struggling to remove the stains from the kitchen wall or not getting satisfactory hygiene results? Then, consider following these kitchen hygiene rules to protect your family members from harmful allergens.

1. Cook Foods in the Right Temperature

Proper cooking temperature ensures that the food is safe and healthy. You might have preserved the food in a contaminated place. But, you can still prevent bacteria by cooking those food items at a high temperature. 

Always consider preparing the foods like fish, chicken or eggs to a safe minimum internal temperature. For instance, if you plan to make any ham-related dishes, the cooking temperature should be 140-degree Fahrenheit. 

For the egg or meat dishes, these temperatures should be below 170-degree Fahrenheit. And, if these foods are undercooked, it increases the chances of food poisoning. So, before initiating the cooking process, make sure to check its required temperature. It's the best possible way to ensure the cooked food is safe to consume. 

2. Keep the Cooking Essentials Clean

Did you recently shift to a new apartment? Then, you must have added the necessary cooking appliances in the kitchen. Cooking essentials like microwave, pressure cooker or mixer grinder are must-have kitchen elements. But over time, due to dust accumulation, these electronic devices become dysfunctional. As a result, you have to invest in another set of kitchen appliances for your daily use. So, consider cleaning these electronic appliances after using them. 

But, don’t use any hazardous cleaning chemicals that can damage these kitchen essentials. Instead, use the mixture of white vinegar and water to get an effective cleaning outcome. You can also use dishwashing liquid in devices like food processors or juicers. And, for more cleaning suggestions, make sure to contact a home cleaning services expert. 

3. Clean the Cutting Boards

There could be more than 200 per cent more faecal bacteria in an average cutting board than on a toilet seat. So, every homeowner should provide their prior attention in cleaning the cutting boards. Consider using hot water and mix it with any hand soap; that will do the trick. You can also apply the mixture of detergent and warm water on the plastic cutting boards. 

Do you own a wooden cutting board? Then, any of these cleaning hacks won't work. Take a half-sliced lemon and mix it with salt to prevent bacterial growth. 

It’s recommended to use two or more cutting boards to prevent the spread of harmful bacteria. When germs from unclean objects come close to any cooked food, cross-contamination occurs. 

So, to avoid cross-contamination, the cleaning experts recommend using colour-coding cutting boards. For an extra safety precaution, wipe the boards with a chlorine beak solution. Let this solution soak for a while, and then rinse it with water. 

4. Keep the Refrigerator Clean

A well-cleaned and maintained fridge ensures the preserved foods are safe. Moreover, when you remove the contamination, the device can perform without any glitch. On the other hand, a dirty refrigerator can be the storehouse of harmful bacterias like salmonella and listeria. For this reason, the home cleaning services expert recommends deep cleaning this electronic device. 

Cleaning Products to Use

Thinking about which cleaning solution to use? For cleaning the refrigerator’s interior, take two tablespoons of baking soda. Then, mix that with one quart of warm water before applying it. Use a damp cloth to rinse out this cleaning mixture, and then dry it with a towel. Food absorbs odours, so it is better to use unscented mild cleansers like baking soda. 

Or, the homeowners can apply hot soapy water to clean the fridge both outside and inside surfaces. Make sure to use cold water to remove this cleaning solution. Consider using one tablespoon of liquid bleach and one gallon of water to sanitise this electricity-driven appliance. Don’t overload the fridge with too many food items — that prevent air circulation. As a result, the food items will become cold and increase bacterial growth. 

1. Keep Your Hands Clean

You must be aware that germs and bacteria thrive on hands and can spread onto uncooked food items. Therefore, wash and sanitise your hands before starting the cooking process; that’s the best hygiene practice. Additionally, make sure to use hand washing soaps or liquids after touching muddy vegetables or any poultry products. 

Frequent handwashing plays an imperative role in ensuring the cooked foods are safe to eat. Hence, everyone should clean their hands to prevent the spread of harmful diseases. After using the oil-based products, hands need to be washed with warm water and soap. 

2. Clean the Veggies and Fruit

Do you consider cleaning the vegetables and fruits? No! Then, the chances of getting infected by E.coli are high. Nowadays, chemical sprays are used in perishable food items to keep aside bug-related problems. Thus, it becomes essential to clean them with white vinegar and water to remove bacteria. These sorts of cleaning products ensure the vegetables are safe for consumption. 

Make sure to wash your hands after cleaning the soiled fruits and vegetables. Most individuals tend to use soap for vegetable or food cleaning. But that’s not essential! Take a bowl of hot water and mix it with baking powder, and then keep the vegetables. Keep these items for more than 20-30 minutes in this solution for effective disinfection. The homeowners can also wash vegetables/fruits with warm water for 3-5 minutes to maintain utmost hygiene. 

Don’t have baking powder in your kitchen? Then, take the same amount of salt, turmeric powder and vinegar into a bowl. Mix these three ingredients with warm water and then soak the fruits and vegetables into this solution. Ensure to keep them for at least 30 minutes; that will help you get rid of the harmful germs. 

3. Clean the Kitchen Countertops

Cleaning the kitchen premises ensures the food preparation process is carried out, maintaining good hygiene. From the cluttered and grimy kitchen countertops, germs can spread. Thus, keeping these surfaces clean and sanitized aids in eliminating the risk of consuming food-borne bacterias. 

Especially in the marble and granite kitchen countertops, the germs remain for a prolonged time. Use a mixture of warm water and dish soap to clean these types of surfaces. You can also apply the baking soda paste to remove the tough stains from marble/granite countertops.

But, if you have a wood-based countertop, consider using warm water and white vinegar’s mixture instead. And rub lemon on the stains; that’s an effective stain removal item for this type of countertops. 

Do you have laminate countertops in the kitchen? Then, go for cotton cloth and a mixture of water and non-chemical liquid detergent to clean it. Then, apply the paste of baking soda and water to remove the stain from the laminate countertops. 

Is there Anything Else that Can Keep the Kitchen Germ-Free?

You have to focus on removing the dirt-dust-grime buildup of the sinks using vinegar. And, if this cleaning product doesn't work, consider putting in a handful of soda crystals. Next, clean the garbage disposal with ice cubes and cold water; that’s one of the best cleaning solutions. 

For removing the odor from the disposal, use baking soda and vinegar. Then, keep the kitchen floor clean using cleaning tools like steam cleaners. And, if you need more kitchen cleaning ideas, call a home cleaning services expert.

Guest Contributor: Priyanka Verma

High Water Pressure in Your Commercial Building is Critical for the Plumbing

RH Business Marketing Solutions

Many people think that having a high water pressure in your building is a good indication. However, high water pressure in your facility can shorten the life cycle of your plumbing fixtures, leading to expensive and annoying damage like pipe bursts and leaks. In addition, excessive water waste due to pipe leaking and burst is terrible for our environment and might cost more than you think on your plumbing system. 

Signs of High Water Pressure in Your Building

  • Banging Sounds in Pipeline

Many of us already heard that scary hammering or banging noise that is coming out from the pipeline. It happens when high pressure or heavy water flow halts. A fixture such as valves, faucets may stop the water in their tracks.

It is the effect of a high-pressure shock wave sent by the water through your plumbing system; a strong vibration in your plumbing system creates the shuddering sounds in your pipelines.

  • Burst Pipelines and Leaking Fixtures 

Domestic use plumbing fixtures cannot withstand excessive water pressure, unlike in industrial plant pipeline systems. When a high pressure of water flow pushes through the fittings, it can lead to bursting. And it may create a pinhole leakage, which is hard to notice until your ceiling or walls get damaged.  

Based on the statistics, a water pressure above 80 pounds per square inch can lead to the failure of water fixtures. 

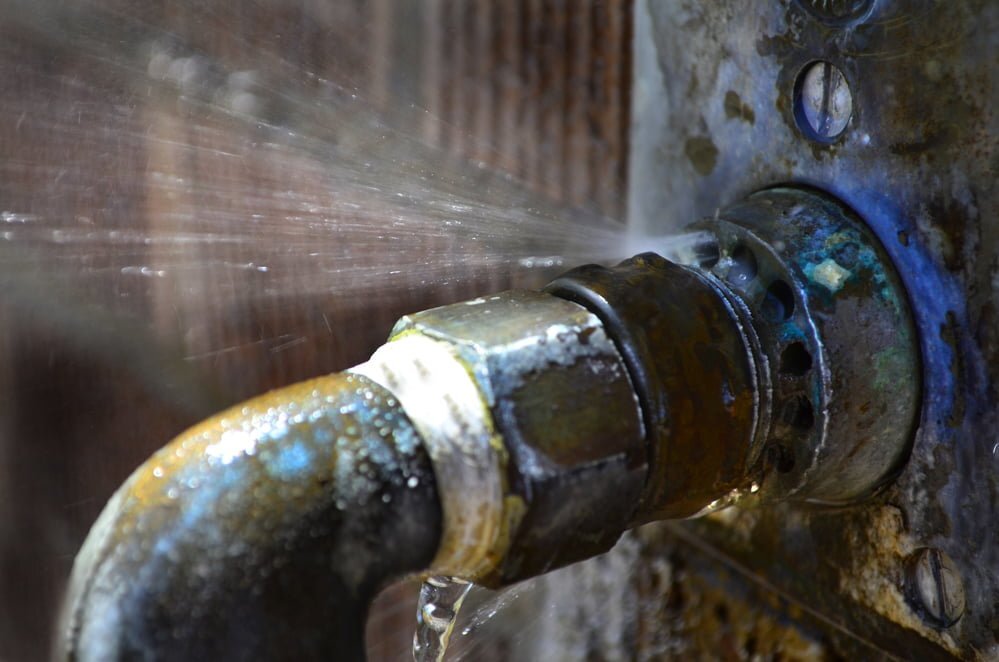
The most common signs of having too much pressure are leaking faucets or spitting, especially if it is out of the cold tap and another telltale sign is a little water spraying stream appears at the slides of the fittings.

  • High Utility Bills

Try to track your water bills; if you notice a sudden spike in your consumption and pay more than the usual bill range you have, high water pressure could be a possible reason behind it. Because of the high pressure, you can consume more water every time somebody opens a faucet or uses the toilet in your building. As a result, there is wasted money on billing and wasted water. 

  • Running Toilet Facilities

Suppose the toilet facilities in your building keep running and even flushing on their own. In that case, there might be a faulty or passing valve in the pipeline, usually when there are high water pressure issues. Toilet valves tend to quickly wear out due to increased pressure that leads to constant running water from the primary source in the bowl. 

  • Leaking Water Heater System 

A leaking water heater system in your building is possibly due to excessive water force in the supply line, as the internal parts cannot withstand high pressures. You should be aware that the water pressure in your building does not exceed 80 psi. Otherwise, your whole portable plumbing system is at risk. 

Causes of Excessive Water Pressure

  • High Rise Structures

In most cases, the sudden water pressure changes in the primary line are the supplier's responsibility. And please note that you can experience intense water pressure in your pipeline if high-rise buildings surround your building. Therefore, the supplier will give high water pressure in that specific zone to reach the water on the top floors. 

  • Maintenance In The Water Network

When your water network line undergoes maintenance, a trapped pressure will stay on the line after the supplier closes the main isolation valve. As a result, it can cause a sudden and temporary increase in the pressure in the pipeline. 

How To Regulate High Water Pressure
Fortunately, controlling high water pressure is pretty simple, especially if the primary isolation of your plumbing system is easily accessible and secured with louvered access doors and panels; you can even do it by yourself. For example, you can try to throttle your plumbing system's upstream main isolation valve so that the whole plumbing system in your building or on the downstream side has a minimum or has safe water pressure enough for your consumption. Or you can call a professional plumber to install a water pressure regulator device in your line to prevent any damage to the plumbing system in your building.

Guest Contributor: Chris Jackson

A Thorough Guide For Plumber Licensing

RH Business Marketing Solutions

Plumbers are one of the most heavily regulated occupations in the US. Plumber licensing criteria for journeyman and master plumbers are almost universal; however, the requirements and exams differ from state to state. You'll want to make sure that you follow the regulations in your state so that you may build your business after years of research and practical training.

Is There a Need to Acquire a License?

Yes, to conduct plumbing jobs in the United States, plumbing experts must have a state license. After that, aspiring plumbers must complete an apprenticeship program. In most areas, passing a state-approved test is still required to obtain your certification and become a fully licensed plumber. Depending on where you reside, you'll need a different kind of plumbing certification.

The benefits of being a Master Plumber are numerous. A license makes you more desirable and trustworthy to potential consumers, in addition to allowing you to execute plumbing chores legally. Apprenticeship experience and a certificate in plumbing demonstrate that you know what you're doing.

The Cost of Getting a Plumbing License

The cost of obtaining a plumbing certification and license varies by area and regulations, just as the expense of pursuing a plumbing job.

The following is a breakdown of what it usually costs:

  • Certificate programs can cost anywhere from $1,250 to $3,000 

  • Online training programs can cost anywhere from $800 to $1,000 

  • Certificate programs can cost anywhere from $1,250 to $3,000 

  • Online training programs can cost anywhere from $800 to $1,000 

  • An apprenticeship can cost anywhere from $0-$1,000 

  • An associate's degree in plumbing technology can cost anywhere from $3,000 to $23,000 

  • The total cost of getting a plumbing certificate and license can range anywhere from $5,000 to $28,000 

  • A yearly or biannual plumbing license fee can cost anywhere from $30 to $200

Whatever you invest in your plumbing certificate and license, you will earn back once you get hired as a plumber. The benefit of an apprenticeship program is that you are also making money although you are nominally in school.

Plumbing Licensure Requirements

The categories on a plumbing license test vary by state. However, most states include the following:

  • Codes/Regulations - Most states have adopted the International Plumbers Code (IPC) or Uniform Plumbers Code (UPC) plumbing rules. Still, you may also need to be familiar with the National Fuel Gas Code or the Uniform Mechanical Code. It is also best if you acquaint yourself with OSHA regulations for safety. An example is how to access duct access doors and panels safely and correctly when doing maintenance work.

  • General Information - Design and installation, occupational safety, and general electricity principles are among the topics or subjects that the general knowledge covers.

  • Planning & Math - For the everyday parts of this job, you'll need real-world math abilities and solid math background, so expect to be tested on fundamental pipe length calculations and a broad grasp of physics and other affecting forces.

  • Pipefitting - You'll need to understand how to operate and examine essential equipment and gear, as well as how to layout and install pipes.

Plumbing Career Path Timeline

The length of time it takes to obtain a plumbing license will depend on your locality. On average, an apprenticeship lasts 4-5 years before you may appear for your test. You can earn your permit and start your own plumbing business once you've got your Master's Plumber degree. 

As a result, you may now supervise and instruct an apprentice or Journeyperson. Keep in mind that these timescales differ depending on the country, state, and region. However, you may use these figures as a general approximation of how long it will take you to obtain your plumbing license.

Here's a short version:

  1. High school diploma (4 years)

  2. Apprenticeship (4-5 years)

  3. Journeyperson (anywhere from 2-5 years)

  4. Master Plumber (7-10 years)

Final Thoughts

Being a plumber is a beautiful career path to pursue. It does require time and dedication to develop the skills, knowledge, and experience needed to become great in this field. If you ever need a piece of solid advice or you require additional information, do not hesitate to consult a professional.


Guest Contributor: Chris Jackson

Budget-Friendly DIY Greenhouse Ideas: Extend Your Growing Season

RH Business Marketing Solutions

Looking to build a DIY greenhouse without breaking the bank? It's more doable than it seems at first glance. Plenty of folks are looking to introduce some extra, tasty greenery in their backyards, but most of them don't know how to do it properly. To help you get started, we've come up with some essential ideas that you should consider. 

Consider the size

Before you start looking at frames and materials, you have to decide on the size of your DIY greenhouse. There are numerous factors to consider before you make a decision. How many plants do you want in the greenhouse? What types would you prefer? Do you have enough extra space in your backyard for something on the larger side? 

There are also practical elements that might influence your decision. A larger greenhouse helps stabilize internal temperatures and allows for more breathing room. You can even set up seating inside if there's enough space. Plus, it can let you grow quite a few plants that take up a lot of room. On the other hand, you'd also have to dedicate extra time to maintaining a large number of plants. A bigger greenhouse would take up more of your backyard as well.

Use a skylight for ventilation

Every greenhouse needs to have adequate ventilation to help mitigate temperature and humidity changes. However, a complex system of fans might be a little too pricey for a DIY greenhouse. Not only would it use tons of electricity, but it would also cost quite a bit to install properly. In most cases, you won't need fans unless you're running a pretty big greenhouse. 

A great budget-friendly way to introduce some ventilation is to install a skylight. It's a pretty straightforward element that can help make summers much more tolerable for your plants. A good rule of thumb is to place skylights on the eastern side of the greenhouse. 

What's great about skylights is that adding upgrades and practical features isn't expensive either. You can set up an automatic system that will make it easier to open them. Instead of having to open your skylight by hand, you can connect it to a hydraulic system. Better yet, you can link the hydraulic system with a thermometer, allowing the skylight to open itself whenever the temperature reaches a certain threshold. Not only would this save you a lot of time and effort, but it wouldn't cost too much to implement either. 

Introduce proper heating 

Summer isn't the most problematic season for DIY greenhouses. When setting up your greenhouse, you have to make sure that the heating system and insulation are good enough to keep your plants alive when temperatures drop in winter. There are numerous different options when it comes to heating, so you won't lack for options. 

Gas and electricity home heating systems are the most popular options for most greenhouses, as they're pretty easy to install. While the costs of installation might be low, the bills will still be on the higher side of things. Whichever way you look at it, heating your greenhouse is expensive.

A great way to reduce costs in the long run is to introduce solar heating. Panels tend to be expensive, but they provide you with quite a bit of energy, and they're a one-time investment. As time goes by, you can recuperate the cost of installing them and provide your greenhouse with free and eco-friendly heating. 

Use adequate insulation

All the heating in the world won't matter much if your greenhouse doesn't have proper insulation. It's just going to leak out and increase your bills dramatically. Because of this, it's important that you get the greenhouse insulation done properly.

Some of the most popular materials for greenhouse insulation include polystyrene and bubble wrap. While they may be on the cheaper side, they're not even close to the most effective options available. If you want to avoid losing too much heat, it's recommended that you go for polycarbonate. A polycarbonate sheet can transmit 90% of incoming light while also providing effective insulation. Plus, it's a durable material that can withstand pressure and temperature changes with ease. Plus, it's relatively easy to install, so you shouldn't have trouble implementing it in your greenhouse.

Create a stable foundation

Changes in weather don't just affect greenhouse elements above the ground. When pressure and temperature shift, it can affect the foundation of your greenhouse as well as the ground that surrounds it. During summer, heat can cause the ground to sag, while winter can cause groundwater to rise and leak into the greenhouse. 

Creating a stable foundation will prevent these issues and keep your greenhouse consistent throughout the seasons. Aluminum is one of the more hassle-free and affordable options for greenhouse foundation. It provides all the protection you need to keep the ground stable, and it can be transported pretty easily. If you ever decide to move, you can take every part of your greenhouse with you, including the foundation. 

Conclusion

If you want to keep your greenhouse active and extend the growing season, you need to get busy with your design. A budget-friendly greenhouse requires some proper research and planning. Knowing which plants to add, how to size the greenhouse, and where to put it is crucial if you want to maintain your plants on a budget.

Guest Contributor: Gabriel Hill 

Planer vs. Belt Sander: Which is the Best Sander?

RH Business Marketing Solutions

Do you have difficulty choosing between belt sander and planer during a woodworking project? Differences abound in the functions of these two that you might know about.

Do you have difficulty choosing between belt sander and planer during a woodworking project? Differences abound in the functions of these two that you might know about.

The good news is we've prepared you detailed information as to the differences and benefits of these two tools in your woodworking projects.

It is worthy of mention that if you have a task removing either vanish or slices from the surface of the wood, choosing between a planer and a belt sander can prove challenging. You might have the same misconception as many other people, that both woodworking tools perform the same task. The fact is, knowing the exact strength and functionality of each will make a whole lot of difference to your project. 

It suffices to say that while a larger company can have both products in their tool kits and apply each as necessary, you might only get to have either of them in your workshop. If you are stuck at understanding which power tool is best for what wood project, then you're just at the right place. So, Let's get to business.

What is a Belt Sander?

It is, by far, one of the most useful tools in your tool kit. You might be wondering as to what is the belt sander used for? It executes the finishing tasks just quickly and correctly. It is designed to remove stains, paints, and deterioration on wood. While the planer can handle lumber and rough woods, a belt sander is best at handling plywood and related materials. Thus, applying a planer to plywood may inform damage to the material, as it is designed for rougher materials. It is noteworthy that though the latter is easy to use, it requires utmost carefulness in the application. The reason is they are incredibly aggressive, as they can cause damage to the property or injury to you if no handled carefully. 

Furthermore, a belt sander is amazingly fast and efficient. This woodcutting tool helps you tackle a larger project in very little time, as it removes much material in a single pass! Hence, you need to pay apt attention while using this tool. Also, it is no gainsaying that this tool comes in different shapes and sizes: there are small belt sander and more significant surface types. For a relatively large project, we recommend you opt for a large surface belt sander, as they cover a considerable pace at a single pass. 

It is important to stress that the power sander is the group of sanders you'll find on the market. For a particular sander, there is a unique functionality. Thus, a belt sander is best at starting a project, while you can finish it up with the instrumentality of a detail sander. For electric sander, it can be either corded or cordless; you'll have to choose one that suits your purpose. Chicago Tribune maintains that nothing beats a belt sander in making rapid rust, stain, and varnish remover. 

What is Planer?

Perhaps you are wondering about how to use a planer. It'll interest you to know that a wood planer is best at helping you achieve a level surface on a woodworking project. We recommend that you get a planer for home use, as it's suitable for making small and large adjustments with ease; especially, when the change relates to door, shelves, and cupboards, among others. In other words, if you need to reduce the width of entry to fit into its frame, you'll need the help of a planer for this. Thus, while a planer is designed to create a consistent level by removing wood, a belt sander is better for eliminating finishes: stains and paints, among others.

A critical advantage of the planer is: it is suitable for beginners, as it is easy to make level surface and uniform cuts with every pass. However, a belt sander is more complicated, as you are likely to find high and shallow spots on the wood after application. Put differently. You need to acquire experience in using it. In getting a planer, we recommend you get an electric planer. This kind of planer is of high versatility in a woodworking project. With this kind, you get the work done quickly and more perfectly.

Finally, it's worthy of mention that nothing beats a wood planer in trimming a door or leveling a surface in an incredibly fast and efficient way. Equally, the best woodworking tool you can always resort to in removing stains, layers of varnish, rust, and paint; is a belt sander. More so, if you are a good learner, you won't have difficulty mastering the belt sander, as it has a teaching skill that you don't get from other woodworking tools. 


Author's Bio: Chele is a researcher, sustainable gardening enthusiast, sport, and Gym Expert. She writes and publishes articles for different sites. She enjoys swimming and playing American football during her leisure time. Chele is married with two kids.

Should you stay in the house or move out during major plumbing work

RH Business Marketing Solutions

Should you stay in the house or move out during major plumbing work? There are benefits to both, here is how to make the best decision!

Read More

Heating Repair: -Home Heating is essential for safety and comfort.

RH Business Marketing Solutions

The need for Heating repair doesn't generally introduce itself through framework disappointment. All things being equal, little execution issues can show that your radiator is experiencing difficulty staying aware of your utilization.

A considerable lot of these issues can be tended to by our HVAC administration professionals. In any case, a decent dependable guideline is that once your Heating repair costs surpass a large portion of the expense of another unit, it's an ideal opportunity to supplant it.

Signs your Heater needs Repairs to include the following:

  • A lack of hot air

  • Your heater is 7-8 years or older

  • Inadequate airflow

  • A sudden increase in your energy bills

  • Your heater turns on too frequently

  • Your heater is making strange noises

  • Automatic shutdowns

Things to Try Before Calling for Heating Repairs

A broken warming framework can be disappointing; however, what's similarly baffling is discovering that you could take care of the issue all alone—after you've effectively brought in a professional for heating repairs. 

Check the Air Filter

 This is a word of wisdom to take when your warming framework (a heater or even a warmth siphon) is simply not working right. However, it might not have closed down totally, temperatures are not what you might want, or the wind stream is restrained. Then again, you may see that the radiator closes off and turns on time after time (short cycling).

Check the Thermostat:-You may feign exacerbation at this idea since you've presumably checked the indoor regulator on more than one occasion as of now. Still, there could be something you are missing. So this should be noticed before calling for heating repairs.

  • Has it been placed into a cooling mode?

  • Do you see the words "fan just" on the presentation or on a switch?

  • If the indoor regulator is off, does it require batteries?

Reset the Circuit Breaker

The electrical board might be made out of a few electrical switch switches, or you may have a more established wire box. First, you'll need to discover the wire or electrical control that prompts your heater. Hopefully, these are labelled; if not, you may need to test each one. You can flip the switch on an electrical switch box or substitute a blown wire for a more established electrical board.

Call the Heating Repair Company

Finally, you might want to call the Heating repair company. But first, try your other heating appliances. Suppose the broiler or the heated water storage aren't working. In that case, you may have missed an instalment, or the warming help may have committed an error.

Benefits of Heating system Maintenance

Energy Savings: -A heating system that is messy or dismissed needs to work more earnestly than is necessary to bring the temperature up in your home. Throughout the planned arrangement, a certified expert will play out various essential Heating repairs mechanism, including:

  • Tightening loose connections

  • Lubricating moving parts

  • Cleaning or changing the air filter

  • Testing airflow

  • Visually inspecting ductwork

  • Checking connections

Increased Comfort: -Malfunctioning framework segments, flawed ventilation work, or diminished wind stream can keep your warming framework from accomplishing the ideal set-point on your indoor regulator.

Enhanced Air Quality: -As adapted air moves all through your conduit organization, it conveys with it any free particulate that couldn't be caught because of a stopped-up air channel, filthy framework segments, or sat waiting in your pipes. Elemental impurities can include:

  • Pet dander

  • Mold

  • Mildew

  • Bacteria

  • Dust

  • Pollen

Extended Equipment Lifespan: When your heating system is spotless, greased up, and in decent shape, parts can move uninhibitedly, and the wind stream is unhampered. The less pressure put on your hardware, the more it will last, guaranteeing long periods of ideal execution.

Lower Cost of Repairs: -Most minor issues can be distinguished and corrected during routine support before becoming major, exorbitant fixes.

Reliability

Taking an opportunity to plan preventive upkeep toward the beginning of warming season guarantees your framework will work at top execution, giving dependable, productive warming administrations and staying away from an exorbitant, mid-season breakdown.

Conclusion: - 

The most ideal approach to guarantee the unwavering quality, proficiency, and ideal execution of your warming gear is with yearly preventive support—and the best ideal opportunity to plan this important help is in the fall before you turn your warming framework on. In case you're not persuaded that customary upkeep is wise speculation, reconsider: having your warming framework expertly cleaned, tuned, and examined has various huge advantages.     

Guest Contributor: Emma Smith

Add a Tropical Flair to Your Backyard With These 6 Tips

RH Business Marketing Solutions

Your backyard should be an oasis that makes you feel entirely at home and like you’re on vacation. While that might not sound entirely possible, you can create the oasis of your dreams, whether you live somewhere with a tropical climate or you simply want to capture that vibe. 

If you’re inspired but aren’t sure where to start, here are just a few ways you can bring a bit of the tropics into your home. 

1. Put Plants Everywhere

This tip probably comes as no surprise to you, but it truly is one of the best ways to bring a tropical feel into any space. One of the best parts of decorating with plants is that they’re natural. They can improve air quality, mood and the environment. You can fill your garden with tropical plants like elephant’s ear, bird of paradise, ficus and philodendrons — these are all easy to grow and keep alive.

2. Use Water

The sound of dripping or running water can be relaxing and tropical — making you feel like a rain forest is right around the corner. If you want that zen vibe right in your own backyard, try adding a water feature like a fountain, small lagoon or miniature waterfall. These features sound great, look pretty and can bring a sense of movement into your space.

3. Utilize Natural Materials

Tropical vibes aren’t all about the accessories, though. In fact, much of that island feeling can come from the materials you use in furniture and accessories. Recycled wood, bamboo, wicker, burlap and other items can bring a natural feel to your backyard, especially when juxtaposed with a setting of greenery and plant life.

4. Add Pops of Color

Tropical inspiration isn’t always just about plants and serenity. In fact, the aesthetics are most often lively and bright. Adding some vibrant pops of color can truly make a difference. Whether you seek hibiscus-colored throw pillows or find an ocean-toned outdoor rug, the idea is to bring color to your backyard.

5. Hang Around

While you can take any direction you want with furniture, hammocking is definitely a tropical-feeling way to lounge. Some people have portable hammocks, but you can also find permanent ones that are a bit sturdier. It’s all about your comfort and preference.

6. Light the Way

You can’t forget about the lighting. While hanging lights aren’t always tropical in nature, they can make any space feel a bit cozier and more comfortable. Plus, lanterns, string lights and tiki torches can bring a bit of an island vibe if that’s what you’re looking for. Lighting can be a form of decor and not just a functional fixture. 

Tropical Dreams

Everyone’s style is a little different, and you can create a tropical paradise in your backyard however fits you best. Whether you hang a hammock or use a water feature, your little corner of the tropics will be unique to your home and will be the perfect spot to chill out.

Guest Contributor: Rose Morrison

Emergency Plumbing Service for Your Plumbing Solutions

RH Business Marketing Solutions

It’s 3 AM in the morning, and you suddenly wake up and acknowledge that water is running out from your bathroom flush. After the inspection, you realize that your bathroom flush is malfunctioning, and the house is all set to become a mini swimming pool. First and foremost, you should think about how you can control the water flow. Secondly, you need to seek assistance from the emergency plumber service in your vicinity. 

The emergency or 24/7 plumber services will ensure that your bathroom flush problem is fixed, and you can have a peaceful sleep without any noise. Such plumber services can fix other types of issues like water leakage, clogged drainage pipes, leaking taps, and many more. 

Most readers might be unaware of the emergency plumber services; hence, we are mentioning the advantages of using such services below:

Round The Clock Availability

The biggest advantage of hiring 24/7 plumber services is that there are no time boundaries. None of us like to wait for the plumber, especially when the house will become a swimming pool. Thus, the emergency plumber service is ready to deliver the right solutions round the clock and throughout the week. 

As you know that your plumber is always ready to knock on your door anytime, you do not have to worry much about your plumbing issues. For example, if any drainage pipe has burst, you undoubtedly need someone to fix this plumbing problem in less than 30 minutes. Because these situations cannot be delayed the plumbers will be available at urgent hours as well.

You do not need to have a panic attack and wait until the morning to call the local plumber. Sometimes, the heavy plumbing issues require immediate assistance, and the only saviour is the emergency plumber service

You Save Your Hard-Earned Money

One thing you should understand that 24/7 emergency plumber services are costly than regular plumbing services. But, here, you are still saving money despite working with an emergency plumber. These people work at odd hours and will try their best to reach the location ASAP hence the charges shoot up.

For example, if you are having a major leakage issue, this problem can cost you a bit. As the floor will be covered with water for a longer period, it can leave some stains and moulds in the corners. The longer your plumber takes to reach your doorstep, the higher cost you must pay for resolving the issue. 

Waiting until morning is bad, some plumbing issues might worsen, and your local plumber cannot even help you out. If you are running a home-based business, seeking assistance from the emergency plumber service. So, without thinking much, the next time you are experiencing some plumbing issues, look no further than a 24/7 emergency plumber. 

Flexible Schedule 

Even if the emergency plumber service doesn’t require immediate assistance or you’re away from your house, the emergency plumbing service will be ready to visit your home at your scheduled time. If the plumber is your good friend, he can visit your house and resolve the issue. At last, the plumbing issues will be fixed at nominal rates, and you don’t even have to disturb your daily routine. 

Always Get Prompt Response

As already mentioned above, some plumbing issues require immediate assistance; getting a prompt response is also mandatory. For example, if there are water leakage issues at midnight, you expect an immediate response, especially during non-working hours. If the turnaround time is less than a minute, resolving the issue won’t require one or two hours. 

Having access to the emergency plumber service assures all the benefits mentioned above without any fail. As soon as you tell the plumbing issue, the rest will be handled by the emergency plumber. You can always contact us for more information.

Guest Contributor: Nivi Watson