Google+

contact us

Use the form on the right to contact us.

Day or Night, we are here to serve you. Leave your plumbing problem to us.


Tinley Park, IL

(708)845-7922

Residential and Commercial plumbers and plumbing contractors available in Orland Park, Tinley Park, Oak Lawn, Palos Heights, Midlothian, Oak Forest, Homer Glen, Mokena, Frankfort, and the surrounding Chicago South Suburbs. Emergency plumbers.

copper water lines.jpg

Kevin Szabo Jr Plumbing Blog

Kevin Szabo Jr Plumbing is Tinley Park, Orland Park, Oak Forest, Midlothian, Orland Hill, Homer Glen, Mokena, Frankfort, Crestwood, Palos Heights, Oak Lawn, local plumber. Read our blog for advice, tips, a good laugh, and basic home improvement.

**We are moving our old blog to our new and improved website. Too see all our posts visit kevinszabojrplumbing.blogspot.com

Filtering by Category: June

Can You Drink Water from a Dehumidifier? What You Need to Know

RH Business Marketing Solutions

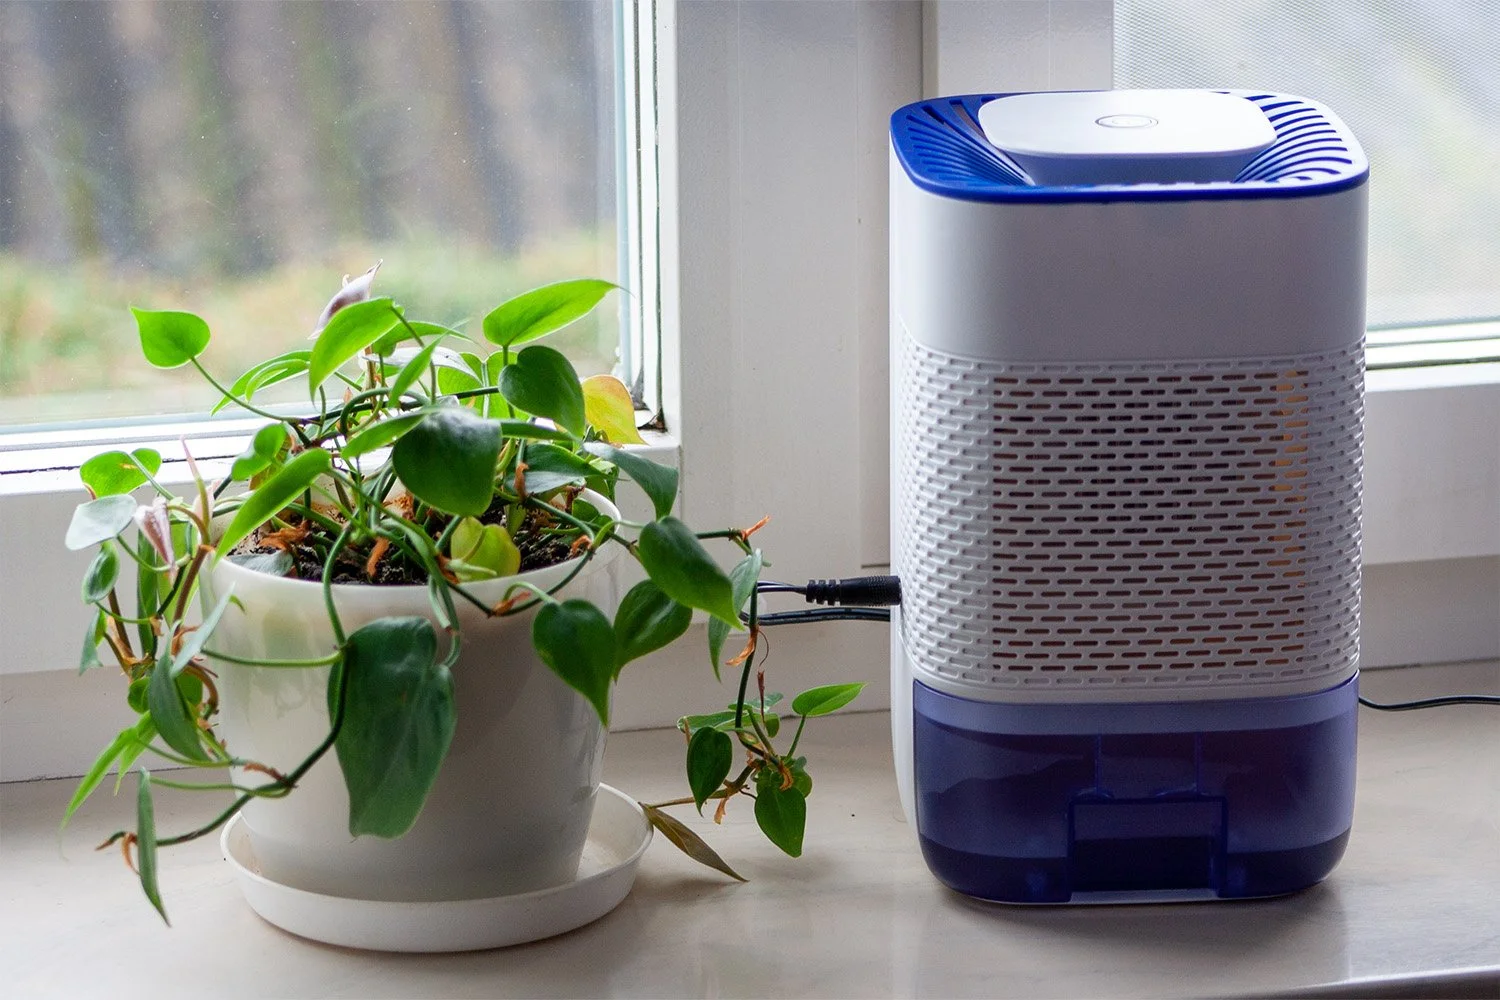
Dehumidifiers are common appliances in many homes, especially in regions with high humidity levels. They work by extracting excess moisture from the air, thereby creating a more comfortable and healthier living environment. One question that often arises is, "water dehumidifier can you drink?" This article aims to provide a comprehensive answer to this query.

Is the Water from a Dehumidifier Drinkable?

The short answer is no, the water from a dehumidifier is not drinkable. Although it may appear clean and clear, this water can contain a variety of contaminants and impurities that make it unsafe for consumption. To understand why, it's important to delve into the process of how dehumidifiers work and the types of pollutants they can collect.

How Dehumidifiers Work

Dehumidifiers function by drawing in humid air, cooling it to condense the moisture, and then collecting this moisture in a reservoir. The process involves several steps:

  1. Air Intake: The dehumidifier pulls in air from the surrounding environment.

  2. Cooling Coil: The air passes over a cooling coil, which causes the moisture in the air to condense into water droplets.

  3. Collection Tank: These water droplets are then collected in a tank or reservoir.

  4. Air Release: The now dehumidified air is released back into the room.

While this process effectively reduces humidity, it does not purify the water. Thus, the water collected by a dehumidifier can contain various contaminants from the air and the machine itself.

Why Is the Water from a Dehumidifier Unsafe to Drink?

Several factors contribute to the unsuitability of dehumidifier water for drinking:

  1. Airborne Contaminants: Dehumidifiers do not filter the air they dehumidify. As a result, any dust, allergens, mold spores, or other airborne particles can be collected in the water.

  2. Bacterial Growth: The water in a dehumidifier's collection tank is often stagnant, creating an ideal environment for bacteria and other microorganisms to grow.

  3. Chemical Contaminants: Dehumidifiers are made from various materials, and some may contain chemicals that can leach into the water over time. These chemicals can be harmful if ingested.

Health Risks of Drinking Water from a Dehumidifier

Drinking water from a dehumidifier can pose several health risks, including:

  1. Illness: The water may contain bacteria, mold, or other microorganisms that can cause gastrointestinal or respiratory illnesses if ingested.

  2. Chemical Exposure: The potential for chemical contaminants from the dehumidifier's components can lead to toxic exposure, which may result in various health issues.

  3. Allergic Reactions: Contaminants such as mold spores or dust mites in the water may trigger allergic reactions in sensitive individuals.

Safe Uses for Water from a Dehumidifier

While the water from a dehumidifier is not safe for drinking, it can be repurposed for other uses around the home. Some practical applications include:

  1. Watering Plants: The water can be used to water non-edible plants, both indoor and outdoor. However, it's advisable to avoid using it on edible plants, as contaminants might be absorbed.

  2. Cleaning: This water can be utilized for cleaning purposes, such as mopping floors, washing cars, or other household cleaning tasks. It is particularly useful for non-porous surfaces where contaminants will not pose a health risk.

  3. Ironing: Some people use dehumidifier water in their steam irons, provided it is free from any visible contaminants. This can help prevent the buildup of mineral deposits in the iron.

Improving the Quality of Dehumidifier Water

If you're considering using dehumidifier water for purposes other than drinking, there are steps you can take to improve its quality:

  1. Regular Maintenance: Keep your dehumidifier clean and well-maintained. Regularly clean the air filter and the water collection tank to minimize the buildup of contaminants.

  2. Filtration: Using an additional filtration system can help reduce some impurities in the water. However, this is still not enough to make it safe for drinking.

  3. Boiling: Boiling the water can kill bacteria and other microorganisms, making it safer for non-consumptive uses. However, this does not remove chemical contaminants.

Conclusion

In conclusion, while the water collected by a dehumidifier may appear clean, it is not safe to drink. The presence of airborne contaminants, potential chemical leaching, and the risk of bacterial growth all contribute to making this water unsuitable for consumption. Therefore, if you ever wonder, "water dehumidifier can you drink?" the answer is a definite no.

Instead, consider repurposing this water for other household tasks such as watering plants, cleaning, or ironing. By doing so, you can make efficient use of the water without compromising your health. Remember, a dehumidifier's primary function is to manage indoor humidity, not to provide potable water.

Important Steps to Take After a House Fire

RH Business Marketing Solutions

Experiencing a house fire can be a devastating and overwhelming event. The aftermath can leave you feeling uncertain about what steps to take next. Knowing how to handle the situation promptly and effectively is crucial for ensuring your safety. After all, national statistics in Orlando show that the average number of injuries per 1000 fires was 6.4 in 2022.

This article will guide you through the important steps to take after a house fire, providing you with clear and practical advice to help you manage the aftermath of a fire and move forward with confidence.

Ensure Safety and Contact Emergency Services

The first and most crucial step after a house fire is to ensure the safety of everyone involved. Once you are out of immediate danger, call 911 to report the fire if it hasn't already been done. Emergency responders will extinguish any remaining flames and secure the area. Do not re-enter the home until firefighters have given you the all-clear, as the structure may be unstable, and there could be lingering smoke or hazardous conditions.

Once the immediate danger has passed, notify your utility providers to turn off gas, electricity, and water to prevent further hazards. Do not attempt to turn utilities back on yourself; leave this to the professionals. Fire departments typically ensure that utilities are safely managed during their response, but it's good practice to follow up.

Contact Your Insurance Company

After ensuring everyone's safety and securing a temporary place to stay, the next step is to get in touch with your insurance company. Notify them of the fire as soon as you can to start the claims process. Your insurance company will guide you through the steps required to file a claim and help you understand what your policy covers.

If you reside in Orlando, the best thing to do is get in touch with an Orlando claims adjuster. An independent claims adjuster works on your behalf to assess the damage, prepare an estimate, and negotiate with your insurance company to ensure you receive a fair settlement. This can be particularly beneficial if you are feeling overwhelmed or unsure about handling the claim on your own.

Gather all relevant documentation, such as your insurance policy, a list of damaged or lost items, and any photos or videos of the damage. If you don't have photos or videos from before the fire, try to find receipts or other documentation to prove ownership and value. Your claims adjuster can assist in compiling and organizing this information to strengthen your claim.

Keep track of all expenses related to the fire, including temporary housing, meals, and any immediate repairs or replacements. These costs may be reimbursable under your insurance policy, so maintaining accurate records is essential.

Document the Damage

Thoroughly documenting the damage is a critical step in the recovery process. Accurate documentation helps support your insurance claim and provides a clear record of the losses you've incurred. Start by taking photographs and videos of the entire property, focusing on areas that have been most affected by the fire. Capture multiple angles and close-up shots to ensure that all details are clearly visible.

Create an inventory of damaged or lost items. List each item, including its description, age, purchase price, and estimated current value. If possible, gather any receipts or proof of purchase for these items. This inventory will be crucial for your insurance claim and help you recover the value of your belongings.

In addition to personal items, document any structural damage to your home. This includes damage to walls, ceilings, floors, and any built-in fixtures such as cabinets or appliances. Take detailed notes on the extent of the damage and any necessary repairs or replacements. If you hire a contractor or restoration company to assess the damage, ask them to provide a written estimate and include it in your documentation.

Begin the Cleanup and Restoration Process

Once you've documented the damage and your insurance claim is underway, it's time to start the cleanup and restoration process. This step can be emotionally and physically challenging, but it's essential for getting your home back to a livable condition.

Begin by contacting a professional fire restoration company. These experts are trained to handle the aftermath of a fire, including smoke and soot removal, water damage mitigation, and structural repairs. They have the necessary equipment and expertise to clean and restore your home safely and effectively. Attempting to clean up on your own can be dangerous and may cause further damage.

The restoration company will conduct a thorough assessment of your home and provide a detailed plan for cleanup and repairs. This plan should include timelines, costs, and any necessary permits or inspections. Work closely with the restoration team and your insurance adjuster to ensure that the proposed work aligns with your coverage and budget.

During the cleanup process, prioritize safety. Wear protective clothing, gloves, and masks to avoid exposure to harmful substances. Ensure that the restoration company follows safety protocols and disposes of hazardous materials properly.

Seek Support and Take Care of Yourself

Recovering from a house fire is not only a physical process but also an emotional one. It's essential to seek support and take care of yourself and your family during this challenging time. The stress and trauma of losing your home and possessions can take a significant toll on your mental health, so it's crucial to prioritize self-care and seek help when needed.

Reach out to friends, family, and community resources for emotional support. Talking about your experiences and feelings can help you process the trauma and begin to heal. Many communities have support groups for fire survivors, where you can connect with others who have gone through similar experiences.

Consider seeking professional counseling or therapy to help you cope with the emotional aftermath of the fire. Mental health professionals can provide valuable support and strategies for managing stress, anxiety, and grief. Don't hesitate to ask for help if you need it; taking care of your mental health is an essential part of the recovery process.

Conclusion

Experiencing a house fire is a devastating event, but taking the right steps afterward can help you recover and rebuild. Ensuring safety, contacting your insurance company, documenting the damage, beginning the cleanup and restoration process, and seeking emotional support are all essential components of the recovery journey.

By following these steps, you can navigate the aftermath of a house fire with confidence and resilience, ultimately restoring your home and well-being. Remember, recovery takes time and effort, but with the right support and strategies, you can overcome this challenging experience and move forward.

How To Pack Fragile Items: Advice From Expert Removalists

RH Business Marketing Solutions

When it comes to moving, the most challenging task is ensuring the safe transport of fragile items. Whether it's delicate, precious artwork, or sensitive electronics, packing and moving these items requires special care and expertise.

Here, you will find advice from Central Coast removalists who specialise in handling fragile items to help you navigate this tricky relocation aspect. These professionals, known for their meticulous attention to detail and commitment to safety, offer invaluable insights on how to securely pack and move your fragile belongings.


-       Understanding the Basics: Why Fragile Items Need Special Attention 

Due to their delicate nature, fragile items are susceptible to damage. They require careful handling with appropriate packing materials and techniques to ensure they remain intact throughout the moving process. Central Coast removalists, who regularly deal with countless delicate items, emphasise that the key to successful fragile item transport lies in thorough preparation and the efficient use of moving boxes and packaging supplies.


-       Essential Packing Materials for Fragile Items

Expert fragile item movers recommend having the following supplies on hand:

●      Sturdy Moving Boxes: Use various sizes to accommodate different items.

●      Bubble Wrap: Ideal for wrapping delicate items and providing cushioning.

●      Packing Paper: Use for wrapping and filling empty spaces in boxes.

●      Packing Peanuts: These provide extra cushioning and prevent items from shifting.

●      Foam Sheets: Great for added protection, especially for delicate items like glassware.

●      Tape: High-quality packing tape to secure your boxes.

●      Markers and Labels: For clearly marking boxes containing fragile items.


-       Step-by-Step Guide to Packing Fragile Items

1.    Sort and Declutter: Before packing, go through your fragile items and decide what to take. This step reduces the volume of items to be packed and ensures you're not transporting unnecessary items.

2.    Wrap Each Item Individually: Central Coast removalists recommend wrapping each fragile item individually using bubble wrap or packing paper. Ensure every part of the item is covered, paying special attention to corners and edges.

3.    Use the Right Size Box: Choose an appropriately sized box for the item you're packing. Avoid using boxes that are too large, which can lead to excessive movement and potential damage.

4.    Layer the Bottom of the Box: Before placing items in the box, line the bottom with a layer of packing peanuts or crumpled paper to provide a cushioning base.

5.    Carefully Place Items in the Box: Place the wrapped item in the box, ensuring it fits snugly. If there is any space, fill it with packing peanuts, crumpled paper, or foam sheets to prevent movement.

6.    Label the Boxes Clearly: Once packed, seal the boxes securely with tape and label them as "Fragile." Indicate which side of the box should face up to ensure proper handling during the move.


-       Specific Tips for Different Types of Fragile Items 

a)    Glassware and Dishes

●      Place plates and dishes on their sides rather than flat.

●      Fill gaps in the box with crumpled paper.


b)   Artwork and Mirrors 

●      Use specialty boxes designed for artwork and mirrors.

●      Wrap the item in bubble wrap, then cover it with a cardboard sheet for extra protection.

●      Label the box with "Fragile" and "Do Not Lay Flat."


c)    Electronics

●      Use the original packaging whenever possible.

●      If the original packaging is not available, wrap the item in bubble wrap and place it in a sturdy box.

●      Fill any empty spaces with packing peanuts to avoid movement.


-       Hiring Professional Fragile Item Movers

While packing your fragile items carefully can reduce the risk of damage, there is no substitute for the expertise of professional fragile item movers. Delicate item removal services offered by Small Removalists Coffs Harbourprovide specialized care and handling for your most sensitive belongings. These professionals have the experience and equipment necessary to ensure your items are transported safely and securely.


-       Benefits of Hiring Delicate Item Removal Services

●      Expert Handling: Trained movers understand the best practices for handling and transporting fragile items.

●      Proper Equipment: Professional movers use the right equipment, like dollies and padded blankets, to protect your items.

●      Insurance: Reputable fragile goods transporters offer insurance to cover any potential damage during the move.

●      Efficiency: Professionals can pack and move your items more quickly and efficiently, saving time and effort.


-       Conclusion

Moving can be a stressful experience when it involves fragile items. With the right preparation, packing materials, and expert help from Central Coast removalists, you can ensure that your delicate belongings arrive at their new home safely. By following the advice of experienced fragile item movers and considering the benefits of fragile item packing and moving services, you can protect your valuable and sentimental items from damage during your move. Investing in proper packing and professional moving services is a small price to pay for the peace of mind that comes with knowing your fragile items are in good hands.

What to Have at Home That Can Help You With Sports

RH Business Marketing Solutions

Sports at Home: Your Guide to Working Out in a Sports-Themed Home

Are you a sports fanatic? Do you really enjoy watching your favorite teams play? If so, then you might be wondering how best to incorporate sports into your home environment, not just as a training regime for yourself but also for ambience and decor. If you want your home to be your ultimate sports-themed sanctuary, complete with memorabilia from your favorite teams and a home workout gym, then read on.


Your Home Gym

Why spend hundreds of dollars a year on a gym membership? Except for specialized training, most people can exercise at home. With a few adjustments to your schedule, you can make working out at home easy. Some studies suggest that most people may find gym memberships to be a waste of money, as the majority of those who sign up for new gym memberships only use them for the first month or two before discontinuing their visits. This is primarily due to busy lifestyles and the inconvenience of having to drive to a separate location to work out. But at home, with a few pieces of inexpensive equipment, you can work out just as well.


Cardio

Cardio training typically does not require specialized equipment aside from good workout shoes. You can watch a variety of free workout channels on YouTube in your living room, many of which cater to beginners.


Yoga and stretching

Again, several YouTube channels will guide you through stretching and yoga routines, but you may want to buy some good gear. A high-quality yoga mat can help you avoid brush burns from the carpet, while some stretching bands and elastic can help you execute certain stretching routines.


Strength

You don’t need the variety of heavy weights at the gym for conditioning and strengthening exercises. Use a backpack filled with cans or other weights for resistance, and simply elevate your point of contact to add more resistance to your regular workout. If not, you can easily purchase a cheap set of simple weights from Walmart or Academy Sports.


Conditioning

You might miss the gym's bikes and elliptical machines, but you can still perform many conditioning exercises without them. Wall sits, planks, burpees, and jogging around your neighborhood are all acceptable conditioning routines that require minimal equipment, if any. The best part about conditioning training is that it can really be done almost anywhere and you know what they say practice makes perfect.


Sports-Themed Ambience 

What better way to get into the mood for working out than to decorate your workout room, or even your whole house, with a sports theme? Check out Pinterest and other sites for ideas on how to decorate your home with a sports motif. Frame your favorite players' jerseys and hang them on the wall, along with any sports pennants or banners from your favorite teams. In your workout room, paint the walls in your team's favorite colors and throw a football field rug on the floor.

Many professional sports teams and college teams offer online merchandise, including workout equipment such as water bottles, towels, and other exercise gear. You might also find other home items, such as bedspreads, throw pillows, kitchen accessories, and bathroom towels. If this is not available, you might consider making your own from a generic set of items and painting them with your favorite logo.

Be creative with what you have or can buy at the craft store for a generic look. Find fabric prints of team-themed logos and make some curtains, or look for some inexpensive wall art featuring your favorite team. Make useful items out of recycled sports gear, such as a baseball bat coat holder or door hanger. Recycle some lockers for bedroom storage, or find some used furniture at a garage sale and paint it in your team’s colors.


Summary 

Doctors are always saying that we, as a society, need to work out more. There are numerous ways to maintain our health and fitness while working out at home, especially when our favorite sports team decorates our walls. If you want to incorporate more sports into your home life, encourage your family to jump on board with their own workout and decoration ideas to make your home truly a sports sanctuary. Take a Saturday to surf the local garage sales for sports-themed items, or anything that might be easily repurposed. Creativity knows no bounds and, when properly applied, creates a truly unique environment that encourages staying in shape while also cheering for your favorite teams.


Written by Taylor McKnight, Author for Quantum Performance

Maximizing Space: 5 Expert Tips to Make Your Small Space Feel Bigger

RH Business Marketing Solutions

Making a small space feel larger is a common problem that many of us have. Whether you're living in a cozy apartment, a compact studio, or a tiny house, there are strategies you can employ to make the space feel more open and airy. From thoughtful furniture selection to strategic decor choices, here are five key techniques to help you maximize every square foot of your small space.

1.        Choose the Right Furniture Scale for Your Space

Selecting furniture that fits the scale of your room is one of the most important ways you  can create the illusion of space. In a small space, bulky or oversized furniture can overwhelm the area and make it feel cramped. Instead, opt for pieces that are proportionate to the room's dimensions. Consider sleek, streamlined designs with clean lines that won't visually weigh down the space. Additionally, furniture with raised legs can create a sense of openness by allowing light to flow underneath, making the room appear larger. Before making any purchases, measure your space carefully and choose furniture that complements its size and layout.

2.        Choose Furniture that Has More Than One Purpose or Use

In a compact living environment, every piece of furniture should serve a dual purpose to maximize functionality without sacrificing space. Look for multifunctional furniture designs that offer versatility and efficiency. For example, a sofa bed or a futon can provide seating during the day and transform into a sleeping area at night, eliminating the need for a separate guest bed. Similarly, an ottoman with hidden storage compartments can double as a coffee table while providing extra space to stow away blankets, pillows, or other items. By investing in furniture that serves multiple roles, you can optimize your space and enhance its usability without overcrowding it with unnecessary pieces.

3.        Use Mirrors

Mirrors are a powerful tool in small space design because they can visually expand a room and add depth and dimension. Placing mirrors strategically through your home can amplify natural light, reflect views, and create the illusion of a larger space. Consider positioning a large mirror opposite a window to bounce light around the room and make it feel brighter and more spacious. To really add to your space, choose a floor mirror like an Anthropologie mirror dupe that has strong style elements and will leave a lasting impact.

Additionally, mirrored furniture, such as dressers or side tables, can contribute to the illusion of openness by reflecting the surrounding environment. Experiment with different mirror placements and angles to maximize their impact and enhance the perceived size of your space.

4.        Stick to One Home Decor Style

Maintaining a cohesive home decor style throughout your small space can help create a sense of continuity and harmony. When decorating a compact area, it's essential to avoid clutter and visual distractions that can fragment the space and make it feel chaotic. Instead, choose a single design theme or aesthetic and incorporate elements that complement each. Whether you prefer minimalist modernism, rustic farmhouse charm, or eclectic bohemian flair, aim for consistency in color palettes, furniture styles, and decorative accents. By curating a unified look, you can create a cohesive visual flow that maximizes the perceived size and openness of your space.

5.        Minimize Clutter

Clutter can quickly overwhelm the senses and make a room feel cramped and claustrophobic. To combat clutter, prioritize organization and storage solutions that keep your space tidy and streamlined. Invest in furniture with built-in storage compartments, such as bookshelves with concealed cabinets or beds with drawers underneath, to maximize vertical space and minimize visual clutter. Utilize decorative baskets, bins, and boxes to corral loose items and keep surfaces clear. Regular decluttering sessions can also help prevent accumulation and maintain a sense of openness in your small space. By eliminating excess clutter and embracing a minimalist approach to decor, you can create an environment that feels airy, serene, and more spacious.

In conclusion, transforming a small space into a functional and inviting environment requires thoughtful planning, creativity, and strategic design choices. By selecting appropriately scaled furniture, maximizing multifunctionality, harnessing the power of mirrors, maintaining a cohesive decor style, and minimizing clutter, you can optimize every inch of your space and make it feel larger and more expansive than ever before.

Five Indications You Need a Kitchen Plumber for Your Home

RH Business Marketing Solutions

A home is like the human body. It's a complex system where everything must work in harmony, and just like your health, ignoring small issues can lead to more serious problems down the line. When it comes to our homes, the kitchen, undoubtedly, is the hearty hub that is in constant use. Therefore, efficiently functioning kitchen plumbing becomes all the more critical. Recognising the signs of a problem and responding promptly can save homeowners plenty of hassle, time, and money. This blog is dedicated to helping you understand the vital signs that signal your kitchen plumbing needs expert attention.

Understanding Your Kitchen Plumbing System: The Basics

Before we delve deeper into the signs that might indicate a problem, let's first understand our adversary - the kitchen plumbing system. Your kitchen plumbing system comprises four basic elements: your sink, water supply pipes, drainage pipes, and the faucet or tap. The water supply pipes carry clean, potable water from your main water source to your kitchen tap. Drainage pipes, on the other hand, carry away the waste water to the city sewage system. These elements, although simple and basic, are interlinked in a complex manner. If here's something wrong with one component, especially if it's neglected, the entire system can face a breakdown.


The Five Indicators You Need a Professional Plumber for Your Kitchen


1)    Slowly Draining Sink

If your kitchen sink takes forever to rinse down the water, this could be a red flag. Clogged or slow-draining sinks are the most common symptom of a bigger plumbing issue such as a blocked drain pipe. Sometimes, you can fix it with a plunger or a hand auger. But when these methods fail repeatedly, you may have a bigger problem on hand requiring professional attention.


2)    Unusual Noises

Is your kitchen turning into a haunted house with unusual gurgling or bubbling noises coming from the pipes? These noises could be a sign of trapped air in the pipes or worse - some blockages. Not all noises hint towards a dire situation but if they persist, you should consider ringing a professional plumber.


3)    Persistent Backups or Overflows

It's natural for your sink to backup or overflow once in a while, especially after a heavy meal preparation. But if this becomes a recurring problem, it might be a symptom of an obstructed or damaged sewage line. This can lead to more serious issues like pipe bursts or leaks if not checked promptly by experts.


4)    Low Water Pressure

If you've been noticing consistently low water pressure in your kitchen tap, it might indicate a hidden leak or blockage. Low pressure could also be due to sediment build-up in the faucet aerator or a cracked water supply line - all of which warrant an expert check-up.


5)    Unpleasant Odours

Does your kitchen reek of an unpleasant sewer-like smell? Foul odours around your kitchen sink or drain can be a sign of problems with the venting of your drain pipes or decay in the pipe material. Ignoring these odors can lead to health implications and so, a plumber's intervention is deemed necessary.

The Risks of Ignoring These Indicators: Consequences and Cost Implications

The smellier the problem, the costlier it tends to be. Ignoring the signs of plumbing problems will not make them go away. Instead, it can escalate the situation leading to a complete shutdown of your kitchen, expensive bills and even compromise the structural integrity of your house. Early detection and repair can save homeowners a fortune in water and repair bills.


Why You Should Hire a Professional Plumber Rather Than DIY

Although fixing minor plumbing issues yourself can be tempting, it's wise to leave the bigger problems to the experts. Professional plumbers have the necessary experience, equipment and knowledge to diagnose and repair even the trickiest of problems. They also take care of safety measures, provide warranty for their work and ensure the long-term health of your plumbing system.


How to Choose the Right Plumber for Your Kitchen: Tips and Considerations

Choosing the right plumber is as essential as getting the repairs done. Ensure your plumber is licensed, has good reviews or testimonials and provides clear and upfront pricing. Also, check if they offer a warranty for their work. These are some key factors that determine the reliability and quality of a plumber's service.


Conclusion

Remember, your kitchen is one of the most-used spaces in your homes. Prioritising its plumbing health can lead to longer lifespan of appliances and a comfortable, problem-free kitchen experience. And when you encounter these five signs, don’t ignore them but contact a professional plumber immediately.

How You Can Make an RV Into Your Home

RH Business Marketing Solutions

What is an RV?

RV stands for "recreational vehicle." They can be either towed or have their own engines. They're designed to accommodate a certain number of people as a sort of "domicile on wheels." Generally, they'll have, at the very least, a sleeping area and a common area. Many of them also have cooking apparatuses, dining areas, and entertainment centers. Most of them also have some sort of restroom. Even the smallest of them, which are generally built upon the beds of large pickup trucks, can have a restroom of sorts.

They range in size from those small ones up to colossi that can weigh up to 40 tons and be nearly the size of a tractor trailer. These huge vehicles have full bedroom suites, multiple bathrooms, living areas with 60-inch televisions, solar cells, onboard generators, and all manner of other luxuries. In essence, by providing up to 400 square feet of living space, they're already the equivalent of a small house. In between these two extremes, you'll find Class-B and Class-C motorhmes. These smaller vehicles offer a balance between opulence and practicality. When it comes to size, a Class-C motorhome resembles a large van while a Class-B is somewhat larger. 

When it comes to trailers, there are a few different types, which include fifth wheels, toy haulers, and travel trailers. A fifth wheel has a connection that's similar to that of a tractor-trailer whereas a travel trailer has a standard hitch. A toy hauler is a specific kind of RV that comes with a "garage" as well as the interior living space. You can store smaller vehicles, such as ATVs, mountain bikes, and even small watercraft in that garage.


How You Can Make Your RV Into Your Home

The biggest, most luxurious RVs already have everything you need to live in them all the time. However, smaller RVs could use some "extras" to make them livable full time. One thing that you may not realize is that having a permanent address is actually required. It's called your "domicile state." Just because you live in an RV doesn't mean that you get to shirk taxes, vehicle registration, and voting responsibilities.

The second thing to consider is whether you'll be mobile all the time or park for awhile, most likely during the winter. Either way can work, but there are some precautions to take. For example, if you plan to be stationary during the winter in a place where you get cold weather, then you'll need the following: an RV skirt to keep snow from piling up under your RV, heat tape to coat your water pipes and the potable, grey, and black water tanks, and a working system to stay warm.

Additionally, you can choose to add a dehumidifier to keep out moisture, which could lead to condensation freezing on the interior of the windows. You can also choose different methods to insulate your RV. The insulation will also work to help keep you cool during hot weather. When it comes to keeping cool, you can choose either fans, portable air conditioners, or both. Another possibility is to choose roof vents and/or a full HVAC system, although such systems are rare outside of Class-A RVs.

As far as making your RV home "homey" is concerned, there are all manner of small things you can do, such as putting down throw rugs, bringing trusty pillows along, or putting "Nana's china" in the RV's kitchen cabinets. Quite literally, you are spoiled for choice.


Improvements You Might Need to Make

If you have an older RV, then it might be missing certain components or have components that need repair or replacement. One such item is the generator that comes with many RVs. This will give you power while boondocking or staying in a primitive campground, such as those maintained by the Bureau of Land Management. You also have the choice of installing a solar system in an old RV, which is easier on the environment than a diesel generator.

Based upon your mobility and that of your family members, you have the option to add folding ramps, additional railings, and other assistance devices to your RV to help with ingress and egress. Should you want to have additional electronics in the RV that aren't standard, then you can install an inverter if the RV lacks one. Lastly, if you plan to spend time outside the RV while you're boondocking or parked in a campground, you can make the choice to add an awning or upgrade an existing awning.

Written by Taylor McKnight, Author for Pro RV Repair Vancouver

Daily Habits to Adopt If You Want to Keep Your House Clean

RH Business Marketing Solutions

Keeping a house clean and tidy can often seem like a daunting task, especially for those juggling busy schedules. However, integrating simple daily habits into your routine can significantly lighten the load, ensuring that cleanliness becomes a natural part of your day rather than a chore. Adopting these practices not only maintains the aesthetic appeal of your home but also contributes to a healthier living environment. Here we explore practical habits that can help you keep your house in top condition with minimal effort.

1. Start Your Day by Making the Bed

One of the quickest ways to give your bedroom a neat appearance is by making the bed each morning. This task, which takes just a few minutes, can dramatically transform the look of your room and set a productive tone for the rest of the day. A made bed not only tidies the bedroom but also instills a sense of accomplishment first thing in the morning, encouraging you to keep the rest of your space organized throughout the day.

2. Manage Your Home's Waste System

A clean house isn't just about the things you see but also about maintaining the unseen elements, such as the home's waste system. Regular maintenance of your septic system, for example, is crucial to prevent backups and odors that can compromise the cleanliness and usability of your home. It’s a good idea to establish a routine check-up with professionals. Homeowners should lookup the keyword septic companies near me on a search engine to find and schedule regular service from trusted local providers. This proactive step helps avoid emergencies that could disrupt the home environment and lead to bigger, messier issues.

3. Do a Load of Laundry Daily

Allowing laundry to pile up can create a daunting task that requires several hours of sorting, washing, folding, and putting away clothes. To avoid this, incorporate doing a load of laundry into your daily routine. Tackling laundry in smaller, more manageable batches not only keeps your laundry basket empty but also ensures you never run out of clean clothes. It simplifies the process, making it less time-consuming and more routine.

4. Wipe Surfaces After Use

In the kitchen and bathroom, surfaces often become dirty very quickly. To prevent the buildup of grime and bacteria, make it a habit to wipe down counters, stovetops, sinks, and other surfaces after each use. Keeping cleaning wipes or a cloth and cleaning spray handy can encourage this habit. This practice not only maintains the cleanliness of these frequently used areas but also reduces the time needed for more extensive cleaning later.

5. Manage Clutter

Clutter can accumulate quickly in any household, making spaces look messy and disorganized. Incorporate daily decluttering into your routine to combat this. Spend a few minutes each day returning items to their designated places, and consider implementing a "one in, one out" policy to control the accumulation of new items. Regularly assessing your space to remove or donate items that are no longer needed can also keep clutter under control. By managing clutter daily, you maintain a more orderly home that feels spacious and clean.

6. Sweep or Vacuum Daily

Daily sweeping or vacuuming is crucial, especially in high-traffic areas like kitchens, hallways, and living rooms. Dirt and debris can accumulate quickly, not only detracting from the cleanliness of your home but also potentially damaging your flooring over time. This task takes only a few minutes but makes a significant difference in the upkeep of your home.

7. Handle the Dishes After Every Meal

A sink full of dirty dishes can make even the cleanest kitchen look messy. To avoid this, make it a practice to wash dishes immediately after meals or load them into the dishwasher. This not only keeps your kitchen looking neat and ready for the next cooking session but also helps prevent the buildup of bacteria and odors associated with left-out dishes. Managing dishes promptly is a simple yet effective way to maintain cleanliness and order in one of the most used spaces in your home.

8. Take Out the Trash Regularly

Regularly removing trash from your home is essential to prevent odors and maintain a clean environment. Make it a daily habit to check trash bins in key areas such as the kitchen, bathroom, and office, and take out the trash if they’re nearing full. This practice helps manage waste effectively and reduces the likelihood of spills and unpleasant smells, contributing to a fresher and cleaner home.

9. Implement Evening Pick-Ups

An evening pick-up routine can greatly enhance the cleanliness of your home. Spend a few minutes each night walking through each room and putting away items that were used during the day. Toys, books, clothes, and other personal items should be returned to their designated places. This not only helps reduce clutter but also prepares your space for the next day, allowing you to wake up to a tidy home. This routine can become a calming end-of-day activity that helps you decompress and prepare for a restful night.

10. Plan Weekly Cleaning Sessions

While daily habits are crucial for maintaining a clean home, weekly cleaning sessions are necessary to address areas that aren’t covered in the daily routine. Set aside time each week to do more thorough cleaning tasks such as dusting, mopping, scrubbing bathrooms, and cleaning windows. These sessions ensure that every part of your home receives attention and stays in excellent condition. Planning these sessions helps distribute the cleaning workload evenly throughout the week and keeps the tasks manageable.

Conclusion

Adopting these daily and weekly habits will drastically change the way you manage household cleanliness. By integrating these simple tasks into your routine, you ensure that your home remains not only clean but also a welcoming and pleasant space for you and your family. Remember, consistency is key; the more regular you are with these habits, the easier and less time-consuming they become. Keep your home clean not just as a chore, but as a way to enhance your overall quality of life.

The Role of High-Quality Metals in Modern Plumbing Systems

RH Business Marketing Solutions

In the ever-evolving world of plumbing, the materials used have a significant impact on the durability, efficiency, and performance of the systems. Among these materials, high-quality metals and advanced alloys stand out for their remarkable properties and benefits. This article explores how these metals contribute to modern plumbing systems' success, ensuring reliability and longevity.


Enhanced Durability

One of the primary advantages of using high-quality metals in plumbing is their exceptional durability. Metals like copper, stainless steel, and brass are renowned for their resistance to corrosion and wear. Copper, for instance, has been a staple in plumbing for decades due to its ability to withstand extreme temperatures and resist rust. This durability ensures that plumbing systems remain leak-free and operational for extended periods, reducing the need for frequent repairs and replacements.


Superior Efficiency

Efficiency is a critical factor in modern plumbing systems, where the smooth flow of water and minimal energy consumption are paramount. High-quality metals contribute to this efficiency by providing excellent thermal conductivity and strength. For example, stainless steel pipes offer a low coefficient of friction, allowing water to flow more freely and reducing energy consumption in pumping systems. Additionally, metals like brass are often used in valves and fittings due to their precise machining capabilities, ensuring tight seals and efficient water flow control.


Improved Performance

The performance of plumbing systems is significantly enhanced by the use of advanced alloys. These materials are engineered to provide specific properties that address the unique demands of contemporary plumbing. Nickel-based alloys, for instance, offer exceptional resistance to high pressures and extreme temperatures, making them ideal for industrial and commercial plumbing applications. Moreover, the flexibility and malleability of certain metals allow for innovative designs and installations, accommodating the complex layouts often required in modern buildings.


Environmental Benefits

High-quality metals in plumbing systems also offer environmental advantages. Metals like copper and stainless steel are highly recyclable, reducing the environmental impact associated with the extraction and processing of raw materials. By using recyclable metals, plumbing systems contribute to sustainability efforts, aligning with the growing emphasis on eco-friendly practices in the construction and plumbing industries.


In conclusion, the role of high-quality metals in modern plumbing systems cannot be overstated. Their durability, efficiency, and performance are crucial in ensuring reliable and long-lasting plumbing infrastructure. As technology advances, the development of new alloys and the improved processing of existing metals will continue to enhance plumbing systems, meeting the ever-increasing demands of contemporary construction and ensuring the sustainability of our built environment.

Property Upgrades that Pay: ROI Strategies for a Stunning Investment Property

RH Business Marketing Solutions

Investing in a property can be a wealth-building venture, but realizing its full potential calls for strategic planning and action. Here are some strategies to enhance your investment property's appeal and maximize returns, shared by Kevin Szabo Jr. Plumbing.

Check Your Plumbing System

Ensuring your investment property's plumbing is fully functional and in good condition is essential for maintaining its value and avoiding costly repairs. Kevin Szabo Jr. Plumbing can provide you with a thorough evaluation of your plumbing system and comprehensive assistance with various components such as ejector pumps, sump pumps, grease traps, water softeners, water heaters, drainage pumps, faucets, garbage disposals, gas lines, pipes, valves, and general fixtures. Their expertise ensures your property's plumbing remains reliable and efficient, giving you peace of mind and protecting your investment.

Manage Your Property with an LLC

Forming a limited liability company (LLC) for managing your investment property can offer numerous benefits, including liability protection and potential tax advantages. An LLC structure helps safeguard your personal assets from business-related risks and obligations. You can avoid hefty lawyer fees by filing yourself or by using a formation service like https://www.zenbusiness.com/, which simplifies the process and makes it more affordable. This way, you can efficiently establish your LLC while keeping costs down.

Leverage the Expertise of an Interior Designer

Partnering with a seasoned interior designer can pay dividends when planning ROI-friendly renovations. They can help you select designs that resonate with a broad spectrum of prospective tenants or buyers, thereby enhancing your property's value. Additionally, an experienced designer can guide you in choosing cost-effective materials and suggest innovative design solutions that align with current industry trends.

Give Your Floors a Facelift

Floors can make or break first impressions. Investing in top-notch flooring can dramatically transform your property's appearance and draw more interested parties. Consider swapping outdated carpets with hardwood or laminate options, which often offer higher durability and broader appeal. Furthermore, incorporating underfloor heating systems can provide an added touch of luxury and comfort, especially during colder months. Remember, a well-maintained floor adds value to your property and enhances its overall appeal.

Upgrade to Modern Appliances

Contemporary, energy-efficient appliances can be a significant draw for many renters and buyers. Besides sprucing up your property, they can also lower energy costs, making your property more attractive to environmentally conscious individuals. Additionally, consider installing smart home technology to automate and streamline various processes, such as temperature control and security systems, offering convenience and peace of mind to occupants. Lastly, these upgrades can also increase the overall value of your property.

Prioritize Regular Repairs and Maintenance

Routine maintenance and timely repairs can prevent minor issues from escalating into major headaches. This approach not only saves you money over time but also preserves your property's value. Regular inspections can help detect potential problems early, and addressing these issues promptly can avert further damage. Additionally, establishing a network of reliable contractors and service providers can streamline the maintenance process, ensuring efficient and effective resolution of any issues that arise. 

Investing in property can be a lucrative venture, but it requires strategic planning and action to unlock its full potential. By implementing these proven strategies, such as forming an LLC, partnering with an interior designer, upgrading flooring and appliances, embracing eco-friendly plumbing, and prioritizing regular maintenance, you can enhance your investment property's appeal and maximize returns. With careful attention to detail and a focus on long-term value, your stunning investment property is sure to stand out in the market and attract tenants or buyers seeking quality and sophistication.