Google+

contact us

Use the form on the right to contact us.

Day or Night, we are here to serve you. Leave your plumbing problem to us.


Tinley Park, IL

(708)845-7922

Residential and Commercial plumbers and plumbing contractors available in Orland Park, Tinley Park, Oak Lawn, Palos Heights, Midlothian, Oak Forest, Homer Glen, Mokena, Frankfort, and the surrounding Chicago South Suburbs. Emergency plumbers.

copper water lines.jpg

Kevin Szabo Jr Plumbing Blog

Kevin Szabo Jr Plumbing is Tinley Park, Orland Park, Oak Forest, Midlothian, Orland Hill, Homer Glen, Mokena, Frankfort, Crestwood, Palos Heights, Oak Lawn, local plumber. Read our blog for advice, tips, a good laugh, and basic home improvement.

**We are moving our old blog to our new and improved website. Too see all our posts visit kevinszabojrplumbing.blogspot.com

Filtering by Category: February 2023

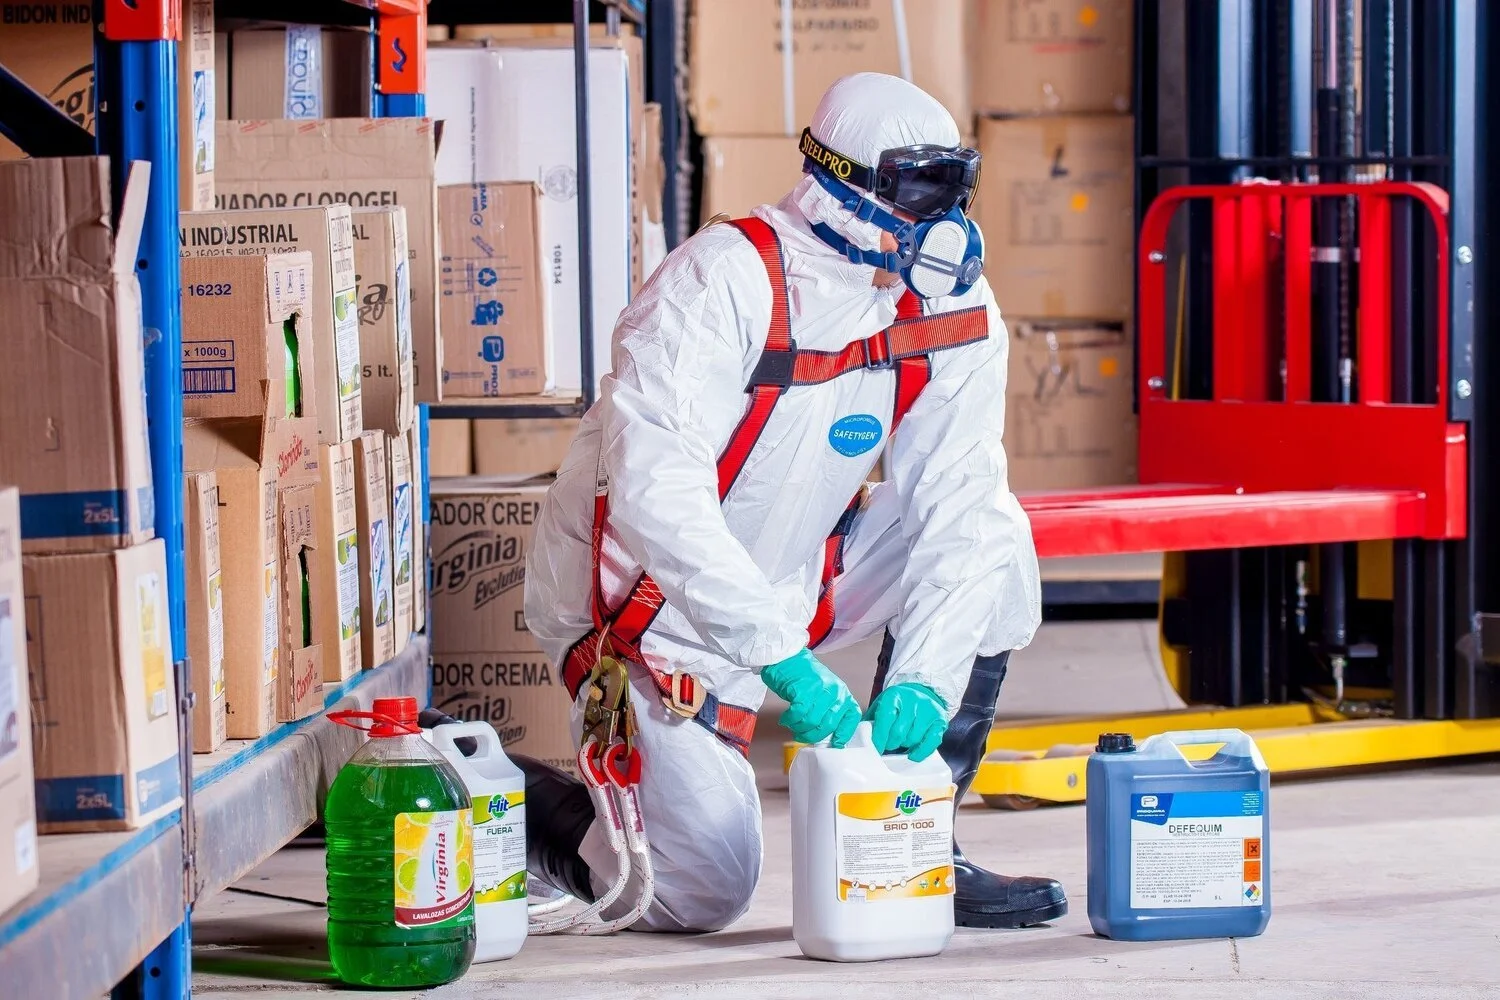
Safe practice for storing hazardous substances on construction sites

RH Business Marketing Solutions

By Kevin Rowe, Managing Director of SafetyBuyer.com


Construction has historically been one of the industries with the highest risk of possible workplace safety hazards in the UK, so it is crucial for employers in the construction sector to maintain the highest standard of health and safety planning. A crucial component of this planning should be ensuring that your construction site has sufficient secure procedures in place for the handling and storage of hazardous materials.

Cement, paint, caustic chemicals, glues, solvents, and other products that produce inhalable vapours, fumes, and dust are just a few of the hazardous elements used regularly in the construction industry. Each of these might cause environmental or human harm if stored or managed improperly.

The Control of Substances Hazardous to Health (COSHH) laws in the UK provide a legal obligation on all construction businesses that store hazardous materials and chemicals on site to enforce specific information on how these risks should be managed.

Essential safety measures for storing hazardous materials on building sites

If storing hazardous chemicals is a requirement on your construction site, you and your team should be taking the following aspects into account:

●      Ensure the designated storage area is organised, well-lit, adequately ventilated and has ample space to safely store all of the potentially hazardous materials

●      The storage area's surfaces must all be resistant to the materials being stored and be easy to clean

●      All potentially harmful substances and chemicals must be kept in accordance with the manufacturer’s recommendations and instructions

●      Store incompatible substances separately if it is unsafe to keep them together

●      Keep potentially flammable materials away from ignition sources, such as heaters and boilers

●      For ease of identification, every item must have legible and accurate labels

●      The number of different hazardous substances being stored should be kept to a minimum, as should the quantity of each substance kept on site

●      Hazardous materials should be kept close to spill cleanup kits, so that staff have easy access to cleaning materials in case of a spill

●      Chemical and liquid storage facilities should be kept above ground, where they are less likely to be damaged

●      Storage spaces for hazardous compounds should be clearly designated with the proper safety signs, notifications, and hazard symbols, to alert staff to possible hazards and the required safety precautions associated with chemical storage

These procedures will vary depending on the kind of hazardous material you use at work, but by taking each one into account, you can make sure that you are taking into account the potential risks and that you are always following safe practices.

Additional safety guidelines for storing hazardous materials at building sites.

Construction sites should take the following actions to ensure the safety of their employees, in addition to offering a secure storage area and complying with best practice guidelines when handling potentially hazardous materials:

●      Perform a risk assessment to identify any possible hazards at work and dangerous chemicals that your employees may come into contact with while performing their everyday tasks, including any goods they are using and any byproducts that are produced by their job

●      Find ways to eliminate these substances from your activities, or use a safer version of the product, if possible

●      Create and maintain a defined method for handling and disposing of the hazardous chemical to reduce any possible risk of harmful exposure

●      All staff members should get thorough training on safe techniques for storing hazardous materials, including explanations of all potential dangers, manufacturer's instructions, and recommendations on when personal protective equipment (PPE) might be required

●      Establish a clear emergency process to guarantee that any leaks or spills are cleaned up as fast as possible and that the essential equipment is available to prevent injury

●      Ensure there are enough storage bins and facilities for any hazardous substances that must be stored on-site, and frequently inspect them for leaks, container damage, or product expiry

●      Provide PPE for every staff member who must routinely handle dangerous chemicals

●      Use safety signs and site safety boards to alert workers and site visitors to the possible hazards posed by hazardous materials and to instruct them on how to handle these materials safely

●      Keep COSHH management and spill control supplies on-site to guarantee that any unintentional spills can be cleaned up and contained safely


Construction businesses can control the risks from hazardous substances and materials without affecting their efficiency by putting these regulations in place, allowing employees to benefit from a safe workplace.

6 Reasons Why Installing a New Roof Shouldn’t Be a DIY Project

RH Business Marketing Solutions

When it comes to roof replacement, the do-it-yourself (DIY) route can be tempting. After all, don't you want to save money and take pride in a job well done? While DIYing may seem like the way to go, it is important to consider the risks that come with taking this approach. In this blog post, you will learn why you should not DIY your roof replacement and the reasons that professional roofers are the best choice.

Professionals Have All The Tools Needed

In terms of having your roof replaced, the cost of tools and materials can add up quickly. Professional roofers have access to all the necessary equipment needed for a successful job, from ladders and scaffolding to specialized tools like power drills and saws. 

In addition, they will often be able to get better deals on high-quality materials than you would if you were to purchase the items yourself. The professionals behind resolveroofing.com recommend that you compare the cost of materials between a professional roofing company and a big box store before making your final decision. You may be tempted to borrow or rent tools from a friend or neighbor, but this can be a risky proposition. Not only do you run the risk of damaging the equipment, but you also could end up injuring yourself if you're not properly trained in the use of the tools.

You Don't Really Save Money

DIY replacement may seem like a great idea to save money, but in reality, you're sacrificing quality for the sake of spending less. Even if you get lower-quality materials and pay less labor costs, there are still other factors at play. Professional roofers have experience and knowledge that an amateur doesn't, which could end up costing you more in the long run.

Furthermore, if an inexperienced person repairs their own roof, it's not likely to hold up as well as a professional job would and can end up costing you more in the long term due to costly repairs or replacements down the line. Put simply, DIY roofing might save you money upfront but could cost you much more in the long term. That's why it's best to leave roof replacement up to professionals.

You Don't Get A Warranty

If something goes wrong, either with the materials or the installation, it's up to you to fix it and cover any costs that go along with it. Professional roofers provide warranties on their workmanship which means they stand behind their product and will take responsibility if anything fails.

Therefore, it is always better to let the experts handle your roofing ventures  – they will make sure everything is done correctly and provide protection in case of any problems. Furthermore, they can help ensure that the job is done up to local building codes and standards. So, don't take the risk with DIY – it's not worth it in the long run. Get a warranty by leaving it to the professionals!

The Danger Level And Injury Risk Isn't Worth It

When it comes to replacing a roof, the danger level and injury risk are simply too high for attempting to do it yourself. Improperly installed roofs can lead to safety hazards and expensive damages in the future. Professional contractors have the specialized training and expertise needed to replace your roof correctly, with confidence that the job will be done right. 

Attempting to do it yourself could result in serious injury - or even death. It's simply not worth the risk. Not to mention, most homeowners need the necessary tools or equipment to complete the job correctly. Don't take chances with your safety - or your roof. Hire a professional contractor to get the job done right, the first time.

The Time Spent May Not Be Worthwhile

If you're considering a DIY replacement of your roof, one thing to keep in mind is the time it takes. A typical timeline for an experienced professional can take between a few days and two weeks depending on the size of your roof and any complexities involved. 

On the other hand, if you attempt to do it yourself, it's likely that it will take much, much longer. Depending on your experience level, it could take months or even years to complete the work, and the result may not be as good as a professional job.

It Just Won't Look As Good

There's a huge difference between a professional replacement job and a DIY roof replacement. When you hire a professional, you're paying for their years of experience and expertise. They know how to properly install a roof so that it looks its best. A DIY job will never look as good as a professional one.

You might not know how to properly install the roofing materials, leading to an uneven and sloppy look. You also may not have access to all of the necessary tools for installation. Even if you do have the right tools, it's very difficult to replicate the aesthetic of a professionally installed roof on your own.

In conclusion, DIY roof replacement is simply not worth it. It can end up costing you more in the long run, you won't get a warranty if something goes wrong, and there's too much danger and injury risk involved. The time it takes might not be worth it either, and a DIY job will never look as good as a professional one.

How To Pick A Carpet Runner According To Your Interior Design

RH Business Marketing Solutions

Carpet runners can be a great way to add color, texture, and pattern to your home décor. Whether you’re looking for something classic or modern, the right carpet runner can tie the room together. But how do you choose the perfect rug for your interior design? We’ll cover all of the essential steps needed to find and pick out a carpet runner that will match your existing interior design. From understanding what type of material works best in each room, to considering size and length options – we’ll provide tips on everything you need to know when shopping for a new carpet runner!

Materials

The type of material is a critical factor to consider when selecting an area rug. Natural fibers like wool, sisal, and jute are the most popular choices for runners as they provide excellent durability and quality. They also offer a variety of textures that can complement various decor styles. Synthetic materials such as nylon or polyester are great options for people who prefer a lower cost but still want good performance. You can get top-quality carpet runners at Direct Carpet without breaking the bank and without compromising on the matter of aesthetics. A good carpet runner should be able to handle heavy foot traffic, so look for something that is tightly woven and will last a long time.

The Size & Length 

When it comes to selecting a carpet runner size and length, the possibilities are endless! Generally speaking, you should look for a rug that’s two to three feet wide so that it can fit comfortably in most spaces. In terms of length, you should pick something that’s at least four feet longer than the longest walls in the space so it won’t feel crowded when placed against them. If your hallway or entryway is particularly long, you may want to consider getting an extra-large runner option so that it can cover more surface area without feeling cramped. For example, a 9-foot runner is perfect for a hallway that measures 10 feet long. 

Color & Pattern

One of the most fun parts about shopping for a carpet runner is selecting the color and pattern! When you’re choosing colors, opt for hues that will complement your existing interior design scheme. For example, if you have neutral walls and furniture, try adding some vibrant blues or greens to add some contrast to the room. You can also look into getting a patterned runner - such as floral print, stripes, or geometric shapes - to further enhance visual interest in your space. A striped rug can be a great option for small hallways that need a pop of color and pattern.

  • Dark vs Light Colors: When you're selecting a color or pattern for your carpet runner, it's important to keep in mind how much natural light comes into the room. Darker colors tend to absorb the light and make the space feel cozier, while lighter hues can help brighten up a dark corner. The color will also determine how the room appears - if you want to widen the area, opt for a bright white or off-white rug. On the other hand, if you want a more narrow space, opt for a darker color.

  • Pattern vs Solid Color: Especially when it comes to stairs, try to avoid crazy patterns that will be too busy or distracting. On the other hand, solid colors can help to create a more spacious feel and will be easier on the eyes when walking up or down the stairs. You can also go for subtle patterns such as plaids or stripes for an interesting touch without overwhelming the space.

Durability & Maintenance 

Durability and maintenance are two of the key factors to consider when purchasing a carpet runner. Natural fibers such as wool, jute, and sisal are some of the most durable materials, so if you’re looking for something that will last a long time these are great options. Synthetic materials like nylon or polyester tend to be less expensive but still provide excellent performance. Direct Carpet offers quality alternatives at an affordable price that can handle heavy foot traffic without sacrificing aesthetics or comfort. 

Picking out a carpet runner is an exciting way to freshen up your home décor! By understanding what type of material works best for each room and by considering size, length, color, and pattern options – you’ll be able to find the perfect rug that matches your interior design needs. By being mindful of the materials used, size and length considerations, as well as taking into consideration how much natural light is available in the space - you’ll be able to create the perfect look for your home. 

How to Install A Freestanding Bathtub At The Comfort Of Your Home

RH Business Marketing Solutions

Many agree that a bathtub is a bathroom necessity. After all, the bathtub industry and market size continue to proliferate.

Bathtubs, particularly freestanding ones, can transform an ordinary room into a tranquil, spa-like sanctuary. However, the installation procedure can be scary, particularly if you need to brush up on plumbing and home improvement tasks.

To assist you in installing freestanding bathtubs in the comfort of your own home, we have created this in-depth guide. Everything from selecting the appropriate equipment and supplies to connecting the pipes is covered in this article.

We'll also offer advice on choosing the best freestanding bathtub, measuring the available space, and setting up your bathroom for installation. You'll discover how to anchor the bathtub, level it, and connect the overflow and drain.

Setting Up a Freestanding Bathtub in the Convenience of Your Own Home

Freestanding bathtubs are bathtubs that stand alone, unattached to any walls or other fittings. Freestanding bathtubs, as opposed to regular bathtubs, are intended to be the center point of the bathroom.

Installing a standalone bathtub involves meticulous planning, accurate dimensions, and knowledge of plumbing and electrical connections. The guide to install a freestanding tub provides in-depth information and detailed instructions to help ensure a successful outcome.

It provides critical information about the bathtub type you require, the installation site you like, and the supplies required to complete the project. This knowledge is critical for directing your decisions and avoiding mistakes that threaten the safety and efficiency of the bathtub.

This material is useful for folks who are just starting out with home renovation initiatives. It can reduce frustration and boost chances of achievement.

1. Bathtub Selection

Bathtub selection is an integral part of installing a freestanding bathtub. The following factors should be considered when selecting a bathtub:

  • Size

One significant factor to examine is the size of your bathtub. Size is vital because your bathroom may not require a larger bathtub if a smaller bathtub will suffice. A bigger tub is generally advised if your bathroom can sustain it and you have the place for it. 

If you have the adequate space, freestanding is an excellent choice. If your area is more restricted, alcove, drop-in, and soaking may be better options. Although a wider bathtub is more aesthetically attractive, it will also demand a higher water bill because it takes more time to fill entirely than a smaller size.

  • Material

Bathtubs are available in a number of styles. Fiberglass, acrylic, and ceramic are examples of low-cost materials. These are porous substances that soak up, making cleaning more difficult and time-consuming. Materials such as stone resin, cast iron, and copper, on the other hand, are significantly stronger and non-porous. 

The appearance, texture, heaviness, and cost of these pricey plumbing fittings are all influenced by the bathtub material. Additionally, since tubs are difficult to repair, it is wise to do your research before making a purchase to ensure that you will be satisfied with it for many years to come.

  • Features

Some freestanding bathtubs have extra features, including heated surfaces, built-in overflow systems, and jets. While relaxing in the tub, jets can give you a massage, and built-in overflow devices stop water from overflowing the sides.

The water is kept warm for longer on heated surfaces, which makes soaking in the tub more enjoyable. Choose a bathtub that suits your needs by thinking about the aspects that are most essential to you.

  • Drain Location

With a drain system at the tub's base connected to an overflow that may or may not have a control knob, all bathtubs drain essentially the very same fashion. For the freestanding tub the drain location is mainly located at the bottom of the tub.

Water exits the bathtub through the drain gear, a tailpiece, and into the trap when the plunger or stopper is lifted. Every plumbing fixture in a home must have a trap, which keeps water in it and serves as a seal to keep sewer gases out of the house.

2. Gather Tools and Materials

Before starting the installation process, it is vital to prepare appropriately. The first step in preparation is to gather the necessary tools and materials. The specific tools and materials you'll need will depend on the type of bathtub you are installing.

Generally, you will need a level, an adjustable wrench, plumbing tools, and silicone caulk. You may also need materials such as plumbing parts, drain stoppers, and overflow cover plates.

3. Mark the Drain Placement

The location of the drain and the overflow should then be marked on the floor. The location of the drain is essential for the bathtub to operate correctly. Therefore, it's crucial to measure and keep it precise.

You can use this to decide where the bathtub should be placed in your bathroom. Repeat the method for the overflow placement after designating the drain location. After finishing these preparations, you are prepared to proceed to the following installation stage.

4. Leveling the Bathtub

Leveling the bathtub is one of the most important phases in constructing a freestanding bathtub. The bathtub is sturdy and safe, and the water drains correctly, thanks to proper leveling. A bathtub that isn't level might leak and cause water damage and be dangerous to use:

  • To level the bathtub, follow these instructions using a level and a shim:

  • Make sure the bathtub is centered as you place it in the designated location.

  • Check the level of the bathtub using the level from the front, back, and side. This will guarantee appropriate water drainage and guard against any problems with leakage or damage.

  • Recheck the level of the bathtub and make adjustments as necessary. Repeat this process until the bathtub is level in all directions.

5. Plumbing Connection

Connecting the plumbing comes next in the installation process after leveling the bathtub. The water supply and drain lines must be connected to the bathtub to complete the plumbing installation for a freestanding bathtub. This phase needs a fundamental knowledge of plumbing and accessibility to the necessary equipment and supplies, such as these steps.

  • Turn off the water supply to the restroom.

  • Connect the bathtub's hot- and cold-water supply lines.

  • Connect the bathtub's overflow pipe to the drain line.

  • Restart the water supply and check for leaks.

It's important to note that the plumbing connections for freestanding bathtubs may differ from those for traditional bathtubs. When making connections, consult the manufacturer's instructions and local plumbing codes.

6. Anchoring the Bathtub

The final element of the installation process is to link the plumbing. Attaching the bathtub ensures that it does not shift or slide while in use. You need to follow the following steps to make sure it is fixed:

  • Examine the bathtub level to confirm it has not altered during the plumbing operation

  • Apply silicone caulk to the bottom of the bathtub where it touches the floor. This decreases the chance of water entering the bathtub from beneath.

  • To maintain the bathtub attached to the ground, use metal brackets or brackets made of another sturdy material around its edges.

It is also critical to test the bathtub's stability following installation. Make any required changes to the brackets or caulk to guarantee the bathtub is stable if it feels unsteady or unstable.

7. Finishing Touches

The final touches are what give your freestanding bathtub its ultimate appearance and feeling after installation. These final steps are frequently the particulars that provide the bathtub an opulent and soothing spa-like atmosphere.

  • Attach the overflowing covering: Overflow pipe permits water to drain from the bathtub if it reaches too high. The overflow cover is made to fit over this pipe. The overflow cover should be installed to offer the bathtub a finished appearance and to cover the overflow pipe.

  • Put the drain stopper in place: The drain stopper is intended to block the drain, which is where the bathtub's water exits. By inserting the drain stopper, you can manage the bathtub's level of water.

  • Installing a faucet in the bathtub is not required, but it can make it easier to fill the tub with water. A bathtub faucet should match your bathtub and bathroom's design.

  • After completion, the bathtub should be properly cleaned along with the surrounding region. This will give the bathtub a clean, polished appearance and aid in clearing away any leftover dirt or contamination from the setup process.

  • When entering and exiting the bathtub, your feet can benefit from a soft, comfortable surface provided by bath mats or rugs. Pick rugs or bath mats that go well with the design of your tub or bathroom.

Conclusion

If you have the correct information and equipment, constructing a freestanding bathtub at home may be a rewarding and successful endeavor. This manual covers every installation step, from selecting the ideal bathtub to mounting it and attaching the plumbing.

You should remain assured of finishing the job and turning your bathroom into a tranquil and spa-like place with the help of clear directions and helpful advice. During the installation procedure, safety must always come first. Ensure you use the appropriate gloves, goggles, and safety equipment, and take the advised safety measures.

The bathtub must also be properly maintained if you want it to last for many years. It will continue to look its best with routine cleaning and care as directed by the manufacturer.

Guest Contributor: Daniel Martin

What are the Things I Should Pay Attention to When Looking for Property?

RH Business Marketing Solutions

When looking for a property to purchase, it's important to pay attention to several key factors to ensure you're making a smart investment. Whether you're looking for a new home to live in or an investment property, there are several things you should keep in mind before making an offer.

Location

Location is one of the most important factors to consider when looking for a property. Make sure you research the neighborhood you're interested in and consider factors such as crime rates, nearby schools, public transportation, and proximity to key everyday places for shopping, dining, and entertainment.

Property Condition

It's important to carefully inspect the condition of the property before making an offer. Look for signs of wear and tear, such as cracks in the walls, roof damage, or a leaky roof. You should also consider the age of the property and any major upgrades or renovations that may need to be done in the near future.

Hiring a Real Estate Agent

Hiring a real estate agent can be extremely beneficial when looking for a property. A real estate agent has extensive knowledge of the local real estate market and can help you find the right property for your needs. They can also assist with negotiating the price and terms of the sale, as well as navigating the complex process of buying a property.

Additionally, a real estate agent has access to a wide range of properties and can provide you with information and insights that may not be readily available to the general public. They can also assist with the inspection process and help you navigate any legal or technical issues that may arise during the buying process. It’s important to choose a real estate agent who is knowledgeable and experienced in the area you're interested in. Look for an agent who has a good reputation and is committed to helping you find the right property. You should also look for an agent who is responsive, easy to communicate with, and whom you feel comfortable working with. Thankfully, if you want to work with such people, look for real estate agents from Orange, NSW.

Zoning Regulations

Before making an offer on a property, it's important to research the local zoning regulations and building codes. This will help you determine if the property is suitable for your needs and what types of renovations or additions may be possible.

Homeowner’s Association (HOA) Rules

If you're considering purchasing a property in a neighborhood with a homeowner's association, it's important to review the HOA rules and regulations. This will help you understand what's allowed and what's not allowed in the neighborhood and whether the HOA fees are reasonable. For more details about homeowner’s associations, head over here.

Future Growth Potential

It's important to consider the future growth potential of the area you're interested in. Research the local economy and look for signs of future development or growth, such as new businesses or new housing developments.

Market Trends

It's important to stay up-to-date on the local real estate market and keep an eye on property prices, sales trends, and demand for properties in the area you're interested in. This will help you make an informed decision and determine if the property you're considering is a good investment.

Property Taxes

Before making an offer on a property, it's important to research the local property tax rates. This will give you an idea of how much you'll be paying in taxes each year and whether the property is affordable in the long term.

Home Insurance

Home insurance is an important consideration when purchasing a property. Make sure you research the different insurance options available and compare rates to find the best coverage for your needs.

Utilities

Before making an offer on a property, it's important to research the cost of utilities in the area. This will give you an idea of how much you'll be paying each month for electricity, gas, water, and other essential services.

Property Inspection

Finally, it's important to have a thorough property inspection before making an offer. This will help you identify any potential problems with the property and give you a clear understanding of its condition. This is not only vital for your future life at that property, but it will also influence the amount of cash you will spend to rectify these problems, as well as the market value of the property in the future.

            All in all, there are many things to pay attention to when looking for a property. By considering these key factors, you can make an informed decision and ensure you're making a smart investment. Whether you're looking for a new home to live in or an investment property, it's important to do your research and take the time to carefully consider all of the factors that will impact your decision. Best of luck!

Guest Contributor: Mike Parsons

4 Imminent Signs Your Furnace Broke Down Recently

RH Business Marketing Solutions

Your furnace is one of your home's most important assets. So, when it stops working, it creates a lot of chaos for your household. Especially if you live in a cold climate.

Most furnaces last for about 15 years. But, you might want to replace them even sooner because of high energy costs. If you're thinking about replacing your furnace, you probably want to know if there is something wrong before replacement. So, what are the imminent signs your furnace broke down?

Here are some of the signs you need a furnace replacement.

1. Common Noises If Your Furnace Breaks Down

Did you know that one of the main disadvantages of high efficiency furnaces is the high chance of a breakdown? Though these furnaces are more efficient than older models, the complex design and components often cause them to break down more quickly.

If your furnace breaks down, you may notice one or more distinct noises indicating a problem. If you hear an audible popping noise, this could indicate a malfunctioning fan or a problem with the blower motor. You may also hear a loud banging or humming sound. This can be an indication of a faulty igniter or burner.

If you hear a hissing or whistling sound, this can indicate a gas leak or a problem with the gas valve. Another sound you may hear is a rattling noise, which could mean a broken fan blade.

2. Understanding Odors That Signal a Furnace Malfunction

It is important to understand odors that signal a furnace malfunction to help prevent the possibility of a major malfunction that could lead to costly and dangerous repairs. Some of the odors that signal a malfunction could be a strong chemical smell, such as burning plastic or electrical wiring, a rotten egg smell, or a foul gaseous odor.

If you detect any of these smells coming from your furnace, turn it off and contact a professional to come and inspect it.

3. Discolored Pilot Lights

Discolored pilot lights in the furnace can be a sign of a potentially serious problem. They are typically either yellow, blue, or orange and indicate a carbon monoxide issue or another component breakdown. Yellow indicates a cracked heat exchanger or damaged burner, blue illustrates a problem with the gas valve, and orange is a sign that there may be an inefficient or insufficient fuel mix.

In any case, it is important to take care of discolored pilot lights as soon as possible to avoid hazardous conditions or further damage to the unit.

4. Low-Temperature Output

If your furnace is not producing enough heat, it is likely due to a broken furnace part. Things to check first would be the condensate drain and drain pan, the thermocouple, and the air filter. Faulty ignition systems, restricted airflow, and incorrect pilot settings are all common causes of the furnace not producing enough heat.

If the issue persists, it is best to call a professional furnace repair service to come and tend to your furnace.

Watch Out for These Signs That Your Furnace Broke Down

If your furnace broke down, it is not something to take lightly. It’s important to remove the immediate safety risks and contact a qualified service technician for a proper diagnosis.

If you notice any of the signs mentioned above, do not hesitate to call for professional help. Your home, your family, and your wallet all deserve the best furnace and service available.

For more articles, feel free to browse through some of our other blogs!


Why Homeowners Need to Understand the Nature of Pests That Lurk at Home

RH Business Marketing Solutions

Homeownership comes with many responsibilities, and one of them is to protect your home from pests. While it can be easy to ignore the presence of pests in your home, understanding the nature of these creatures and what they do is essential for homeowners. In this article, we'll explore why it's important to understand the different types of pests that may lurk in your home, and how you can protect yourself from them.

Types of Household Pests

Household pests come in all shapes and sizes, from the tiniest of insects to the largest of rodents. While some pests are merely a nuisance, others can pose a serious threat to your health and your home. It’s important to be able to identify the different types of household pests so that you can take the appropriate steps to get rid of them.

The most common type of household pest is the insect. Insects like ants, cockroaches, and beetles are attracted to homes for food and shelter. While most insects are harmless, some can bite or sting, and some can transmit diseases. Be sure to research the different types of pests that may be in your home. For example, by knowing that the eyes of spiders indicate their species, you can determine which ones to be on the lookout for. Rodents like mice and rats are also common household pests. These animals carry a variety of diseases, including hantavirus and salmonella, so it’s important to take steps to get rid of them. Rodent traps and poison bait are two of the most effective ways to eliminate these pests from your home.

Birds can also be a problem in some homes, especially if they’ve nested in attics or chimneys. Birds in your home pose a health risk due to the droppings they leave behind, as well as being noisy and disruptive. To get rid of birds, try installing bird spikes on ledges or other areas where they may be roosting.

Other types of household pests include flies, fleas, bed bugs, mites, silverfish, moths, and even bats. It’s important to research the different types of pests that may be present in your home so that you can take the appropriate steps to get rid of them safely and effectively.

How Do Pests Enter Your Home?

Pests enter your home in a variety of ways. Some, like rodents, can squeeze through tiny cracks and holes. Others, like cockroaches, can fit through spaces as thin as a quarter. And still others, like ants, can come in through doors and windows.

To keep pests out of your home, it’s important to seal up any cracks or holes that they could use to get inside. You should also regularly check screens on doors and windows to make sure there are no gaps or tears.

What Are the Dangers of Having Pests at Home?

Pests can pose a serious threat to your home and family if they are not controlled. Some of the dangers of having pests at home include:

• Pests can carry diseases that can be harmful to humans, such as Salmonella and Hantavirus.

• Pests can cause structural damage to your home by chewing through wood, drywall, and insulation.

• Pests can trigger allergies and asthma attacks in people who are sensitive to them.

• Pests can be a nuisance, making it difficult to enjoy your home.

Tips for Prevention and Control of Pests

-Pests are attracted to food, water, and shelter. So, keep your home clean and free of clutter. Store food properly and don't leave water or crumbs lying around. Repair any leaks or water sources that may attract pests.

-Inspect your home regularly for signs of pests, such as droppings or damage. Be sure to check cracks and crevices, behind appliances, and in storage areas.

-Seal up any openings that pests could use to enter your home. This includes cracks in foundations and walls, gaps around doors and windows, vents, and holes for plumbing or wiring.

-Use pest-resistant materials when building or repairing your home. This can include using tight-fitting screens on doors and windows, using caulk or sealant to fill cracks and gaps, using stainless steel wool or wire mesh to block openings, and choosing treated lumber for framing projects.

-Keep your yard clean and well-maintained. Remove debris, trim weeds and grass, and store firewood away from your home.

Homeowners must understand the different types of pests that may be present in their homes. This knowledge is important as it can help them identify and exterminate any pest problems quickly before they become serious issues. Additionally, understanding the nature of these pests also helps homeowners to create an environment that is less attractive for future infestations. By following these guidelines, homeowners can ensure that their house remains safe and healthy for years to come.

4 Types of Plumbing Problems That Should Never Be Ignored

RH Business Marketing Solutions

When you have certain plumbing issues, the easiest thing is to ignore them, but there are some plumbing problems that you shouldn’t avoid. Postponing these plumbing problems can have costly and damaging consequences, so call the plumber as soon as possible. It’s important to know that some plumbing issues are obvious while others can be difficult to spot, so take care of them.

Locate a Qualified Plumber

Few people know how to deal with plumbing problems, and the moment they occur, we realize the significance of an experienced plumber. For that reason, the folks at Provistaplumbing.com.au are among the plumbing experts who provide services like installation, repairs, and maintenance. Such a team of workers is committed to providing you with the highest quality work as well as dedication to the clients. In that way, you won’t have to worry about the possible consequences of some malfunction.

Clogged Drains

Clogged drains can cause a complete blockage, rendering your sink, shower, or tub completely useless until it's repaired. This problem usually begins with a slow drain and later results in clogged drains that can cause a catastrophe for you. Therefore, you can fix this problem yourself with a liquid drain cleaner because it can clear out some drains. Still, if this doesn’t solve the problem, you need to hire a professional who can tell you the real cause of the problem. For instance, the clog can indicate that there is damage to your plumbing, so you need to prevent it quickly.

Running Toilet and a Leaky Faucet

The most common plumbing problem is leaky faucets, which can be slightly irritating, and wastewater, so you should deal with them immediately. The truth is that it can result in gallons of clean water being wasted every day, so solve this quickly. Fortunately, a leaky faucet is easy and inexpensive to repair, and it takes a minimal amount of time. 

It saves you from higher water bills and persistent drips from the tap. A similar problem occurs with running toilets, which results in wasting water again. For that, you shouldn't postpone this repair, and you usually need to replace a fill valve or flapper, which isn’t costly or difficult.

Low Water Pressure

If you see that the water pressure in your house has dropped significantly, don’t ignore this problem for a long time. A temporary low water pressure can be related to some malfunction in the municipal water supply, but if this lasts for a long time, it indicates a major leak or burst pipe. If you notice unusually low water pressure, check each fixture in the house and see if some run better than others. If that is the case, you can easily pinpoint the location of your plumbing issue.

Considering the most common plumbing problems listed above, remember that it’s always in your best interest to take proper care of them. In many cases, a professional will be necessary, so don’t put off calling a plumber the moment you notice any of these issues in your home.


The Most Common Swimming Pool Plumbing Issues and Their Solutions

RH Business Marketing Solutions

Whether you're a new pool owner or you've been dealing with a pool for years, plumbing problems are inevitable. While some issues are minor and can be easily fixed, others can be more serious and require the help of a professional.

To help you troubleshoot your pool's plumbing issues, we've compiled a list of the most common problems and their solutions. From leaks to clogs, keep reading to learn more about what could be causing your pool's plumbing woes.

Other than plumbing professionals, hot tub services can also help you with your swimming pool plumbing problems. Hot tubs and pools both require effective water circulation for proper functioning. A hot tub service provider understands how water pumps, filters, and circulation systems work. 


This knowledge can translate to helping diagnose and address circulation problems in a swimming pool, such as poor water flow or insufficient filtration. So, if you live in Boise, Idaho, and can’t get a plumber’s appointment, you can look up the best hot tub service in Boise, Idaho, and ask for their help.

Clogged drains 

If a clogged drain is looking like it might be a problem in your beloved swimming pool, you're probably already feeling a little frustrated. However, take heart – clogged drains are actually one of the most common plumbing issues when it comes to pools and can easily be remedied. In fact, all you need is some patience, a plunger, and some elbow grease. To clear out any grime or dirt that might be blocking the drainpipe, use the plunger to force out any blockage and then scrub away at scale buildup afterward with some brushing – just make sure not to use anything too abrasive since that could damage your pool's surface. 

Leaks 

Another common issue many homeowners face with their swimming pool plumbing is leaks. Pool leaks can manifest in a variety of different ways, from seeing more water flowing through the skimmer baskets than usual to visible water seeping into the ground around your pool's foundation. Though not an enjoyable situation to be in, there are effective measures that can be taken to address any type of leak. 

To start, inspect the plumbing system regularly and check for visible signs of wear on components like hoses and pipes. If you notice an area of trouble, it might be worth having a professional plumber come out to provide an analysis and repair. Taking these precautions can help combat bigger problems down the line so that you can properly enjoy your swimming pool plumbing all summer long!

Dirt buildup 

Keeping your pool clean is an important part of pool maintenance, but dirt and debris can still build up without proper drainage. Fortunately, there are several options to help alleviate this issue. The most common is by running a pool cleaner to pick up any material from the pool floor and walls. In general, pool cleaners should be used once per week for best results, to ensure that no pesky particles roam free in your pool's water chemistry environment for too long. If the pool cleaner isn't helping after regular use, further steps must be taken to solve the problem of dirt buildup in the pool plumbing system.

Cracks in the pool 

If you notice a crack in your pool, chances are you're feeling a bit panicked. How serious is the damage? Should you call a professional? Fortunately, in most cases, these cracks can be fixed with relative ease. The most important thing to do is to establish whether the crack is in the surface of the pool or if it's an actual structural issue with the plumbing. Structural cracks should be tended to by a qualified professional who specializes in swimming pool repairs. 

Smaller cracks found on the surface may simply require some basic patching or caulking. Whichever option you go with, with swift and proper action, those unsightly flaws in your oasis won't be dampening your summer days.

Broken pipes 

Despite being durable, pipes within a swimming pool can still suffer a breakage due to weather changes and age. The harder the water within a pool, the more likely it is for mineral deposits to build up, eventually leading to pipe corrosion and corrosion-induced leaks. Fortunately, fixing broken pipes isn’t as difficult as one might expect. Start simple by running your hands along the pipe in your pool system; if you feel any leakage or indentations, then the pipe likely needs patching up with some cement or rubber sealant. If the problem is more severe than expected, professional help may be needed to replace or repair what’s been damaged. In either case, it’s important that this job be done right away – otherwise continued water damage might lead to costly maintenance down the line!

Poor water quality

Poor water quality is one of the most frustrating issues pool owners have to deal with. Beyond displaying an unsightly green hue, poor water quality can be damaging to the equipment running your pool's filtration system. Fortunately, there are several different ways to maintain the health of your pool's plumbing and ensure that you don't run into any major plumbing issues due to poor water quality. 

Some of these solutions include checking and maintaining proper chlorine levels, replacing broken or worn-out parts, periodically cleaning out the lint that builds up in pipes, unclogging drains regularly, and ensuring filters remain free of debris. With a little bit of attention and care, it's easy to keep your pool clean and well-maintained for many years to come.

High water bills 

Lastly, one of the most common plumbing issues associated with swimming pools is higher than normal water bills. If your swimming pool is continuously leaking or evaporation levels are too high, you may find that you're spending far more on the water than you should be. Thankfully, there are several products and techniques available to help maintain proper water levels within a pool, such as mesh covers to reduce evaporative losses and use alarms to alert owners if the pool’s water level becomes too low. With a few basic hardware upgrades and some routine maintenance tips, you can cut down on wasted water and protect yourself from skyrocketing costs in the future.

While plumbing problems with your swimming pool can be frustrating, there are solutions to almost every issue. With a little knowledge and understanding of how your pool works, you can fix many problems on your own. However, some issues will require the help of a professional. Whether you have a leaky pipe or a clogged filter, remember that there is always a solution to your problem. Have you ever encountered any of these common swimming pool plumbing issues? What did you do to solve the problem?

If You Have Been Injured on a Construction Site, These Legal Tips Can Save You

RH Business Marketing Solutions

There are 150,000 accidents on construction sites every year. While some of these accidents are minor, others can lead to lifelong disability or even death. 

If you’ve been injured on a construction site, you must take the correct steps to ensure you get the compensation you deserve. 

However, what are those steps? And, how do you keep other parties from getting away with not taking responsibility? 

Keep reading for tips on what to do if you’re involved in an accident on a construction site.

Research Lawyers Before an Accident

When you’ve been in a construction accident, you need to call the right lawyer to assist you. However, picking an attorney can be a challenge when you’re facing a significant amount of stress. 

If you work in the construction industry, start your research before an accident even occurs. Have a few names, and then when it’s time to use them, schedule a consult. 

Scheduling a free consultation with an attorney specializing in personal injury at construction sites is always a good idea. A lawyer that’s familiar with construction site injuries should also be familiar with the laws surrounding workman’s compensation. 

Not sure what to look for? This is a good example of a construction accident lawyer in Reno as they not only display their knowledge in the field, but also provide testimonials from past clients. Make sure you choose a lawyer with a good success rate and solid references.  

Know What Caused the Injury

Construction site injuries can be caused by various factors. While you’re often covered under worker’s compensation, you may also be able to file a civil lawsuit. You can do so if you can prove three things. 

First, you need to be able to prove that another person or entity had a duty to act in a safe and reasonable manner concerning you. Second, you need to be able to prove that they were negligent and failed to do so. Finally, you must prove that your injuries occurred because of that negligence

Some of the types of accidents you can run into involve the following.

Warning Signs Aren’t Erected Correctly

By law, construction sites are required to put up certain signs that warn people of danger. This is similar to stores being required to use wet floor signs to warn of slip hazards. Not having these signs can cause injury. 

Improper Barricades

Barricades can cause problems in a couple of ways. First, if the right barricades aren’t up, people can wander into the site accidentally. This can result in an injury. 

Second, if the barriers are too close to activities, it can cause an accident as well. 

Poorly Maintained Equipment

Next, poorly maintained or inspected equipment can cause issues. If this equipment malfunctions or fails, it can cause injuries to anyone in the surrounding area. 

Unsecured Tools

What happens if debris or tools fall from a location up high on your construction site? If they land on someone, it can cause injury or death. If they fall because someone failed to do their job properly, it could be negligence.  

Understand Liability on the Construction Site

The responsibility of an accident can fall on different people. It all depends on the circumstances. However, one thing remains true, anyone or any entity that has control over the construction site is responsible for the safety of anyone entering the site. Knowing who is responsible will help you work with your attorney to determine whether you have a civil case.  

This can include property managers, the owner, general contractors, and more. There’s a few ways to know who is liable in your circumstance. Here are some examples of who could get held liable: 

Property Owners

When you go onto a construction site, the property owner or manager has a responsibility. It’s their job to make sure that contractors, workers, customers, visitors, and tenants enter a property that’s safe.

Contractors or Employees From a Different Company

If you’re injured while working on a property with multiple contractors, another company could be held liable. If one of their employees is negligent it opens the door for you to sue the company for that negligence.  

Product Manufacturers

If the equipment on your site is maintained and inspected, but you still get injured due to a malfunction, it could come back on the product manager. You may be able to file a product liability claim in this circumstance. 

Architects and Engineers

What if it’s the construction plans that are incorrect or faulty? Architects and engineers have a responsibility to design safe buildings. If you’re injured because of a faulty plan, you can potentially sue them. 

Follow the Right Steps After a Construction Accident Injury

After an injury at a construction site; you need to follow the correct steps. The first step is to seek medical attention right away. Make sure you document any injuries and follow your doctor's recommendations. After that, you should follow these steps:

Report the Accident to Your Employer

While your employer may already know about the accident and your injury, you need to make it official. Make sure you fill out the necessary paperwork to report the injury and get the worker's compensation process started. 

Contact Your Lawyer

You want to make sure that your injuries get covered, and often worker’s compensation doesn’t cover everything. Working with a lawyer can help you get what you deserve. They’ll also be able to help you explore whether or not you can file a civil suit. 

Report the Accident to Your Insurance Company

If you have to use your personal insurance to cover the costs of medical care, make sure they know the circumstances. That way, they can place a lien on your settlement and recoup the money spent on your healthcare. 

Gather Evidence

Any evidence you can gather can be helpful. This can include witnesses and coworkers that were present at the time of the accident. If you’re able, get pictures from the accident too. Your attorney will be able to guide you on what type of evidence will be helpful. 

Follow These Tips for a Construction Site Injury

If you’ve been injured on a construction site, you shouldn’t have to worry about paying your bills. Contact a lawyer and work with them to determine who is at fault and how to move forward.