Google+

contact us

Use the form on the right to contact us.

Day or Night, we are here to serve you. Leave your plumbing problem to us.


Tinley Park, IL

(708)845-7922

Residential and Commercial plumbers and plumbing contractors available in Orland Park, Tinley Park, Oak Lawn, Palos Heights, Midlothian, Oak Forest, Homer Glen, Mokena, Frankfort, and the surrounding Chicago South Suburbs. Emergency plumbers.

copper water lines.jpg

Kevin Szabo Jr Plumbing Blog

Kevin Szabo Jr Plumbing is Tinley Park, Orland Park, Oak Forest, Midlothian, Orland Hill, Homer Glen, Mokena, Frankfort, Crestwood, Palos Heights, Oak Lawn, local plumber. Read our blog for advice, tips, a good laugh, and basic home improvement.

**We are moving our old blog to our new and improved website. Too see all our posts visit kevinszabojrplumbing.blogspot.com

Filtering by Category: August 2024

Renting IBC Totes: Is It Worth It to store attic items?

RH Business Marketing Solutions

Storing attic items can be a daunting task, especially when you have a variety of items that need safe, organized storage. One solution that has been gaining popularity is renting Intermediate Bulk Containers (IBC totes). But is it worth it? Let's dive into the benefits and drawbacks of using IBC totes for attic storage.

What Are IBC Totes?

IBC totes are large, reusable containers typically used for transporting and storing liquids and bulk materials. They are made of high-density polyethylene (HDPE) and have a sturdy metal frame, making them durable and versatile. These containers come in various sizes, but the most common is the 275-gallon tote, which offers ample storage space.

Benefits of Using IBC Totes for Attic Storage

1. Durability

IBC totes are built to withstand heavy use and harsh conditions. Their robust construction ensures that your items will be protected from damage, moisture, and pests. This makes them ideal for storing items that are sensitive to environmental conditions, such as electronics, books, and seasonal decorations.

2. Stackability

One of the standout features of IBC totes is their stackability. They can be stacked securely, maximizing vertical space in your attic. This can be especially beneficial if you have a small attic or limited attic storage space. By stacking totes, you can keep your items organized and easily accessible.

3. Ease of Access

IBC totes typically have a large opening at the top, making it easy to load and unload items. Some models also come with a spout or valve, which can be useful if you need to store and dispense liquids. This ease of access can save you time and effort when organizing and retrieving your stored items.

4. Cost-Effective

Renting IBC totes can be a cost-effective solution compared to purchasing traditional storage containers. Many companies offer flexible rental options, allowing you to rent the totes for as long as you need them. This can be particularly useful if you only need temporary storage or are planning a move.

Drawbacks of Using IBC Totes for Attic Storage

1. Size and Weight

While the large size of IBC totes can be a benefit, it can also be a drawback. The totes are bulky and can be heavy when filled, making them difficult to move around. This can be a challenge if your attic has limited space or if you need to frequently rearrange your stored items.

2. Initial Setup

Setting up IBC totes in your attic can require some effort. You may need to clear out existing items and make space for the totes. Additionally, because of their size, you might need assistance in transporting and positioning the totes in your attic.

3. Rental Costs

Although renting IBC totes can be cost-effective, the costs can add up over time. It's important to compare the rental fees with the cost of purchasing traditional storage containers to determine which option is more economical for your needs.

Is It Worth It?

The decision to rent IBC totes for attic storage depends on your specific needs and circumstances. If you require durable, stackable, and spacious storage solutions, IBC totes can be an excellent choice. They offer significant advantages in terms of protection and organization, particularly for items that need to be stored in a controlled environment.

However, if you have limited attic space or need to frequently access your stored items, the size and weight of IBC totes may pose challenges. Additionally, it's important to weigh the long-term rental costs against the benefits to determine if this solution is financially viable for you.

For those looking to explore rental options, a reputable provider like Verdetrader.com can offer a range of IBC totes to suit your storage needs. By considering all factors, you can make an informed decision about whether renting IBC totes is the right solution for storing your attic items.

Conclusion

Renting IBC totes for attic storage can be a practical and efficient solution for many homeowners. Their durability, stackability, and ease of access make them a strong contender for storing a variety of items. However, it's essential to consider the size, weight, and rental costs to ensure that this storage solution aligns with your needs. By evaluating the pros and cons, you can make a decision that will help you keep your attic organized and your items safe.

An Essential Guide to Excavator Attachment Hire for Construction Projects

RH Business Marketing Solutions

Excavator attachments are essential for any modern construction sites. They transform your excavator into a versatile tool that can handle a wide range of tasks. Buying these attachments can be expensive, though. That's where excavator attachment hire comes in. It's a smart way to access specialized equipment without breaking the bank.

Understanding Excavator Attachments

Excavator attachments are like power tools for your excavator. They turn it from a basic digger into a versatile machine that can handle countless jobs. Some of the common options include:

Buckets

These are the classic digger part. They scoop up dirt, gravel, or whatever you need to move.There are different sizes and shapes for specific jobs.  

Hydraulic Breakers

Think of these as giant jackhammers. They smash through concrete, asphalt, and rocks. Demolition crews love them.  

Augers

These are like giant drills. They bore holes in the ground for fence posts, planting trees, or digging underground utilities.

Rippers

These are heavy-duty teeth that tear through tough soil and rocks. They're perfect for breaking up hard ground.  

Grapples

These are like giant claws. They grab and move materials like scrap metal, logs, or large debris.

The variety of attachments extends far beyond this list, each meticulously designed to tackle a specific task. From tree shears to trenchers, the possibilities are endless.

Why Hire Excavator Attachments?

You might wonder why hiring attachments from service providers like www.hammerhire.com.au is better than purchasing them. The answer lies in cost-effectiveness and flexibility. Hiring allows you to use the right attachment for the job without the hefty upfront investment. It also eliminates the need for maintenance and storage, which can be costly and time-consuming.

When you hire, you can select attachments based on your current project requirements. This flexibility means you're not stuck with equipment that may only be used occasionally. Plus, you can always access the latest models and technology, ensuring you have the best tools.

How To Choose the Right Attachment

Choosing the right attachment for your project is crucial. The wrong choice can lead to inefficiency, increased costs, and even safety risks. Below some tips to help you make the right decision:

Identify Your Needs

Determine the tasks you'll be performing. Do you need to dig, break, drill, or lift? Knowing this will help you choose the appropriate attachment. For instance, a trenching bucket is ideal for digging narrow trenches, while a hydraulic breaker is perfect for demolishing concrete.

Consider the Excavator's Specifications

Make sure the attachment is compatible with your excavator's size, hydraulic capacity, and weight. For example, when considering hydraulic couplings for excavators, select those that precisely match the attachment's requirements to ensure efficient power transfer.

Using the wrong attachment can damage the machine or reduce its efficiency. Check the weight limits and hydraulic flow requirements to match the attachment to your excavator's capabilities.

Quality and Reliability

Opt for high-quality attachments from reputable brands. Reliable equipment reduces downtime and maintenance issues. Look for attachments that have been well-maintained and come with positive reviews from other users.

If you're unsure which attachment to choose, consult with experts or the rental company. They can provide valuable insights based on your specific project needs. These professionals can help you understand the pros and cons of different attachments and recommend the best options for your tasks.

The Hiring Process

Hiring excavator attachments is a straightforward process, but it's essential to know what to expect. Here's a simple guide to help you through it:

Research and Compare

Start by researching rental companies. Compare their offerings, prices, and reviews. Look for companies with a wide range of attachments and good customer service. This step helps you find a reliable provider and the best deal for your needs. Moreover, if you're not familiar with how to operate an excavator, it's advisable to check if the company offers instructional materials or training as part of their services.

Request a Quote

Once you've narrowed down your options, request a quote. Be sure it includes all costs, such as delivery, pickup, and any additional fees. Understanding the full cost upfront prevents any surprises later on.

Check Availability

Confirm the availability of the attachment for your project timeline. Some attachments may be in high demand, so booking in advance is a good idea. This ensures that you have the necessary equipment when you need it, avoiding project delays.

Inspect the Equipment

Before accepting the equipment, inspect it for any damage or wear. This will help you avoid any issues when returning it. Noting the condition of the equipment at the start can prevent disputes about damage claims.

Review the Contract

Carefully review the rental agreement. Pay attention to the terms and conditions, especially regarding damage, maintenance, and late returns. Understanding your responsibilities and the rental terms helps you avoid unexpected charges and complications.

By following these steps, you can streamline the hiring process, which ensures a smooth experience from start to finish. This preparation helps secure the right attachments, allowing you to focus on completing your project efficiently.

Conclusion

Hiring excavator attachments can significantly boost your construction project's efficiency and productivity. By understanding your project needs, considering the benefits of rental, and selecting the right company, you can make informed decisions. Always prioritize safety when operating heavy machinery.

How to Install Artificial Turf: A Step-by-Step Guide

RH Business Marketing Solutions

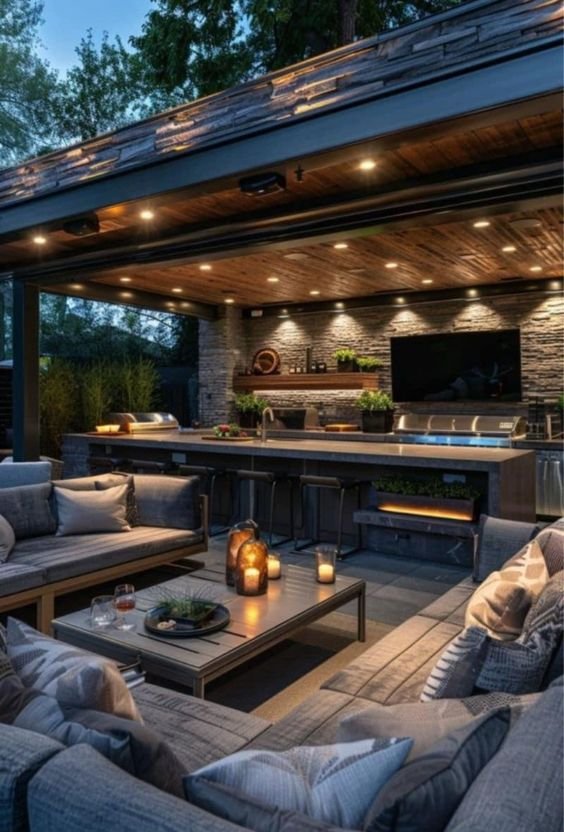
When it comes to creating a lush, green yard without the constant upkeep of natural grass, many homeowners are turning to artificial turf. Installing artificial turf can transform our outdoor space into a beautiful, low-maintenance area that looks great year-round. It’s an eco-friendly choice that reduces water usage and eliminates the need for fertilizers or pesticides.

We can tackle this DIY project with the right preparation and materials. From removing old grass to laying down a solid base, each step is crucial for ensuring that the turf lasts. With a few handy tools and some basic skills, we can achieve a professional-looking lawn without hiring expensive help.

Not only does artificial turf provide a practical solution for busy lifestyles, but it also offers a safe play area for kids and pets.

By following a clear step-by-step guide with insights from an artificial grass installation company from Gainesville Florida, artificialgrassgainesville.com, we can enjoy the benefits of a vibrant outdoor environment while making a positive impact on our planet.

Benefits of Artificial Turf

Artificial turf offers many advantages for homeowners and property managers. With minimal upkeep, long-lasting materials, and positive environmental impacts, it is a practical choice for various settings. Let’s explore these benefits in detail.

Low-Maintenance and No Mowing Requirements

One of the main benefits of artificial turf is its low-maintenance nature. Unlike natural grass, we do not need to mow it regularly. This saves us time and reduces noise pollution.

We won't need to worry about frequent watering either, which is especially important in drought-prone areas. With artificial turf, we can save on water bills while ensuring a green space year-round.

Routine maintenance is simple. We can easily remove debris, such as leaves and branches, with a broom or hose. Occasional brushing helps keep the turf fibers upright. This ease of care makes artificial turf an attractive option for families and busy individuals.

Durability and Longevity

Artificial turf is designed to withstand heavy foot traffic without showing signs of wear. Many products are made with high-quality materials that resist fading and damage from UV rays.

We can expect artificial grass to last anywhere from 15 to 25 years, making it a long-term investment.

Unlike natural grass, it does not suffer from patchy areas, brown spots, or insect damage. This durability translates into lower replacement costs and a consistently appealing appearance.

Regular inspections and simple cleaning can further extend the lifespan of the turf. By investing in artificial grass, we are ensuring our outdoor space remains functional and beautiful for years.

Environmental Advantages

Artificial turf presents several environmental benefits. First, it does not require watering, which conserves water—an essential resource.

By reducing our dependence on irrigation, we can contribute to water conservation efforts in our community.

Additionally, the use of pesticides and fertilizers is minimized. This helps prevent chemical runoff that can harm local ecosystems.

As a result, artificial grass can provide a safer environment for pets and children. With fewer resources needed for upkeep, we can enjoy a green space that aligns with eco-friendly values.

Tools and Materials Required

When we install artificial turf, having the right tools and materials is essential for a smooth process and a successful outcome. We need to gather our equipment and select suitable materials to create a durable and attractive lawn.

Essential Tools for Installation

To complete the installation, we need a variety of tools. Here’s a list of essential items:

  • Sod Cutter: This tool helps us remove existing grass and roots efficiently.

  • Shovel and Rake: These are useful for leveling the ground and preparing the base.

  • Utility Knife: A sharp knife is needed for cutting the turf to size.

  • Wheelbarrow: We use this for transporting materials around the site.

  • Broom: This helps in spreading the infill and keeping the turf neat.

Using the right tools ensures we work effectively and maintain quality throughout the installation.

Selecting the Right Materials

Choosing the right materials is crucial for achieving a good result. Here are the primary materials we need:

  • Artificial Turf: We want a durable turf that suits our climate and intended use.

  • Infill: This material goes on top of the turf to help stabilize it and provide cushioning. Common types include rubber and sand.

  • Turf Adhesive: We need a strong adhesive for joining seams and securing edges.

  • Geotextile Membrane: This layer prevents weeds from coming through while allowing water to drain.

By selecting high-quality materials, we ensure our turf will last and perform well over time.

Understanding Infill Options

Infill is a key ingredient in the artificial turf system. It helps keep the blades upright and adds comfort. Here are some common options:

  • Rubber Granules: These provide excellent shock absorption and are often used in playgrounds and sports fields.

  • Sand: This is a more economical option that also helps with drainage.

  • Mixed Infill: Combining rubber and sand can give us the benefits of both materials.

When choosing infill, we should consider the turf’s purpose and the type of activity it will see. This will guide us in making the best choice for our project.

Pre-Installation Steps

Before we start installing artificial turf, we need to ensure the area is ready. Proper preparation helps make the installation process smooth and effective. This includes clearing the area and considering soil grading and drainage.

Clearing and Preparing the Area

First, we must remove any old grass and plants. To do this safely, we can use a non-toxic herbicide to kill existing grass. This helps prevent any regrowth. After waiting the recommended time, we can dig out the dead grass and other debris.

Next, we should clear the area of rocks, roots, and other obstacles. A clean surface allows for better installation. It's also helpful to measure the space to ensure we have the right amount of turf.

Once cleared, we can level the ground so that our turf will sit evenly. This step is critical to avoid bumps in our final lawn.

Soil Grading and Drainage Considerations

Good soil grading helps water drain properly away from our turf. We should check the slope of the area. Ideally, the surface should slope away from any structures to prevent water pooling.

If we notice poor drainage, we might need to add gravel or sand to promote better flow. In some cases, we can create a slight slope by removing soil in certain areas.

We also need to pack the base soil down to create a solid surface. This can be done using a tamping tool. Proper drainage and grading will extend the life of our artificial turf and keep it looking good.

Laying the Foundation

Creating a strong foundation is essential for a successful artificial turf installation. It ensures durability and helps prevent issues like shifting or weed growth.

Applying Base Material and Compacting

First, we need to lay a solid base material. We typically use crushed stone or gravel, which should be about 3 to 4 inches deep. This material allows for proper drainage and provides stability.

Next, we spread the base evenly across the area where the turf will be installed. It is important to use a rake to level the surface. After leveling, we compact the material using a plate compactor. This step is crucial because compacting helps eliminate any air pockets, making the foundation sturdy.

Once compacted, we may want to re-check the surface with a level. Our goal is to create a well-drained, flat surface that will support the artificial grass. Proper compaction can prevent future bumps or shifts in the turf.

Introducing a Weed Barrier

To keep our installation clear from unwanted plants, we need to add a weed barrier. This material helps block sunlight, preventing weeds from growing through the turf.

We can use landscape fabric, which is easily available at garden stores. We cut it to fit the area and lay it over the compacted base material. The fabric should overlap at the edges to ensure complete coverage.

Once the fabric is in place, we secure it with landscape staples. This helps keep the fabric from shifting when we apply the turf. Proper installation of the weed barrier will save us from potential maintenance headaches later on.

Artificial Turf Installation

Installing artificial turf involves careful measuring, cutting, securing seams, and anchoring the material effectively. Each step is essential for a successful, long-lasting installation that looks great and performs well.

Measuring and Cutting the Turf

Before cutting the artificial turf, we must accurately measure the area. Use a measuring tape to find the exact dimensions of the space. Remember to account for any curves or irregularities.

Once we have our measurements, we can begin cutting the turf. We recommend using a sharp utility knife for clean edges.

Important tips:

  • Make two cuts: one for width and one for length.

  • Cut in an S-shape to reduce resistance between seams, preventing gaps.

This careful approach ensures a precise fit that enhances the aesthetic and performance of our installation.

Securing and Joining Seams

Next, we focus on securing and joining seams. To create a uniform look, we should lay out the individual pieces of turf side by side.

We can use seam tape, which provides strong adhesion without leaving visible marks. Apply adhesive to the seam tape and align the edges of the turf properly.

Best practices include:

  • Press the seams together firmly.

  • Avoid pulling the grass blades, as this could create unevenness.

This careful alignment and securing will result in a seamless look, essential for maintaining our turf’s appearance.

Anchoring the Turf with Nails or Staples

After the seams are joined, it’s important to anchor the turf to the ground for stability. We can use either nails or staples based on the landscape's conditions.

For nails, 7-inch lawn spikes work well. We should place them about every four feet along the edges.

For stapling:

  • Use landscaping staples (6 inches long) for additional hold.

  • Space them at least every 1-2 feet to keep the turf in place.

Taking these steps will help ensure that our artificial turf stays securely in place, reducing the risk of shifting or lifting over time.

Infill Application

Infill plays a crucial role in the stability and appearance of artificial turf. By choosing the right infill and applying it properly, we can enhance the usability and longevity of our turf.

Choosing Your Infill

We have several options for infill materials, each with unique benefits. Silica sand is one of the most basic choices. It supports the blades and prevents matting but lacks advanced features.

Rubber infill is popular for its shock-absorbing qualities. It is great for areas used by pets and children. This type of infill provides cushioning, making surfaces safer for play.

When selecting infill, consider the specific needs of the area. For instance, if the turf is for a putting green, silica sand may be best. In contrast, for playgrounds, rubber infill can be more suitable. Always follow the manufacturer’s recommendations for the frequency and type of infill material used.

Spreading and Settling the Infill

We will now focus on how to spread infill properly. First, we can use a drop spreader for even distribution. This tool helps us apply the infill consistently across the turf.

Once we have spread the infill, it is important to work it into the grass blades. A stiff-bristled broom or power broom is effective for this task. We should section off our work area to ensure we cover every part evenly.

After brushing, it is beneficial to lightly wet the area. This settles the infill and helps eliminate dust. Finally, we can use a tamper for compacting the infill, ensuring it stays in place. Proper installation improves the performance and visual appeal of our artificial turf.

Post-Installation and Maintenance

To keep artificial turf looking its best, we need to focus on regular cleaning, managing pet needs, and ensuring safety and durability. Following the right maintenance steps will help preserve the appearance and functionality of our turf over time.

Cleaning and Upkeep

Regular cleaning is essential for maintaining artificial turf. We should remove leaves and debris at least once a week. A leaf blower works well for this task. We can also use a broom or rake designed for turf.

For deeper cleaning, we may need to rinse our turf occasionally with a garden hose to remove dust and pet waste. If spots arise due to oil or food spills, a mild dish soap solution can help. We should avoid harsh chemicals, as they could damage the grass fibers.

Managing Pet Considerations

For pet owners, we must consider how to maintain our turf while accommodating our furry friends. After pets use the bathroom, spots should be rinsed with water to prevent odors. Using an enzyme cleaner specifically made for artificial grass can help eliminate waste and bacteria.

We must also monitor how our pets interact with the turf. Regular brushing of the grass will keep it fluffy and can prevent matting due to pet traffic. Choosing turf designed for pet use can enhance drainage and durability, making cleanup easier.

Ensuring Lasting Appearance and Safety

To ensure our turf stays safe and attractive, we need to check for any signs of damage or wear every few weeks. If we notice any wrinkles or loose seams, they should be repaired to maintain safety and aesthetics.

We also want to keep an eye on the infill material, as it helps support the grass and manage heat. Refreshing the infill every few years helps prevent compaction and retains the grass's support.

Overall, by implementing these simple maintenance strategies, we create a vibrant and safe outdoor space for ourselves and our pets.

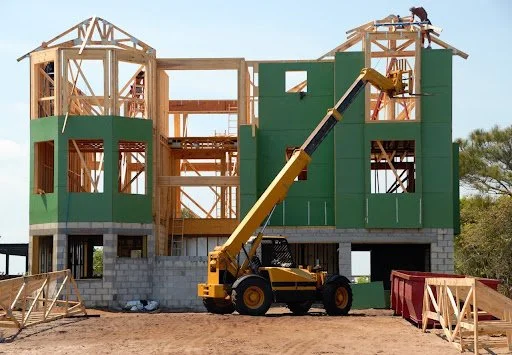
Professional Installation vs. DIY

Choosing between professional installation and a DIY project for artificial turf involves understanding the benefits and challenges of each option. We need to consider how much we want to spend, our skill level, and the size of the area we're working on.

Evaluating the Pros and Cons

DIY Installation:

  • Pros:

    • Cost Savings: We save money by not paying for labor.

    • Customization: We have full control over the design and layout.

    • Learning Experience: Completing a DIY project can be satisfying and educational.

  • Cons:

    • Time-Consuming: DIY projects can take longer than expected.

    • Skill Requirement: We need to be comfortable with tools and following instructions.

    • Quality Control: We bear the risk of mistakes, which could lead to uneven surfaces or other issues.

Professional Installation:

  • Pros:

    • Expertise: Professionals have experience and skills that can ensure a high-quality result.

    • Efficiency: They can often complete the job much faster than we might.

    • Warranty: Many contractors offer warranties on their work, providing peace of mind.

  • Cons:

    • Higher Costs: Hiring professionals can significantly increase the total cost.

    • Less Control: We have to rely on someone else’s judgment for design decisions.

Cost Comparison and Final Recommendations

When we compare the costs of artificial grass, DIY might seem more appealing. The average labor costs for professional installation can range from $5 to $20 per square foot, depending on the project size and complexity. This means for a 500-square-foot yard, we could be looking at $2,500 to $10,000 just for labor.

For DIY, we only pay for materials, which can be about $2 to $5 per square foot, plus any tools we may need to buy or rent. Besides materials, we should factor in our time and any mistakes that could lead to additional costs.

For smaller areas, DIY can be a practical choice. For larger spaces or complex installations, hiring a contractor may prove to be beneficial for quality and efficiency. Ultimately, we should choose the option that aligns with our budget and skill level.

Artificial Turf vs Natural Grass: Pros and Cons Explained

RH Business Marketing Solutions

The debate between artificial turf and natural grass is a significant one for homeowners, sports organizations, and environmental advocates alike. We find that natural grass typically offers better player safety and environmental benefits, while artificial turf boasts durability and reduced maintenance costs. Each option presents distinct advantages and challenges that can influence our choice based on specific needs and circumstances.

In recent years, artificial turf has gained popularity due to its low upkeep and year-round usability, making it attractive for busy lifestyles and high-traffic areas. Conversely, the feel and performance of natural grass often provide a more enjoyable experience for athletes and users, raising questions about player health and safety on synthetic surfaces.

As we explore the various aspects of both options, it becomes essential to consider factors like cost, maintenance, and environmental impact. Understanding these elements will help us make an informed decision tailored to our preferences and priorities.

Understanding Artificial Turf and Natural Grass

In examining artificial turf and natural grass, we recognize the distinct qualities each option presents. Understanding their definitions and characteristics can guide our decisions based on needs and preferences.

Defining Artificial Turf

Artificial turf is an engineered surface made from synthetic fibers designed to mimic the appearance of natural grass. It typically consists of a combination of polypropylene, polyethylene, or nylon materials. These synthetic fibers are installed over a base layer of crushed rock and may include a padded layer for shock absorption.

The installation process requires expertise to ensure proper drainage and stability. Unlike natural grass, artificial turf does not rely on soil, making it less susceptible to weather conditions. This type of surface offers durability and can withstand heavy foot traffic or athletic activities.

Characteristics of Natural Grass

Natural grass is a living plant, typically grown from seeds or sod. It thrives in soil and requires proper maintenance, including watering, weeding, and mowing. The care involved can vary greatly depending on climate and soil quality.

Natural grass provides a soft, organic feel and promotes biodiversity by supporting local insects and wildlife. It can absorb rainfall, aiding in water conservation and reducing runoff. However, maintaining a healthy lawn can incur various costs, such as irrigation systems, seed purchases, and fertilizers, making it an ongoing commitment.

Installation and Maintenance

When choosing between artificial turf and natural grass, the installation process and ongoing maintenance are critical factors to consider. Each option presents distinct approaches and requirements that impact both initial costs and long-term upkeep.

Installing Artificial Turf

The installation of artificial turf involves several key steps that ensure its durability and functionality. First, we need to prepare the ground, which may include removing any existing grass and leveling the surface. We typically aim for a solid foundation that promotes proper drainage.

Next, we lay down a shock-absorbent layer and compact the base material. After this, we roll out the turf, aligning it properly before securing it with stakes or adhesive. The installation cost for artificial turf typically ranges from $5 to $20 per square foot, depending on material quality and labor.

Once installed, artificial turf requires minimal maintenance. We won’t have to worry about mowing, watering, or fertilizing, making it a low-maintenance choice.

Natural Grass Installation and Upkeep

When it comes to natural grass, installation involves seeding or laying sod. If we choose to seed, we prepare the soil by tilling and adding appropriate nutrients. Seeding is generally more cost-effective, costing about $1 to $2 per square foot.

Once established, natural grass requires regular upkeep. This includes mowing every few weeks, especially during the growing season, and consistent watering to maintain its health. We also need to fertilize periodically and control weeds, which can involve additional labor and costs.

Maintaining a natural grass lawn can be labor-intensive. We must be prepared for the ongoing investment in both time and resources to keep it lush and healthy.

Economic Aspects

When evaluating artificial turf versus natural grass, cost is a critical factor. We need to analyze both the initial expenses and long-term financial implications to make an informed decision for our space.

Cost Comparison

The initial cost for artificial turf typically ranges from $5 to $20 per square foot, while natural grass costs about $1 to $2 per square foot. Although artificial turf requires a higher upfront investment, it offers greater longevity.

Aspect Artificial Turf Natural Grass

Initial Cost $5 - $20 per sq. ft. $1 - $2 per sq. ft.

Lifespan 15 - 20 years 5 - 10 years

In addition, natural grass incurs ongoing expenses like mowing, fertilizing, and weeding, potentially costing us $100 to $200 per month.

Long-Term Financial Implications

The longevity of artificial turf results in lower long-term costs. While natural grass may be cheaper initially, we must consider the cumulative costs of maintenance. This could include water bills for irrigation, which add to the financial burden.

Artificial turf provides water conservation benefits. It requires little to no watering, minimizing our water bills significantly. Furthermore, the minimal maintenance needed for synthetic grass saves us time and reduces yearly expenses associated with upkeep.

In summary, while the initial expense of artificial turf is higher, its durability and reduced maintenance costs can make it more cost-effective in the long run.

Environmental Impacts

The choice between artificial turf and natural grass significantly affects environmental health. We can evaluate key aspects, including eco-friendliness, water consumption, and impacts on biodiversity and soil.

Eco-Friendly Attributes

Natural grass plays a crucial role in oxygen production and carbon sequestration. Unlike artificial turf, which is primarily constructed from petroleum-based products, grass acts as a living filter for pollutants.

Healthy lawns can support soil microfauna and contribute to nutrient cycling. In contrast, artificial turf contributes to plastic pollution and requires specific disposal methods, as it cannot be recycled.

Natural grass also provides a cooling effect, helping to mitigate urban heat islands. This cooling not only enhances comfort but also reduces energy consumption associated with air conditioning.

Water Usage and Conservation

While artificial turf may initially seem like a water-saving solution, its impact can be misleading. The production of synthetic grass requires significant water for manufacturing processes.

Conversely, natural grass does require watering, but proper management can optimize water usage. Techniques such as xeriscaping and using drought-resistant grass varieties can minimize irrigation needs.

Moreover, healthy grass promotes better water infiltration into the soil, reducing runoff and erosion. This capability enables natural grass to play a vital role in groundwater recharge, enhancing overall water conservation efforts.

Biodiversity and Soil Health

Artificial turf lacks the ecological richness provided by natural grass. Natural lawns support diverse ecosystems, promoting interactions among various plant and animal species.

By covering the soil, grass protects against erosion while fostering fertility through organic matter. The root systems of natural grass enhance soil structure and contribute to stormwater management.

In contrast, artificial surface disrupts these natural cycles. It prevents the growth of beneficial organisms, reduces habitat availability for insects, birds, and other wildlife, and often requires artificial fertilizers and pesticides to maintain appearance.

Choosing natural grass enhances biodiversity and supports healthier soil, ultimately benefiting the entire ecosystem.

Sports, Recreation, and Aesthetics

In our exploration of artificial turf versus natural grass, we find important distinctions in their applications for sports, recreation, and overall aesthetics. Each type of surface presents unique advantages that cater to various needs.

Turf for Athletic Fields

When we consider athletic fields, artificial turf clearly stands out for its durability. It can endure heavy usage without significant wear and tear. This makes it ideal for sports that have frequent games, such as soccer and football.

Artificial surfaces also provide a consistent playing condition, which can enhance safety by reducing uneven patches that can lead to injuries. Additionally, the maintenance costs for turf are often lower in the long run, as they require less water, mowing, and fertilization compared to natural grass.

Residential and Commercial Landscaping

In residential and commercial settings, the choice between turf and grass significantly impacts aesthetic appeal. Artificial turf offers a lush, green appearance year-round, while natural grass can be prone to brown patches and weeds, particularly in adverse weather conditions.

We can see that artificial turf provides an aesthetically pleasing, uniform appearance that enhances curb appeal for homes and businesses. Its density and color retention make it suitable for various landscaping styles, from play areas to decorative lawns.

Aesthetic Considerations

When we delve into aesthetics, both artificial turf and natural grass have their merits. Natural grass boasts a vibrant, organic look, with a variety of textures and colors influenced by seasonal changes.

Conversely, artificial turf comes in an array of colors and textures, allowing us to customize the appearance to suit our preferences. We can achieve a perfect lawn without worrying about seasonal maintenance.

Both options can create inviting environments, but artificial turf tends to maintain a consistent look that can appeal to many property owners seeking low-maintenance solutions.

Practical Concerns

When evaluating artificial turf versus natural grass, we need to consider key practical aspects such as durability, wear, and safety implications for users. These factors play significant roles in determining the most suitable option for different environments.

Durability and Wear

Artificial turf is designed to withstand high-traffic areas with minimal wear and tear. The lifespan of quality synthetic grass ranges from 15 to 20 years, making it a resilient choice for spaces that experience heavy foot traffic. In contrast, natural grass typically lasts around 5 to 10 years, often requiring reseeding or resodding.

Durability translates to lower maintenance costs for artificial grass. We don’t need to worry about constant watering, mowing, or applying fertilizers. For environments with pets, synthetic options offer easier clean-up and weed control since they do not allow for natural growth. While natural grass can get muddy and compacted over time, resulting in uneven surfaces, artificial turf maintains a consistent footing.

Safety and Health Factors

Safety is paramount when comparing these surfaces. Artificial turf is generally considered pet-friendly and does not harbor pests as natural grass might, reducing allergen exposure for many individuals. The infill material used in synthetic grass provides cushioning that can help prevent injuries, especially in sports and playground settings.

On the flip side, we should note potential concerns regarding the temperature of artificial turf, as it can become hot under direct sunlight, possibly leading to discomfort for pets and children. In terms of health, those with allergies may prefer artificial grass due to its reduced pollen count compared to natural lawns. Balancing these considerations is essential to ensure a safe environment for all users.

How to Choose the Perfect Garage Door for Your Home's Style

RH Business Marketing Solutions

Your garage door isn't just a functional entrance to your home—it's a significant component of its curb appeal and overall aesthetic. Surprisingly, it's often overlooked in the grand scheme of exterior design. However, the right garage door can elevate your home's style and even increase its value.

Navigating the vast selection of garage doors can feel like a maze. This guide serves as your roadmap, breaking down essential considerations to help you discover a door that enhances your home's curb appeal, provides peace of mind, and proves to be a wise investment.

Defining Your Garage Door Style Goals

Before diving into the world of garage doors, it's important to establish your style goals.

Architectural Harmony

Consider your home's architectural style—is it craftsman, modern, traditional, or something else? Your new garage door should harmonize with the existing design elements. A sleek, minimalist door would complement a modern home. In contrast, a carriage-style door with decorative hardware might suit a traditional or Craftsman house.

Materials Matter

The ideal garage door material depends on individual preferences and priorities, as each material presents distinct advantages and disadvantages.

  • Steel: Durable, low-maintenance, and available in a wide range of styles and colors.

  • Wood: Offers a classic, warm look but requires more upkeep.

  • Composite: Achieves the warmth of wood with the longevity of different materials, typically at a lower price point.

Curb Appeal and First Impressions

Your garage door is often the first thing people see when they approach your home. Your front door is the focal point of your home's facade. Make it a welcoming and stylish entryway.

Exploring Design Options and Features for Garage Doors

Considering your style preferences and material options, let's explore the exciting design possibilities and features we can incorporate.

Panel Styles

  • Raised panel: Adds depth and dimension, suitable for traditional and classic homes.

  • Recessed panel: Creates a clean, contemporary look.

  • Carriage house: Mimics the appearance of swing-out doors, often with decorative hardware, ideal for traditional or rustic homes.

Window Options

Adding windows to your garage door allows natural light to filter into the space, but consider privacy concerns. Choose window styles (arched, square, etc.) and placements that complement your home's architecture.

Colors and Finishes

The color of your garage door should ideally match or complement your home's exterior palette. From vibrant hues to understated elegance, the possibilities for personalizing your color choice are endless.

Hardware Accents

Decorative hardware like hinges and handles can elevate a standard garage door, turning it into a visually appealing centerpiece.

Prioritizing Functionality and Safety for Garage Doors

Beyond aesthetics, functionality and safety are crucial considerations for your garage door.

Insulation

Insulated garage doors offer a valuable solution for attached garages or those used as workspaces. They help regulate internal temperatures and enhance overall energy efficiency. Look for doors with higher R-values, which indicate better insulation.

Openers and Technology

Modern garage door openers offer convenience and security features like smartphone control, battery backup, and built-in cameras. Choose a reliable opener that suits your needs and budget.

Safety Features

Ensure your garage door is equipped with auto-reverse mechanisms to prevent accidents, and consider adding sensors for additional safety. Regular maintenance is essential to keep your door operating safely.

Considering the Practical Aspects of Choosing Garage Doors

Let's not forget the practical aspects of garage door selection:

  • Wind Load Requirements: If you live in an area prone to high winds or storms, invest in a wind-resistant garage door to protect your home from damage.

  • Quality and Durability: A well-constructed garage door from a reputable brand will offer better durability and longevity, saving you money in the long run.

  • Budget and Price: Garage door prices vary widely depending on the material, style, and features. Establish a spending limit before making any purchases.

  • Professional Installation: Always hire qualified professionals for new garage door installation. Failure to follow proper installation guidelines could result in suboptimal door function and potential hazards.

Making an Informed Garage Door Purchase Decision

You've done your research and considered all the options. Now it's time to make your decision.

  • Visit Showrooms: Visit local showrooms to see and touch different garage doors in person. This will give you a better sense of their look and feel.

  • Consult with Experts: Don't hesitate to seek advice from garage door professionals. Their services include a comprehensive evaluation of your residence, followed by tailored recommendations to address your unique needs.

  • Get Multiple Quotes: Compare prices and warranties from different vendors before making your final decision.

Conclusion

Choosing the ideal residential garage door requires a thoughtful balance of style, functionality, and practicality. A properly chosen garage door can significantly enhance your home's exterior aesthetic, provide peace of mind through enhanced security, and represent a long-term investment in your property's value.

To achieve these benefits, it's crucial to align your garage door selection with your home's architectural design, your personal style preferences, and your budget.

Ready to transform your home's exterior? Visit a showroom today and start exploring the exciting world of garage doors!

Ultimate Guide to End Of Tenancy Cleaning

RH Business Marketing Solutions

End of tenancy cleaning is a crucial task for both tenants and landlords. It ensures that the property is left in pristine condition, ready for the next occupant. This not only helps tenants secure the return of their deposit but also maintains the property's value and appeal.

What is End Of Tenancy Cleaning?

End of tenancy cleaning refers to the thorough cleaning of a rental property at the end of a lease period. Unlike regular cleaning, it involves deep cleaning of every nook and cranny to meet the standards expected by landlords and letting agencies. This comprehensive cleaning includes scrubbing appliances, washing windows, and sanitising bathrooms, ensuring that the property is spotless and hygienic for the next tenant.

Why is End Of Tenancy Cleaning Important?

Ensuring the property is clean at the end of a tenancy is vital for several reasons. Firstly, a thorough cleaning can help tenants secure the full return of their security deposit, as many tenancy agreements stipulate that the property must be clean. Secondly, it prepares the property for new tenants, making it more appealing and ready for immediate occupancy. Lastly, fulfilling cleaning responsibilities can prevent potential disputes with landlords and ensure a smooth handover process.

Checklist for End Of Tenancy Cleaning

A concise end-of-tenancy cleaning checklist is essential to ensure no area is overlooked. Here’s a detailed area-by-area guide:

  • Kitchen: Clean and degrease all appliances (oven, fridge, microwave), wipe down surfaces, descale sinks and

  • Bathroom: Descale showers, sinks, taps and disinfect all

  • Living Areas: Fully vacuum carpets, disinfect floors, dust furniture, clean skirting boards and light

  • Bedrooms: Clean wardrobes and drawers, vacuum under the bed, wipe and buff all internal windows and window

Following this checklist helps ensure that every part of the property meets the required cleanliness standards.

DIY vs Professional End Of Tenancy Cleaning

When it comes to end of tenancy cleaning, tenants have the option to either do it themselves or hire professional cleaners.

  • DIY Cleaning: This can save money but requires significant time and Tenants must be thorough to meet the expected standards.

  • Professional Cleaning: Hiring experts ensures a high-quality clean, potentially saving tenants from disputes over their deposit. Professionals have the right tools and experience to tackle even the toughest cleaning

Considering the pros and cons of each option can help tenants decide the best approach for their situation.

Step-by-Step Guide to End Of Tenancy Cleaning

Here’s a step-by-step guide to ensure an effective end of tenancy cleaning:

  1. Planning and Preparation: Schedule enough time and gather all necessary cleaning

  2. Declutter: Remove personal belongings and

  3. Room-by-Room Cleaning: Follow a systematic approach to clean each room

  4. Attention to Detail: Don’t forget to clean often-overlooked areas like behind furniture and inside

  5. Final Inspection: Perform a walkthrough to ensure every area meets the required

By following these steps, tenants can leave the property in excellent condition, ready for the next occupants.

Common Mistakes to Avoid in End Of Tenancy Cleaning

Avoiding common mistakes is crucial for a successful end of tenancy cleaning. Here are some pitfalls to watch out for:

  • Ignoring Hard-to-Reach Places: Ensure areas like behind furniture are

  • Not Cleaning Appliances Thoroughly: Pay special attention to ovens, fridges, and

  • Skipping the Final Inspection: Always do a final walkthrough to catch any missed

How Much Does End Of Tenancy Cleaning Cost?

The cost of end of tenancy cleaning can vary based on several factors. Typically, prices depend on the size of the property, the level of cleaning required, and the region. On average, tenants might pay between £100 and £300, with potential for higher costs depending on the property's size and the condition the tenants leave it in. Investing in a professional end of tenancy cleaning can often be worth the peace of mind and potentially safeguard you from losing your deposit.

FAQs about End Of Tenancy Cleaning

How long does end of tenancy cleaning take?

The duration depends on the size and condition of the property. Generally, it takes between 3 to 6 hours for a thorough clean.

Can I do end of tenancy cleaning myself?

Yes, you can, but it requires time, effort, and attention to detail to meet the standards expected by landlords and letting agents.

What happens if the property is not cleaned to standard?

If the property isn’t cleaned adequately, landlords may deduct cleaning costs from your deposit to cover professional cleaning services.

Are professional cleaners worth it for end of tenancy cleaning?

Professional cleaners can save you time and ensure the property meets required standards, often making it worth the investment to secure your full deposit return.

End of tenancy cleaning is a critical task that ensures tenants can secure their deposit return and leave the property in excellent condition for the next occupants. Whether choosing to clean yourself or hire professionals, following a detailed checklist and avoiding common mistakes can make the process smoother and more effective.

The Timeless Beauty and Durability of Stonework

RH Business Marketing Solutions

Stonework has been a cornerstone of construction and design for centuries, offering a blend of natural beauty, durability, and versatility that few other materials can match. At Starbright Chimney Sweep and Masonry, we specialize in high-quality stonework that enhances the aesthetic and structural integrity of homes and buildings.

The Versatility of Stonework

Stonework encompasses a wide range of applications, from functional structures to decorative elements. Here are some popular uses of Stonework that can transform your property:

  1. Exterior Facades: Stone facades add a timeless, elegant look to any building. Whether you prefer the rustic charm of natural stone or the sleek appearance of cut stone, a stone facade can significantly enhance your property's curb appeal.

  2. Interior Features: Inside the home, stonework can be used to create stunning fireplaces, accent walls, and kitchen backsplashes. These elements not only serve a functional purpose but also add a touch of luxury and sophistication to your interior design.

  3. Landscaping: Stonework is a popular choice for landscaping projects, including patios, walkways, retaining walls, and garden features. The natural beauty and durability of stone make it ideal for creating outdoor spaces that are both beautiful and long-lasting.

  4. Structural Applications: Beyond its aesthetic appeal, stonework is also prized for its structural qualities. Stone foundations, load-bearing walls, and columns provide unmatched strength and stability, ensuring the longevity of your construction projects.

Benefits of Stonework

Opting for stonework in your construction and design projects offers numerous advantages:

  1. Durability: One of the most significant benefits of stonework is its durability. Stone is resistant to weathering, fire, and pests, making it a long-lasting and low-maintenance option for both interior and exterior applications.

  2. Aesthetic Appeal: Stone offers a natural beauty that is hard to replicate with other materials. Its unique textures, colors, and patterns provide endless design possibilities, allowing you to create one-of-a-kind features that enhance your property's overall aesthetic.

  3. Environmental Sustainability: Stone is a natural, eco-friendly material that requires minimal processing. Using stone in your construction projects can reduce your environmental footprint and contribute to sustainable building practices.

  4. Value Addition: Incorporating stonework into your property can significantly increase its value. The timeless appeal and durability of stone make it a desirable feature for potential buyers, ensuring a good return on investment.

Our Stonework Services

At Starbright Chimney Sweep and Masonry, we take pride in offering comprehensive stonework services tailored to meet your specific needs. Our skilled craftsmen have extensive experience working with various types of stone, ensuring high-quality results that exceed your expectations. Here’s what we offer:

  1. Custom Stone Design: We work closely with you to understand your vision and design custom stone features that perfectly complement your property. Whether it’s a new fireplace, a stone facade, or an outdoor patio, our team can bring your ideas to life with precision and creativity.

  2. Installation and Construction: Our stonework installation services are carried out with meticulous attention to detail. We use high-quality materials and advanced techniques to ensure that every project is completed to the highest standards of craftsmanship and durability.

  3. Repair and Restoration: Stonework, while durable, can still suffer from wear and tear over time. Our repair and restoration services can address any issues, from minor cracks to significant structural damage, restoring the beauty and integrity of your stone features.

  4. Consultation and Planning: Successful stonework projects start with careful planning. We offer consultation services to help you choose the right materials, design elements, and construction methods for your project. Our expert guidance ensures that your stonework not only looks great but also performs well for years to come.

Choosing the Right Stone

Selecting the appropriate type of stone for your project is crucial to achieving the desired outcome. Here are some popular stone options and their characteristics:

  1. Granite: Known for its strength and durability, granite is an excellent choice for high-traffic areas and structural applications. Its wide range of colors and patterns makes it versatile for both indoor and outdoor use.

  2. Limestone: Limestone offers a softer, more uniform appearance, making it ideal for facades, flooring, and decorative elements. Its natural beauty and workability make it a favorite among designers and architects.

  3. Slate: Slate’s unique texture and color variations make it a popular choice for roofing, flooring, and wall cladding. It’s durable and water-resistant, making it suitable for both interior and exterior applications.

  4. Marble: Marble is synonymous with luxury and elegance. Its smooth surface and distinctive veining make it perfect for countertops, flooring, and decorative features. However, it requires more maintenance due to its susceptibility to staining and scratching.

Stonework offers a timeless, durable, and versatile solution for enhancing the beauty and functionality of your property. At Starbright Chimney Sweep and Masonry, we are dedicated to delivering high-quality stonework that meets your specific needs and exceeds your expectations. Whether you're looking to add a stunning stone feature to your home or require expert repair and restoration services, our skilled team is here to help. Contact us today to discuss your stonework project and discover how we can bring your vision to life with our exceptional craftsmanship and attention to detail.

Dream Backyard: Patio Ideas

RH Business Marketing Solutions

Photo Source: buildtuff.com

When designing an outdoor patio, creativity and functionality should be at the forefront. Here are some ideas to enhance your patio space:

Photo Source: lovelyharbor.com

1. Create Zones

Segmenting your patio into distinct areas can maximize its usability. Consider a dining zone with a table and chairs, a lounge area with comfortable seating, and a space for grilling or cooking.

Image Source: quietminimal.com

2. Incorporate Natural Elements

Utilizing natural materials like stone or wood for your patio can create a warm, inviting atmosphere. Consider adding potted plants, hanging baskets, or a vertical garden to bring lush greenery into the space.

Image Source: hello-hayley.com

3. Use an Awning or Pergola

To provide shade and shelter, consider installing a retractable awning or a pergola. This allows for comfortable outdoor activities regardless of the weather while adding an architectural element to your patio.

Image Source: lovelyharbor.com

4. Select Comfortable Furniture

Choose durable, weather-resistant furniture that doesn’t compromise on comfort. Cushioned sofas, lounge chairs, and even hammocks can elevate the relaxation factor of your patio.

Image Source: greensnooze.com

5. Outdoor Lighting

Strategically placed lighting can transform your patio into a cozy retreat in the evening. String lights, lanterns, or built-in lights along pathways can create an inviting atmosphere.

Image Source: crazylaura.com

6. Fire Feature

Incorporating a fire pit or outdoor fireplace can serve as a focal point while providing warmth and ambiance for nighttime gatherings.

7. Add a Water Feature

The sound of flowing water can create a tranquil environment. Consider a small fountain, pond, or even a waterfall feature to enhance the sensory experience of your patio.

8. Outdoor Kitchen or Bar

For those who love to entertain, an outdoor kitchen or bar area can make cooking and serving more convenient. This can range from a simple countertop and grill to a fully equipped kitchen with a refrigerator and sink.

Photo Source: decorwitheva.com

9. Use Outdoor Rugs

Rugs can help define spaces and add color and texture. Choose rugs that are specifically made for outdoor use to ensure they withstand the elements.

Photo Source: bydesignandviz.com

10. Personal Touches

Incorporate personal decor elements such as outdoor art, decorative pillows, or custom planters to make the space uniquely yours.

By utilizing these ideas, you can create a patio that not only complements your home but also serves as a versatile space for relaxation, dining, and entertainment.

5 Essential Home Construction Professionals for Building Your Dream House

RH Business Marketing Solutions

In 2023, 1.41 million houses were built in the US alone. Building your dream house is a process that requires many professionals to use their skills and work together. Every expert has an important part in guaranteeing the complete realization of your vision with accuracy, security, and effectiveness. From the initial planning stage to the final touches, knowing about these main characters can help you have a better experience during home construction. 

In this article, we'll present the five key professionals in home construction who are crucial for transforming your dream house into a real one.

Architects

Architects are the ones who take your vision and turn it into reality. They play an important part in the design and planning stage of building your house. An architect will cooperate with you to comprehend what you need, like, and how you live, translating it into an organized design that makes the best use of both usefulness and appearance.

Architects have experience in more than just making good-looking designs. They look at things like the way a place is positioned, how it gets natural light and if it's energy efficient or not, so your house will be both pretty and eco-friendly. Architects also help with getting permits and approvals and handling tricky details of zoning laws and building codes. The team's detailed plans are a guide for the construction workers, helping to reduce mistakes and guarantee that what is built matches what you imagined.

Professional Home Builders

Home builders are crucial for every construction of a new home. These professionals supervise the complete building process, making sure that all parts meet top quality and safety measures. Home builders handle tasks like communicating with other construction experts, controlling timeframes, and staying within budget limits.

Hiring a local home-building company has lots of benefits. For instance, if you're living in Georgia, it's best to look for home builders in Georgia for several reasons. For one, you get lots of experience and knowledge as they understand the details of construction codes and rules, so they make sure that your home meets all local laws when building it. Also, they have good connections with local suppliers and subcontractors. This may result in saving a few bucks, as well as a timely wrap-up of the project. Engaging a skilled home builder provides you with a devoted partner, committed to making your dream come true and ensuring the robustness and longevity of your residence.

Structural Engineers

The stability and safety of your home are the tasks given to a structural engineer. They study and plan out all parts that make up its structure, from the foundation to beams, load-bearing walls, and more. Their purpose is to guarantee stability against different forces or pressures so your house stays safe for many years. They're the ones who make sure everything holds together correctly; they also check if any changes in form might affect the overall balance. Their job is very important because it prevents failures from happening, which could put your house at risk or reduce how long it lasts.

In the initial phases, structural engineers collaborate with architects to make certain that the design is not only visually attractive but also structurally strong. They carry out careful calculations and simulations to figure out which materials and building methods suit your project best. In some cases, during the construction process, structural engineers might inspect the work to ensure it fulfills specified standards and requirements. Their expertise is indispensable in creating a home that is both beautiful and resilient.

Electricians

Electricians are needed to install and keep the electrical systems in your home functioning properly. They make sure that everything is wired safely and effectively, from basic light switches or outlets up to complex home automation setups.

To comprehend your electrical necessities and preferences, a trained electrician will cooperate with you. They will sketch out a design that fits well with your way of life. They take care to see if the electrical systems follow the rules set by local authorities, reducing the danger from fires and other risks related to electricity. Electricians also collaborate with other specialists like plumbers or HVAC technicians for smooth integration of all things related to electricity into overall construction work. Their work is crucial in providing the comfort and convenience that modern homes demand.

Plumbers

The role of plumbers is essential in maintaining the proper functioning of residential water supply and drainage systems. They are responsible for installing pipes, fixtures, and appliances that bring clean water into homes while also removing waste materials efficiently. Whether constructing a new home or renovating an existing one with modifications to plumbing system components, it's vital to enlist professional plumber services. Plumbers not only handle installation duties but also monitor your entire plumbing infrastructure over time, providing repairs when necessary.

Collaborating closely with builders and architects during construction ensures planned efficient and reliable fittings adherence to legal regulations governing such installations. Additionally, plumbers are crucial in installing major household appliances like washing machines and dishwashers. They ensure these appliances are correctly connected and functioning properly, contributing to hygienic living spaces that provide comfort and convenience for daily needs.

Bottom Line

Building your dream house is a complex process that requires the expertise of various professionals. Home builders, architects, structural engineers, electricians, and plumbers, each play a critical role in ensuring that your home is constructed to the highest standards of quality and safety. By understanding the contributions of these essential home construction professionals, you can make informed decisions and collaborate effectively to bring your vision to life. With the right team in place, your dream home can become a reality, providing you with a beautiful, functional, and lasting space for years to come.

How to Maximize Space in Your Home

RH Business Marketing Solutions

Maximizing space in your home is a widespread challenge, more so now with the shift toward working from home. Across the United States, over 250 million square feet of storage space has been built in the last five years, accounting for more than 15% of all new real estate developments. This surge reflects a national trend toward utilizing storage units, with one in five Americans now using external storage spaces. Knightdale, North Carolina, is no exception to this trend, where families prioritize spacious and functional living environments. This blog will offer essential tips and strategies to help you effectively use every inch of your home, improving both its functionality and your quality of life.

Declutter Regularly

Decluttering is a critical step in maximizing home space. By regularly sorting through your belongings and removing items you no longer use or need, you can significantly reduce clutter and free up space. Start with a system that categorizes items into things to keep, donate, sell, or throw away. This process can be less daunting if done regularly—consider a bi-annual schedule to prevent buildup. Organizing items as you go also prevents the creation of new clutter, ensuring that everything has a designated place.

If optimizing your space seems overwhelming, it might be beneficial to get extra help. Local storage units, for instance, can provide a practical solution for storing items that are not needed daily but are still important to keep. Look up the keyword storage Knightdale North Carolina online as a starting point. Visit websites and read customer reviews. These insights will help you choose a facility that offers the best security, accessibility, and price for your needs.

Utilize Vertical Spaces

One of the most effective ways to free up floor space in your home is by taking advantage of vertical spaces. Walls aren’t just for paintings or photos; they are prime real estate for storage solutions. Installing floating shelves can transform your walls into storage areas for books, decorative items, and everyday essentials without sacrificing floor space. Wall-mounted racks in the kitchen can hold pots, pans, and cooking utensils, which helps to clear up cabinet and counter space. In bedrooms, tall, narrow cabinets or shelves can utilize the vertical space that would otherwise remain empty, providing extra storage without crowding the room. This approach not only helps declutter your living areas but also makes cleaning easier.

Invest in Multi-functional Furniture

Multi-functional furniture is a game-changer in maximizing space. Pieces that have multiple uses can significantly reduce the need for extra furniture and help maintain an organized and spacious home. For instance, an ottoman with built-in storage can serve as a coffee table, extra seating, and a storage spot for books or blankets. Sofa beds can turn living rooms into guest rooms quickly, and expandable dining tables can host extra guests when needed and shrink for daily use. These pieces are not only space savers but also enhance the functionality and flexibility of your living spaces.

Optimize Closet Organization

A well-organized closet can save a tremendous amount of space. Installing double-hanging rods increases the hanging capacity for clothing, allowing for more efficient use of vertical space. Adding shelves or drawers can help segregate different types of clothing and accessories, making them easier to find and reducing the need to keep extra storage units in the bedroom. For those with smaller closets, over-the-door organizers for shoes or jewelry can make a big difference, as can vacuum-sealed bags for storing out-of-season clothing under the bed or on high closet shelves.

Adopt Smart Lighting Solutions

Smart lighting solutions can play a significant role in maximizing the perception of space in your home. Opting for wall-mounted or pendant lights can free up surface areas on nightstands and end tables, creating a cleaner and more spacious environment. Additionally, incorporating recessed lighting into ceilings or under cabinets can brighten a room without encroaching on living space. Strategically placed mirrors, combined with these lighting techniques, can also enhance the feeling of depth and openness, making any room appear larger and more inviting.

Use the Right Containers and Bins

Choosing the right containers and bins for storage can significantly improve the efficiency of space usage in your home. Opt for clear bins when possible; they allow you to see the contents without needing to open each one. Utilize different sizes to fit various spaces and needs—larger bins for seasonal clothing under the bed and smaller ones for crafts or office supplies in closets. Also, labeling each container clearly can save time and prevent the need to search through multiple bins, keeping your home more organized and functional.

Implement a Space-Saving Kitchen Layout

Maximizing space in the kitchen requires smart organization and the strategic use of fixtures. Installing hanging racks for pots, pans, and utensils can free up cabinet space. Utilize the insides of cabinet doors by adding small racks for spices or hooks for measuring cups. Consider a magnetic strip on the wall for knives, which keeps them out of drawers but still handy. If space allows, an island with built-in cabinets can serve multiple purposes, providing additional storage as well as extra prep space.

Focus on Your Bathroom Storage

Many homes have small bathrooms that need to hold lots of products and accessories. Making good use of space is essential. Installing cabinets above the toilet or using over-the-door organizers can provide much-needed storage without taking up extra floor space. Drawer dividers help keep countertops uncluttered by organizing items that are usually left out. For small things like bobby pins and hair ties, using magnetic strips or small containers can keep them from making drawers messy.

Embrace Minimalism

Adopting a minimalist approach to your home decor and organization can drastically reduce clutter and make your living spaces appear larger. Focus on keeping only the essentials and storing away items that are not in daily use. Furniture with clean lines and a simple design can make rooms feel more open and airy. Minimalism isn’t about having less for the sake of it; it's about making room for more of what matters—clear space, clear mind.

All in all, maximizing your home's space is about smart planning and creative thinking. It's not just about squeezing more stuff in; it's about making your space work harder for you. By decluttering, organizing, and using furniture wisely, you can transform a cramped space into a functional and stylish haven. It's not about owning more, but enjoying what you have to the fullest. Small changes can make a big difference, so start with one room and see how it transforms your overall living experience.