Google+

contact us

Use the form on the right to contact us.

Day or Night, we are here to serve you. Leave your plumbing problem to us.


Tinley Park, IL

(708)845-7922

Residential and Commercial plumbers and plumbing contractors available in Orland Park, Tinley Park, Oak Lawn, Palos Heights, Midlothian, Oak Forest, Homer Glen, Mokena, Frankfort, and the surrounding Chicago South Suburbs. Emergency plumbers.

copper water lines.jpg

Kevin Szabo Jr Plumbing Blog

Kevin Szabo Jr Plumbing is Tinley Park, Orland Park, Oak Forest, Midlothian, Orland Hill, Homer Glen, Mokena, Frankfort, Crestwood, Palos Heights, Oak Lawn, local plumber. Read our blog for advice, tips, a good laugh, and basic home improvement.

**We are moving our old blog to our new and improved website. Too see all our posts visit kevinszabojrplumbing.blogspot.com

Filtering by Category: August 2024

Maintenance Tips for Ducted Air Conditioning Systems

RH Business Marketing Solutions

Ah, the blissful comfort of a cool breeze on a scorching summer day. Ducted air conditioning systems are a modern marvel, silently working in the background to keep our homes at a comfortable temperature. But like any machine, these systems require regular maintenance to function efficiently and deliver optimal performance. Here's your comprehensive guide to maintain them when you buy ducted air conditioning system, ensuring a cool and comfortable home environment for years.

Understanding Your Ducted Air Conditioning System

Before diving into maintenance, let's gain a basic understanding of how your ducted AC system works. Imagine a closed loop:

  • Indoor Unit (Evaporator): This unit draws warm air from your home through a filter. The cool refrigerant absorbs the heat, causing the air to cool down.

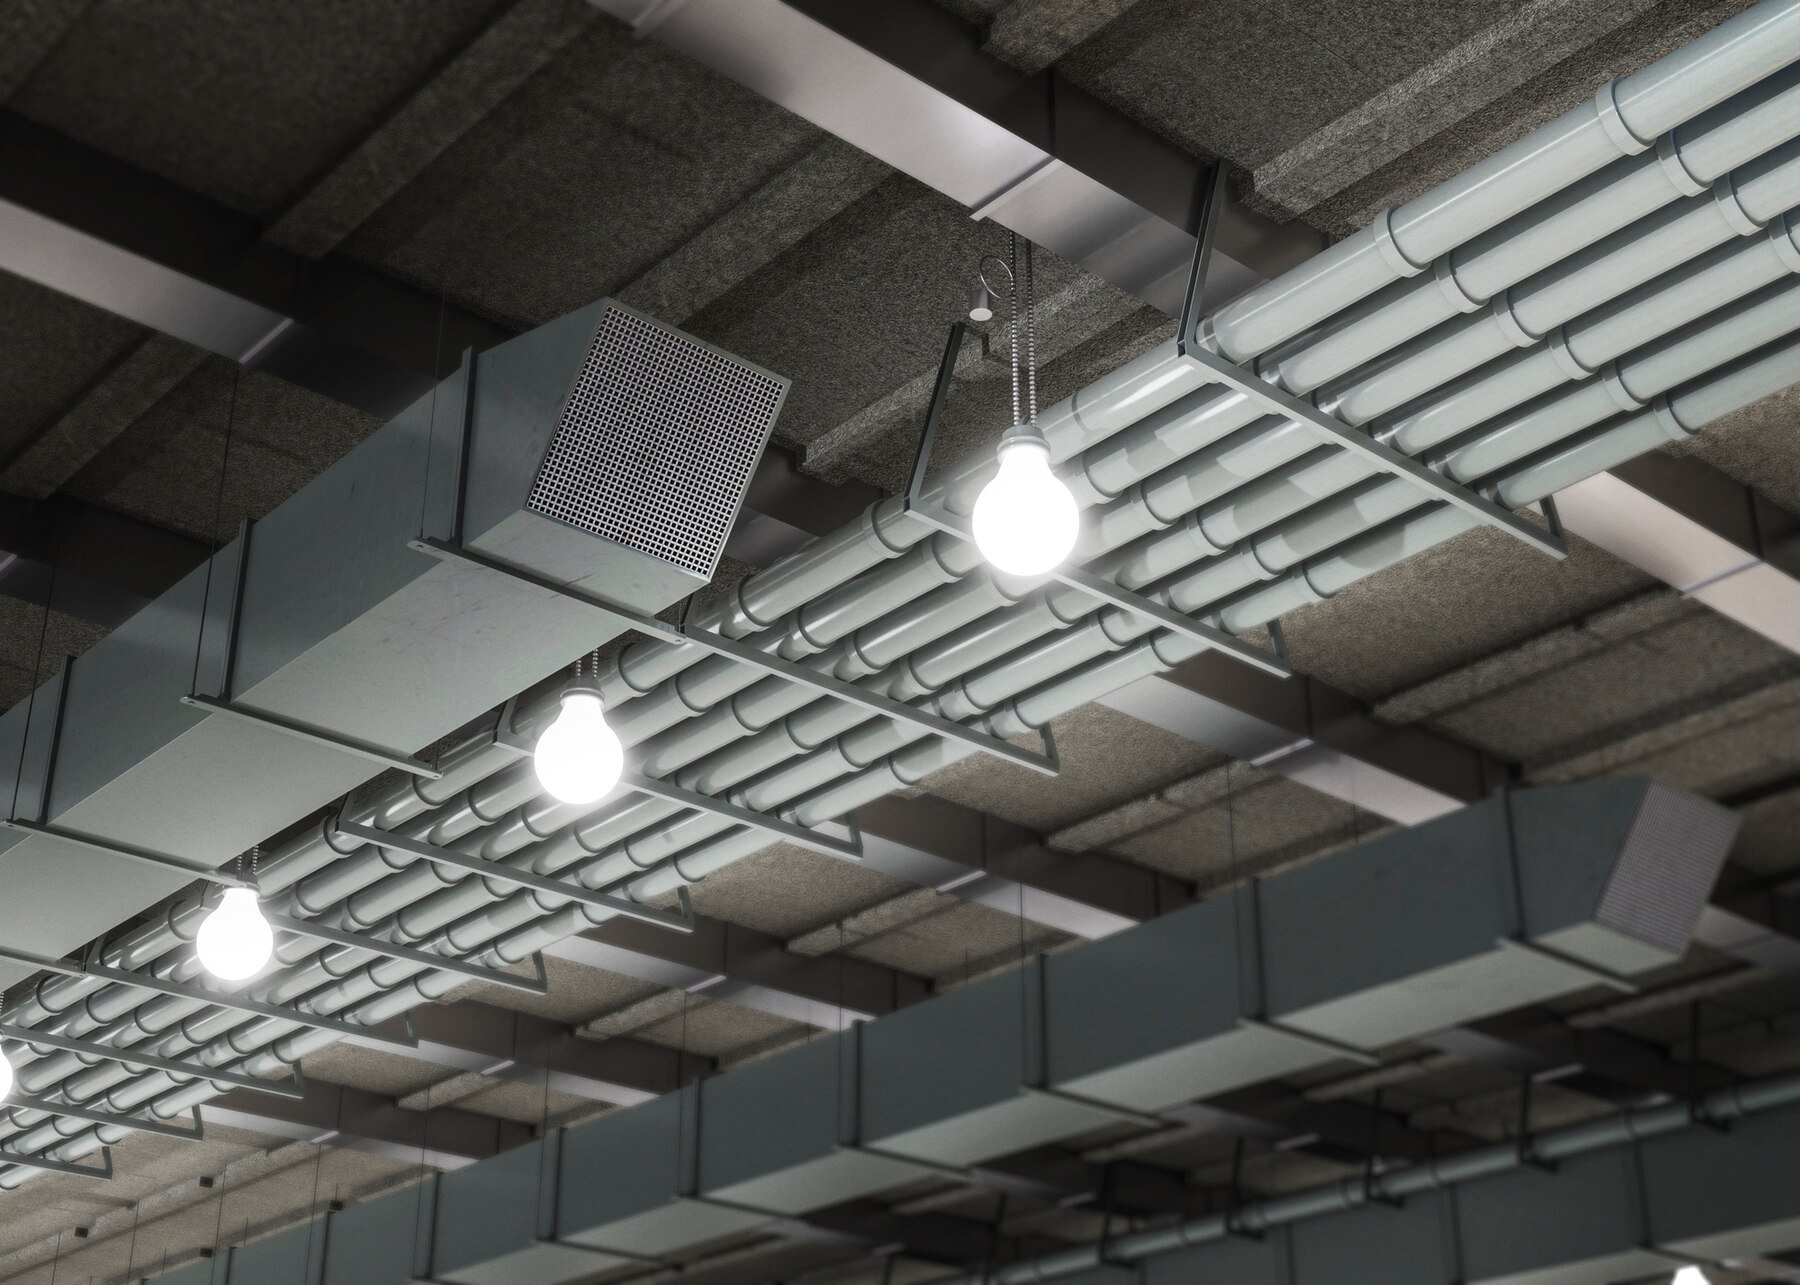
  • Ductwork: A network of insulated pipes carries the cooled air throughout your house.

  • Vents and Registers: These are the openings in your walls or ceilings where the cool air exits the ductwork and enters your living space.

  • Outdoor Unit (Condenser/Compressor): The hot refrigerant travels here, releasing heat into the external environment. The cooled refrigerant then returns to the indoor unit to repeat the cycle.

Regular Maintenance Schedule: Your System's Recipe for Success

Like a car that needs regular oil changes, your ducted air conditioning system thrives on a consistent maintenance schedule. Here's a breakdown of tasks based on frequency:

  • Monthly:

    • Filter Cleaning: This is crucial for maintaining airflow and efficiency.

  • Quarterly:

    • Inspect Vents and Registers: Check for dust buildup and ensure they're not blocked by furniture or curtains.

  • Annually:

    • Professional Maintenance Service: A professional can thoroughly clean your system, inspect ductwork, and ensure optimal performance.

Filter Cleaning and Replacement: Your System's Air Purifier

Air filters trap dust, pollen, and other airborne pollutants. A clogged filter restricts airflow, forcing your system to work harder, reducing efficiency, and potentially increasing energy bills. Here's how to maintain your air filter:

  • Locate the filter: Consult your user manual to find the filter's location, typically behind a grill on the indoor unit.

  • Cleaning: Most filters are washable. Use warm, soapy water and let it dry completely before reinstalling.

  • Replacement: Replace disposable filters according to the manufacturer's recommendations, typically every 1-3 months, depending on usage and dust levels.

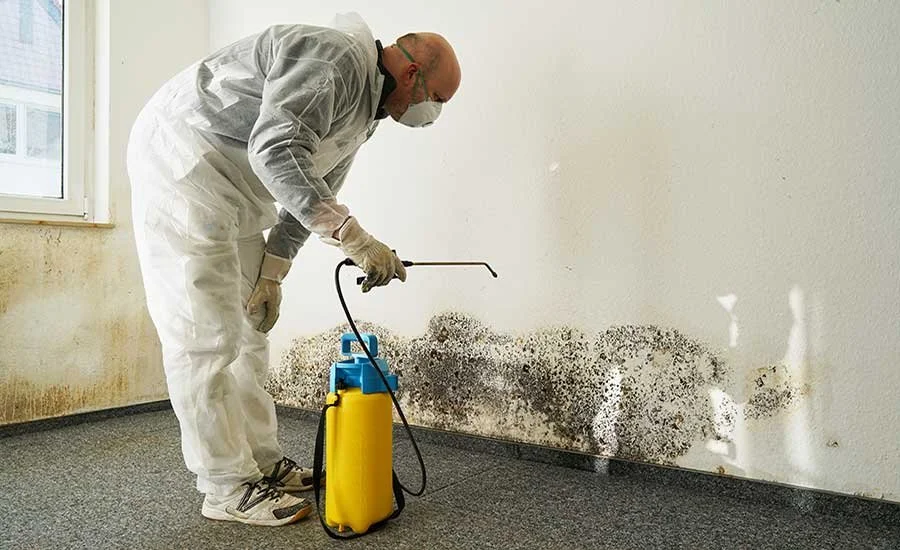
Inspecting and Cleaning Ductwork: Keeping the Airflow Smooth

Over time, dust and debris can accumulate within the ductwork. This reduces airflow and can lead to mold growth, impacting indoor air quality. While professional cleaning is recommended every few years, here are some DIY tips for inspection:

  • Signs of Trouble: Watch for uneven cooling throughout your home, increased dust levels, or unusual noises from the vents. These can indicate ductwork issues.

  • Visual Inspection: Access a portion of your ductwork (usually located in the basement or crawl space) if possible. Look for visible dust buildup or blockages.

  • Cleaning: For minor dust accumulation, use a long-reach vacuum cleaner with a hose attachment to reach into the ducts. Remember, professional cleaning offers a more thorough solution.

Checking and Cleaning Vents and Registers: The Final Frontier

Vents and registers are the final contact points for cool air entering your living space. Blocked vents significantly impact airflow:

  • Cleaning: Remove the vent covers and gently vacuum dust and debris. Wipe the covers with a damp cloth if necessary.

  • Unobstructed Flow: Ensure furniture, curtains, or rugs are not blocking the vents, allowing for proper air circulation.

Inspecting the Outdoor Unit: Keeping the Heat Out

The outdoor unit, usually next to your home, is vital in heat exchange. Here's how to maintain it:

  • Clear the Area: Keep the area around the unit free of debris, leaves, and overgrown vegetation. This allows for proper airflow.

  • Visual Inspection: Look for any visible damage to the fins or casing of the unit.

  • Leave it to the Professionals: Avoid tampering with the internal components of the outdoor unit.

Checking Thermostat Settings: Optimizing Comfort and Efficiency

Your thermostat acts as the conductor for your air conditioning system. Here's how to ensure it's working efficiently:

  • Calibration: Ensure your thermostat is accurately reading the room temperature. Most thermostats have a calibration function.

  • Settings: Adjust thermostat settings according to your comfort and needs. Consider using smart thermostats that learn your routines and adjust settings automatically.

Professional Maintenance Services: Your System's Annual Check-Up

While regular cleaning and DIY maintenance are essential, a yearly professional service is crucial for optimal system performance and longevity. Here's what you can expect:

  • Thorough Cleaning: Professionals utilize specialized tools and techniques to clean the entire system, including the indoor unit, ductwork (in some cases), and outdoor unit. This removes deep-seated dust, dirt, and potential mold growth that DIY methods might miss.

  • Inspection and Diagnostics: Technicians inspect all system components for signs of wear and tear, potential leaks, or loose connections. They also perform diagnostic checks to ensure the system is operating efficiently.

  • Performance Optimization: Professionals can adjust refrigerant levels, calibrate the thermostat, and optimize system settings to ensure your air conditioning system runs at peak efficiency. This can translate to lower energy bills for you.

  • Peace of Mind: Knowing your system has received a thorough inspection and professional cleaning provides peace of mind. This proactive approach can prevent minor issues from escalating into costly repairs.

Troubleshooting Common Issues: When DIY Might Suffice

While some issues require professional attention, here are some common problems you might be able to troubleshoot yourself:

  • Uneven Cooling: Check for blocked vents or registers. Ensure the thermostat settings are consistent throughout the house. If the air filter is clogged, consider replacing it.

  • Reduced Airflow: Clean the air filter and vents. Check if the furniture is blocking vents.

  • Strange Noises: Turn off the system and consult your user manual for troubleshooting tips based on the specific noise.

  • No Power: Check the thermostat settings and ensure the circuit breaker hasn't tripped.

However, if the issue persists or you suspect a refrigerant leak, malfunctioning compressor, or any other major concern, don't hesitate to call a qualified AC technician.

Breathe Easy with Proactive Maintenance

By following these essential maintenance tips, you can ensure your ducted air conditioning system operates efficiently, delivering cool air while keeping your energy bills in check. Remember, proactive maintenance is key to extending the life of your system and preventing costly repairs. Schedule regular cleaning, invest in annual professional services, and enjoy a cool and comfortable home environment for years. So, breathe easy, knowing your air conditioner is well-maintained and ready to keep you cool throughout the hot summer months.

Plumbing and Car Accidents: Understanding the Connection

RH Business Marketing Solutions

When thinking about plumbing and car accidents, they may seem like two completely unrelated subjects. However, there are unique scenarios where these two worlds intersect, and understanding these connections can be important for homeowners, drivers, and even professionals in both fields. This article explores the surprising ways plumbing and car accidents can be related, including the impact of plumbing issues on driving conditions, and the legal considerations when accidents result from such scenarios.

1. Plumbing Emergencies and Road Safety

Plumbing issues, especially those involving water main breaks or sewer line bursts, can create hazardous driving conditions. Here’s how:

a. Road Flooding: When a major water line breaks, it can flood nearby streets. Flooded roads reduce tire traction, increase the risk of hydroplaning, and obscure potential hazards, making driving dangerous.

b. Ice Formation: In colder climates, water from plumbing issues can quickly freeze on roads, creating patches of black ice. These invisible ice patches are a major cause of winter car accidents.

c. Mud and Debris: Plumbing accidents can also lead to the spread of mud and debris onto roadways, making them slippery and difficult to navigate.

2. Plumbing-Related Road Accidents

Several types of car accidents can be directly linked to plumbing-related issues:

a. Hydroplaning Accidents: When roads are flooded, vehicles can hydroplane, losing contact with the road and causing the driver to lose control.

b. Skidding on Ice: Water from plumbing leaks can freeze in winter, creating icy patches that lead to skidding and collisions.

c. Debris-Related Collisions: Broken pipes can scatter debris onto roads, leading to tire blowouts or collisions when drivers attempt to avoid the debris.

3. Legal Considerations and Liability

When car accidents result from plumbing issues, determining liability can be complex. Here are some legal considerations:

a. Municipal Liability: If a water main managed by the city breaks and causes an accident, the municipality might be held liable for damages. However, proving negligence can be challenging.

b. Private Property Owners: If a plumbing issue on private property causes water to flow onto public roads, the property owner may be held responsible for resulting accidents.

c. Contractor Responsibility: If a plumbing contractor's negligence leads to a break that causes an accident, the contractor could be liable.

d. Insurance Claims: Victims of such accidents may need to file claims with their own insurance and the liable party’s insurance. Consulting with a car accident lawyers can help navigate these claims.

4. Preventative Measures

Preventing accidents related to plumbing issues involves proactive measures by both homeowners and municipalities:

a. Regular Maintenance: Homeowners should regularly inspect and maintain their plumbing systems to prevent leaks and breaks.

b. Rapid Response: Quick response to plumbing emergencies can minimize the spread of water and subsequent road hazards.

c. Infrastructure Investment: Municipalities should invest in robust infrastructure and prompt repair services to address water main breaks swiftly.

5. Case Studies and Real-World Examples

Examining real-world examples can provide insights into the impact of plumbing-related road hazards:

**a. Case Study 1: A water main break in a major city flooded several blocks, leading to multiple hydroplaning accidents. The city was sued for negligence, resulting in a substantial settlement for affected drivers.

**b. Case Study 2: In a suburban area, a homeowner's burst pipe led to water flowing onto a busy street during a cold snap. Several cars skidded on the resulting ice, leading to a multi-car pileup. The homeowner's insurance covered the damages after a lengthy legal battle.

Conclusion

While plumbing and car accidents may seem unrelated, their intersection can have significant consequences. Understanding the potential hazards, legal implications, and preventative measures can help mitigate risks. Whether you’re a homeowner, driver, or professional in the field, being aware of these connections is crucial for safety and preparedness.

For more information on how to handle such situations or if you've been involved in a car accident related to plumbing issues, consulting with experts in both plumbing and legal fields can provide the necessary guidance. Remember, safety starts with awareness and proactive measures.

A Checklist for Moving Out of State - Moving to Another State

RH Business Marketing Solutions

If you have a detailed checklist when moving from one state to another, it can make the entire process so much more smooth and less stressful. In this guide, we will help you plan your move, organize your belongings, and settle into your new home with ease. 

From organizing your move to post-move activities, we've got you covered every step of the way. Let’s dive right in!

How to Organize Your Move?

The following is a section-wise checklist on how to organize your move out of state:

Section 1: Hire a Moving Company or Rent a Moving Truck

  • Start by researching various moving companies to find the best fit for your needs. Look for companies with positive reviews and a good reputation, such as MoveSpots. Compare the services they offer, such as packing, loading, and storage options.

  • Ensure that the moving company is licensed and insured to protect your belongings during the move. This information is usually available on the company's website or by request.

  • Read customer reviews on websites like Yelp or Google to gauge the reliability and professionalism of the moving company. Get quotes from multiple companies to compare prices and services, and choose the one that fits your budget and requirements.

Section II: Notify Important Parties

  • Visit the USPS website or your local post office to change your address. This ensures your mail is forwarded to your new address without interruption.

  • Update your address with all financial institutions to ensure you receive important documents and statements. This also helps prevent fraud and identity theft.

  • Notify your employer of your new address for payroll and tax purposes. Arrange for any work-related mail to be forwarded to your new address.

Section III: Transfer Utilities and Services

  • Contact your current utility providers to schedule the cancellation or transfer of services. Provide them with your move-out date and the address of your new home to ensure a smooth transition.

  • Before moving in, set up utilities at your new residence. Contact the local utility providers for electricity, water, and gas to schedule service activation.

  • Contact your cable, internet, and phone service providers to transfer or cancel your services. Schedule the installation of these services at your new home to avoid any downtime.

How to Declutter and Pack?

To declutter your place, begin by sorting through each room, identifying items you no longer need or use. This step helps reduce the volume of things to move and ensures you start fresh in your new home.

Separate items that you do not wish to use but are in good condition. These can be donated to charities or given to friends and family. You can also organize a garage sale or use online marketplaces like eBay or Facebook Marketplace to sell valuable items.

Items that are broken or unusable you can properly dispose them or send them to recycle center. 

To begin packing, gather packing supplies including boxes, packing tape, bubble wrap, and markers. And then, you want to get through checklist:

  • Collect sturdy boxes in various sizes for different types of items.

  • Use packing tape to secure the boxes.

  • Bubble wrap is essential for protecting fragile items.

  • Markers are needed to label each box clearly.

We recommend investing in specialty boxes for items like dishes, glassware, and electronics to ensure they are well-protected during the move.

Preparing for the Move

Start by planning your travel. Book flights or plan your driving route and arrange for accommodation if needed during the journey. Next, prepare your new home by scheduling cleaning and maintenance, and setting up furniture delivery if necessary. 

Finally, prepare an essentials box containing items you'll need immediately, such as clothes, toiletries, and important documents. This box will help you settle in quickly without having to unpack everything right away. 

What to do on the moving day?

On moving day, start by confirming details with the moving company. Double-check arrival times and ensure you have the contact information of the driver. 

Next, take inventory of your belongings by checking off items as they are loaded and keeping a copy of the inventory list. Lastly, perform a final walkthrough of your home to check each room for forgotten items and ensure all windows and doors are locked. 

Final Words 

Remember, a well-organized move reduces stress and ensures a smooth transition to your new home. So, take your time unpacking and settling in. Here’s a bonus tip: prioritize setting up your bedroom and kitchen first, as having these essential spaces ready will make the adjustment easier and more comfortable.

7 Reasons to Invest in a Pool for Your Backyard

RH Business Marketing Solutions

This article lists the many advantages for your lifestyle and property worth, as well as seven strong arguments for thinking about installing a pool in your outside area. A pool may greatly improve your quality of life by improving the visual attractiveness of your house and offering a handy area for leisure and exercise. Whether you're looking to boost your property's value or create a personal oasis for relaxation, a pool can be a transformative addition to your outdoor space

1. Enhances Property Value

The value of your house might rise significantly with a well-designed pool. Pools are seen favorably by many prospective purchasers, which raises your home's marketability. A speedier sale and a better resale price may result from this. A pool also improves the aesthetics of your backyard by producing a visually appealing focal point that draws attention to itself and improves the surrounding landscape. If you decide to sell your house in the future, the investment you made in a pool can thus result in significant profits. In addition, a pool may differentiate your home from others in the area and provide a differentiator that may be crucial in the eyes of prospective purchasers. Your house will stand out and become more marketable and desirable with the opulent appeal of a backyard pool.

2. Promotes Health and Fitness

Exercise like swimming is great since it works the entire body and enhances flexibility, strength, and cardiovascular health. Another therapeutic benefit of swimming is that it can help with stress relief and injury healing. Having a home pool is convenient and promotes regular activity, which helps you and your family lead healthier lives. Swimming is also a low-impact activity, so people of all ages and fitness levels may enjoy it, even those who have mobility or joint problems. It is more convenient to integrate exercise into your daily routine when you have a pool at home since you don't have to go to public pools or purchase a gym membership.

3. Facilitates Family Bonding

A pool in the backyard is the ideal place for family get-togethers and leisure time. It is an entertaining and captivating pastime that all ages may take part in. Family ties may be strengthened, and enduring memories can be made when members spend more time together. Children's collaboration and social skills can also be enhanced by games and activities around the pool. The dynamics of the entire family are enhanced when they get together by the pool. A sense of community and togetherness is fostered by hosting pool parties and barbecues with friends and extended family. Family members may unwind and connect by the pool, away from the stresses of everyday life, in an atmosphere that promotes leisure and relaxation.

4. Provides Entertainment and Socialization

An excellent location for entertaining visitors is a pool. It offers a distinctive and entertaining setting for throwing social gatherings like barbecues and parties. Poolside get-togethers are likely to attract friends and neighbors, which promotes a feeling of community. Having the capacity to throw pool parties may improve your social life by providing countless chances for enjoyment and rest with close friends and family. Events by the pool may accommodate a variety of themes and activities, making every get-together unique and unforgettable. A pool makes your house a popular destination for social gatherings, whether they are informal get-togethers or formal celebrations.

5. Encourages Outdoor Living

Having a pool encourages you to live outside and spend more time in the great outdoors. Given that outdoor activities are known to improve mood and lower stress levels, this may result in a healthier lifestyle. Outdoor furniture may also be used to enhance the pool area, resulting in a welcoming environment for leisure and relaxation. Adding a pool to your backyard may turn it into a multipurpose outdoor living space that improves your quality of life in general. The extended use of your outside space may be achieved by adding elements such as a patio area or cabana beside the pool, which will make it perfect for entertaining as well as resting. Your general well-being can be enhanced, and this increased emphasis on outdoor life can foster a deeper appreciation of the environment.

6. Increases Home Luxury

Your house might become more wealthy and comfortable by adding a pool. You may alter the design, particularly with a pool that can be customized, to fit your needs and tastes. Having a well-designed pool may make your house feel like a resort and be a continual source of delight and relaxation. This luxurious touch may improve your quality of life and offer a special amenity that many homes want. With a custom pool, you may add elements like built-in seating, waterfalls, or even a swim-up bar, which will enhance the luxury and entertainer-friendly appeal of your house.

7. Improves Home Aesthetics

Contemporary pool designs may be tailored to match any landscape, giving your house a sophisticated and fashionable look. A well-designed pool may enhance your home's architecture and landscaping, whether it is a sleek infinity pool or a lagoon with a natural appearance. A well-planned pool makes your backyard a gorgeous outdoor getaway by blending in with it smoothly. Your entire property may be elevated by the visual effect of a pool, which makes it a unique feature that improves curb appeal and user satisfaction. Incorporating elements like water features, lighting, and surrounding landscaping can further enhance the aesthetic appeal, making your pool area a stunning focal point of your home.

Conclusion

Putting up a pool may improve the value of your home, foster family time, and provide entertainment, among many other advantages. It can also promote health. It boosts elegance and enhances the beauty of homes while promoting outdoor life. A pool may improve your lifestyle and increase the value of your house, making it a sensible addition to your backyard, given these benefits.

DIY Lawn Mower Repair Tips

RH Business Marketing Solutions

Welcome to our guide on DIY lawn mower repair tips! Learning to troubleshoot and fix common mower issues yourself can save you time and money, keeping your mower in top shape for a lush, healthy lawn all season long.

Tools and Safety Precautions

Essential Tools Having the right tools on hand is essential for any DIY repair job:

  • Wrenches and Screwdrivers: Essential for removing and tightening bolts and screws throughout the mower, including those securing the mower cables.

  • Socket Set: Useful for various mower parts that require socket fittings, ensuring proper tightening and maintenance of mower components.

  • Pliers and Adjustable Wrench: These tools are invaluable for gripping and turning different components, including nuts and bolts on mower cables and other parts.

  • Mower-Specific Tools: Include specialized tools such as a blade balancer for ensuring balanced blade operation, a spark plug wrench for easy removal and replacement of spark plugs affecting mower cables, carburetor adjustment tools for maintaining engine performance, and a tension spring tool for adjusting and replacing lawn mower tension springs.

Safety Gear 

Always prioritize safety when working on your mower:

  • Gloves: Protect hands from sharp mower blades, heat from the engine, and chemicals used in maintenance tasks, safeguarding against accidental cuts and burns on mower cables.

  • Goggles: Shield eyes from debris dislodged during maintenance and potential sparks that can occur when working around the engine or mower cables.

  • Closed-toe Shoes: Ensure feet are protected from accidental contact with mower blades, hot surfaces, or falling tools, minimizing the risk of injury when handling mower cables and other parts.

Common Lawn Mower Issues and Fixes

Trouble Starting the Mower 

If your mower is hard to start, follow these steps:

  • Check Spark Plug: Inspect for wear or deposits; replace if necessary.

  • Fuel System: Ensure the fuel line is clear and the carburetor is clean and adjusted properly.

Uneven Cutting or Scalping 

To achieve a smooth, even cut across your lawn:

  • Adjust Mower Deck: Set the deck height according to your lawn's needs.

  • Level Blades: Check and adjust blade levels to avoid uneven cutting and potential damage to mower cables.

Excessive Vibration Vibration can indicate issues with blades or mower components:

  • Inspect Blades: Look for balance issues or damage; balance or replace blades as needed.

  • Check Bolts and Nuts: Tighten any loose bolts to reduce vibration and ensure mower cables remain secure.

Maintenance and Prevention

Regular Maintenance Checks Keep your mower running smoothly with these maintenance tasks:

  • Air Filter: Regularly clean or replace the air filter to maintain optimal engine performance. A clean air filter ensures efficient airflow, which is essential for engine operation and reduces strain on mower cables and other components.

  • Oil Change: Follow the manufacturer's recommendations for oil changes. Fresh oil lubricates the engine, including mower cables, reducing friction and wear. Regular oil changes also extend the life of your mower's engine and ensure reliable performance.

  • Blade Sharpening: Keep mower blades sharp to achieve a clean, precise cut on your lawn. Dull blades can tear grass, leading to uneven cuts and increased strain on the engine and mower cables. Sharpen blades regularly to maintain lawn health and mower efficiency.

Preventive Measures 

Avoid future issues with these preventive steps:

  • Fuel Stabilizer: Add a fuel stabilizer to the gas tank before storing your mower. This prevents fuel degradation and buildup in the carburetor, which can affect engine performance and power cables. Stabilizing fuel ensures easier starting and smoother operation when you use the mower next season.

  • Proper Storage: Store your mower in a dry, sheltered area, such as a garage or shed, to protect against rust and moisture. Moisture can lead to corrosion of mower cables and other metal parts. Cover the mower with a fitted cover to further shield it from dust and debris during storage, preserving its condition and extending its lifespan.

Advanced Repairs and When to Seek Professional Help

Complex Issues 

Some mower problems may require advanced skills or professional assistance:

  • Engine Overhaul: Addressing major engine issues may require specialized knowledge and tools.

  • Transmission Problems: Issues with mower transmission often need professional diagnosis and repair to avoid damaging mower cables and other components.

Signs to Seek Professional Help 

Know when it's time to consult a professional:

  • Electrical Issues: Faulty wiring or electrical components should be handled by a qualified technician.

  • Major Engine Malfunctions: If your mower won't start or runs rough despite DIY efforts, a professional diagnosis may be necessary.

  • Extensive Damage: Significant damage to mower cables or other components requires expert evaluation to ensure safe and effective repair.

Conclusion

Mastering DIY lawn mower repair skills empowers you to maintain your mower efficiently and effectively. By following these tips, you can tackle common issues, extend the life of your mower, and enjoy a beautifully manicured lawn with confidence.

How Much Does Artificial Grass Cost in Florida? A Complete Guide

RH Business Marketing Solutions

When considering a lawn upgrade, you may be curious about the cost of artificial grass in Florida, especially if you're a homeowner looking for a low-maintenance solution. The price can vary based on factors like the type of turf and the area to be covered.

Generally, you can expect to pay between $6 and $19 per square foot for artificial grass installation, including materials and labour.

Understanding the financial commitment is essential. For instance, many homeowners spend an average of $5,749 for a project that typically covers around 500 square feet of lawn space. This means that the total cost to install artificial turf for most homeowners in Florida usually hovers around $7,400.

Beyond the upfront costs, artificial turf saves time and money on lawn maintenance over the long run. With the Florida heat, you can enjoy a lush, green yard without the constant care required by natural grass.

This article provides a detailed breakdown and insights from industry experts at artificialgrass-orlando.com, an artificial grass company based in Florida, you'll discover more about the costs, benefits, and factors to consider when thinking about transitioning to artificial grass in your own yard.

Understanding the Basics of Artificial Grass

Artificial grass, also known as synthetic turf, comes in various types and materials. It offers different benefits compared to natural grass, allowing you to make an informed choice.

Types of Artificial Turf

You can find three main types of artificial grass: polyethylene, nylon, and polypropylene.

  • Polyethylene is the most common. It looks realistic and feels soft, making it great for lawns and playgrounds.

  • Nylon is durable and suitable for high-traffic areas. It holds its shape well but can be more expensive.

  • Polypropylene is the least costly but not as durable. It’s often used for decorative or temporary installations.

When choosing a type, consider where you will install it and how much wear and tear it will face.

Comparing Artificial Grass to Natural Grass

Artificial grass has several advantages over natural grass. For starters, it requires less maintenance. You won't need to mow, water, or fertilize it. This can save you time and money in the long run.

On the downside, the initial cost can be higher, varied by country. Installation may range from $5 to $20 per square foot.

Natural grass can provide a cooling effect and is environmentally friendly but requires regular upkeep and watering. Weigh these factors based on your needs and lifestyle.

Key Benefits and Downsides

Choosing artificial grass comes with several benefits, including durability and low maintenance.

  1. Durability: It can handle heavy foot traffic, making it ideal for sports fields or busy backyards.

  2. Water Savings: You save on water bills since artificial grass doesn’t need regular watering.

  3. Allergy Reduction: It doesn't produce pollen, which can help those with allergies.

However, there are downsides to consider.

  • The upfront cost for installation is higher compared to natural grass.

  • Synthetic turf can heat up more in sunny conditions, which may not be comfortable to walk on.

By balancing these pros and cons, you can decide if artificial grass is right for your area.

Factors Influencing Artificial Grass Costs

Several key elements play a significant role in determining the cost of artificial grass installation. Understanding these factors can help you make informed decisions that align with your budget and preferences.

Turf Material and Texture

The type of turf material you choose greatly impacts the cost. Synthetic grass comes in various qualities, with options varying from basic to premium.

  • Basic Turf: Typically made from lower-grade synthetic fibres and costs around $2 to $6 per square foot.

  • Premium Turf: Higher-quality materials such as synthetic fibres designed for a more natural appearance can range from $6 to $12 per square foot.

Additionally, turf texture influences the price. Thicker, denser grass may require more material and therefore, higher costs. Brands like ForeverLawn and SYNLawn offer different textures, which can add to or reduce your expenses.

Property Size and Shape

The size of your property plays a crucial role in calculating total costs. Larger areas require more turf, leading to higher overall expenses. For example, covering 1,000 square feet can cost between $7,500 to $13,000 for installation.

The shape of your yard can also influence the cost. Unusual layouts or hard-to-reach areas might require more labour and extra cuts of turf, which could increase your installation costs. It's advisable to measure your space accurately to get a clearer understanding of the expenses you might incur.

Installation Complexity

The complexity of the installation will directly affect your total costs. If you choose to have features like decks or patios integrated with the turf, the work involved can increase labour costs significantly.

For a simple installation on a flat surface, labour costs might range from $2 to $5 per square foot. However, if your project involves additional grading or removing old grass, this could rise to $6 to $10 per square foot. It's essential to consider these factors when budgeting for your artificial grass project.

Installation Process and Expenses

When installing artificial grass, you should understand the steps involved and the associated costs. The installation process includes preparation of the ground, laying and securing the turf, and final touches. Each step plays a key role in ensuring a successful installation.

Preparing the Ground for Installation

The first step is to prepare the area where the artificial grass will go. This involves removing any existing grass, weeds, and debris. You want a clean surface to work with.

Once cleared, you should grade the soil to ensure proper drainage. This may involve adding base materials such as crushed rock or decomposed granite to create a solid foundation. A level base helps prevent water pooling and keeps your turf looking good.

Next, you’ll want to install a weed barrier. This material helps prevent weeds from growing through the artificial grass. The entire ground preparation process can involve costs for materials and labour, generally adding $1 to $3 per square foot to your total expenses.

Laying and Securing the Turf

After preparing the ground, you can lay down the turf. First, roll out the artificial grass and position it correctly over the prepared area. Pay attention to the seams and ensure they align properly. You can use seam tape and special adhesive to secure the edges where pieces meet.

During this phase, infill material may be added for stability and weight. Options for infill include sand or rubber granules. This not only adds weight but also helps the blades stand upright, making the grass look more natural.

Labour costs for this part of the installation can range from $2 to $5 per square foot, depending on your location and the complexity of the job.

Finishing Touches and Cleanup

Once the turf is laid, you'll need to add any finishing touches. This includes brushing up the grass to ensure the blades are standing tall and looking fresh. Make sure the turf edges are secure and tidy.

After brushing, it’s important to clean up the site. Remove any leftover materials, tools, or debris from the installation area. A clean space not only looks good but also ensures the longevity of your new turf.

The costs for this final phase can vary, but typically, cleanup can add an additional $0.50 to $1 per square foot to your total project expense.

Maintenance, Durability, and Additional Costs

Maintaining artificial grass can be simple and cost-effective. By focusing on regular care and understanding durability, you can make informed decisions about this investment. This section covers what you need to know about routine cleaning, repair considerations, and long-term savings.

Routine Cleaning and Care

To keep your artificial grass looking its best, regular cleaning is essential. You should remove debris like leaves or branches to prevent dirt buildup. A leaf blower or broom can be helpful.

Every few months, rinse the turf with water to remove dust and pet waste. For deep cleaning, use a mixture of water and mild soap. Be careful with chemicals; avoid pesticides or fertilizers that could damage the turf.

Consider infill maintenance as well. If you have infill materials, like silica sand or rubber, you will need to replenish them every few years. This helps maintain the surface's softness and durability.

Repair and Replacement Considerations

Even though artificial grass is durable, certain issues may arise over time. Damage can occur due to heavy use or extreme weather. Pay attention to any faded areas or wear and tear.

If you notice loose seams, you can often fix them with grass adhesive or tape. For larger repairs, it may be necessary to replace sections of the turf. Many companies offer patch kits that match your turf style.

Having a weed barrier fabric installed can reduce the chances of weeds growing under your turf. This further enhances durability and decreases future repair costs.

Long-Term Savings Versus Upfront Costs

Although the initial investment for artificial grass can be high, it often pays off in the long run. You won’t need to spend money on mowing, watering, or fertilizing your lawn. This can save you several hundred dollars each year.

Additionally, reduced maintenance costs mean you spend less on equipment and servicing. Many homeowners find that the durability of synthetic turf leads to lower overall expenses over time.

Evaluating these factors will help you understand the true value of artificial grass. It can be a practical choice that balances upfront costs with long-term benefits.

Top Artificial Grass Brands and Options

When choosing artificial grass, it’s important to consider brand features and costs. Below are some top brands that offer various options to suit different needs.

Highlighting Brand Features and Costs

  1. ForeverLawn: Known for its high-quality turf, ForeverLawn offers products with a mix of textures. Their prices range from $5.93 to $12.68 per square foot. The blades are designed to mimic natural grass closely.

  2. SYNLawn: This brand provides durable options with prices between $6.61 and $9.71 per square foot. SYNLawn features different blade shapes, including V-shaped and C-shaped, which enhance the realistic appearance.

  3. ProGreen: ProGreen is popular for its realistic look and feel. The turf is typically priced at about $3.50 to $6.50 per square foot.

  4. PreGra: Their offerings are budget-friendly, ranging from $3.51 to $5.26 per square foot. The turf is designed for various applications, including residential and commercial spaces.

    By evaluating these brands, you can determine what fits your budget and design expectations.

Choosing the Right Turf for Your Needs

Selecting the right artificial grass involves understanding your specific needs. Consider factors such as usage, installation area, and maintenance preferences.

  • Blade Shape: Different blade shapes, like S-shaped or W-shaped, affect both appearance and feel. S-shaped blades provide softness, while W-shaped blades offer more durability.

  • Texture: Choose a texture that aligns with how you’ll use the space. For play areas, a tougher option is wise, whereas a softer texture may suit a decorative lawn.

  • Purpose: Think about whether the turf will be for pets, play, or low-maintenance landscaping. Brands like Perfect Turf focus on durability for pet owners.

By carefully evaluating these features, you can find the best artificial grass option for your particular environment and lifestyle.

11 Doable Ways to Reduce Your Renovation's Carbon Footprint

RH Business Marketing Solutions

Renovating your home is an exciting journey—from creating vision boards and gathering inspiration from magazines to spending hours on Pinterest and choosing the perfect design. The possibilities are endless, but so is the potential environmental impact if you’re not actively considering it.

Reducing your renovation's carbon footprint benefits not only the planet but also your wallet in the long run. Eco-friendly renovations can lead to lower energy bills, a healthier living environment, and increased property value. 

Let's dive into some practical ways to make your renovation greener and more sustainable.

Understanding Your Carbon Footprint

A carbon footprint is the total amount of greenhouse gasses, primarily carbon dioxide, emitted directly or indirectly by human activities. In the context of renovations, this includes several stages:

In the context of renovations, it could include the following: 

  • Material Extraction and Manufacturing: The production of building materials often involves energy-intensive processes and the release of greenhouse gasses.

  • Transportation: Moving materials from manufacturers to your home requires fuel and generates emissions.

  • Construction: The use of heavy machinery and equipment during construction adds to carbon emissions.

  • Waste Disposal: Demolition and construction waste, if not properly managed, ends up in landfills, producing methane and other greenhouse gasses.

Understanding these contributions helps in identifying areas where you can reduce your impact.

Actionable Steps to Reduce Carbon Footprint When Renovating 

Adopting eco-friendly practices when renovating doesn't have to be complicated or expensive. 

For homeowners, a few thoughtful choices and strategies can make a significant difference. As for individuals in the construction industry, they can take proactive steps to minimize the environmental impact of their projects, paving the way to sustainable and eco-friendly building practices. 

Here's a guide to actionable steps everyone can take to reduce a renovation's carbon footprint, from planning to execution.

1. Plan Ahead

The first step to an eco-friendly renovation is careful planning. Start by designing your project with sustainability at the forefront. Consider energy-efficient layouts, proper ventilation, and natural lighting.

Opt for designs that maximize space efficiency and reduce energy consumption. For example, open floor plans can enhance natural light distribution, reducing the need for artificial lighting.

2. Use Recycled Materials

Using recycled materials can significantly reduce the environmental impact of your renovation. These materials require less energy to produce and help divert waste from landfills.

Look for recycled steel, reclaimed wood, and recycled glass. These materials are not only eco-friendly but also add unique character to your home.

3. Opt for Low-VOC Products

To ensure your indoor environment remains healthy, it's crucial to be aware of Volatile Organic Compounds (VOCs). These chemicals, which can easily become gasses, are often found in construction materials and can degrade your indoor air quality.

Low-VOC products reduce the release of harmful chemicals, improving indoor air quality and reducing health risks. They also contribute to a lower overall carbon footprint.

4. Invest in Energy-Efficient Appliances

Looking to save on energy bills? Check for the Energy Star label on your appliances! This label means the appliance meets the tough energy efficiency standards set by the U.S. Environmental Protection Agency.

Energy-efficient appliances consume less electricity and water, leading to significant cost savings over time and a reduced environmental impact.

5. Opt For Screen Doors 

Screen doors are a simple yet effective way to enhance your home's energy efficiency. They allow for natural ventilation while keeping out insects, reducing the need for air conditioning and artificial cooling. 

By optimizing airflow, screen doors help maintain a comfortable indoor climate, contributing to lower energy consumption.

6. Incorporate Solar Energy

Installing solar panels can drastically cut down on your home's reliance on fossil fuels. Solar energy systems provide a renewable source of energy, reducing your carbon footprint. 

By harnessing the power of the sun, these systems convert sunlight into electricity, which can be used to power various appliances and devices in your home. 

7. Improve Insulation

Proper insulation is crucial for maintaining energy efficiency. Consider eco-friendly options like cellulose insulation made from recycled paper or cotton insulation made from recycled denim.

Good insulation keeps your home warm in the winter and cool in the summer, reducing the need for heating and cooling systems, thus saving energy and lowering your carbon footprint.

8. Utilize Natural Lighting

Design your renovation to take full advantage of natural light. Large windows, glass doors, and open spaces can help bring in more daylight, reducing the need for artificial lighting.

Installing skylights and large windows can enhance natural light in your home. They not only reduce energy consumption but also create a bright and welcoming atmosphere.

9. Improve Plumbing Efficiency

Maximize your water savings by installing low-flow toilets, faucets, and showerheads. These innovative fixtures use significantly less water while ensuring top-notch performance, helping you conserve resources and reduce utility bills.

If you have an irrigation system, upgrade to a smart system that adjusts watering schedules based on weather conditions and soil moisture. This reduces water wastage and ensures efficient irrigation.

10. Use Sustainable Landscaping

Transform your garden into a low-maintenance paradise by choosing native plants that need little water. Adopt xeriscaping to reduce or even eliminate the need for irrigation. Sustainable landscaping practices not only conserve water but also decrease maintenance and enhance your garden’s resilience.

11. Recycle Construction Waste

Proper disposal and recycling of construction waste play a crucial role in reducing the environmental impact of renovations. To do this effectively, separate different materials such as wood, metal, and concrete. Each material should be placed in its designated recycling bin to ensure it is processed correctly and diverted from landfills.

Conclusion

Reducing your renovation's carbon footprint is not only beneficial for the environment but also for your health and finances. By incorporating sustainable practices and materials, you can create a more eco-friendly home that is comfortable, efficient, and valuable. 

Start small with a few changes and gradually implement more as you see the benefits. Remember, every step towards sustainability counts! 

For more informative articles about home improvement, check out our Blog

Creating the Perfect Autumn Home: Embrace the Cozy Season

RH Business Marketing Solutions

As the sweltering days of summer give way to the crisp, cool embrace of autumn, our homes too can transition to reflect the beauty and warmth of the season. Autumn, with its vibrant colors, earthy scents, and comforting textures, offers a unique opportunity to create a cozy and inviting sanctuary. Whether you’re looking to make small changes or embark on a full seasonal makeover, here’s how to create the perfect autumn home.

Embrace Autumn Colors

Autumn is synonymous with a rich palette of colors. Think deep oranges, warm reds, golden yellows, and earthy browns. Incorporate these hues into your home to instantly evoke the essence of fall.

1. Textiles: Switch out lightweight summer fabrics for heavier, cozier options. Introduce autumn colors through throw blankets, cushions, and rugs. A plaid or tartan blanket in warm tones can add a touch of seasonal charm to your living room or bedroom.

2. Walls and Decor: If you’re feeling bold, consider painting an accent wall in a warm, autumnal shade. For a subtler touch, decorate with artwork, wreaths, and garlands that reflect the season’s colors.

Layer in Comfort

As temperatures drop, layering becomes key not only in your wardrobe but also in your home decor. Creating layers of comfort makes your space feel warm and inviting.

1. Throws and Pillows: Drape cozy blankets over sofas and chairs, and pile on plush pillows in varying textures. Think velvet, faux fur, and chunky knits to add depth and interest.

2. Rugs: Swap out lightweight rugs for thicker, more luxurious ones. Layering a smaller, patterned rug over a larger, neutral one can add warmth and style to your space.

Bring Nature Indoors

Autumn is the perfect time to incorporate natural elements into your home decor. The beauty of the season’s foliage and harvest can be showcased indoors.

1. Centerpieces and Arrangements: Create stunning centerpieces with pumpkins, gourds, and seasonal flowers like mums and dahlias. Add in some eucalyptus or wheat for texture and a touch of green.

Photo Source: worthingcourtblog.com

2. Decorative Accents: Use pinecones, acorns, and branches as decorative accents. A simple bowl of pinecones or a vase filled with branches can bring an autumnal feel to any room.

Set the Mood with Lighting

The shorter days and longer nights of autumn call for warm, inviting lighting. Create a cozy ambiance with the right lighting choices.

1. Candles: Scented candles in fragrances like pumpkin spice, apple cinnamon, and vanilla can make your home smell like autumn while providing a soft, flickering glow.

2. String Lights: Drape string lights around windows, door frames, or along mantels to add a magical touch. Opt for warm white or amber lights for a more autumnal feel.

3. Lamps and Lanterns: Incorporate table lamps and lanterns with warm-toned bulbs to create a soft, inviting glow. Consider adding dimmers to your existing lighting to control the ambiance.

Indulge Your Senses

Autumn is a sensory season. Engage all your senses to fully embrace the coziness of your autumn home.

1. Scents: Beyond candles, use essential oils or simmer pots with cinnamon sticks, cloves, and orange peels to fill your home with the aromas of fall.

2. Textures: Incorporate a variety of textures throughout your home. Think woolen throws, velvet cushions, and wooden accents. The tactile experience adds to the overall coziness.

3. Sounds: Create an autumn playlist with soft, acoustic tunes or nature sounds like rustling leaves and crackling fires to enhance the cozy atmosphere.

Seasonal Entertaining

Autumn is a wonderful time to gather with loved ones. Make your home the perfect place for entertaining during the season.

1. Dining Table: Set a beautiful autumn table with seasonal tablecloths, placemats, and centerpieces. Use earthy tones and natural materials like wood and stone for a rustic look.

2. Outdoor Spaces: Don’t forget your outdoor areas. As long as the weather permits, create a cozy outdoor space with fire pits, blankets, and warm lighting for chilly evenings.

3. Comfort Foods: Embrace autumn cooking with hearty soups, stews, and baked goods. The scent of freshly baked pumpkin bread or apple pie can make your home feel instantly inviting.

Conclusion

Creating the perfect autumn home is all about embracing the warmth, comfort, and beauty of the season. With a few thoughtful changes, you can transform your space into a cozy retreat that celebrates everything we love about fall. Whether you’re curling up with a good book, hosting a dinner party, or simply enjoying the changing colors outside your window, your autumn home will be the perfect backdrop for all your seasonal activities.

How does Mold Remediation Help in Architectural Design

RH Business Marketing Solutions

Mold is a silent threat lurking in our homes and buildings, posing serious health hazards and structural problems. As public awareness grows about mold's dangers, from allergic reactions to more severe health issues, the need for effective preventive measures and remediation has never been clearer. Mold doesn't discriminate in affecting both new constructions and old buildings. It hides in walls, under floors, and above ceilings, often undetected until the damage is done. This article explores how mold remediation is revolutionizing architectural design, creating healthier living spaces and more durable structures.  

Benefits of a Mold-Free Architectural Design

When architects design buildings to prevent mold, they prioritize health, durability, and efficiency. These architectural designs make buildings healthier, stronger, and better for the environment. They also contribute to long-term cost savings and improved quality of life for occupants. Here are the key benefits of designing buildings to be mold-free:

Cleaner Air and Healthier People

Buildings free from mold have cleaner air, noticeable right upon entry, benefiting the health of occupants as such:

  1. Easier Breathing: The absence of mold in the air makes it easier to breathe. It helps those with asthma by reducing attacks and symptoms, leading to less medication and a better quality of life overall. Additionally, people without health issues often feel more awake and energetic in mold-free environments, leading to better productivity and a more active lifestyle.

  2. Reduced Illness: Some mold species produce toxins that can lead to various health problems. When buildings are designed to be mold-free, the occupants are less likely to fall ill. In healthcare facilities, mold-free environments can significantly lower the risk of hospital-acquired infections. Families can feel at ease in households, knowing they are not inhaling harmful mold spores. This peace of mind contributes to a healthier home environment.

  3. Stronger Immune Systems: Our immune systems work better when our bodies don't have to fight mold all the time. We might catch fewer colds and recover faster when we do get sick. Quicker recovery times mean less disruption to daily life and routines. Over time, living in a mold-free place could help us stay healthier. This overall improvement in health can lead to a better quality of life and potentially lower healthcare costs. 

Better Mental Health

Mold-free buildings are beneficial for both our physical and mental well-being. The psychological advantages of living in a mold-free environment are as follows:

  1. Less Stress: Knowing your home or office is mold-free can be a huge relief and significantly reduce stress levels. That's one less thing to stress about in a building designed to prevent mold. This reduction in environmental stress can contribute to better mental health overall. This can help people feel more relaxed and happier overall. An improved mood can lead to better relationships and increased life satisfaction.

  2. Better Sleep: Mold can disrupt sleep and affect physical and mental health. It can cause breathing problems and anxiety, leading to insomnia or restless sleep. In mold-free bedrooms, people often sleep much better. This improved sleep quality can result in feeling more refreshed and energetic during the day. Good sleep helps improve mood, thinking, and physical health. Consistent, quality sleep is also linked to better long-term health outcomes.

  3. More Comfort: Mold often thrives in damp areas, creating discomfort for occupants. Buildings designed to prevent mold do a better job of controlling humidity, temperature, and other issues like dust mites and static electricity. This makes the building more comfortable, improves mood and productivity in workplaces, and creates a more relaxing atmosphere in homes.

Stronger and Longer-Lasting Buildings

Mold-free design is beneficial not only for people but also for buildings. This construction approach can significantly extend the lifespan of structures. Here's how:

  1. Less Damage: Mold can deteriorate building materials like wood and drywall, leading to extensive damage that often goes unnoticed until it's severe. Preventing mold helps these materials last longer, maintaining the building's structural integrity and reducing the need for repairs. This leads to lower maintenance costs and less disruption for occupants, while also avoiding expensive and disruptive mold removal and preventing the potential spread of spores during cleaning.

  2. Safer Structures: In the worst cases, mold can weaken parts of a building, compromising the safety of the entire structure. By designing to prevent mold, architects help ensure that buildings remain strong and safe for many years, avoiding mold removal measures. This long-term strength ensures that the building remains a secure environment for its occupants, which is especially important for large buildings or areas with harsh weather conditions. Mold-free design can contribute to a building's resilience in areas prone to natural disasters.

  3. Lower Upkeep Costs: When a building is kept free from mold, it requires less maintenance. There's no need to clean up mold, replace damaged parts, or repaint moldy areas. Avoiding these tasks also means less exposure to potentially harmful cleaning chemicals, saving money and time for building owners and the people who live or work there. These savings can be reinvested in various other aspects of building improvement or passed on to occupants.

Energy Savings and Environmental Benefits

Energy-efficient design often aligns with other sustainable building practices, resulting in healthier, eco-friendly buildings. Here are the benefits:

  1. Better Insulation: Architects prevent mold by managing moisture, leading to improved insulation. Proper insulation maintains a cozy indoor atmosphere that helps keep buildings warm in winter and cool in summer while reducing energy consumption. This temperature stability creates a more comfortable environment year-round. Over time, this can save a lot of money on heating and cooling bills. These energy savings contribute to a lower carbon footprint for the building.

  2. Improved Air Systems: Mold-free designs often include better air handling systems. These advanced systems provide more than just mold prevention benefits. These systems not only control moisture but also clean the air of other pollutants. This comprehensive approach to air quality can significantly improve the overall indoor environment. This can lead to healthier air and more efficient heating and cooling. Efficient HVAC systems can also contribute to energy savings and reduced mold removal costs. Good air systems can also reduce the need for separate air purifiers or dehumidifiers. This reduction in additional appliances can lead to further energy savings and less electronic waste.

  3. Longer Building Life: When buildings last longer because they don't have mold damage, it reduces the need for new construction. This longevity has a significant positive impact on resource conservation, saving resources and energy in the long run. Reduced construction also means less disruption to communities and ecosystems. It also means less waste from tearing down and rebuilding structures. This reduction in waste helps minimize the construction industry's environmental impact. The need for extensive mold removal in older buildings becomes much less common, saving time and resources. Avoiding frequent mold removal also reduces the use of harsh chemicals often associated with the process.

Conclusion

Mold-free architectural design is a game-changer for our buildings and health. By focusing on preventing mold, architects create spaces that are healthier, stronger, and more efficient. These designs lead to cleaner air, reduced illness, and better mental health for occupants. Buildings last longer and require less maintenance, saving money in the long run. Energy-efficient systems not only keep mold at bay but also reduce environmental impact. As we become more aware of mold's dangers, this approach to design becomes increasingly important. It's a win-win situation – better for people, buildings, and the planet.

The Importance Of Timely Basement Waterproofing For Commercial Buildings

RH Business Marketing Solutions

Water can be a silent threat to commercial buildings, especially in their lower levels. Over the years, moisture seeping into basements can cause serious, costly damage. It's not just about keeping things dry - it's about protecting the whole building's structure and the health of everyone inside. Taking care of these issues early on is smart business. It saves money and prevents bigger problems down the road. This guide explains why it's crucial to act quickly on water issues in commercial basements and the benefits of early action. 

1. Stopping Water Damage

Water is a constant threat that building owners need to take seriously. Water damage might happen fast during a big storm or slowly over time. Both scenarios can lead to significant problems if not addressed promptly. When water builds up around the foundation, it's more likely to get inside. This is where proper drainage becomes crucial. Basement waterproofing helps prevent water from seeping into the building through weak spots.

Experts can also seal up small cracks and check the roof for problems. These small steps can make a big difference in protecting the building. This helps building owners avoid expensive repairs later on. Without proper waterproofing, water can cause all sorts of issues, from damaging the structure to ruining the inside of the building. The consequences can be far-reaching and costly. It's always better to stop the problem before it starts. Investing in waterproofing is an investment in the building's future.

2. Protecting Valuable Assets

When water gets in, it doesn't just damage the building – it can wreck everything inside, too. Water damage can be particularly devastating to businesses with expensive equipment or inventory. This includes important equipment, fancy finishes, and costly furniture. All of these items represent significant investments that need protection. You're protecting all the valuable things in your building by keeping water out. 

This protection extends to documents, electronics, and other crucial business assets. It's not just about saving money on repairs; it's about keeping everything in good shape so your business can run smoothly. Continuity is key in any business operation. Waterproofing is like an insurance policy for all your valuable stuff. Knowing that your assets are protected from water damage provides peace of mind.

3. Dealing with Bad Weather

Big storms can really put commercial buildings to the test. They're unpredictable and can cause damage quickly if a building isn't prepared. Without proper basement waterproofing, rain and snow can cause significant issues. They can damage the roof, seep in through small cracks in the walls, or flood the area around the building. Each entry point must be addressed to protect the building fully. Some buildings might be okay during small storms, but big ones can still cause problems. It's important not to be lulled into a false sense of security by mild weather.

Waterproofing experts can spot potential issues that building owners might miss and install drainage systems to keep water away from the building. They can also seal up the foundation to stop water from getting in. This way, your building stays dry and safe inside, no matter how bad the weather gets. Good waterproofing gives you one less thing to worry about during severe weather events.

4. Keeping Tenants Happy

If you own a commercial building and rent it out, you know how important it is to satisfy your tenants. Happy tenants will likely renew their leases and recommend your property to others. People want to avoid finding new tenants all the time. It's time-consuming and costly if spaces remain vacant for long periods. Home improvement projects are sure an investment that pays off in tenant satisfaction. Water entering a building can make it look bad, feel uncomfortable, and not work right. Business operations can be disrupted, potentially leading to lost revenue.

By waterproofing, you ensure water stays out and doesn't cause problems. This keeps your tenants happy and their businesses running smoothly. It's a win-win situation for both property owners and tenants. Happy tenants are likely to stick around, which is good for everyone. Long-term tenants provide stable income and reduce turnover costs.

5. Stopping Mold Growth

Mold is bad news for commercial buildings. It's unsightly, smelly, and can cause health issues. It can make the air unsafe for employees and customers. This can lead to increased sick leaves, decreased productivity, and potential liability issues. Plus, getting rid of mold is hard once it starts growing. Often, you have to tear out and replace big areas inside the building to fix a mold problem. This process is disruptive and expensive. So, commercial waterproofing is important to address the root cause of mold growth.

By keeping water out, you're also keeping mold away. This preventative measure can save a lot of trouble down the line. This means the building stays healthier and safer for everyone inside. A mold-free environment is crucial for commercial businesses to maintain a good professional image. It also saves you from dealing with expensive mold removal later on. The cost of waterproofing is often much less than the cost of mold remediation.

6. Better Indoor Air Quality

Water problems can make the air inside a building bad. Once mold starts growing, it can release toxins into the air that are not good to breathe, causing allergic reactions and respiratory issues. Also, if there are gaps in the walls or foundation, outside air can get in that carry pollutants or allergens. This is especially bad in cities where the air outside isn't very clean.

However, the air inside stays much cleaner when a building is well-waterproofed. It creates a barrier against external contaminants. There's no mold growing and no dirty outside air sneaking in. This means everyone inside can breathe easier. People are more likely to notice good air quality and appreciate the working space even more. Clean air is important for keeping people healthy and comfortable, which is crucial for any commercial building.

7. Protecting the Foundation

The foundation of a building is literally what holds up everything. When water builds up around a building, it can wash away the soil. This process, known as erosion, can happen gradually over time, making the foundation sink or shift, which is bad news. Even small changes in the foundation can lead to big problems throughout the building. Fixing foundation problems is extremely expensive and can shut down a business for a long time. The repairs often require heavy equipment and extensive work.

Taking preventative measures through waterproofing can save a lot of trouble. It helps keep water from the foundation so the soil stays put and maintains the stability of the entire structure. Foundation issues can affect everything from walls to roofs. By taking care of the foundation, you're making sure the whole building stays strong and stable for years to come.

Conclusion

In the end, waterproofing your basement is about more than just preventing water damage. It's about creating a stable, efficient, healthy environment supporting business success. For any commercial building owner or manager, it should be considered a fundamental part of property maintenance and improvement. The initial investment in quality waterproofing can yield significant savings and benefits, making it a smart choice for any commercial property.