Google+

contact us

Use the form on the right to contact us.

Day or Night, we are here to serve you. Leave your plumbing problem to us.


Tinley Park, IL

(708)845-7922

Residential and Commercial plumbers and plumbing contractors available in Orland Park, Tinley Park, Oak Lawn, Palos Heights, Midlothian, Oak Forest, Homer Glen, Mokena, Frankfort, and the surrounding Chicago South Suburbs. Emergency plumbers.

copper water lines.jpg

Kevin Szabo Jr Plumbing Blog

Kevin Szabo Jr Plumbing is Tinley Park, Orland Park, Oak Forest, Midlothian, Orland Hill, Homer Glen, Mokena, Frankfort, Crestwood, Palos Heights, Oak Lawn, local plumber. Read our blog for advice, tips, a good laugh, and basic home improvement.

**We are moving our old blog to our new and improved website. Too see all our posts visit kevinszabojrplumbing.blogspot.com

Filtering by Category: August 2023

How to Prevent Clogged Pipes and Drains in Older Houses

RH Business Marketing Solutions

Older houses exude a timeless charm, boasting architectural details and historical significance that captivate homeowners. However, these vintage abodes often come with their unique set of maintenance challenges, and one prevalent issue is the occurrence of clogged pipes and drains. Over time, the accumulation of debris, sediment, and the natural wear and tear of aging plumbing systems can gradually lead to blockages, causing inconvenience and even potential damage. To counter this, preventing clogged pipes and drains in older houses necessitates a proactive and comprehensive approach, so here’s how to make it happen.

Understanding the Plumbing System

The first critical step in preventing clogged pipes and drains in older houses is to embark on a journey of understanding the intricate plumbing system that resides within your dwelling. Gaining a comprehensive knowledge of the layout of the plumbing network, including the main drainage lines, sewer connections, and vital junction points, is pivotal.

Equipped with this information, homeowners can discern the flow of wastewater, pinpoint potential trouble spots, and take necessary preventive measures before these issues escalate into costly repairs. For those who are fortunate enough to procure the original plumbing plans, these blueprints can provide invaluable insights. Alternatively, consulting with a professional plumber can offer a detailed overview of the system's design, vulnerabilities, and potential bottlenecks.

Avoid Chemical Drain Cleaners

In moments of plumbing distress, chemical drain cleaners might seem like a convenient quick fix to clear clogs. However, these potent chemicals can inadvertently inflict more harm than good, especially when applied to older plumbing systems. The corrosive nature of these chemicals can accelerate the corrosion of pipes, leading to their weakening and eventual leaks.

Rather than relying on these potentially hazardous solutions, opting for more natural alternatives is prudent. For instance, a mixture of baking soda and vinegar followed by a flush of hot water can often prove effective in clearing minor clogs. In instances of more stubborn blockages, enlisting the expertise of a professional plumber ensures the use of safe and efficient methods that maintain the integrity of the plumbing system.

Upgrade When Necessary

In the realm of plumbing systems within older houses, strategic upgrades can be a proactive and effective approach to preventing clogs and maintaining optimal functionality. By evaluating the state of outdated or corroded pipes and replacing them with modern, resilient materials, homeowners can significantly mitigate the risk of clogs and corrosion. This forward-thinking approach not only improves the efficiency of the plumbing system but also augments the overall value of the residence. Collaborating with a professional plumber to identify the most appropriate upgrades tailored to the unique plumbing needs of the home ensures that homeowners are making informed decisions that are aligned with the well-being of their plumbing infrastructure.

Regular Maintenance

The axiom "prevention is better than cure" holds particularly true when it comes to the maintenance of older plumbing systems. These systems demand consistent care to ensure they operate seamlessly. To this end, scheduling routine inspections by a professional plumber is imperative. These regular assessments can unearth early signs of deterioration, rust, or corrosion within the plumbing infrastructure. Swiftly addressing minor issues before they escalate into major plumbing emergencies can not only save homeowners from exorbitant repair costs but also spare them the hassle of disruptions that such emergencies entail.

Furthermore, homeowners should consider periodic professional cleaning of their pipes. This process eradicates the accumulated sediment, debris, and potential blockages, thereby enhancing water flow and preventing the development of clogs that may impede the efficiency of the plumbing system. And if you live in Australia, for example, you might stick to reliable Chiswick plumbing services and people who will help your drains and pipes get better than ever!

Educate Household Members

Preventing clogs and fostering the health of a plumbing system is not a solo endeavor; it requires the collective commitment of all household members. Educating and enlightening everyone within the residence about the importance of proper disposal practices is pivotal.

This extends to imparting the significance of refraining from flushing non-flushable items down the toilet and exercising caution regarding the quantity of hair and soap residue that enters the drains. Encouraging a sense of shared responsibility throughout the household cultivates a culture of plumbing consciousness, significantly diminishing the likelihood of clogs and facilitating the seamless functioning of the plumbing system.

The allure of older houses often lies in their rich history, architectural significance, and the stories they carry. This proactive and thorough approach not only ensures a smoothly operating household but also serves as a testament to the preservation of the historical and architectural value that these cherished older homes encapsulate. With the implementation of these strategies, homeowners can rest assured that their abodes will continue to stand the test of time, both in terms of structural integrity and the comfort they provide for generations to come.

Guest Contributor: Diana Smith

How to Properly Create a Vintage Display Room in Your Home

RH Business Marketing Solutions

Creating a vintage display room within the confines of your home is an endeavor that amalgamates artistry and interior design. A vintage display room is a room with a harmonious fusion of aesthetics, history, and personal connection. This unique room provides a canvas upon which you can artfully arrange items of significance, turning them into a visual narrative that unfolds through carefully curated displays.


Crafting Your Vintage Display Room

1. Choosing the Right Space

Selecting an appropriate room for your vintage display is crucial. Consider a space with ample natural light and enough room to accommodate your collection without feeling cramped. Ideally, a room with a neutral color palette can serve as a versatile backdrop. This allows your vintage treasures to take center stage.


2. Curating Your Collection

Before embarking on the design process, curate your vintage collection. Decide on an era or theme that resonates with you. Curating your collection ensures a cohesive and visually pleasing display.


3. Furniture Selection

Vintage furniture is the cornerstone of your display room. Hunt for pieces that align with your chosen theme. Mix and match different styles, but ensure a harmonious blend. Ornate wooden cabinets, elegantly carved chairs, and intricately designed tables can infuse an authentic vintage feel. Also, take advantage of secondhand stores, flea markets, and online platforms. You can uncover unique gems from them.


4. Color Palette and Textures

The color palette should reflect the era you're evoking. Soft, muted colors like pastels were popular in earlier decades, while bolder hues gained prominence in mid-century design. Integrating a variety of textures – from velvets and silks to distressed wood – adds depth and tactile interest to the space.


5. Wall Decor and Artifacts

The walls provide an opportunity to showcase vintage artwork, mirrors, and other artifacts. Adorn them with framed vintage posters, antique mirrors, or intricate tapestries. Mix different sizes and shapes for an eclectic yet curated look. Vintage clocks, sconces, and wall-mounted curiosities can further enhance the room's ambiance.


6. Lighting Choices

Lighting is essential in setting the mood of your vintage display room. Opt for fixtures with timeless appeal – chandeliers, Tiffany lamps, and candle sconces are all fitting choices. Also, you can adjust the lighting with dimmer switches to create a cozy atmosphere.


7. Textiles and Upholstery

Select textiles that complement your theme while providing comfort. Curtains, drapes, and upholstery should all reflect the vintage era you're channeling. Look for patterns and fabrics reminiscent of the period, such as damasks, floral prints, and rich brocades.


The Allure of Displaying Challenge Coins

Among the myriad items you can feature in your vintage display room, challenge coins are emblematic pieces of history and accomplishment. These distinctive coins have a rich tradition dating back to the military and have now extended to various organizations, businesses, and groups. Displaying challenge coins in your vintage room adds an element of prestige and uniqueness.

To create an engaging challenge coin display, consider these tips:


1. Showcasing Diversity through Eras

Arrange your challenge coin collection chronologically to showcase the evolution of these tokens through different eras. This visual journey allows visitors to witness changes in design, materials, and craftsmanship over time. It's also a great way to underscore the enduring appeal of challenge coins and how they adapt to contemporary aesthetics while preserving their timeless charm.


2. Thematic Displays: Celebrating Achievements

Create thematic displays within your vintage room to celebrate specific achievements. Military challenge coins, for instance, can be grouped to highlight valor and service. Display coins from different branches or units to emphasize their unique identities. Similarly, thematic displays can feature coins from charitable organizations, academic institutions, and corporate entities, each with distinct stories to tell.


3. Embracing Artistry and Craftsmanship

Challenge coins are art pieces that reflect their makers' creativity and skill. Dedicate a section of your vintage display room to focus on the intricate designs, engravings, and materials used in crafting these coins. Highlight each coin's craftsmanship and attention to detail, highlighting the efforts invested in creating miniature masterpieces.


4. Interactive Elements and Personal Stories

Enhance the engagement factor by incorporating interactive elements into your display. Consider installing touchscreens with videos that delve deeper into the history of certain challenge coins or the stories of individuals who received them. Sharing personal anecdotes adds a human touch, making the experience more relatable and emotionally resonant.


In conclusion, by meticulously curating items and arranging them thoughtfully, you can create a space that transcends time and evokes emotions. With their unique history and symbolism, challenge coins are exquisite additions to such a room. So, embark on the journey of creating your vintage display room, where the past comes alive, and stories are woven into the fabric of your home.


Written by Taylor McKnight, Author for Challenge Coins Ltd

DIY vs Pros: What to Do When It Comes to Home Fixes

RH Business Marketing Solutions

As homeowners, you will inevitably have to repair and fix your homes. When this happens, you are frequently confronted with the problem of whether or not to do the work ourselves or to contract it out to a professional. Some adjustments require the knowledge and abilities of an expert, even though do-it-yourself projects can be enjoyable and save money. Making the right decision will help you stay out of debt, save money, and reduce stress. You have two choices when doing repairs around the house: do it yourself or hire a professional. This post will discuss the six most important considerations for each option. At this conclusion, you will be better ready to make an informed selection tailored to your requirements and the conditions you face.

The Difficulty Of The Task

The complexity of the required house repairs is one of the first factors to consider. Changing a lightbulb and cleaning out a drain are two jobs best suited for do-it-yourself projects. Installing a ceiling fan is another task that is perfect for do-it-yourself projects. However, more sophisticated tasks, like rewiring the electrical system or fixing the roof, demand specialist abilities that can only be learned through professional training. These talents are required to complete the tasks successfully.

The experience and training that professional plumbers have give them the ability to solve various plumbing issues. If you are looking for Charlotte plumbing services or one in your area, make sure you choose someone who has undergone thorough training and is equipped with the essential skills to evaluate problems and propose solutions that are successful accurately. Whether it's a clogged drain, a leaky pipe, or a broken water heater, skilled plumbers can resolve any plumbing problem with the accuracy and efficiency required.

Your Schedule And The Options You Have

Your time and availability are important factors to consider if you must choose between doing something yourself and hiring professionals to accomplish it. If you have a lot of free time, a patient disposition, and a flexible schedule, you can complete several do-it-yourself projects successfully. Hiring a professional, however, can help you save time you would otherwise spend and ensure that the task is completed promptly if you have limited time or the project requires immediate attention. This is because the professional can help you save time you would otherwise waste doing the task yourself.

Restrictions Placed On The Budget

When it comes to making decisions, the budget is a very crucial consideration to take into account. DIY initiatives typically result in labor cost savings. Still, if the individual conducting the job needs access to the necessary tools and materials, the project could be cheaper than it would have been otherwise. On the other hand, hiring professionals may give the impression of being more expensive initially. However, it guarantees the job is completed correctly, lowering the possibility of subsequent problems and extra expenses.

 Factors Relating To Safety And Danger

 Home modifications might threaten one's safety. mainly if they involve dealing with electrical, plumbing, or structural issues. Professionals have received significant training to manage risks successfully and are supplied with the proper protective gear. If you do not have the required experience or are unaware of the potential dangers, it is best to hand off the task to a professional with that experience.

Quality And Long-Term Results

Completing a do-it-yourself project can be satisfying, but the level of work produced may only sometimes be on par with that of a trained expert. The results won't be as positive in the long run. When a solution requires precision and knowledge, using specialists guarantees that you will achieve the greatest possible results and that those results will last as long as is practically possible. In addition, guarantees are usually provided for the work done by specialists, giving you an additional sense of security.

Important Learning Experiences

 The ability to get valuable life experiences and a sense of accomplishment can be gained by completing do-it-yourself projects. On the other hand, if getting the task done quickly and efficiently is your top priority, the best choice you can make is to deal with a professional who specializes in the field. It is vital to evaluate the significance of obtaining new abilities in light of the urgent nature of the problem to arrive at a judgment founded on sound reasoning.

Conclusion

When it comes to fixing things around the house, whether you should do it yourself or hire a professional relies on several considerations, including the degree of difficulty, the amount of time available, the cost, the level of safety and quality, and your personal preferences. Careful consideration of these aspects will lead you to the most suitable choice to deal with your specific challenges. Remember that there is no one-size-fits-all solution and that certain improvements may require the assistance of a professional, while others can be pleasurable tasks that you complete on your own. Always put safety and quality first in all you do so that your house can always be a relaxing and well-maintained place to be.

Guest Contributor: Destiny Clarkson

Does Roof Repair Affect Plumbing? An Authoritative Insight for Homeowners

RH Business Marketing Solutions

Roof repair is an essential aspect of maintaining the integrity of a home. However, its connection to plumbing might seem distant at first glance. What homeowners may not realize is that these two essential components are more interconnected than one might think. This article will delve into:

  • The connection between roof repairs and plumbing issues

  • In-depth analysis of how roof repairs can lead to plumbing issues

  • Effective solutions and preventive measures to guard against these problems

The relevant scope of roofing, plumbing, roof leaks, and water damage will be our central themes, offering an indispensable guide for homeowners concerned with roof damage and repair costs.

How Roof Repairs Can Lead to Plumbing Issues

Leak Pathways

One of the primary ways roof repairs can impact plumbing systems is through leak pathways. When roof repairs are not properly done, it can result in gaps or cracks that allow water to penetrate the house. Let's explore the following areas:

  • Roof Leaks: Roof leaks are not only a cause for alarm due to potential damage to the structure but also because of how they can affect the plumbing system. Improper sealing during roof repairs may allow water to infiltrate the interior walls, where it can reach and corrode plumbing pipes. This can result in weakened connections and, eventually, leaks within the plumbing system.

  • Water Damage in the Attic: A poorly repaired roof may lead to water accumulation in the attic. If the insulation gets wet, it could take a long time to dry, creating an environment suitable for mold growth. The moisture and mold can then spread to areas where plumbing lines run, impacting their functionality.

  • Sealing & Flashing Mistakes: Repairing the roof without taking proper care to seal gaps or fix flashing can lead to rainwater seeping into places it shouldn't. It can find its way to the plumbing vents, causing blockages or even freezing in colder climates, which may lead to pipe bursts.

Personal Experience: In my 20 years as a roofing professional, I've seen homeowners suffer from unexpected plumbing issues after a shoddy roof repair job. One client had to deal with a series of pipe leaks that originated from water entering through gaps left in the roof repair. This water found its way to the plumbing system, causing long-term damage.

Vent Pipe Connection

Roofing and plumbing systems are often interconnected through vent pipes. These essential components deserve attention:

  • Connection with Roofing: The vent pipe, part of the drain-waste-vent system, protrudes through the roof. During roof repairs, mishandling around the vent pipe area can lead to problems. If not sealed properly, rainwater can enter, leading to potential leaks within the walls where plumbing pipes reside.

  • Importance of Proper Sealing: Proper sealing around the vent pipe is vital during roof repairs to prevent water intrusion. Any mistake here can directly impact the plumbing system.

  • Roofers and Plumbers Collaboration: Ensuring a seamless connection between the roof and the vent pipe requires collaboration between roofers and plumbers. It underscores the importance of hiring professionals who understand both roofing and plumbing systems.

In conclusion, the interconnection between roof repairs and plumbing is not merely coincidental. It is a complex relationship that requires careful consideration and handling.

Solutions and Preventions

Regular Inspections

Routine inspections are a homeowner's first line of defense against unforeseen complications arising from roof repairs that may impact plumbing.

  • The Role of Inspections: Regularly scheduled inspections can identify potential problem areas before they escalate. By spotting issues early, homeowners can address them before they lead to significant damage.

  • Identifying Roof Damage: Inadequate roof repair jobs might not always be visible to the untrained eye. Professional inspections can highlight these weak points, ensuring they're addressed promptly.

  • Checking Vent Pipes: A crucial part of these inspections is checking the vent pipes. They should be appropriately sealed, free from blockages, and in optimal condition to ensure the plumbing system remains unaffected.

Real-Life Example: I once worked with a homeowner who made it a point to have their roof inspected every year. During one of these routine checks, we discovered a minor roof leak near a vent pipe. Had it gone unnoticed, the damage could have spread to the plumbing system. This forward-thinking approach saved them significant repair costs.

Proper Sealing

Correctly sealing gaps, especially around vent pipes and flashings is vital to prevent water ingress that can affect plumbing.

  • Importance of Quality Sealants: Using high-quality sealants ensures a long-lasting barrier against water intrusion. Cheaper, low-quality products might not provide adequate protection in the long run.

  • Attention to Flashings: Flashings, especially around chimneys and vent pipes, are common areas for leaks. Ensuring these are well-sealed during roof repairs can help prevent complications with the plumbing system.

  • Hiring Experienced Roofers: An experienced roofer understands the importance of thorough sealing. Their expertise can be invaluable in safeguarding your home against potential plumbing issues resulting from roof repairs.

Consulting Professionals

While DIY has its merits, consulting professionals, especially for complex tasks like roof repair, is often the best course of action.

  • Roof Plumber Consultations: Not many homeowners are aware, but there's a specialization within plumbing called roof plumbing. These professionals are adept at understanding the nuances between roofing and plumbing. Consulting with them can offer valuable insights.

  • Expertise in Roofing Systems: Roofers with years of experience can provide homeowners with guidance on the best practices to prevent any inadvertent damage to the plumbing system during repairs.

  • Integrated Approach: Collaborating with both roofing and plumbing experts ensures an integrated approach to home repairs. It offers the best chance to avoid issues that span both domains.

Personal Anecdote: In my early days of roofing, I was approached by a distressed homeowner facing recurrent plumbing issues post a roof repair. On investigating, I realized the vent pipes had been damaged during the roofing process. This prompted me to always collaborate with a trusted plumbing team, ensuring both systems were in harmony.

FAQ Section

1. Can minor roof repairs impact plumbing? 

Yes, even minor roof repairs, if not done correctly, can have consequences on the plumbing system. Especially if they are near vent pipes or flashings which can allow water to seep in.

2. How often should I inspect my roof to avoid potential plumbing issues? 

Annual inspections are recommended, but if you reside in areas prone to harsh weather conditions, a post-storm check can be beneficial.

3. Can a clogged gutter affect my plumbing? 

While clogged gutters primarily impact the roof and foundation, they can contribute to water accumulation, which, if near vent pipes, could have repercussions on the plumbing system.

4. What should I look for when hiring a roofer to ensure my plumbing remains unaffected? 

Look for roofers with experience, positive reviews, and those who are willing to collaborate with plumbing professionals for a holistic approach.

Conclusion

The symbiotic relationship between roofing and plumbing is undeniable. As homeowners, understanding this connection can save both heartache and money. Proper roof repairs, routine inspections, and a collaborative approach with professionals are the keys to a harmonious home where the roof and plumbing coexist without issue. It's not merely about fixing a leak or replacing a tile; it's about ensuring every action taken on the roof resonates positively throughout the home, plumbing included.

Why is My Shower Pressure Low?

RH Business Marketing Solutions

Low Shower Pressure

Low shower pressure can be frustrating and perplexing for many homeowners. Picture stepping into the shower, expecting a rejuvenating stream of water, only to be greeted by a weak trickle. It's a common problem that can disrupt your daily routine and leave you unsatisfied. You must consider the importance of adequate water pressure for the overall shower experience. The correct water pressure ensures thorough cleansing and contributes to a relaxing and refreshing moment. In this guide, we'll delve into the reasons behind low shower pressure and explore practical steps to diagnose and resolve the issue, ensuring your shower time remains an enjoyable escape.


Understanding Shower Pressure

What is Shower Pressure?

Shower pressure refers to the force with which water flows from the showerhead. The rate at which water supplies the shower and the resistance within the plumbing system determines the tension. When you turn on the battery, the water pressure directly affects the intensity of the water stream. A higher pressure delivers a more robust and refreshing flow, while low-pressure results in a feeble dribble.

Water pressure plays a pivotal role in the grand tapestry of a comfortable shower. Beyond cleansing, it massages and relaxes your muscles, turning an ordinary shower into a revitalising experience.


Ideal Shower Pressure Range

For an optimal shower experience, the recommended water pressure range typically falls between 40 to 60 pounds per square inch (psi). This range strikes a balance between water conservation and user satisfaction. Pressure below this range can lead to lacklustre showers, while excessive force might lead to wastage of water and potentially damage plumbing fixtures.

Shower pressure impacts not only the intensity of the water but also its delivery. Inadequate pressure can result in inconsistent water flow and temperature fluctuations, diminishing the overall enjoyment of your shower.


Causes of Low Shower Pressure

Water Supply Issues

Problems within the main water supply line often trace back to low shower pressure. Issues such as water leaks, pipe corrosion, or clogs can significantly affect the pressure. Leaks and corrosion restrict the flow of water, while clogs obstruct it. These problems can occur due to aging pipes, poor maintenance, or even sediment and debris in the water supply.


Clogged Showerhead

Mineral deposits and debris are notorious culprits for low shower pressure. Over time, these particles can accumulate within the small openings of the showerhead, impeding the flow of water. As a result, the once-invigorating spray transforms into a weak drizzle, leaving you dissatisfied.

The impact of clogs goes beyond just pressure; it can also cause uneven water distribution, leading to a rough shower experience. A clogged showerhead can also contribute to water wastage, as you may need more time to rinse it off.


Faulty Pressure Regulator

Pressure regulators are like the conductors of an orchestra, ensuring that every fixture in your home receives the right amount of water pressure.

When these regulators malfunction, they disrupt the harmony of your shower.

 A faulty regulator can lead to inconsistent pressure, causing fluctuations in water flow during your storm. This issue might require a closer inspection and potential adjustment or replacement.


Diagnosing Low Shower Pressure

Checking Other Fixtures

Before you panic about low shower pressure, examining other faucets in your home is a good idea.  If the pressure issue isolates the shower, it's more likely a localised problem.

However, noticing consistently low pressure across multiple fixtures could indicate a more significant problem in your plumbing system requiring immediate attention.


Assessing the Showerhead

To pinpoint whether a clogged showerhead is to blame, start by removing the showerhead from the shower arm. Inspect it closely for mineral deposits or debris accumulation. If you find any, a thorough cleaning is in order. Soak the showerhead in vinegar and water to dissolve mineral buildup. Use a small brush or toothpick to remove debris from the openings gently. This cleaning ritual can restore your showerhead's performance and bring back the invigorating flow.


Professional Inspection

If the low-pressure issue persists after cleaning the showerhead and examining other fixtures, it might be time to call a professional plumber. Plumbers have specialised tools, such as pressure gauges, to measure water pressure throughout your plumbing system accurately. These gauges can help identify any pressure-related problems and guide the appropriate solutions.


Fixing Low Shower Pressure

Cleaning the Showerhead

To clean your showerhead effectively, follow these steps:

●      Unscrew the showerhead from the shower arm.

●      Mix equal parts white vinegar and water in a plastic bag.

●      Submerge the showerhead in the solution and secure the bag around it using a rubber band.

●      Leave it overnight to allow the vinegar solution to dissolve mineral deposits.

●      Remove the bag, scrub the openings gently with a brush or toothpick, and rinse the showerhead thoroughly.

●      Reattach the clean showerhead to the shower arm.

●      Vinegar's natural acidic properties break down mineral deposits, restoring water flow and pressure.


Checking and Replacing Pipes

Inspecting pipes for corrosion or leaks requires a keen eye. Here's how to do it:

●      Examine exposed pipes for rust, greenish stains, or visible leaks.

●      If you suspect corrosion, gently scrape the affected area to see if the metal beneath is intact.

●      If you find significant corrosion or leaks, it's advisable to consult a plumber for further assessment.

●      The plumber might recommend replacing the affected pipes to restore proper water pressure in severe corrosion or irreparable leaks.


Fixing Pressure Regulator

Identifying a faulty pressure regulator and addressing it can make a significant difference in your water pressure. Follow these steps: 

●      Locate the pressure regulator, often where the main water line enters your home.

●      Check for any visible signs of damage, such as leaks or dents.

●      If you suspect the regulator is malfunctioning, you might want to adjust it if it's adjustable or replace it entirely if necessary.

●      Consult the manufacturer's instructions for adjusting or replacing the pressure regulator.

●      Once the adjustment or replacement is complete, test the water pressure in your shower to ensure it's within the recommended range.

Considering Water Pressure Boosting

If you're consistently experiencing low water pressure throughout your home, consider installing a water pressure-boosting system. These systems can help amplify the pressure of the water supply, ensuring that you enjoy a satisfying shower every time. However, while these systems can improve pressure, they might also increase water consumption and energy usage. Before making a decision, weigh the advantages against potential drawbacks.


Get a Proper Shower Maintenance

Low shower pressure is a common issue that can significantly impact your daily routine and overall comfort. We've explored the various causes of this problem, from water supply issues to clogged showerheads and faulty pressure regulators. Diagnosing and addressing the root cause can restore your shower to its full invigorating potential. 

Regular maintenance, such as cleaning your showerhead and inspecting pipes, can go a long way in preventing and mitigating low-pressure issues.  And remember, when in doubt, feel free to seek professional help in repairing your showers, installing a showerhead, cleaning, plumbing, and many more. Especially if the problem seems complex or beyond your expertise. Adequate shower pressure isn't just a matter of convenience.

An Expert Guide on Kitchen Remodel Checklist & Cost

RH Business Marketing Solutions

Action Plan To Get The Kitchen You Always Dreamt Of.

Is your kitchen out of fashion? Are your kitchen essentials and cabinets degrading the look of your kitchen? Consider remodeling your kitchen if it no longer serves your functional requirements. While you dream of remodeling your old kitchen into a classic new one, turning those dreams into reality requires more than wishful thinking. You have to set budgets, sign contracts, and make tough decisions. Spending a few hundred dollars remodeling important rooms like kitchens and bathrooms can also increase the resale value of your house. Kitchen remodeling is an exciting project where you can finally get the cabinets you secretly stared at every time you visited a Home Depot or Ikea. There are several things to consider for stress-free kitchen remodeling without wasting money. For that purpose, we have created a kitchen remodel checklist so you don’t miss anything. If you want to move out, you can turn your home into a vacation rental and make money.  

Kitchen Essentials & Remodeling Checklist

With so many decisions on the designs, cabinetry, appliances, backsplash tiles, flooring, lighting, and hardware, it can be overwhelming to think of where to begin, set up a budget, and hire professional contractors. When planning a kitchen remodeling, you should prepare a kitchen checklist of what sections need improvement or an entire replacement. Before that, let’s learn the difference between renovation and remodeling. Renovation refers to restoring a room’s functionality without changing its purpose and structure, whereas remodeling transforms the entire space structure. In this article, we assume you want complete kitchen remodeling and guide you through the journey.

Identify Your Renovation Goals

When planning a kitchen remodel, it's important to set goals. But you must tackle the basics first, such as establishing a clear budget, choosing an efficient layout, and optimizing storage. Incorporate your personal style into the design and consider hiring professionals for complex installations to ensure safety and quality.

Common goals for kitchen renovations typically focus on improving functionality, aesthetics, and home value. Here are the key objectives: 

  • Enhanced Functionality: Streamline the layout to optimize the workspace, adding more counter space or a multifunctional island. 

  • Updated Appliances: Upgrade to energy-efficient appliances like smart refrigerators and ovens for better performance and convenience. 

  • Increased Storage: Expand cabinet space and include smarter storage solutions like pull-out shelves and built-in organizers to help declutter. 

  • Improved Lighting: Enhance lighting with under-cabinet lights, pendant lights over islands, and ample general lighting. 

  • Modern Aesthetics: Update the kitchen's look with new paint, backsplashes, and durable countertop materials like quartz or granite. 

  • Energy Efficiency: Incorporate LED lighting and ENERGY STAR-rated appliances to reduce energy consumption. 

  • Comfort and Safety: Improve ventilation to reduce odors and smoke, and choose flooring that is easier on the feet. 

  • Increased Home Value: Boost the kitchen's appeal to enhance overall home resale value. 

  • Personalization: Tailor the space to fit specific needs for cooking, entertaining, or family gatherings, making the kitchen a central hub of the home. 

These goals aim to create a more efficient, enjoyable kitchen space and enhance the long-term value of the home.

Ask yourself these questions while planning to remodel your kitchen:

  1. Are you willing to renovate your entire kitchen or personalize specific spaces per your needs?

  2. Do you wish more spacious kitchen or prefer a compact one?

  3. How to accommodate smart appliances in your kitchen? 

  4. How much budget would you like to invest? 

  5. Does the kitchen renovation meet your personal needs or benefit the house value?

  6. Do you want to remodel a vacation rental kitchen

Visualize your ideal kitchen & collect multiple kitchen styles that you love. Seek a professional remodeler to get the design options for your kitchen after remodeling. Except in cases where your kitchen is decades old, your kitchen may only need part modification. If you need a complete remodeling, you can start from scratch. If not, think of what is good in your kitchen versus what needs a complete modification to enhance the space and save money. Find answers to the above questions and prepare a kitchen essentials list. Please remember to consider unexpected expenses in your budget to avoid regrets later. 

Set Realistic Budget

You must be cautious about your choices to avoid ending up overspending. Make a list of your options, must-have kitchen essentials arrangement, and set a realistic budget. Make smart choices to get the most out of every dollar you spend. Here are quick examples of how you should analyze your kitchen and plan for upgradation. 

  • See if the kitchen cabinet organizers are in good shape and need minor repairs to restore their function like new ones. Even if you want to replace them with new ones, there are always budget-friendly options.    

  • Also, check the condition of essential kitchen utensils and mark them for replacement if necessary. 

  • Check if your kitchen needs layout modification. Changing the kitchen layout requires extensive plumbing work and electrical work. In this case, you can save some bucks by using your existing appliances that you can replace later.  

  • If your kitchen is all good in its current layout, working on the same design can help you save money for purchasing upgraded appliances, smart solutions, and other kitchen essentials. 

Please remember that opting for high-end kitchen essentials can be expensive, but they offer a luxurious and long-lasting look. Decide for yourself based on your requirements and the budget available. 

Shopping For The Latest Kitchen Appliances

If you want to turn your home into a vacation rental, upgrading with the latest kitchen essentials can help guests get a convenient cooking experience in the kitchen. Once you have a brief idea of your new kitchen, you must decide on appliances, sinks, faucets, lighting, backsplashes, kitchen essential cookware, etc. For a vacation rental, Airbnb kitchen essentials like a coffee maker, kettle & teapot, food blender, microwave, rice cooker, or toaster can make things simple for the guest in the kitchen. Other important things include

1. Cabinet & Pantry Organization Racks

 you don’t want wall cabinets, you can buy a pantry and replace them after some years. This way, you can replace most kitchen elements and get a refreshing look once every few years. You can store more items by customizing the shelves without disturbing the sophisticated look.   

2. Flatware Organizers

You can install these kitchen flatware holders anywhere to store cutlery items, gadgets, or other small kitchen essentials. They come in plastic, wood, and metal and are available in different sizes to keep kitchen essentials easily accessible. 

3. Make Room for Small Appliances

Smart appliances and small kitchen appliances like blenders, coffee mugs, grinders, ovens, stoves, etc, occupy most of your kitchen. The kitchen layout should be designed to make all these appliances approachable to the person cooking without cluttering the space. Also, make necessary arrangements to secure kitchen glassware sets. Get a kitchen remodel checklist so you don’t miss anything. 

Give Enough Time For Kitchen Remodeling

Remodeling your kitchen consumes time, sometimes even more than your expectations. Depending on the complexity of the remodeling required, it may take just a week or extend for up to several months. Usually, an entire kitchen renovation may be completed between six weeks to four months. So, prepare yourself. You will need a clear action plan about the project's expected duration and ask yourself questions like 

  • Where will you stay during the kitchen remodeling? 

  • Where do you store the old & new kitchen essentials? 

  • How will you cook during the renovation?

  • Please make room for certain uncertainties that may take away your project time. 

While you don’t have to leave your home to renovate any other rooms, it is different in the case of kitchen remodeling. If you decide to live in your home during work, your daily life may not be the same for whatever duration of remodeling. As the disruption caused during the job can affect you in several ways, we advise you to move out temporarily till the project is accomplished.     

DIY or Hire a Contractor?

You may want to remodel the entire kitchen all by yourself. Nothing can match the satisfaction of living in the remodeling or construction project you have completed. But, hiring a professional contractor can help the work done right, on time, while adhering to necessary safety procedures. If this is your first remodeling project, you may be juggling more time and money between researching the process and acquiring the right kitchen essentials tools.  

Ready To Remodel Your Kitchen?

When you invest time in planning, you will soon be able to differentiate between your must-haves and nice-to-have kitchen essentials and save money. Get professional help from Inhaven. You can get the entire kitchen renovated or upgrade specific kitchen spaces. You will be accredited with a badge when remodeling the whole kitchen from Inhaven, which improves your credibility when you list your house as a vacation rental home. Kitchen remodeling genuinely transforms the functionality of your home. With proper planning, it can bring you joy for many years to come.   

5 Inexpensive Smart Devices Every Modern Home Needs

RH Business Marketing Solutions

Smart devices for the home offer lots of benefits. All are designed to make your life a little easier. They make it simpler to run your home efficiently, minimize your impact on the planet, and help you lower many household bills.

Everyday objects, such as doorbells, refrigerators and home lighting, have been made more intelligent (and useful!) through integral computers and internet connectivity. By being able to connect with Wi-Fi and communicate with other devices, smart devices can be controlled from anywhere within the home and even further afield from your phone or tablet. You can also view smart devices’ data output and monitor their use from outside from wherever you are, too.

If you are starting to build a smart home from scratch and are not sure what to start with, here is a guide to the most essential smart devices. All are an inexpensive starting point and are available via the eshop on orangemobile.

1.   Smart Wi-Fi plugs

We know that there’s not usually anything particularly glamorous about a plug. However, upgrading your household plugs is one of the fastest and easiest ways to start becoming more energy efficient. They offer two key advantages over your regular home plugs.

First of all, you can monitor the energy consumption of anything you use them with. This could be a lamp, mobile phone charger, television, hairdryer, fan, or any other item you can use a regular household socket for.

The second advantage is the ability to limit the use of the plug by using a timed on/off setting and creating a schedule. For example, you might have family members who forget to turn electrical items off when they leave home for the day. By setting a timer to switch off the plug when you are never at home, you can be sure that no energy is wasted.  

Smart plugs slot into existing household sockets. You then plug the device of your choice into the smart plug. The product is compact and inconspicuous, and compatible with smart speaker devices for even easier operation.


2.   Smart bulbs

Smart bulbs are another example of how something as dull as a regular light bulb can be way more fun (and energy efficient). Your regular bulbs are easily exchanged for smart bulbs and, as to be expected, smart bulbs are the energy-efficient LED bulbs. It is easy to control the bulbs remotely and through a timer. All you need is the app on your smartphone or tablet.

Smart bulbs have additional interactive features, too. Look out for the ability to adjust the brightness to your liking. Various modes are available, such as working, reading, and nightlight modes. The color of the bulb is changeable, too. With music reactivity enabled, you have ready-made party lighting.


3.   Smart SOS emergency call button

For ultimate peace of mind, an SOS call button is a must-have item. This small device is lightweight and wearable, and is connected to your home Wi-Fi. This connection can then be used to immediately alert you to an emergency, such as a fall or medical episode, while you are out of the home.

 These devices are ideal for elderly, young or vulnerable family members to use. In an emergency, simply touching the button will alert you to a problem via your smartphone. Setting up the device’s ability to alert you via the app is a quick and easy procedure. The device’s battery is rechargeable and can operate in standby mode for many months.


4.   Smart body fat scale

Ditch your regular scales in favor of a much more comprehensive smart scale. These scales have a distinct advantage in that they can connect to your smartphone, making it much easier to track weight loss progress and monitor your health and fitness goals.

Smart body fat scales can calculate your weight, muscle mass, body fat, bone density and more. They can also indicate your calorie requirements for weight loss or weight maintenance. Smart scales can store data as well as send it to an app on your smartphone, making it even easier to see your progress.


5.   Smart security cameras

Smart security is hugely popular and there are multiple products that can help you with peace of mindwherever you happen to be. Indoor cameras are an inexpensive entry point into building a network of home security. They are easy to set up on a table top or can be wall-mounted, and they have a whole range of useful features.

Smart security cameras are activated by motion sensors. Any motion detected will automatically set the camera to push a notification to your phone. You can then control the camera remotely to get a better picture of what’s going on by tilting and panning it via the app. One way speakers also allow you to speak to whoever is in the home. Recording is supported via a memory card. 


Smart products for all

The range of smart devices now available is great and growing all the time. Multiple products are both useful and inexpensive. Introducing smart devices into your home is both affordable and life-enhancing, by freeing you from expensive energy bills, making life a little easier, or giving you a little bit more peace of mind.

Why You Should Add a Sauna to Your Bathroom

RH Business Marketing Solutions

A sauna is a small room or space you can design to experience dry heat sessions, typically characterized by elevated temperatures. Traditional saunas are usually heated with generators. However, in modern times, infrared saunas use infrared heaters to directly heat the body without significantly increasing the air temperature.

The temperatures in saunas can vary, but they generally range from 80°C to 100°C (176°F to 212°F) in traditional saunas, while infrared saunas typically have lower temperatures, around 122°F to 140°F. Additionally, sauna sessions usually last 10 to 20 minutes, with users entering and exiting the sauna as they feel comfortable.


Why Add a Sauna to Your Bathroom

In a world of stress and fast-paced living, finding a sanctuary for relaxation and rejuvenation is essential. Incorporating a sauna into your bathroom isn't just a luxurious fantasy; it's a tangible way to enhance your well-being within the confines of your home.

Some of the benefits of adding a sauna to your bathroom include:


Convenience

Adding a sauna to your bathroom allows you to enjoy sessions without going to a gym, spa, or sauna facility.

Home Value

A well-designed and functional sauna can add value to your home, making it more valuable and attractive to potential buyers. 

Health and Wellness 

Beyond being a place of warmth and tranquility, saunas offer many health benefits, such as:

Relaxation and Stress Relief

Sauna sessions can promote relaxation by helping to reduce stress and anxiety. The warm environment and the release of endorphins contribute to an overall sense of well-being.

Improved Blood Circulation 

The heat in saunas causes blood vessels to dilate, leading to improved blood circulation, reduced blood pressure, and improved heart health.

Detoxification

Sweating in a sauna can lead to the elimination of toxins and waste products as it helps open the skin pores. Additionally, sauna heat can temporarily relieve muscle soreness, joint pain, and tension.

Potential Weight Loss 

The increased heart rate and sweating during sauna sessions may contribute to a slight calorie burn.


How to Add a Sauna to Your Bathroom

Adding a sauna to your bathroom is a creative and practical way to enjoy the relaxing and rejuvenating benefits of sauna therapy without needing a dedicated sauna room. Some of the ways to add a sauna to your bathroom include:


Infrared Sauna

Infrared saunas utilize infrared heaters to heat your body directly, producing a gentle warmth that penetrates deep into your skin. When installing an infrared sauna, you will need the following:

●      Infrared sauna panels or heaters

●      Insulation materials (such as reflective insulation)

●      Plywood or wooden boards

●      Ventilation system

●      Thermostat or temperature control unit

Choose a Suitable Area 

Select a corner of your bathroom with enough space to sit or lie comfortably. Ensure there is proper electrical access for the infrared sauna panels.

Prepare the Space 

Clear the area and remove any obstacles. Consider insulating the walls and floor with reflective insulation to ensure the heat stays within the sauna area.

 Install the Sauna Panels

Mount the infrared sauna panels on the walls. Place one panel on each wall for even heating. Furthermore, install an exhaust fan or ensure adequate ventilation in your bathroom.

Temperature Control

Install the thermostat or temperature control unit to regulate the heat. This allows you to tailor the temperature settings according to your preference. Then, place a comfortable bench or chair in the sauna area. Furthermore, ensure it's positioned safely from the sauna panels to avoid direct contact. 

Steam Sauna

Steam saunas are traditional saunas that use a steam generator to create a humid environment. To create a steam sauna experience in your bathroom, you will need:

●      A portable steam generator

●      Bench or seat

●      Waterproofing materials

●      Ventilation system

Since steam saunas produce humidity, it's crucial to waterproof the sauna area. Apply waterproofing materials to the walls and floor to prevent moisture damage. Then, connect the portable unit to a water source, and install a ventilation system to prevent excess humidity. Steam can lead to mold growth, so proper ventilation is essential.

Finally, place a bench or seating area within the sauna space. Ensure it's comfortable and positioned away from direct steam contact.


By transforming your bathroom into a personal sauna retreat, you're embracing a lifestyle prioritizing your physical and mental well-being. In this harmonious partnership between the bathroom and the sauna, you're crafting a haven where the world's cares dissipate, and your body finds solace in the symphony of heat and relaxation.

Written by Taylor McKnight, Author for Beem Light Sauna

A Guide to Maintaining a Fall Aesthetic in Your Home

RH Business Marketing Solutions

As the air turns crisp and leaves change to their vibrant coats of red, orange, and gold, the enchanting season of fall graces us with its presence. With its sense of warmth, comfort, and beauty, fall presents the perfect opportunity to transform your living space into a cozy hangout. From pumpkin-spiced scents to rustic decor, maintaining a fall aesthetic in your home is all about embracing the cozy vibes that this season brings.

Warm Hues and Natural Elements

When it comes to creating a fall-inspired environment, color plays an important role. Infuse your home with the warm and inviting hues of the season – rich oranges, deep reds, and earthy browns. These colors can be introduced through accent pieces like throw pillows, blankets, and even artwork. For a more subtle yet equally impactful approach, consider adding dried leaves, pinecones, and branches to your decor.

Textures and Fabrics: Embracing Softness and Comfort

Your choice of fabrics can greatly contribute to the cozy atmosphere. Swap lightweight fabrics for soft, textured ones like chunky knit blankets, faux fur throws, and plush rugs. These tactile elements not only add visual interest but also encourage a sense of warmth and comfort that's perfect for the season.

Pumpkins and Gourds: The Iconic Fall Emblem

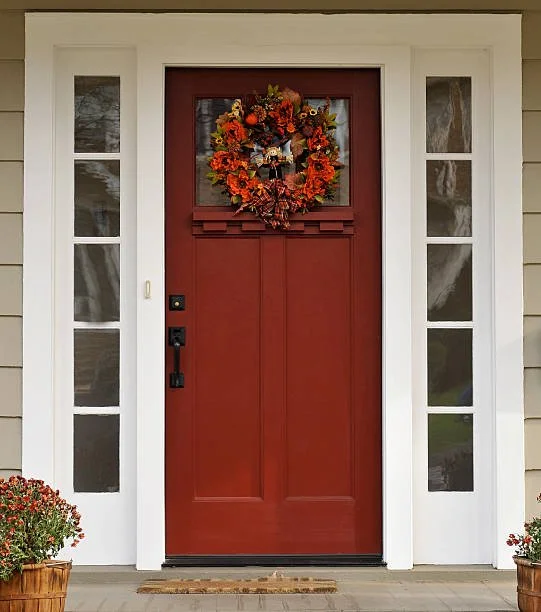
No fall aesthetic is complete without the presence of pumpkins and gourds. From small decorative pumpkins to larger ones for carving, these quintessential symbols of the season instantly bring a touch of autumn to your home. Arrange them on your mantel, scatter them across tables, or even place them on your doorstep for a warm and inviting entrance.

Candlelit Glow: Set the Mood with Soft Lighting

As the days grow shorter, creating a cozy ambiance through lighting becomes even more important. Opt for soft, warm lighting to evoke a feeling of intimacy. Candles, in particular, can transform any space into a magical haven. Consider scented candles in fragrances like cinnamon, apple, or vanilla to fully immerse yourself in the fall spirit.

Seasonal Wreaths and Garlands: Inviting the Outdoors In

A fall aesthetic wouldn't be complete without bringing a touch of the outdoors inside. Adorn your home with seasonal wreaths made of dried leaves, pinecones, and berries. Drape garlands along your staircase railing or across your fireplace mantel to create a seamless transition from nature to your interior space.

Transitional Decor: From Halloween to Thanksgiving

One of the joys of maintaining a fall aesthetic is its versatility. As the season progresses, transition seamlessly from Halloween-themed decorations to those that embody the essence of Thanksgiving. Swap out spooky decorations for cornucopias, wheat sheaves, and more understated elements that celebrate gratitude and abundance.

Rustic Accents: Embrace the Charm of the Countryside

To fully capture the fall aesthetic, embrace rustic accents that evoke the charm of the countryside. Incorporate wooden elements, such as distressed furniture or hand-carved decorative pieces. Vintage finds, such as old mason jars, weathered signs, and antique lanterns, can also infuse your home with a touch of nostalgia.

Seasonal Fragrances: Engage the Senses

A well-rounded fall aesthetic appeals to all the senses, and scent is no exception. Choose warm and comforting scents, such as cinnamon, clove, nutmeg, and apple pie, for your home. Whether through scented candles, essential oil diffusers, or potpourri, these fragrances can transport you to a cozy autumn day.

Thoughtful Details: Personalize Your Space

Lastly, remember that maintaining a fall aesthetic is all about reflecting your personal style and preferences. Whether you're drawn to a more minimalist approach or you prefer a maximalist display of fall decor, infuse your unique personality into your home's seasonal transformation.

In conclusion, embracing a fall aesthetic in your home is a delightful way to celebrate the beauty and charm of the season. Through warm colors, cozy textures, nature-inspired decor, and thoughtful details, you can create a space that envelops you in the comfort and magic of autumn. So, gather your pumpkins, light your candles, and embrace the cozy vibes that fall has to offer.

Important Rules of General Home Exterior Maintenance

RH Business Marketing Solutions

Owning a home is a thrilling journey, chock-full of responsibilities and challenges. It's the hub of cherished memories, but it's also a significant investment. Keeping the home's exterior in tip-top condition enhances its curb appeal and maintains its value over the long haul. Think of it as putting on sunscreen; regular maintenance keeps harmful elements at bay.

Many folks need help figuring out where to start. Some might be tempted to launch into spontaneous weekend projects without a game plan. However, a bit of strategy and understanding can make a world of difference. Here's a roadmap to ensuring a house is the envy of the block, year in and year out.

Exterior Maintenance Priorities

When it comes to maintaining the outside of a building, it's recommended by companies such as the Eustis roofing company to start with the roof, windows, and doors. This ensures your property is weatherproof. Neglecting the roof, windows, and doors invite leaks, translating to a hefty bill for internal repairs. Hence, a routine inspection, especially post-intense storms or weather events, is wise.

Beyond the roof, those walls and sidings echo tales of weather challenges they've faced. Dust, pollutants, and various environmental culprits can diminish their charm. Consider a periodic power wash to breathe new life into them. However, a word of caution: intense pressure can be more harmful than helpful. Gentle and steady does the trick!

Gardens and Greenery

Nature can be a home's best friend or its worst enemy. Beautifully manicured gardens elevate the entire look of a property. Pruning trees and shrubs, mowing the lawn, and pulling out stubborn weeds are therapeutic activities. Not only do they bring about a sense of accomplishment, but they also ensure that overgrown branches don't scrape against walls or windows.

On the flip side, leaving nature unchecked can lead to problems. Overgrown roots can damage foundations or walkways. Fallen leaves can clog gutters and downspouts, leading to water damage. It balances between letting nature flourish and ensuring it doesn't overstep its boundaries.

Regular Checks and Seasonal Maintenance

●      Gutters and Downspouts: These are easy to overlook but vital. Ensuring they're debris-free prevents water damage and boosts the home's resilience against the elements.

●      Windows and Doors: Not just for aesthetics. Sealing gaps can save on energy bills, and replacing worn-out screens can keep pesky bugs out.

●      Paint Touch-ups: Fresh paint doesn't just look pretty; it protects against pests and rot. When there's chipping or peeling, it might be time for a touch-up.

Regularly walking around the property with a cup of coffee highlights potential issues before they become full-blown problems. Is there a loose brick on the path? Fixing it now can prevent someone from tripping later. Spot a cracked windowpane? Better to deal with it sooner rather than when it's pouring rain.

In Conclusion

Maintaining a home's exterior isn't just about showing it off to the neighbours. It's about safeguarding an investment, ensuring safety, and creating a haven for oneself and loved ones. With a proactive mindset and elbow grease, homeowners can ensure their abode remains a place of pride and joy for years.