Google+

contact us

Use the form on the right to contact us.

Day or Night, we are here to serve you. Leave your plumbing problem to us.


Tinley Park, IL

(708)845-7922

Residential and Commercial plumbers and plumbing contractors available in Orland Park, Tinley Park, Oak Lawn, Palos Heights, Midlothian, Oak Forest, Homer Glen, Mokena, Frankfort, and the surrounding Chicago South Suburbs. Emergency plumbers.

copper water lines.jpg

Kevin Szabo Jr Plumbing Blog

Kevin Szabo Jr Plumbing is Tinley Park, Orland Park, Oak Forest, Midlothian, Orland Hill, Homer Glen, Mokena, Frankfort, Crestwood, Palos Heights, Oak Lawn, local plumber. Read our blog for advice, tips, a good laugh, and basic home improvement.

**We are moving our old blog to our new and improved website. Too see all our posts visit kevinszabojrplumbing.blogspot.com

Filtering by Category: August

An Expert Guide on Kitchen Remodel Checklist & Cost

RH Business Marketing Solutions

Action Plan To Get The Kitchen You Always Dreamt Of.

Is your kitchen out of fashion? Are your kitchen essentials and cabinets degrading the look of your kitchen? Consider remodeling your kitchen if it no longer serves your functional requirements. While you dream of remodeling your old kitchen into a classic new one, turning those dreams into reality requires more than wishful thinking. You have to set budgets, sign contracts, and make tough decisions. Spending a few hundred dollars remodeling important rooms like kitchens and bathrooms can also increase the resale value of your house. Kitchen remodeling is an exciting project where you can finally get the cabinets you secretly stared at every time you visited a Home Depot or Ikea. There are several things to consider for stress-free kitchen remodeling without wasting money. For that purpose, we have created a kitchen remodel checklist so you don’t miss anything. If you want to move out, you can turn your home into a vacation rental and make money.  

Kitchen Essentials & Remodeling Checklist

With so many decisions on the designs, cabinetry, appliances, backsplash tiles, flooring, lighting, and hardware, it can be overwhelming to think of where to begin, set up a budget, and hire professional contractors. When planning a kitchen remodeling, you should prepare a kitchen checklist of what sections need improvement or an entire replacement. Before that, let’s learn the difference between renovation and remodeling. Renovation refers to restoring a room’s functionality without changing its purpose and structure, whereas remodeling transforms the entire space structure. In this article, we assume you want complete kitchen remodeling and guide you through the journey.

Identify Your Renovation Goals

When planning a kitchen remodel, it's important to set goals. But you must tackle the basics first, such as establishing a clear budget, choosing an efficient layout, and optimizing storage. Incorporate your personal style into the design and consider hiring professionals for complex installations to ensure safety and quality.

Common goals for kitchen renovations typically focus on improving functionality, aesthetics, and home value. Here are the key objectives: 

  • Enhanced Functionality: Streamline the layout to optimize the workspace, adding more counter space or a multifunctional island. 

  • Updated Appliances: Upgrade to energy-efficient appliances like smart refrigerators and ovens for better performance and convenience. 

  • Increased Storage: Expand cabinet space and include smarter storage solutions like pull-out shelves and built-in organizers to help declutter. 

  • Improved Lighting: Enhance lighting with under-cabinet lights, pendant lights over islands, and ample general lighting. 

  • Modern Aesthetics: Update the kitchen's look with new paint, backsplashes, and durable countertop materials like quartz or granite. 

  • Energy Efficiency: Incorporate LED lighting and ENERGY STAR-rated appliances to reduce energy consumption. 

  • Comfort and Safety: Improve ventilation to reduce odors and smoke, and choose flooring that is easier on the feet. 

  • Increased Home Value: Boost the kitchen's appeal to enhance overall home resale value. 

  • Personalization: Tailor the space to fit specific needs for cooking, entertaining, or family gatherings, making the kitchen a central hub of the home. 

These goals aim to create a more efficient, enjoyable kitchen space and enhance the long-term value of the home.

Ask yourself these questions while planning to remodel your kitchen:

  1. Are you willing to renovate your entire kitchen or personalize specific spaces per your needs?

  2. Do you wish more spacious kitchen or prefer a compact one?

  3. How to accommodate smart appliances in your kitchen? 

  4. How much budget would you like to invest? 

  5. Does the kitchen renovation meet your personal needs or benefit the house value?

  6. Do you want to remodel a vacation rental kitchen

Visualize your ideal kitchen & collect multiple kitchen styles that you love. Seek a professional remodeler to get the design options for your kitchen after remodeling. Except in cases where your kitchen is decades old, your kitchen may only need part modification. If you need a complete remodeling, you can start from scratch. If not, think of what is good in your kitchen versus what needs a complete modification to enhance the space and save money. Find answers to the above questions and prepare a kitchen essentials list. Please remember to consider unexpected expenses in your budget to avoid regrets later. 

Set Realistic Budget

You must be cautious about your choices to avoid ending up overspending. Make a list of your options, must-have kitchen essentials arrangement, and set a realistic budget. Make smart choices to get the most out of every dollar you spend. Here are quick examples of how you should analyze your kitchen and plan for upgradation. 

  • See if the kitchen cabinet organizers are in good shape and need minor repairs to restore their function like new ones. Even if you want to replace them with new ones, there are always budget-friendly options.    

  • Also, check the condition of essential kitchen utensils and mark them for replacement if necessary. 

  • Check if your kitchen needs layout modification. Changing the kitchen layout requires extensive plumbing work and electrical work. In this case, you can save some bucks by using your existing appliances that you can replace later.  

  • If your kitchen is all good in its current layout, working on the same design can help you save money for purchasing upgraded appliances, smart solutions, and other kitchen essentials. 

Please remember that opting for high-end kitchen essentials can be expensive, but they offer a luxurious and long-lasting look. Decide for yourself based on your requirements and the budget available. 

Shopping For The Latest Kitchen Appliances

If you want to turn your home into a vacation rental, upgrading with the latest kitchen essentials can help guests get a convenient cooking experience in the kitchen. Once you have a brief idea of your new kitchen, you must decide on appliances, sinks, faucets, lighting, backsplashes, kitchen essential cookware, etc. For a vacation rental, Airbnb kitchen essentials like a coffee maker, kettle & teapot, food blender, microwave, rice cooker, or toaster can make things simple for the guest in the kitchen. Other important things include

1. Cabinet & Pantry Organization Racks

 you don’t want wall cabinets, you can buy a pantry and replace them after some years. This way, you can replace most kitchen elements and get a refreshing look once every few years. You can store more items by customizing the shelves without disturbing the sophisticated look.   

2. Flatware Organizers

You can install these kitchen flatware holders anywhere to store cutlery items, gadgets, or other small kitchen essentials. They come in plastic, wood, and metal and are available in different sizes to keep kitchen essentials easily accessible. 

3. Make Room for Small Appliances

Smart appliances and small kitchen appliances like blenders, coffee mugs, grinders, ovens, stoves, etc, occupy most of your kitchen. The kitchen layout should be designed to make all these appliances approachable to the person cooking without cluttering the space. Also, make necessary arrangements to secure kitchen glassware sets. Get a kitchen remodel checklist so you don’t miss anything. 

Give Enough Time For Kitchen Remodeling

Remodeling your kitchen consumes time, sometimes even more than your expectations. Depending on the complexity of the remodeling required, it may take just a week or extend for up to several months. Usually, an entire kitchen renovation may be completed between six weeks to four months. So, prepare yourself. You will need a clear action plan about the project's expected duration and ask yourself questions like 

  • Where will you stay during the kitchen remodeling? 

  • Where do you store the old & new kitchen essentials? 

  • How will you cook during the renovation?

  • Please make room for certain uncertainties that may take away your project time. 

While you don’t have to leave your home to renovate any other rooms, it is different in the case of kitchen remodeling. If you decide to live in your home during work, your daily life may not be the same for whatever duration of remodeling. As the disruption caused during the job can affect you in several ways, we advise you to move out temporarily till the project is accomplished.     

DIY or Hire a Contractor?

You may want to remodel the entire kitchen all by yourself. Nothing can match the satisfaction of living in the remodeling or construction project you have completed. But, hiring a professional contractor can help the work done right, on time, while adhering to necessary safety procedures. If this is your first remodeling project, you may be juggling more time and money between researching the process and acquiring the right kitchen essentials tools.  

Ready To Remodel Your Kitchen?

When you invest time in planning, you will soon be able to differentiate between your must-haves and nice-to-have kitchen essentials and save money. Get professional help from Inhaven. You can get the entire kitchen renovated or upgrade specific kitchen spaces. You will be accredited with a badge when remodeling the whole kitchen from Inhaven, which improves your credibility when you list your house as a vacation rental home. Kitchen remodeling genuinely transforms the functionality of your home. With proper planning, it can bring you joy for many years to come.   

5 Inexpensive Smart Devices Every Modern Home Needs

RH Business Marketing Solutions

Smart devices for the home offer lots of benefits. All are designed to make your life a little easier. They make it simpler to run your home efficiently, minimize your impact on the planet, and help you lower many household bills.

Everyday objects, such as doorbells, refrigerators and home lighting, have been made more intelligent (and useful!) through integral computers and internet connectivity. By being able to connect with Wi-Fi and communicate with other devices, smart devices can be controlled from anywhere within the home and even further afield from your phone or tablet. You can also view smart devices’ data output and monitor their use from outside from wherever you are, too.

If you are starting to build a smart home from scratch and are not sure what to start with, here is a guide to the most essential smart devices. All are an inexpensive starting point and are available via the eshop on orangemobile.

1.   Smart Wi-Fi plugs

We know that there’s not usually anything particularly glamorous about a plug. However, upgrading your household plugs is one of the fastest and easiest ways to start becoming more energy efficient. They offer two key advantages over your regular home plugs.

First of all, you can monitor the energy consumption of anything you use them with. This could be a lamp, mobile phone charger, television, hairdryer, fan, or any other item you can use a regular household socket for.

The second advantage is the ability to limit the use of the plug by using a timed on/off setting and creating a schedule. For example, you might have family members who forget to turn electrical items off when they leave home for the day. By setting a timer to switch off the plug when you are never at home, you can be sure that no energy is wasted.  

Smart plugs slot into existing household sockets. You then plug the device of your choice into the smart plug. The product is compact and inconspicuous, and compatible with smart speaker devices for even easier operation.


2.   Smart bulbs

Smart bulbs are another example of how something as dull as a regular light bulb can be way more fun (and energy efficient). Your regular bulbs are easily exchanged for smart bulbs and, as to be expected, smart bulbs are the energy-efficient LED bulbs. It is easy to control the bulbs remotely and through a timer. All you need is the app on your smartphone or tablet.

Smart bulbs have additional interactive features, too. Look out for the ability to adjust the brightness to your liking. Various modes are available, such as working, reading, and nightlight modes. The color of the bulb is changeable, too. With music reactivity enabled, you have ready-made party lighting.


3.   Smart SOS emergency call button

For ultimate peace of mind, an SOS call button is a must-have item. This small device is lightweight and wearable, and is connected to your home Wi-Fi. This connection can then be used to immediately alert you to an emergency, such as a fall or medical episode, while you are out of the home.

 These devices are ideal for elderly, young or vulnerable family members to use. In an emergency, simply touching the button will alert you to a problem via your smartphone. Setting up the device’s ability to alert you via the app is a quick and easy procedure. The device’s battery is rechargeable and can operate in standby mode for many months.


4.   Smart body fat scale

Ditch your regular scales in favor of a much more comprehensive smart scale. These scales have a distinct advantage in that they can connect to your smartphone, making it much easier to track weight loss progress and monitor your health and fitness goals.

Smart body fat scales can calculate your weight, muscle mass, body fat, bone density and more. They can also indicate your calorie requirements for weight loss or weight maintenance. Smart scales can store data as well as send it to an app on your smartphone, making it even easier to see your progress.


5.   Smart security cameras

Smart security is hugely popular and there are multiple products that can help you with peace of mindwherever you happen to be. Indoor cameras are an inexpensive entry point into building a network of home security. They are easy to set up on a table top or can be wall-mounted, and they have a whole range of useful features.

Smart security cameras are activated by motion sensors. Any motion detected will automatically set the camera to push a notification to your phone. You can then control the camera remotely to get a better picture of what’s going on by tilting and panning it via the app. One way speakers also allow you to speak to whoever is in the home. Recording is supported via a memory card. 


Smart products for all

The range of smart devices now available is great and growing all the time. Multiple products are both useful and inexpensive. Introducing smart devices into your home is both affordable and life-enhancing, by freeing you from expensive energy bills, making life a little easier, or giving you a little bit more peace of mind.

Why You Should Add a Sauna to Your Bathroom

RH Business Marketing Solutions

A sauna is a small room or space you can design to experience dry heat sessions, typically characterized by elevated temperatures. Traditional saunas are usually heated with generators. However, in modern times, infrared saunas use infrared heaters to directly heat the body without significantly increasing the air temperature.

The temperatures in saunas can vary, but they generally range from 80°C to 100°C (176°F to 212°F) in traditional saunas, while infrared saunas typically have lower temperatures, around 122°F to 140°F. Additionally, sauna sessions usually last 10 to 20 minutes, with users entering and exiting the sauna as they feel comfortable.


Why Add a Sauna to Your Bathroom

In a world of stress and fast-paced living, finding a sanctuary for relaxation and rejuvenation is essential. Incorporating a sauna into your bathroom isn't just a luxurious fantasy; it's a tangible way to enhance your well-being within the confines of your home.

Some of the benefits of adding a sauna to your bathroom include:


Convenience

Adding a sauna to your bathroom allows you to enjoy sessions without going to a gym, spa, or sauna facility.

Home Value

A well-designed and functional sauna can add value to your home, making it more valuable and attractive to potential buyers. 

Health and Wellness 

Beyond being a place of warmth and tranquility, saunas offer many health benefits, such as:

Relaxation and Stress Relief

Sauna sessions can promote relaxation by helping to reduce stress and anxiety. The warm environment and the release of endorphins contribute to an overall sense of well-being.

Improved Blood Circulation 

The heat in saunas causes blood vessels to dilate, leading to improved blood circulation, reduced blood pressure, and improved heart health.

Detoxification

Sweating in a sauna can lead to the elimination of toxins and waste products as it helps open the skin pores. Additionally, sauna heat can temporarily relieve muscle soreness, joint pain, and tension.

Potential Weight Loss 

The increased heart rate and sweating during sauna sessions may contribute to a slight calorie burn.


How to Add a Sauna to Your Bathroom

Adding a sauna to your bathroom is a creative and practical way to enjoy the relaxing and rejuvenating benefits of sauna therapy without needing a dedicated sauna room. Some of the ways to add a sauna to your bathroom include:


Infrared Sauna

Infrared saunas utilize infrared heaters to heat your body directly, producing a gentle warmth that penetrates deep into your skin. When installing an infrared sauna, you will need the following:

●      Infrared sauna panels or heaters

●      Insulation materials (such as reflective insulation)

●      Plywood or wooden boards

●      Ventilation system

●      Thermostat or temperature control unit

Choose a Suitable Area 

Select a corner of your bathroom with enough space to sit or lie comfortably. Ensure there is proper electrical access for the infrared sauna panels.

Prepare the Space 

Clear the area and remove any obstacles. Consider insulating the walls and floor with reflective insulation to ensure the heat stays within the sauna area.

 Install the Sauna Panels

Mount the infrared sauna panels on the walls. Place one panel on each wall for even heating. Furthermore, install an exhaust fan or ensure adequate ventilation in your bathroom.

Temperature Control

Install the thermostat or temperature control unit to regulate the heat. This allows you to tailor the temperature settings according to your preference. Then, place a comfortable bench or chair in the sauna area. Furthermore, ensure it's positioned safely from the sauna panels to avoid direct contact. 

Steam Sauna

Steam saunas are traditional saunas that use a steam generator to create a humid environment. To create a steam sauna experience in your bathroom, you will need:

●      A portable steam generator

●      Bench or seat

●      Waterproofing materials

●      Ventilation system

Since steam saunas produce humidity, it's crucial to waterproof the sauna area. Apply waterproofing materials to the walls and floor to prevent moisture damage. Then, connect the portable unit to a water source, and install a ventilation system to prevent excess humidity. Steam can lead to mold growth, so proper ventilation is essential.

Finally, place a bench or seating area within the sauna space. Ensure it's comfortable and positioned away from direct steam contact.


By transforming your bathroom into a personal sauna retreat, you're embracing a lifestyle prioritizing your physical and mental well-being. In this harmonious partnership between the bathroom and the sauna, you're crafting a haven where the world's cares dissipate, and your body finds solace in the symphony of heat and relaxation.

Written by Taylor McKnight, Author for Beem Light Sauna

A Guide to Maintaining a Fall Aesthetic in Your Home

RH Business Marketing Solutions

As the air turns crisp and leaves change to their vibrant coats of red, orange, and gold, the enchanting season of fall graces us with its presence. With its sense of warmth, comfort, and beauty, fall presents the perfect opportunity to transform your living space into a cozy hangout. From pumpkin-spiced scents to rustic decor, maintaining a fall aesthetic in your home is all about embracing the cozy vibes that this season brings.

Warm Hues and Natural Elements

When it comes to creating a fall-inspired environment, color plays an important role. Infuse your home with the warm and inviting hues of the season – rich oranges, deep reds, and earthy browns. These colors can be introduced through accent pieces like throw pillows, blankets, and even artwork. For a more subtle yet equally impactful approach, consider adding dried leaves, pinecones, and branches to your decor.

Textures and Fabrics: Embracing Softness and Comfort

Your choice of fabrics can greatly contribute to the cozy atmosphere. Swap lightweight fabrics for soft, textured ones like chunky knit blankets, faux fur throws, and plush rugs. These tactile elements not only add visual interest but also encourage a sense of warmth and comfort that's perfect for the season.

Pumpkins and Gourds: The Iconic Fall Emblem

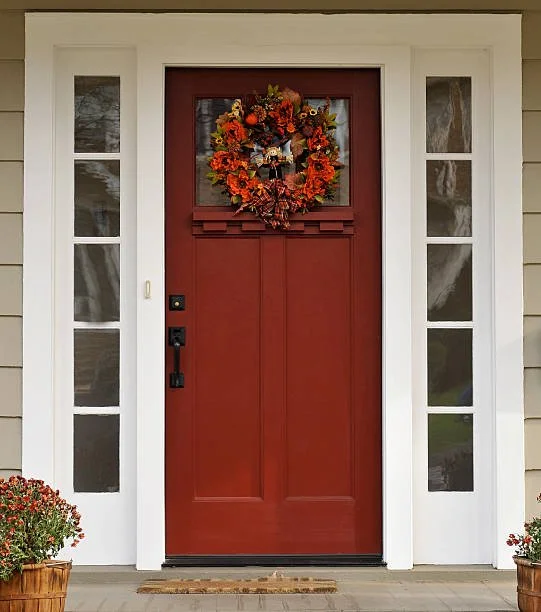
No fall aesthetic is complete without the presence of pumpkins and gourds. From small decorative pumpkins to larger ones for carving, these quintessential symbols of the season instantly bring a touch of autumn to your home. Arrange them on your mantel, scatter them across tables, or even place them on your doorstep for a warm and inviting entrance.

Candlelit Glow: Set the Mood with Soft Lighting

As the days grow shorter, creating a cozy ambiance through lighting becomes even more important. Opt for soft, warm lighting to evoke a feeling of intimacy. Candles, in particular, can transform any space into a magical haven. Consider scented candles in fragrances like cinnamon, apple, or vanilla to fully immerse yourself in the fall spirit.

Seasonal Wreaths and Garlands: Inviting the Outdoors In

A fall aesthetic wouldn't be complete without bringing a touch of the outdoors inside. Adorn your home with seasonal wreaths made of dried leaves, pinecones, and berries. Drape garlands along your staircase railing or across your fireplace mantel to create a seamless transition from nature to your interior space.

Transitional Decor: From Halloween to Thanksgiving

One of the joys of maintaining a fall aesthetic is its versatility. As the season progresses, transition seamlessly from Halloween-themed decorations to those that embody the essence of Thanksgiving. Swap out spooky decorations for cornucopias, wheat sheaves, and more understated elements that celebrate gratitude and abundance.

Rustic Accents: Embrace the Charm of the Countryside

To fully capture the fall aesthetic, embrace rustic accents that evoke the charm of the countryside. Incorporate wooden elements, such as distressed furniture or hand-carved decorative pieces. Vintage finds, such as old mason jars, weathered signs, and antique lanterns, can also infuse your home with a touch of nostalgia.

Seasonal Fragrances: Engage the Senses

A well-rounded fall aesthetic appeals to all the senses, and scent is no exception. Choose warm and comforting scents, such as cinnamon, clove, nutmeg, and apple pie, for your home. Whether through scented candles, essential oil diffusers, or potpourri, these fragrances can transport you to a cozy autumn day.

Thoughtful Details: Personalize Your Space

Lastly, remember that maintaining a fall aesthetic is all about reflecting your personal style and preferences. Whether you're drawn to a more minimalist approach or you prefer a maximalist display of fall decor, infuse your unique personality into your home's seasonal transformation.

In conclusion, embracing a fall aesthetic in your home is a delightful way to celebrate the beauty and charm of the season. Through warm colors, cozy textures, nature-inspired decor, and thoughtful details, you can create a space that envelops you in the comfort and magic of autumn. So, gather your pumpkins, light your candles, and embrace the cozy vibes that fall has to offer.

Important Rules of General Home Exterior Maintenance

RH Business Marketing Solutions

Owning a home is a thrilling journey, chock-full of responsibilities and challenges. It's the hub of cherished memories, but it's also a significant investment. Keeping the home's exterior in tip-top condition enhances its curb appeal and maintains its value over the long haul. Think of it as putting on sunscreen; regular maintenance keeps harmful elements at bay.

Many folks need help figuring out where to start. Some might be tempted to launch into spontaneous weekend projects without a game plan. However, a bit of strategy and understanding can make a world of difference. Here's a roadmap to ensuring a house is the envy of the block, year in and year out.

Exterior Maintenance Priorities

When it comes to maintaining the outside of a building, it's recommended by companies such as the Eustis roofing company to start with the roof, windows, and doors. This ensures your property is weatherproof. Neglecting the roof, windows, and doors invite leaks, translating to a hefty bill for internal repairs. Hence, a routine inspection, especially post-intense storms or weather events, is wise.

Beyond the roof, those walls and sidings echo tales of weather challenges they've faced. Dust, pollutants, and various environmental culprits can diminish their charm. Consider a periodic power wash to breathe new life into them. However, a word of caution: intense pressure can be more harmful than helpful. Gentle and steady does the trick!

Gardens and Greenery

Nature can be a home's best friend or its worst enemy. Beautifully manicured gardens elevate the entire look of a property. Pruning trees and shrubs, mowing the lawn, and pulling out stubborn weeds are therapeutic activities. Not only do they bring about a sense of accomplishment, but they also ensure that overgrown branches don't scrape against walls or windows.

On the flip side, leaving nature unchecked can lead to problems. Overgrown roots can damage foundations or walkways. Fallen leaves can clog gutters and downspouts, leading to water damage. It balances between letting nature flourish and ensuring it doesn't overstep its boundaries.

Regular Checks and Seasonal Maintenance

●      Gutters and Downspouts: These are easy to overlook but vital. Ensuring they're debris-free prevents water damage and boosts the home's resilience against the elements.

●      Windows and Doors: Not just for aesthetics. Sealing gaps can save on energy bills, and replacing worn-out screens can keep pesky bugs out.

●      Paint Touch-ups: Fresh paint doesn't just look pretty; it protects against pests and rot. When there's chipping or peeling, it might be time for a touch-up.

Regularly walking around the property with a cup of coffee highlights potential issues before they become full-blown problems. Is there a loose brick on the path? Fixing it now can prevent someone from tripping later. Spot a cracked windowpane? Better to deal with it sooner rather than when it's pouring rain.

In Conclusion

Maintaining a home's exterior isn't just about showing it off to the neighbours. It's about safeguarding an investment, ensuring safety, and creating a haven for oneself and loved ones. With a proactive mindset and elbow grease, homeowners can ensure their abode remains a place of pride and joy for years.

5 Ways an Oscillating Tool Can Simplify Your DIY Projects

RH Business Marketing Solutions

Due to the rising construction costs, construction companies charge higher for major and minor construction activities, motivating DIY construction projects.  

DIY projects have been getting popular ever since the advent of Covid-19 since they are fun to undertake, help save on costs, learn some skills, and customize the project. But despite the benefits, you should be aware of the challenges associated with the projects, including the lack of tools or the costs of assembling all the needed tools for the projects. 

Instead of buying multiple tools, buy tools that can help you achieve multiple benefits. One of these tools is oscillating tools.  

An oscillating tool is ideal for DIY projects due to its flexibility, multipurpose benefits, and increased number of attachment tools enabling you to do various activities and functions. You can use it for grouting, cutting, sanding, grinding, scraping, etc.  

1. Installations and Modifications  

DIY projects can sometimes be challenging, especially when you lack the skills and experience to install various items such as cabinets, structures like heaters, and cookers. You are bound to make mistakes.  

Hence you need the right tool to fix such issues to enable you to fix your structures without any challenges. For instance, if you fail to create extra space for other items, such as pipes, you can use the oscillating tools to cut the right holes or extend the size of existing holes to fit your needs.  

With the oscillating blades tool, modification is much easier to ensure you fix the extra essentials like pipes to fit your electrical requirements.  

Despite having the most flexible and versatile tools, you should have all the product dimensions in advance.  It avoids last-minute changes since some can require extensive processes or large cuts in the walls, affecting appearance.  

In case of any challenges, you can rely on the Makita oscillating tool to help you fix the problem to have the perfect layout. When buying Makita oscillating tools, ensure you buy the different blades and other essentials that help you make the cuts and other uses, including modifying and creating extra spaces. 

2. Cutting Tiny Spaces 

An oscillating tool is one of the ideal tools you need for various cutting projects, including repairs and building newer projects when engaged in your DIY projects. Therefore, it is one of the most critical tools for your upcoming projects due to its multipurpose nature and flexibility for various construction projects.  

One of these uses is cutting projects which mainly include using the vertical blade and holding the oscillating tool in a vertical position for trim cuts on walls without damaging other areas. For instance, you can use it to cut spaces to insert electrical outlets and space for fan installation, gas and water outlets, and other needs.  

Due to its flexibility, you can use it to cut spaces and create rooms in tight spaces to install other products like doorjambs. In such instances, you can use the tools to cut space below the wall to create room for the door jamb; you can also cut the wall to create smaller space to extend the floor tiling to extend below the wall to ensure uniformity.  

Another use is making flush cuts making it suitable for cutting tiny spaces without affecting the other areas, i.e., cutting a circle hole on the wall to allow cable laying without affecting the entire wall.  

3. Scraping Surfaces 

During your DIY projects, you must be aware of the implication of grout and rust on the structural integrity of the wood, metal, and other materials you use. Therefore, you need a perfect tool to scrape the surfaces to ensure they are smooth, clean, and perfect. If you need a smoother surface on wood, floors, and walls, you can attach sandpaper or scraping tools to clean the surfaces to ensure they are smooth and can easily be painted or do not appear rugged.  

Rust can significantly impact the metals or metallic materials you plan to use for your construction; hence you should remove all the rust to create a perfect surface for welding, painting, etc. Attach a grinding tool to the oscillating tool, grind the surfaces to remove all the rust in various surfaces, and proceed with other roles.  

When using wood, you can attach the grouting tool to clear all the grout from the wood to create an even surface for a perfect appearance. When doing your bathroom renovations or fixing the issues with the home plumbing and water distribution, you need an oscillating tool for grout removal by attaching a carbide-grit removal to cut the grout and even surfaces.  

4. Flooring Projects 

Flooring projects include various functions such as cutting spaces into the floor, cutting the tiles, planks, and other flooring materials, and scraping floors to ensure the materials laid are even. To cut extra space for air inlets and outlets, you cut holes into the tiles and floor materials to create the spaces needed to install whatever products you need. 

Once you attach the right blade, you can use it to cut materials such as tiles, hardwood flooring, and marble to fit into smaller spaces to ensure uniform tiling and flooring. Additionally, you can use grouting and scraping tools to ensure certain floor areas are even to enable you to pace the tiling and marble evenly. For use in areas such as bathrooms, you can use it even to raise floor surfaces to ensure water floor to the outlets.  

When installing marble or tiles on the bathroom walls, you can use it to fix tiles using the grinding pad to remove thin set mortar from the marble surfaces and the wall. After that, you can apply a small film of a thin set, then reattach the marble or tile to ensure it is even with other tiles installed.  

5. Prepping for Paintings 

For a perfect and uniform paint, ensure the surface has no substances that can lead to peeling, molding, and an imperfect appearance. When you need to reuse the wood, ensure the surface is even and free from grease, mold, and stains that can lead to peeling and the paint not sticking. 

You should follow the painting guidelines, which include cleaning surfaces to remove mold, grease, mildew, and loose paints, then smoothen the surfaces. The next process is to fill the holes and other cracks in the wood, which involves scraping surfaces, then filling and finally sanding the surface. All these processes rely heavily on oscillating tools and various attachments to meet your objectives. 


Conclusion 

When doing indoor and outdoor DIY projects, you need the oscillating tools and all the attachments to make your work easier and achieve multipurpose benefits with one tool. With all the necessary attachments, you can use the tool for scraping, grinding, grouting, sanding, cutting, and other DIY project activities.  

How to Maximize Closet Space

RH Business Marketing Solutions

Maximizing Closet Space: Clever Hacks for Efficiency and Organization

Closets are more than just storage spaces; they are versatile assets that can serve various purposes beyond their conventional roles. With creativity and smart organization, you can maximize closet space to its full potential, transforming it into an efficient and organized hub for your belongings.

Let's explore the many uses of closets, examine the strategies for maximizing space, and look into the clothing hacks for organized storage.


The Many Uses of a Closet 

Closets are commonly associated with storing clothes, but they can also serve numerous other functions. Consider these alternative uses to optimize every inch of your closet space:


1. Home Office Nook: Convert a compact closet into a cozy home office. Install shelves for books, a desk for your computer, and task lighting to create a productive workspace.

2. Mini Library: For book enthusiasts, closets can be turned into mini libraries with built-in shelves and seating. A tranquil reading nook awaits just a few adjustments away.

3. Craft Station: Organize crafting supplies neatly by repurposing a closet. Add hooks for hanging tools, shelves for materials, and a fold-out table for crafting activities.

4. Pantry Extension: Overflowing pantry? Use a closet for additional food storage. Install adjustable shelves, clear containers, and labels to keep items easily accessible.

5. Entertainment Center: Mount a TV on the closet wall, add shelves for media devices, and store DVDs or video games inside. It's a creative way to integrate entertainment into your space.


Maximizing Closet Space

To make the most of your closet space, employ these effective strategies:

1. Hat Storage: Optimize your closet's layout by utilizing hooks or pegs mounted on the inner side of the closet door for hat storage. This space-efficient method preserves shelf space and arranges your hats neatly, making them readily accessible.

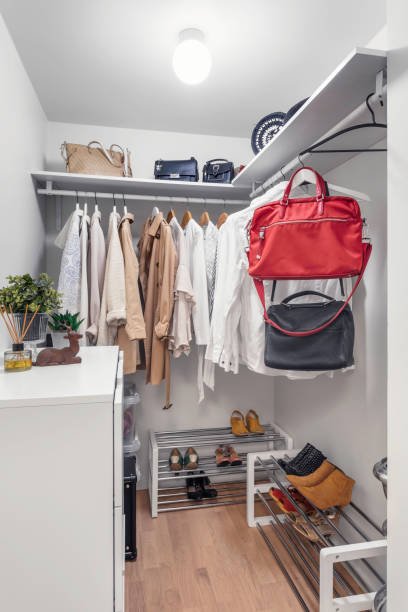
2. Utilize Hanging Space: Maximize vertical space by introducing a second hanging rod. Capitalize on this arrangement by placing shorter items like shirts on the upper rod and longer items like dresses on the lower rod. An alternative approach involves cascading hangers, allowing you to store multiple garments vertically. 

3. Modular Shelving: Elevate organization with modular shelving systems that adapt to accommodate items of varying sizes. This adaptive nature enables you to tailor the closet's setup to your specific storage needs, efficiently utilizing available space.

4. Under-Shelf Baskets: Transform underutilized space beneath shelves into valuable storage by attaching under-shelf baskets. This innovative solution is ideal for stowing away smaller articles such as scarves, socks, and accessories, ensuring clutter-free organization.

5. Clear Storage Containers: Simplify item identification and minimize closet clutter by opting for clear storage containers. This method keeps your belongings in order and contributes to a visually uncluttered closet environment. 

By implementing these practical and space-conscious strategies, you can unlock the true potential of your closet, achieving an organized and efficient storage solution for all your belongings.


Clothing Hacks When Putting Them Away

Clothing organization within your closet can significantly enhance daily routines and save valuable time. Implement the following clothing hacks for an optimized closet space:

1. Roll Instead of Fold: Opt for rolling instead of folding When storing garments such as T-shirts and jeans. This approach conserves space and minimizes wrinkles, ensuring your clothes are ready to wear. 

2. Color Coordination: Arrange your clothing items according to their color spectrum. This simple method accelerates finding specific pieces and adds a visually appealing aspect to your closet.

3. Shoe Racks or Cubbies: Utilize shoe racks or cubbies to effectively organize your footwear collection, keeping them off the closet floor. This practice maintains a sense of order while preventing shoe-related clutter.

4. Seasonal Rotation: Make use of vacuum-sealed bags or containers to store out-of-season attire. As seasons transition, rotate your clothing selection, ensuring your closet remains well-organized and clutter-free.

5. Slim Hangers: Replace bulky hangers with slender alternatives to maximize your hanging space. Velvet or flocked hangers free up additional room and prevent garments from slipping off, keeping your closet tidy and manageable.


Conclusion

Closets are valuable assets that can serve multiple purposes beyond conventional storage. You can optimize your closet's potential by embracing creative uses and employing space-maximizing strategies. From efficient hat storage to smart clothing organization hacks, your closet can become an organized haven for your belongings, enhancing functionality and aesthetics in your living space.

So, don't underestimate the power of an organized closet. Take advantage of the tips and strategies suggested to make the best use of your closet. It's a small step towards a more organized and stress-free lifestyle.


Written by Taylor McKnight, Author for Cap America

6 Benefits of Having An At-Home Gym

RH Business Marketing Solutions

Physical activity has never been so important, thanks to tech advancement and unanticipated global paradigm shifts like the ones brought about by Covid-19, leading to sedentary lifestyles.

It is recommended by Physical Activity Guidelines for Americans, to derive benefits associated with physical activity, you could aim to spend between 2 ½ to 5 hours in a week of moderate to vigorous-intensity activity. These are coupled with two days a week of muscle-strengthening workouts. One way of achieving such fitness thresholds is having an at-home gym.

This article will take a closer look at what an at-home gym entails and the top 6 reasons why having one is worth your investment.


What's an At-Home Gym Anyway?

Any space with essential exercise equipment within your home can make an at-home gym. It's a space where you can do squats, lunges, lifts, and sweat your way to a healthier body without leaving your home. It doesn't have to look complicated like a high-tech training facility or take up a whole room like a professional gym. Even a corner or a designated spot can transform into your fitness sanctuary tailored just for you and your family workout.

What Do You Need for Your In-Home Gym?

Building an at-home gym doesn't require fancy machinery or an Olympic-sized budget. All you need are a few key pieces of gear to get started. A basic item would be an exercise mat. With a mat, the stage is already set. Other essential items are dumbbells, resistance bands, a stability ball, and a jump rope. If you are not ready to expend cash, you can improvise according to the list of alternatives below:

•   Dumbbells - filled water bottles, sand filled bags, and filled backpacks

•   Stability Ball - a sturdy chair or your couch

•   Resistance Bands - bungee or elastic cords

•   Jump Rope - an imaginary rope or a no longer for use rope

•   Yoga Matt - a soft carpet


So, Why Should You Have an At-Home Gym?

 The benefits of your in-house working facility are numerous, and the main ones include the following:

1.         Ultimate Convenience

Gym hours coincide with peak hours, and dealing with traffic jams can be draining. At times bad weather can keep you holed up at home or in your workplace, leaving you with no alternative but skipping your physical session. With an at-home gym, your workout schedule bends to your will, and you can easily access your home gymnasium anytime, forward-pushing your fitness progress.

2.         Time-Saver

Your at-home gym is a time saver that helps you fit workouts into your busy life without the hustle of commuting. Further, preparing for the gym typically involves many activities, from packing your gym essentials to selecting the right workout attire, unlike your at-home fitness space, eliminating the need for extensive preparation.

3.         Non-judgment Zone

Ever felt self-conscious at the gym? In your home gym, the only eyes on you are your own unless you have a pet, partner, or family who is your enthusiastic cheerleader. A public gym can be limiting if you do not feel confident about your body and fear making mistakes when working out. The privacy of an at-home gym makes one less conscious and workout without reservation and care in the world.

4.         Customized Workouts

You're your gym's boss, meaning workouts are tailored to your preferences. If you want to dance while lifting weights or practice your warrior pose between sets, you unreservedly go for it. You can vary the exercises with your gym using youtube videos, Facebook Live, or Youtube streaming. You can choose the music during your workouts and your desired general environment.

5.         Money-Saver Supreme

An at-home gym may require a small initial investment, but it pays off in the long run. It's a significant saving for your pocket as monthly gym fees are no more. Plus, think about the gas money you'll save by skipping the drive to the gym. 

6.         Consistency and commitment

The ease of accessibility is a real motivation. Rain or shine, tired or energized, your equipment's waiting for you, making it easier to stay on track with your fitness goals. When the gym is right at your nose, you expend less effort forming a desirable goal-achieving exercise regimen. You have fewer excuses, and the only option is to hit the ground running at your scheduled sessions.


So, Should You Get an At-Home Gym?

If you want to be on top of your fitness journey, a dedicated workout space at home is the way. Remember, it's not about the size of your gym or the fanciness of your equipment. It's about creating a space that encourages you to move, sweat, and enjoy the process. Ultimately, your at-home gym isn't just a place to work out; it reflects your commitment to your well-being. Setting up should not be daunting. Start small and progressively add equipment that supports your training on essential exercises, aiding you in reaching your fitness and health goals.


Written by Taylor McKnight, Author for ProHealthCareProducts

Pets in Rental Properties: Guidelines for Landlords in New Jersey

RH Business Marketing Solutions

Renting a home is a significant decision for individuals and families, and for many, this includes their beloved pets. As a landlord in New Jersey, accommodating tenants with pets can present unique challenges and opportunities. Striking a balance between ensuring a comfortable living environment for both tenants and their furry companions requires careful consideration and well-defined guidelines. In this article, we'll explore essential guidelines for landlords in New Jersey when it comes to allowing pets in rental properties. By understanding legal obligations, implementing pet-friendly policies, and fostering open communication, you can create a harmonious space where both tenants and their pets can thrive.


Know the Legal Landscape

While New Jersey does not have specific statewide laws that address pets in rental properties, landlords still need to be aware of certain legal aspects. It's crucial to familiarize yourself with federal fair housing laws that prohibit discrimination based on disabilities. If a tenant has a service animal or emotional support animal, you are generally required to make reasonable accommodations for them, even if you have a "no pets" policy.


Set Clear Pet Policies

Before allowing pets in your rental property, establish clear pet policies that outline the terms and conditions. Consider factors such as the number and size of pets allowed, specific breeds, and any required vaccinations. Clearly communicating these policies in the lease agreement helps avoid confusion and ensures that tenants are aware of their responsibilities.


Screen Potential Tenants and Their Pets

As a landlord, you have the right to screen potential tenants and their pets to ensure they're a good fit for your property. Request information about the pet's size, breed, and behavior history. Additionally, you can ask for references from previous landlords to gauge the pet's behavior in previous rental situations.


Charge Pet Deposits or Fees

Many landlords opt to charge a pet deposit or non-refundable pet fee. This helps cover potential damages or additional cleaning costs that might arise due to the presence of pets. While New Jersey law does not specify limits for pet deposits, it's important to ensure that any fees are reasonable and clearly outlined in the lease agreement.


Set Expectations for Cleanliness

Include guidelines for maintaining cleanliness in the lease agreement. Address issues like waste disposal, indoor accidents, and general cleanliness related to pets. Encourage tenants to keep common areas tidy and establish protocols for cleaning up after their pets.


Address Noise Concerns

Pets, particularly dogs, can sometimes create noise disturbances that might affect other tenants or neighbors. To mitigate this, include clauses in the lease agreement that address noise levels and expectations for keeping pets quiet, especially during nighttime hours. This can help maintain a peaceful living environment for everyone.


Include Liability Clauses

It's advisable to include liability clauses in the lease agreement that outline the tenant's responsibility for any damages caused by their pets. This can protect you as a landlord from potential disputes or legal issues arising from pet-related damages.


Regular Property Inspections

Implement regular property inspections to assess the condition of your rental property, particularly if pets are present. These inspections provide an opportunity to address any pet-related concerns, such as damages or sanitation issues. Effective communication with tenants during these inspections fosters accountability and helps maintain a positive landlord-tenant relationship.


Maintain Open Communication

Encourage open communication with tenants about pet-related matters. If any issues arise, whether they involve other tenants, neighbors, or pet behavior, address them promptly and professionally. Creating a channel for communication helps prevent conflicts and ensures that concerns are dealt with in a timely manner.


Conclusion

Navigating the realm of pets in rental properties as a New Jersey landlord involves a delicate balance between providing a comfortable living space and maintaining the property's condition. By adhering to the guidelines outlined in this article, you're better equipped to make informed decisions that benefit both your tenants and their furry companions. Remember, while there might not be specific statewide laws governing this area, understanding your legal obligations under New Jersey landlord-tenant law is crucial. Setting clear pet policies, addressing cleanliness and noise concerns, and fostering open communication are all integral to creating a harmonious living environment for everyone. By embracing these practices, you're not only enhancing the appeal of your rental property but also fostering positive tenant relationships that contribute to a thriving and responsible community. As you navigate the world of rental properties and pets, remember that a well-considered approach ultimately contributes to a property that is welcoming, well-maintained, and enjoyable for both tenants and their four-legged friends.

HOW TO ATTRACT SONGBIRDS TO YOUR BACKYARD

RH Business Marketing Solutions

Do you look forward to the warm months so you can enjoy the pleasing vocalizations of songbirds right in your own backyard? You’re not alone! Millions of Americans consider themselves bird enthusiasts and are interested in attracting songbirds to their gardens and yards.

Well, a little birdie gave us 10 helpful suggestions for attracting a variety of feathered singers throughout the year, and these are listed in the accompanying infographic. Follow these tips and you’ll be listening to beautiful bird sounds and songs in no time!

Graphic created by Bird-X.